Is your clutch having problems engaging and disengaging? Do you feel inconsistency through the clutch lever when operating the clutch? A worn clutch basket could be the cause. In this article, we’ll look at diagnosing a worn clutch basket, review replacement options, and step through the process of replacing the clutch basket so that the next time you need to tackle the job, you’re well prepared.
Diagnosing the Issue
Any clutch issues that a machine may have are typically very apparent to the rider because there is a complementary feeling of loss of control of the machine. The machine won’t become outright unrideable; however, subtleties that quickly become annoying will arise when utilizing the clutch. Most notably, modulation of the clutch may become more difficult, and the clutch feel will be inconsistent.
Before taking the machine apart, verifying possible simple issues such as clutch cable adjustment and that the engine or gearbox oil has been maintained regularly should be confirmed. To inspect and disassemble the clutch, the procedures outlined in the machine’s factory service manual should be followed. Once the clutch has been removed from the engine, inspecting its condition is straightforward.
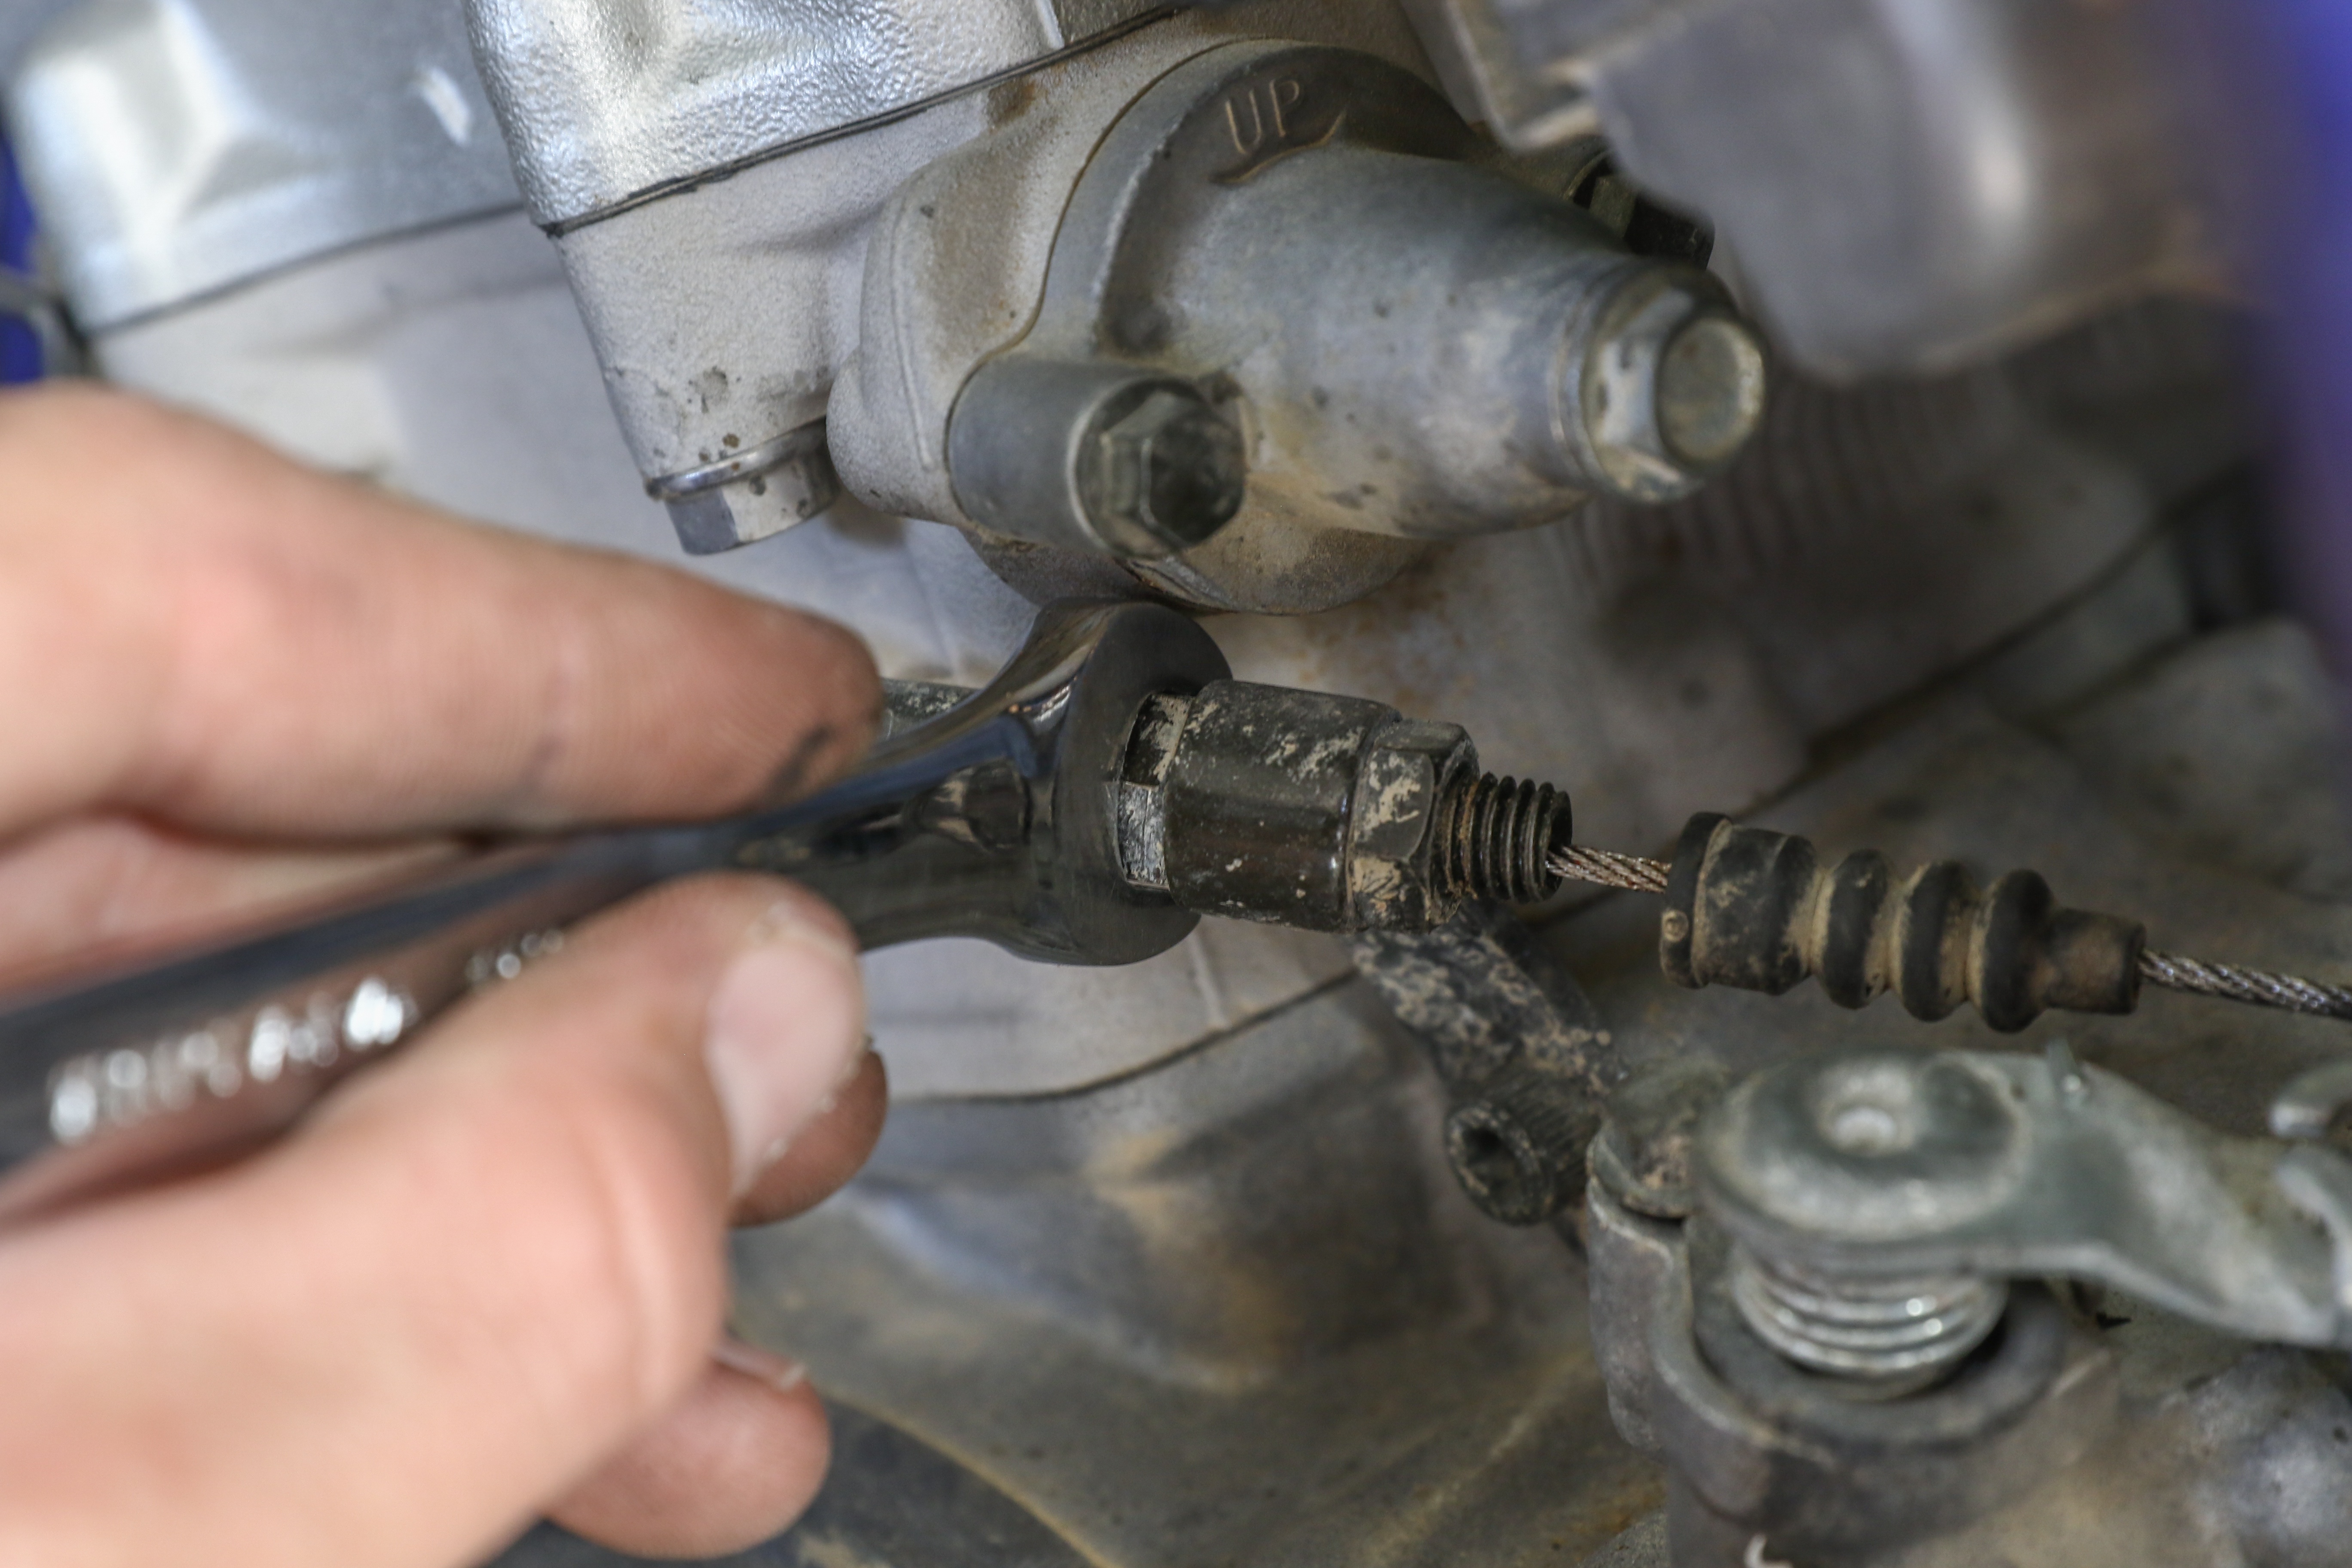
Click here for tips on replacing a clutch cable.
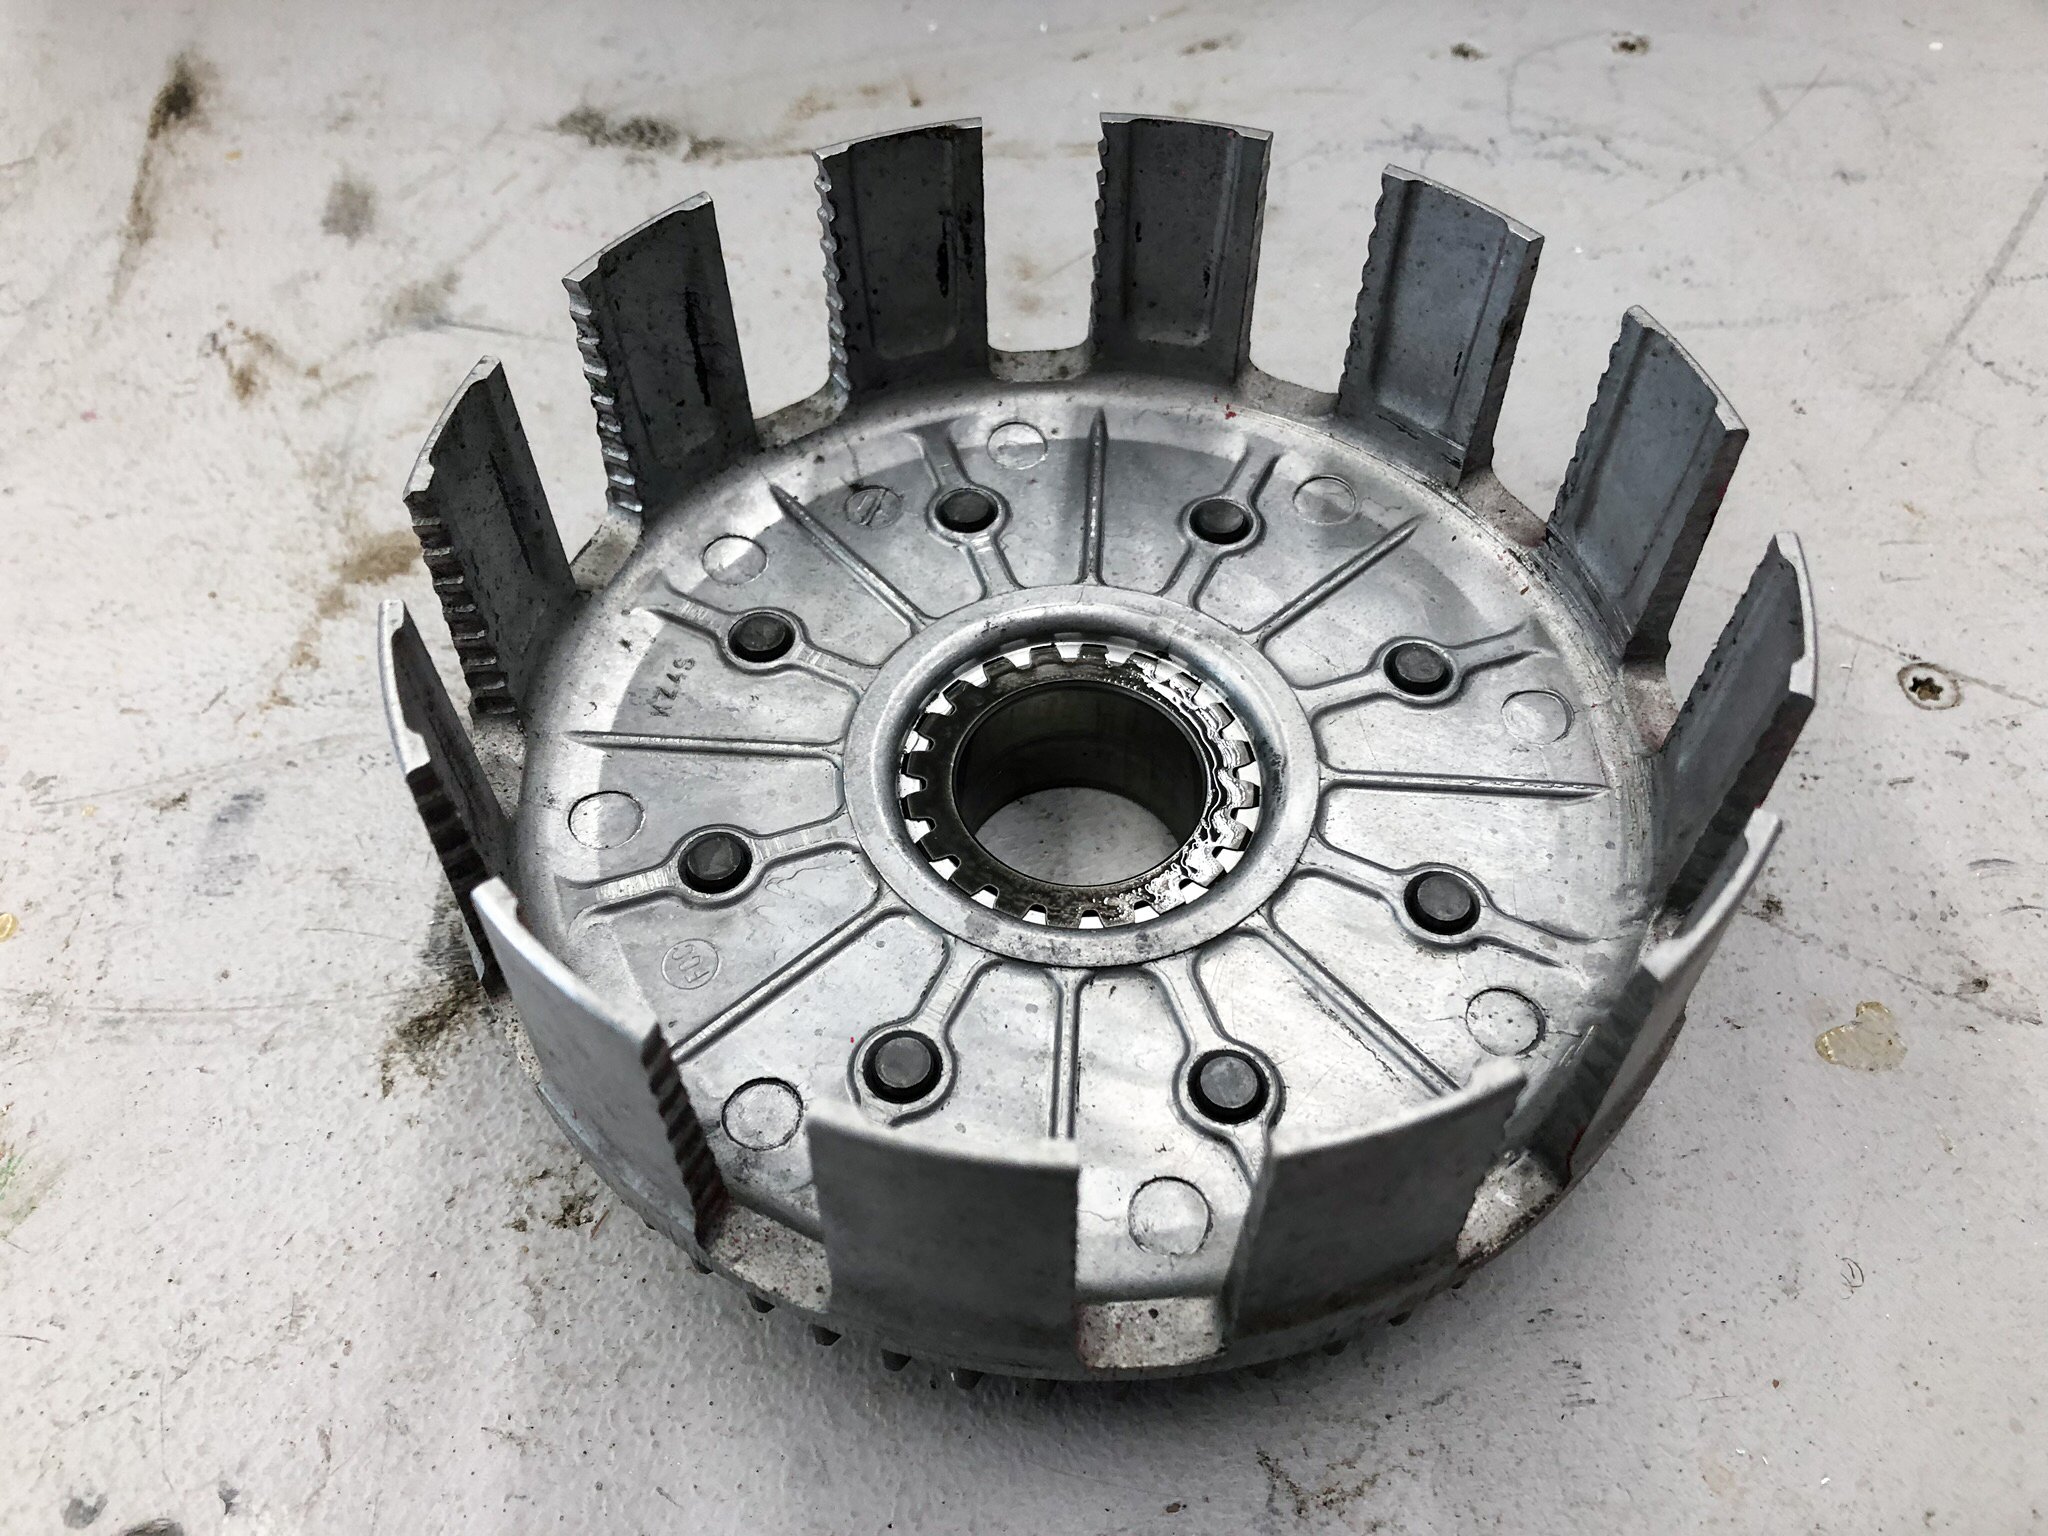
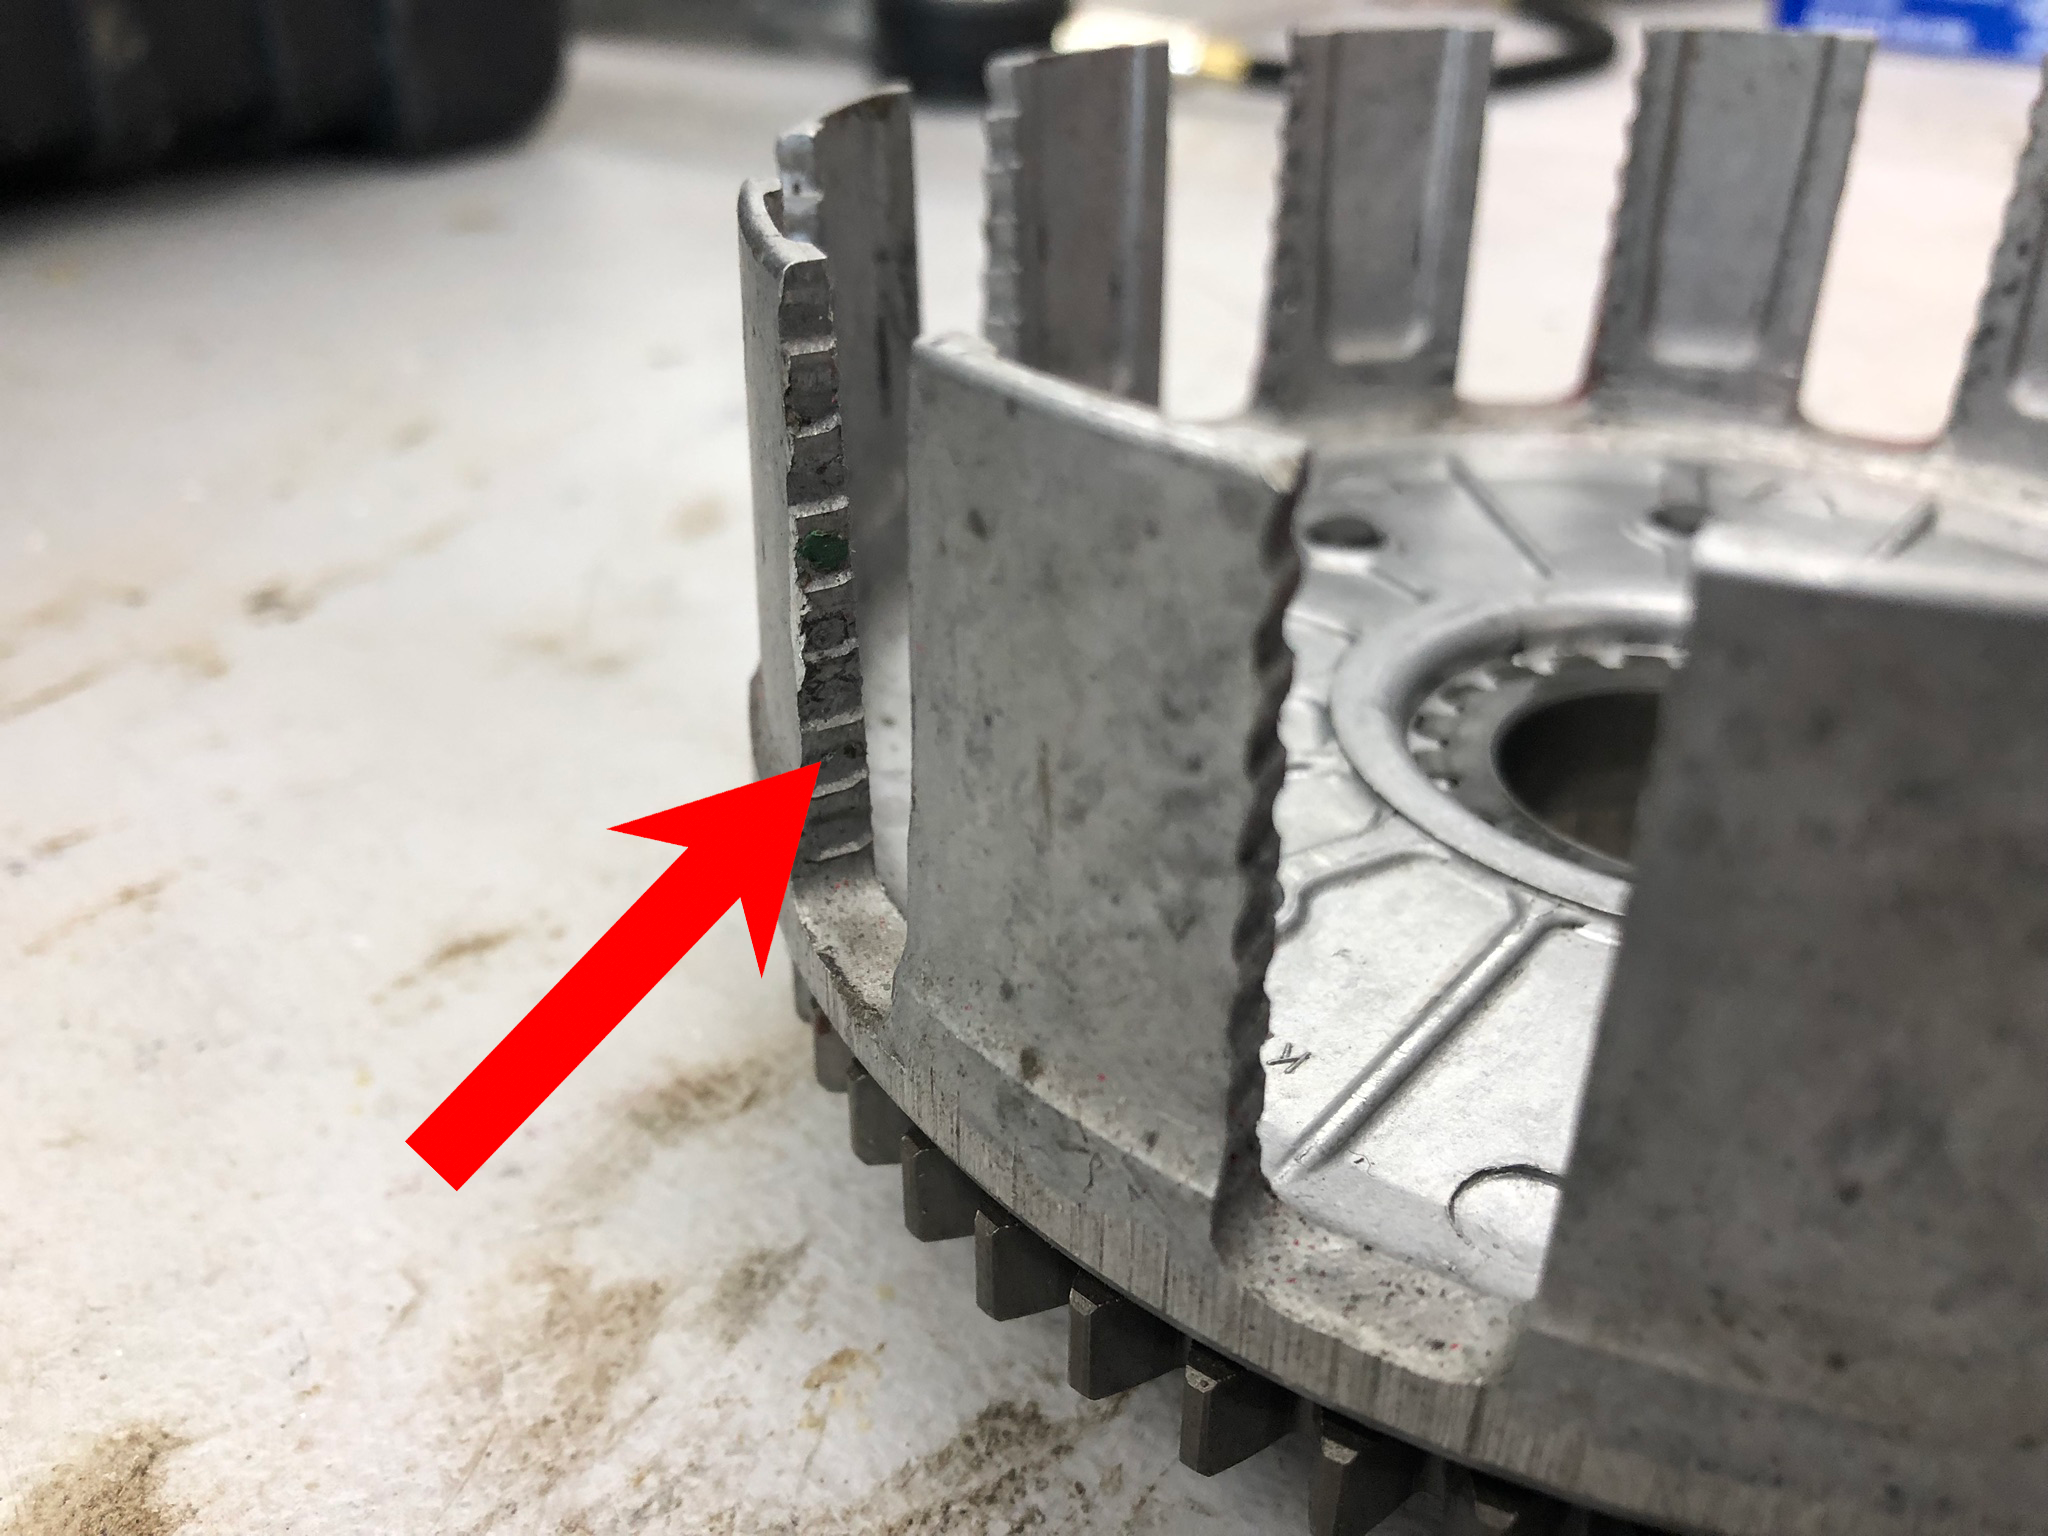
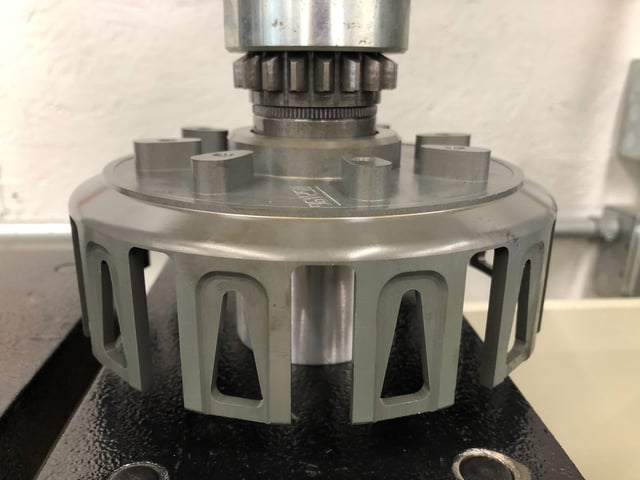
The basket consists of a series of “fingers,” or “tangs” which mate with the friction discs. The basket fingers drive the friction discs. The friction discs slide out when the clutch is engaged and back in when the clutch is disengaged. Due to this interaction, notching can occur on the edges of the basket fingers. Any notching that can be felt with a pick or a fingernail can be potentially problematic. In terms of clutch basket wear, the main grounds for replacement of the basket are worn and grooved basket fingers.
Replacement Options
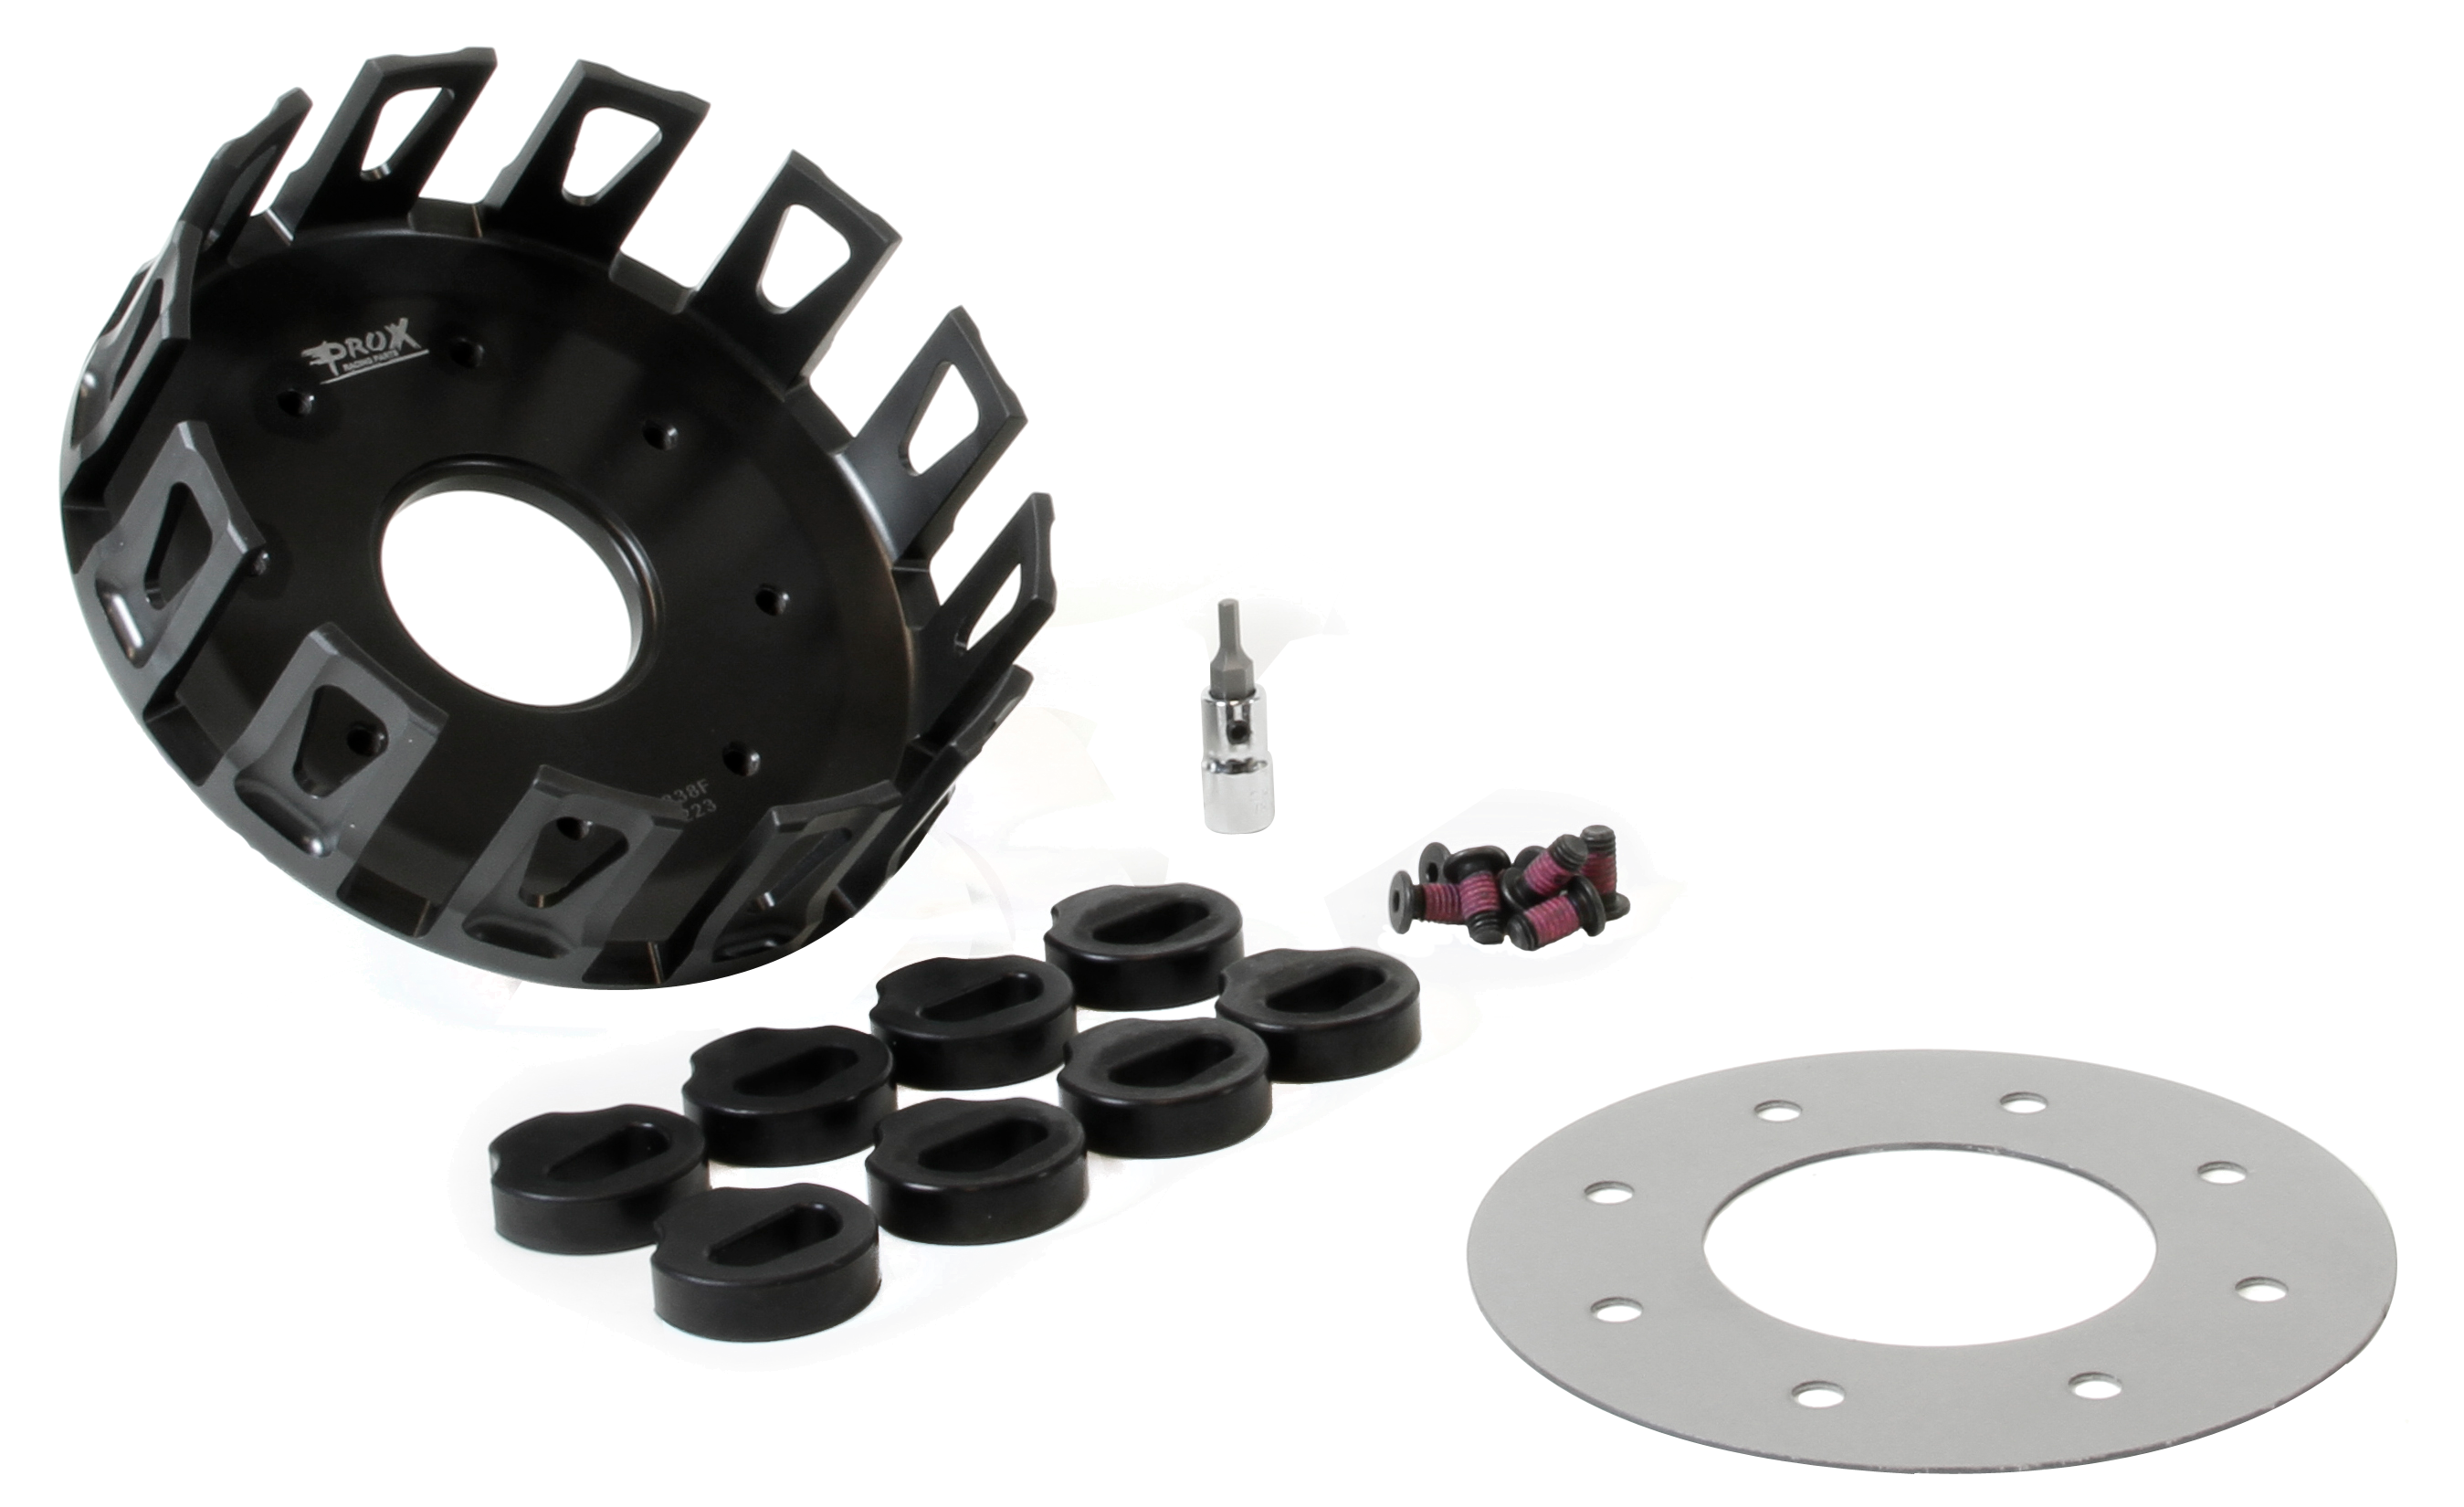
The clutch basket is a great component to upgrade since it has surfaces such as the basket fingers that are inherently wear surfaces. Selecting a ProX basket, which is significantly stronger and more wear resistant than OE baskets, has a high return on investment in terms of reduced maintenance and improved performance. ProX clutch baskets are precision machined from forged 7075-T6 aluminum, which is one of the strongest alloys on the market. Wear resistance is ensured by utilizing a sophisticated hard anodizing process. A final layer of performance is added in the form of a Teflon coating which seals the basket surfaces and allows the friction discs to slide effortlessly over the clutch basket fingers while in operation.
Find ProX clutch components for your bike or ATV here!
Tools Required
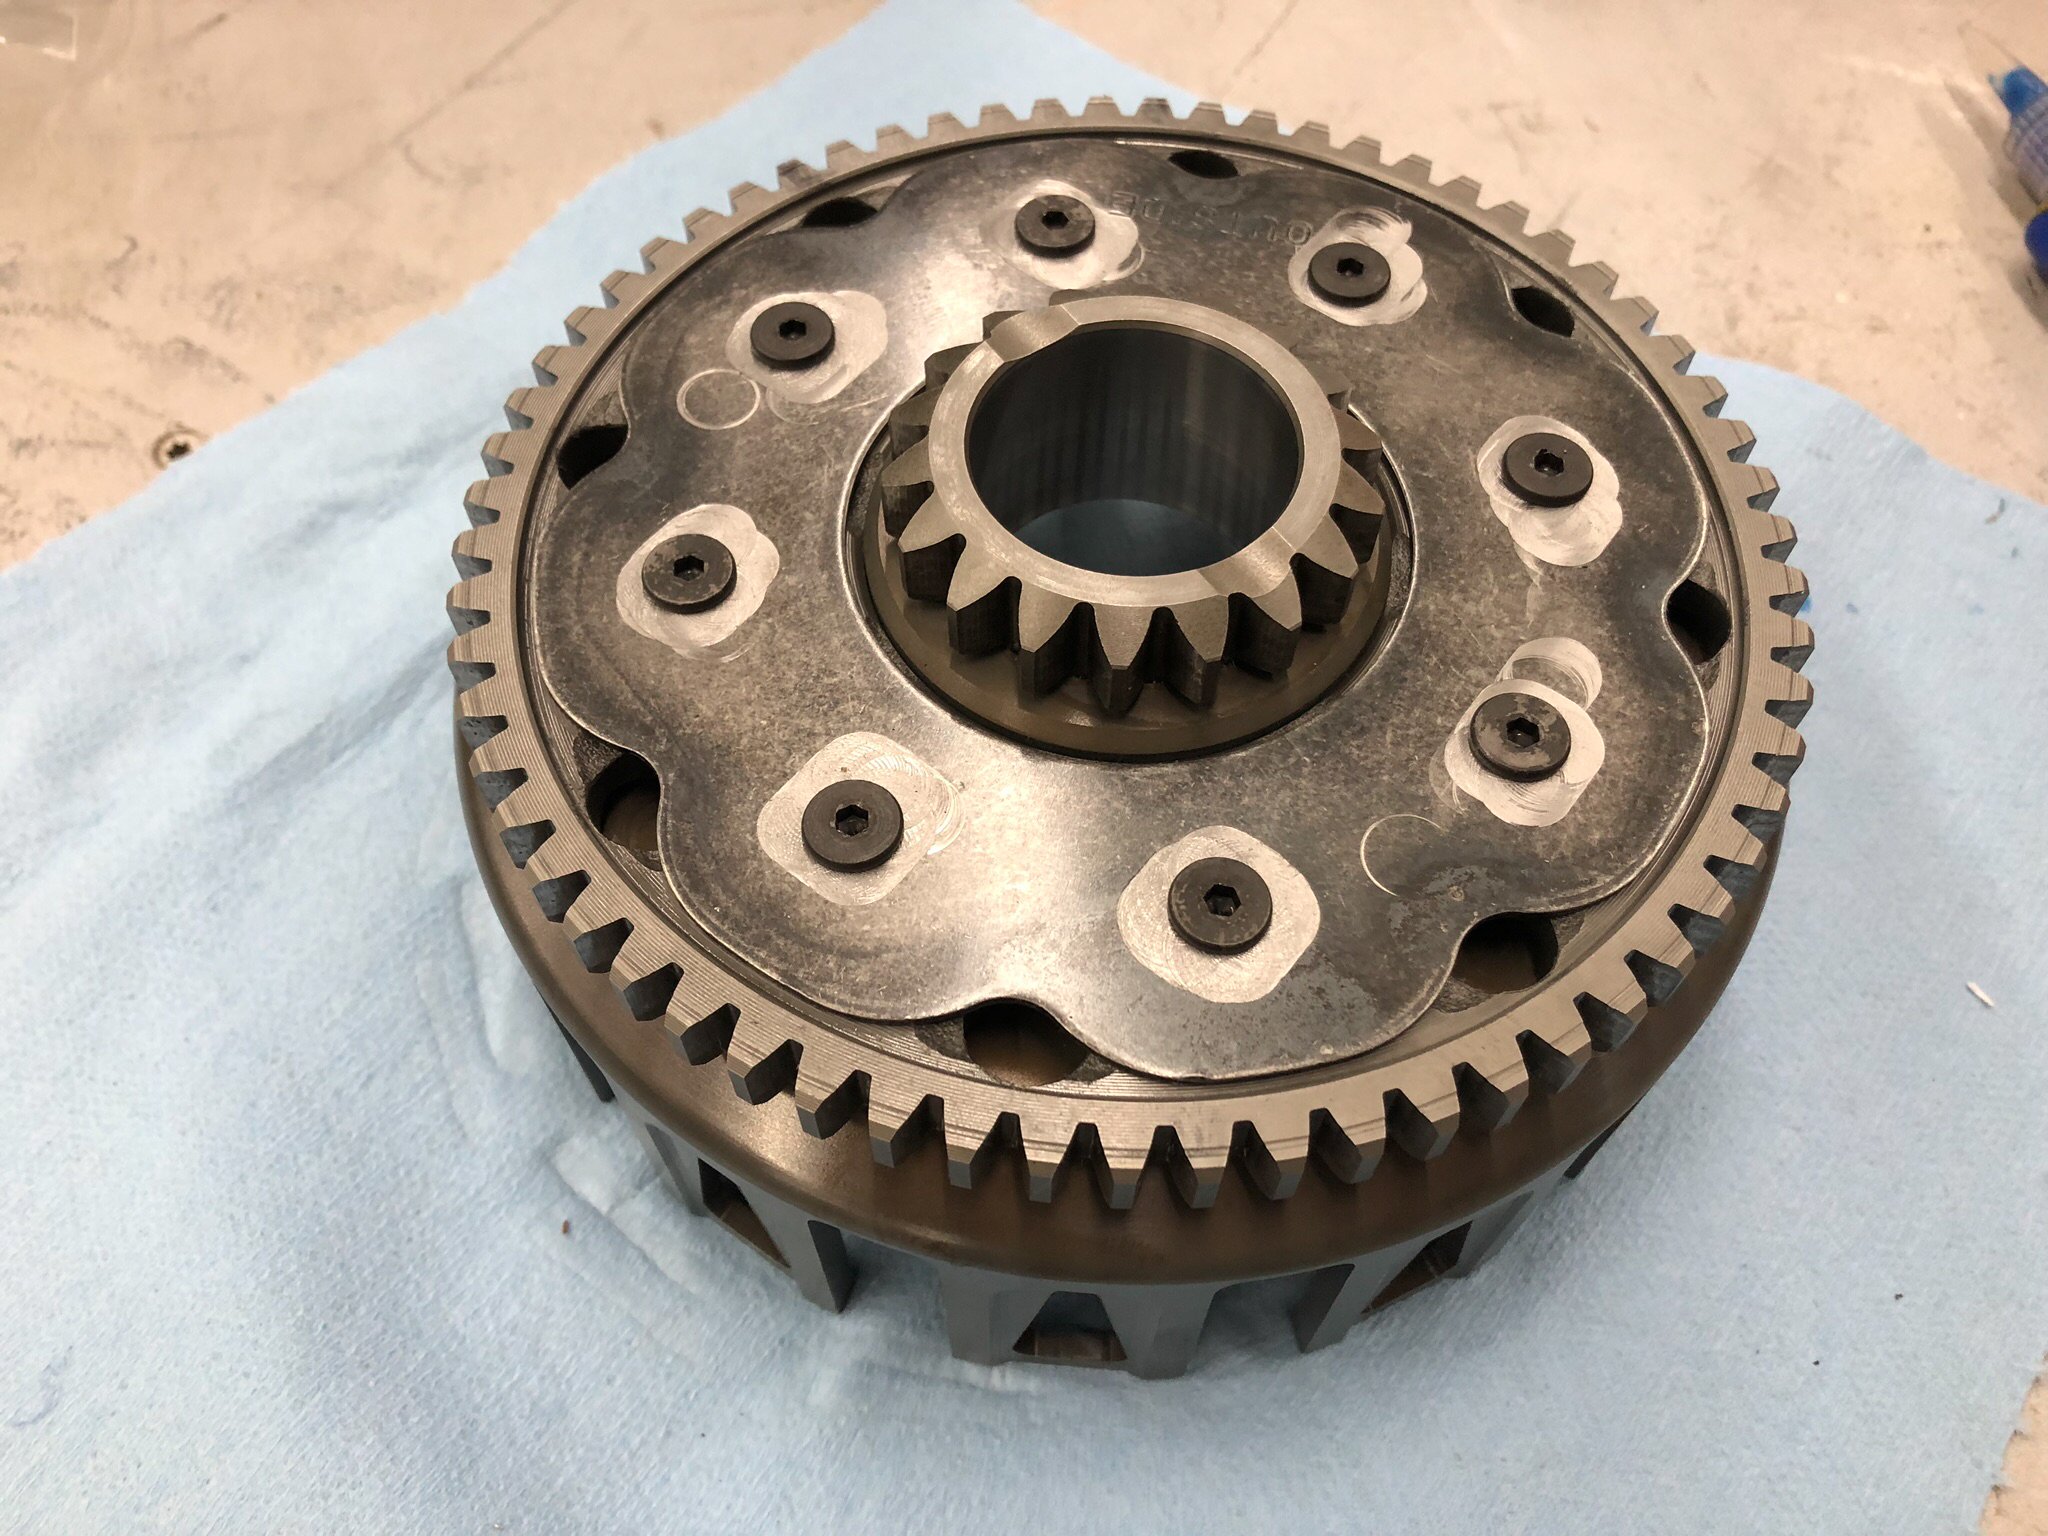
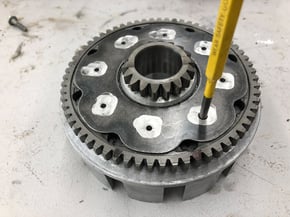
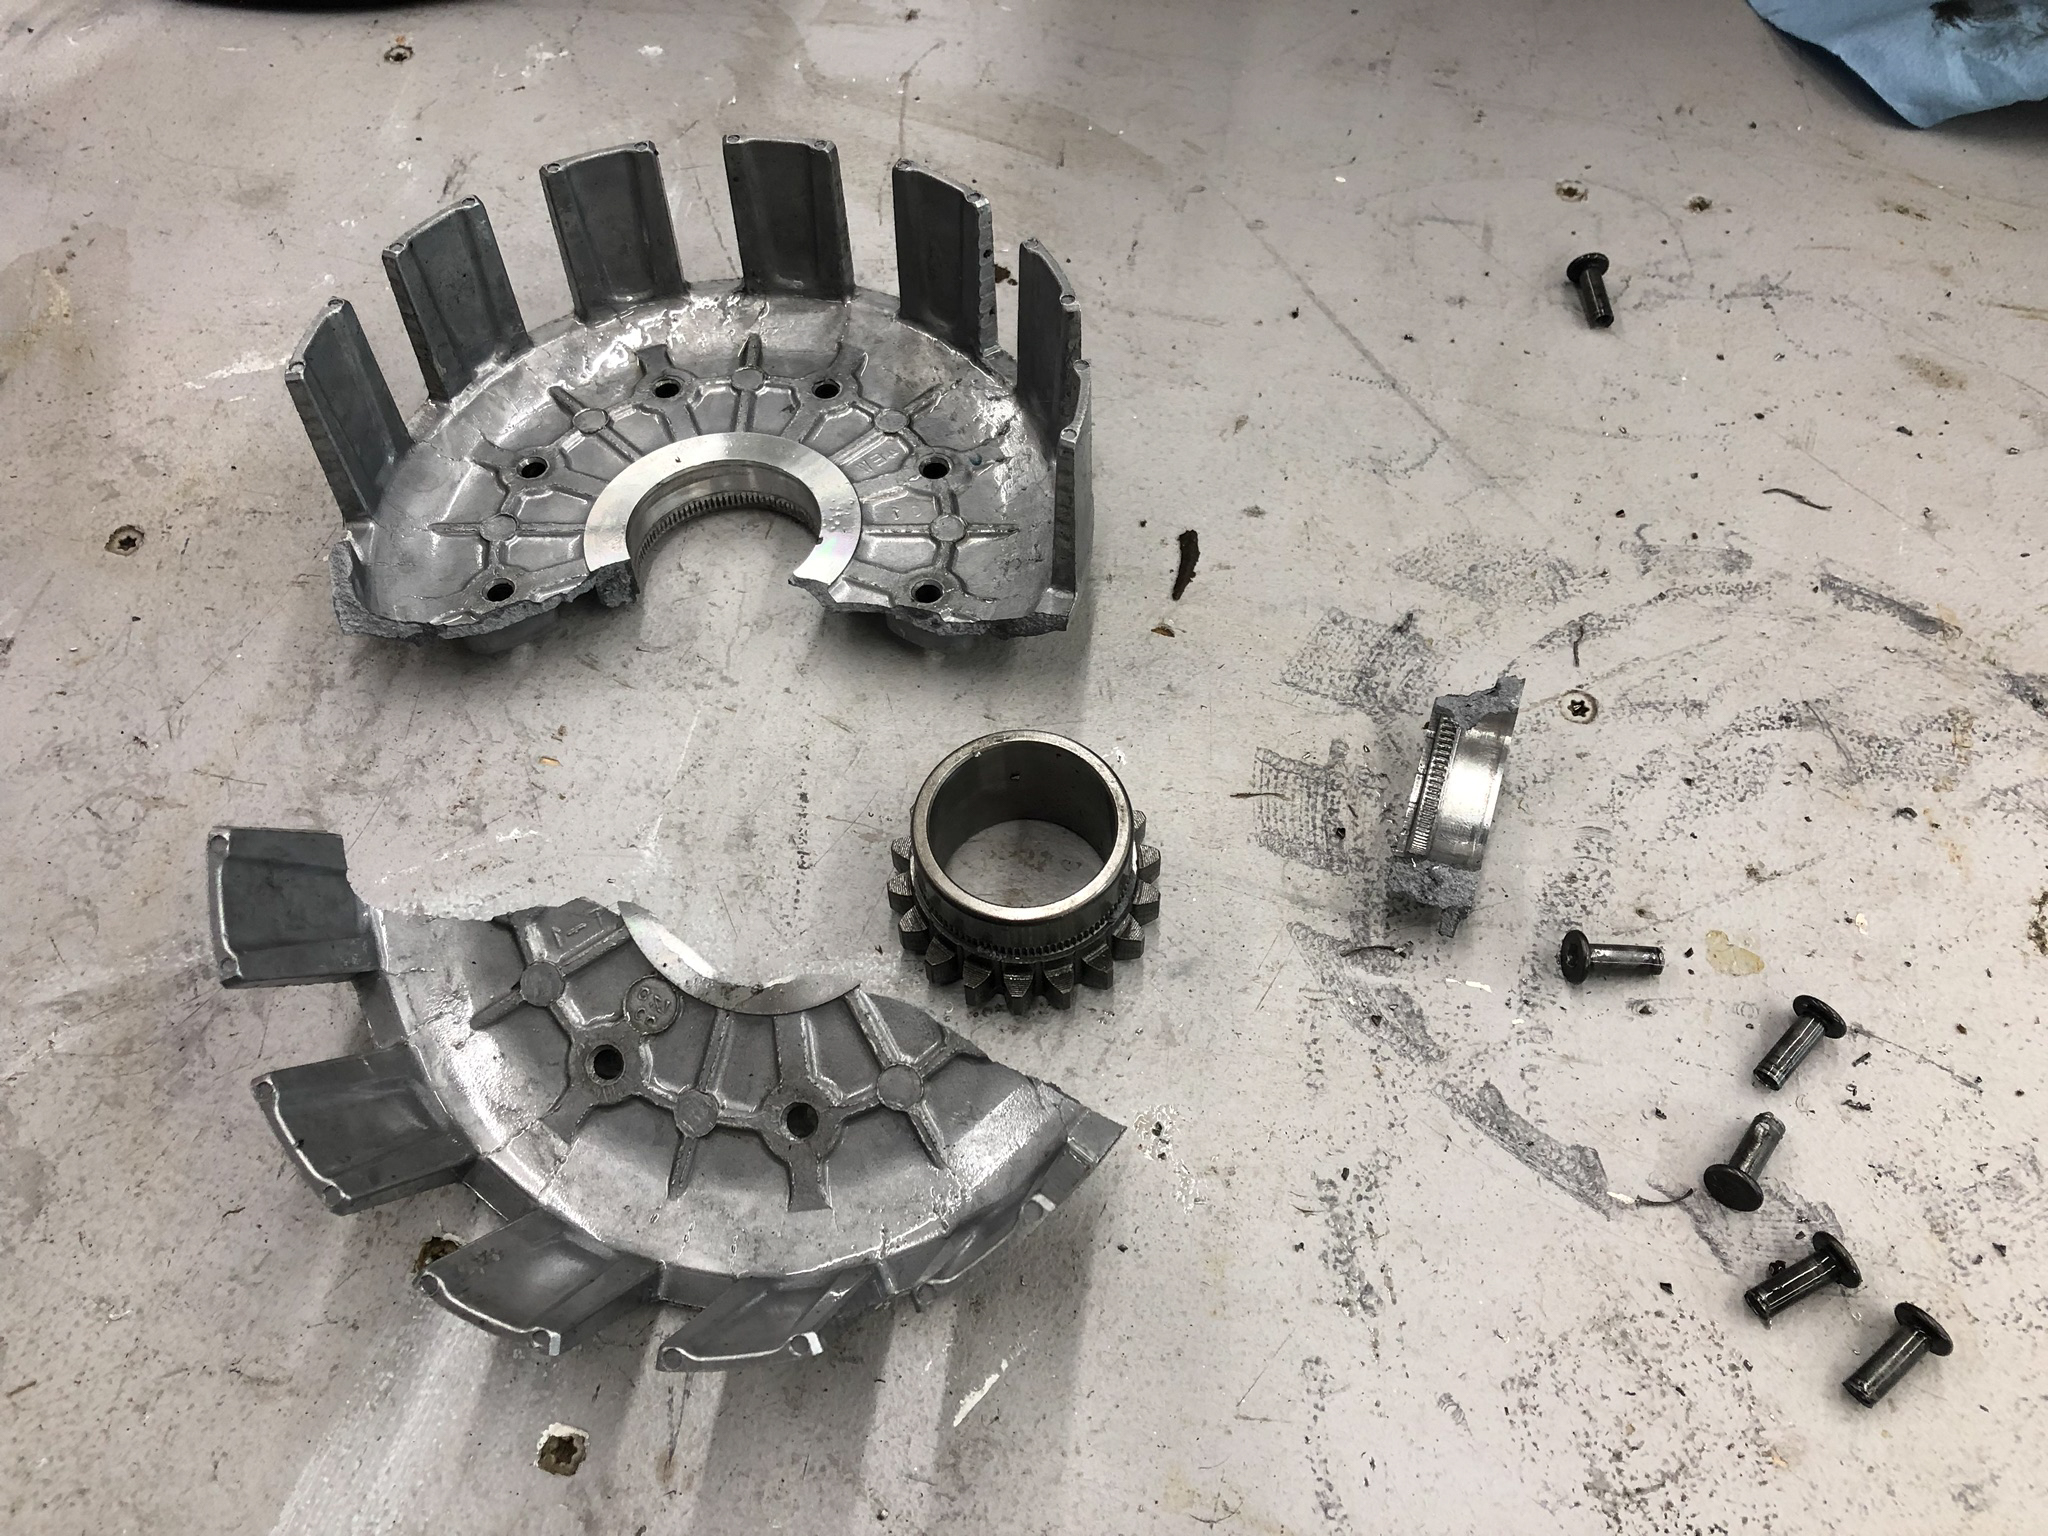
The clutch basket is an assembly of parts including the basket, starter gear, clutch driven gear, dampers, and backing plate. The starter gear is pressed into the clutch basket, and the driven gear, dampers, and backing plate are riveted or screwed in place. When it comes to tools, you’ll need the following, outside of your standard tools used to remove the clutch from the machine:
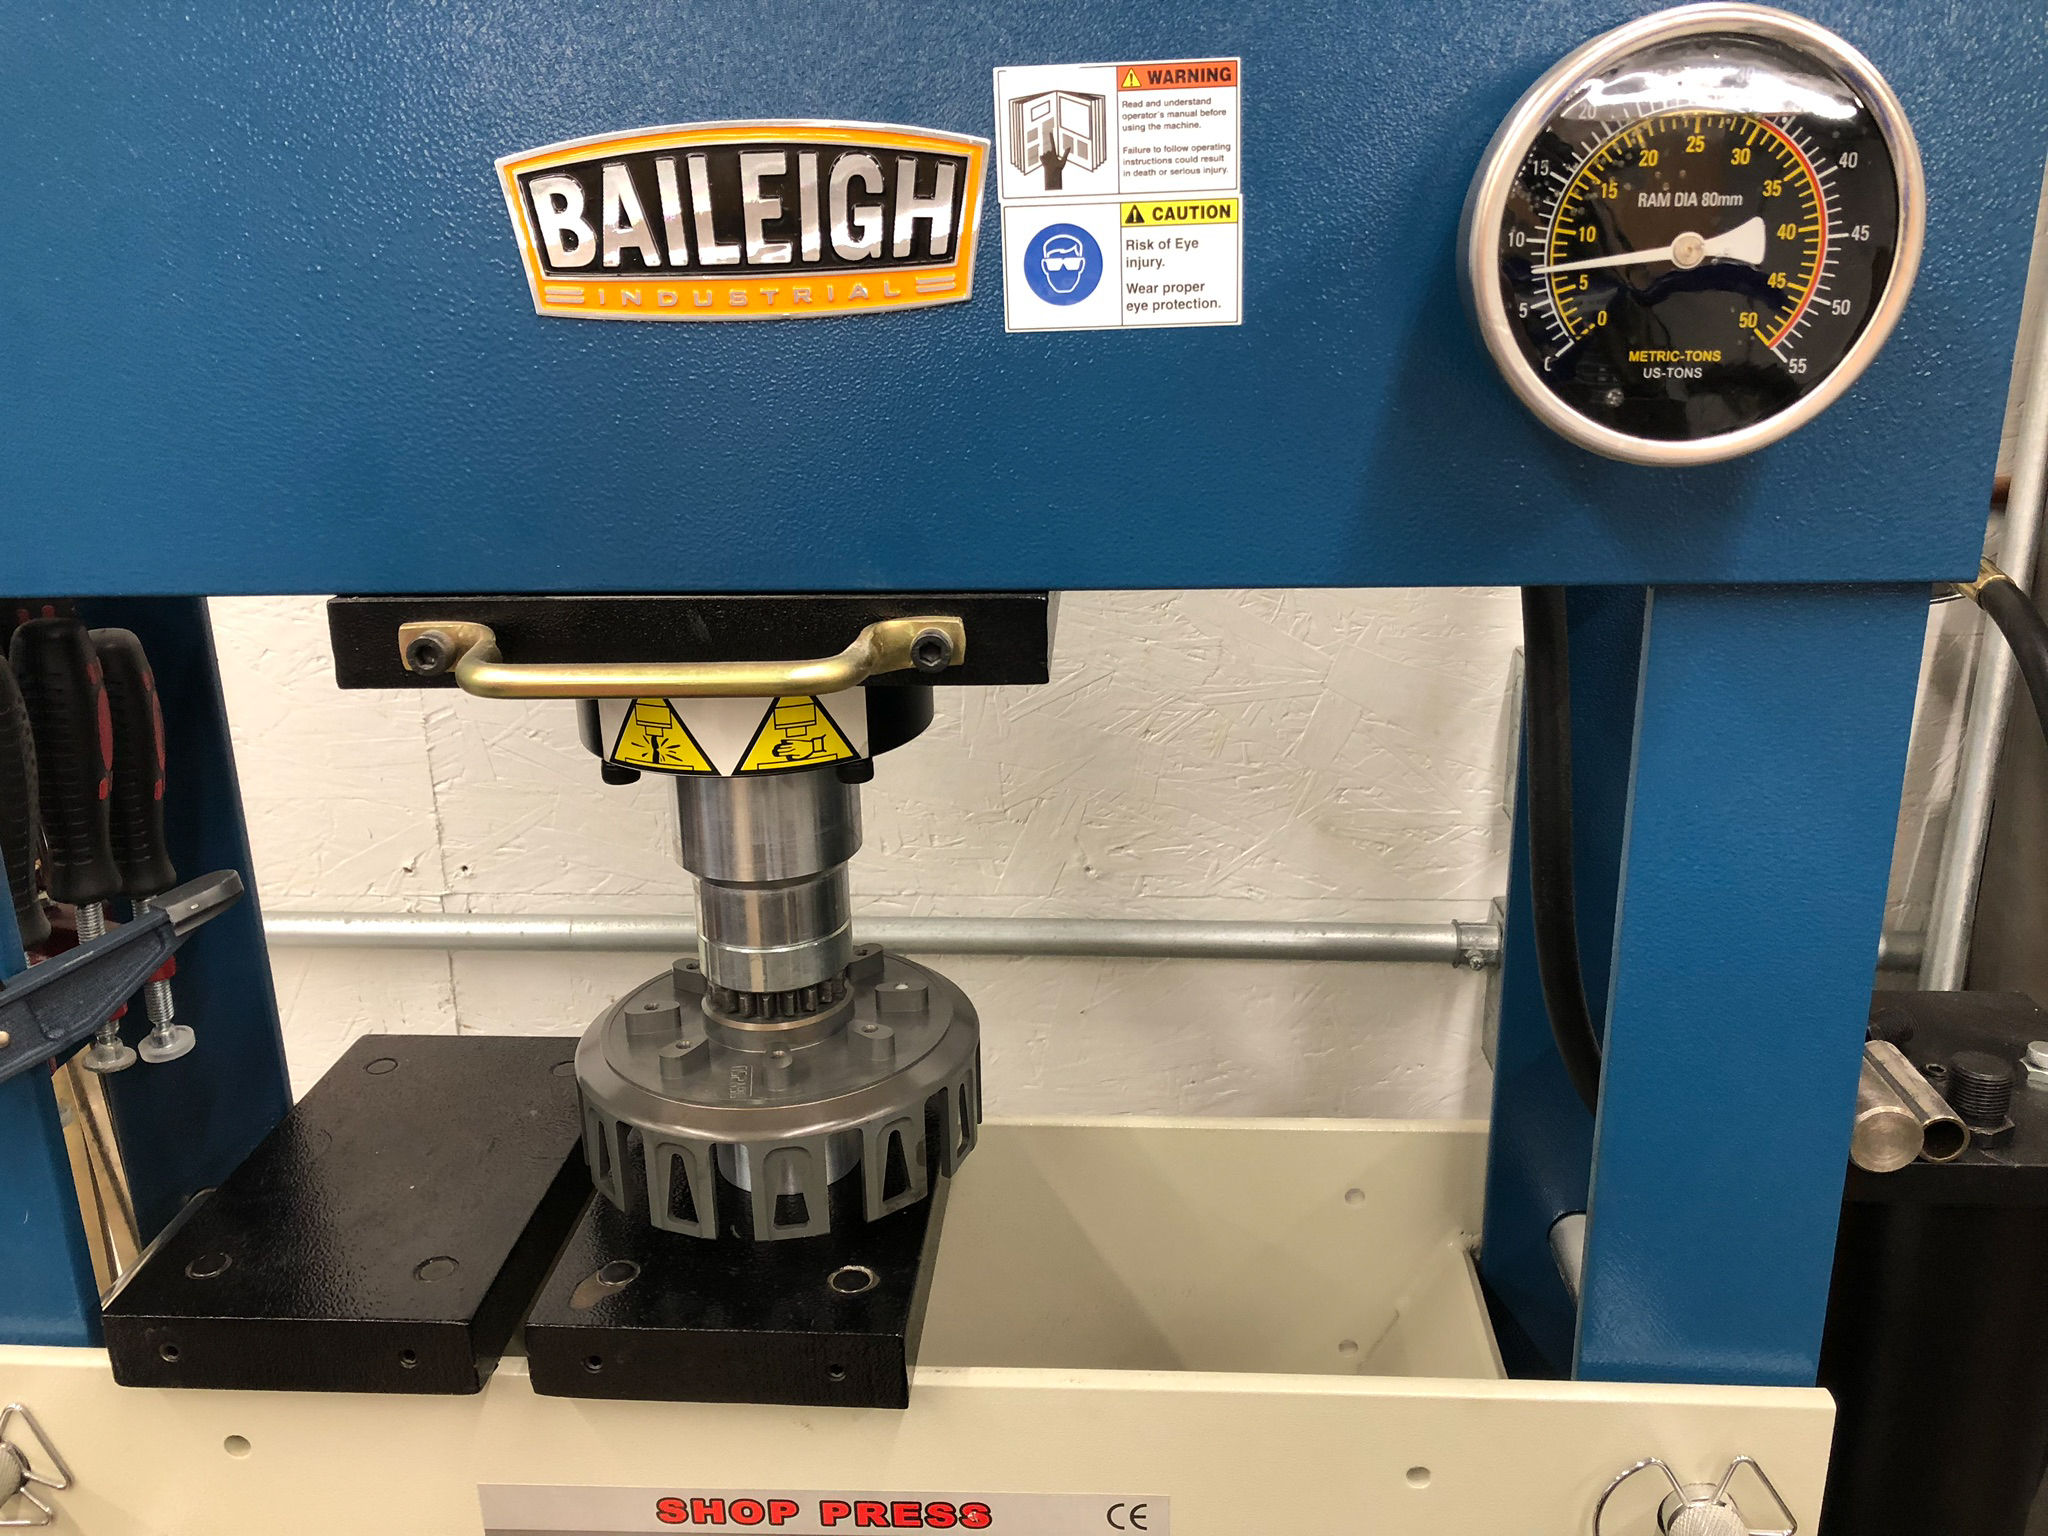
- Hydraulic press or vice - capable of exerting up to 8 tons of force.
- Center punch, drill and drill bits, or grinder, or mill - for removing the rivets
- Punch and hammer - for driving the rivets out of the assembly
- Torque wrench and Loctite - for securing the screws in the new basket
- Fixturing - for adequately supporting the basket while removing and installing the starter gear. The fixturing doesn’t have to be anything fancy, and examples are provided later in this article.
The Process
We’re going to jump into the process post clutch removal and focus on servicing the basket. ProX clutch baskets include new dampers and screws along with instructions for your specific application. The following instructions should be considered supplementary.
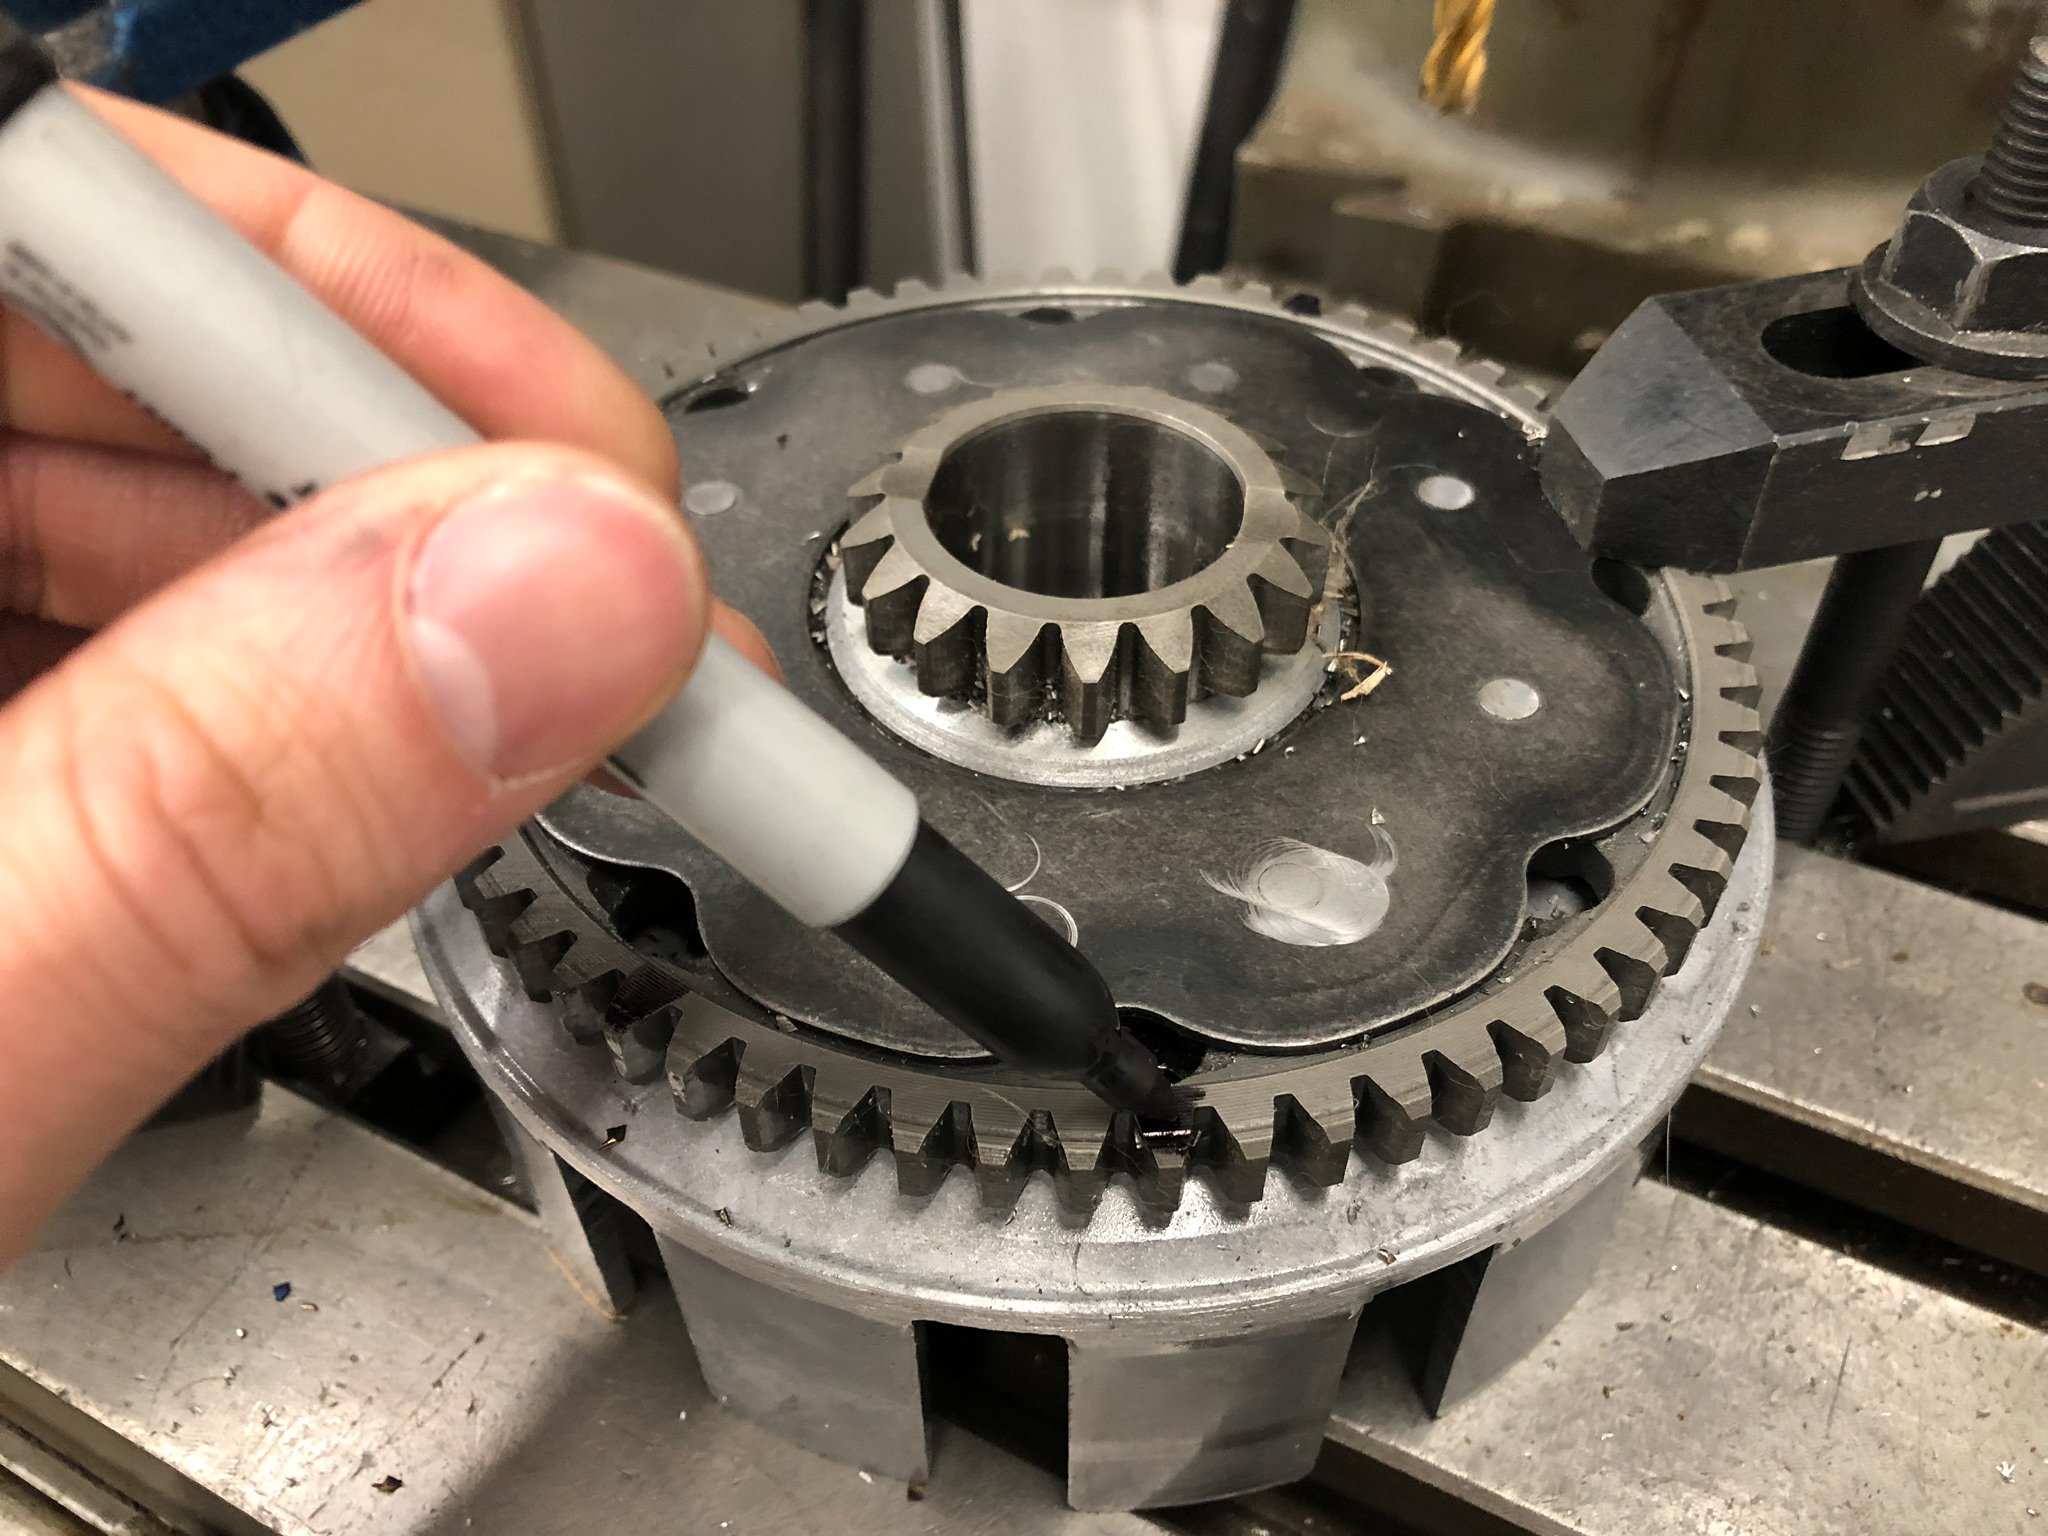
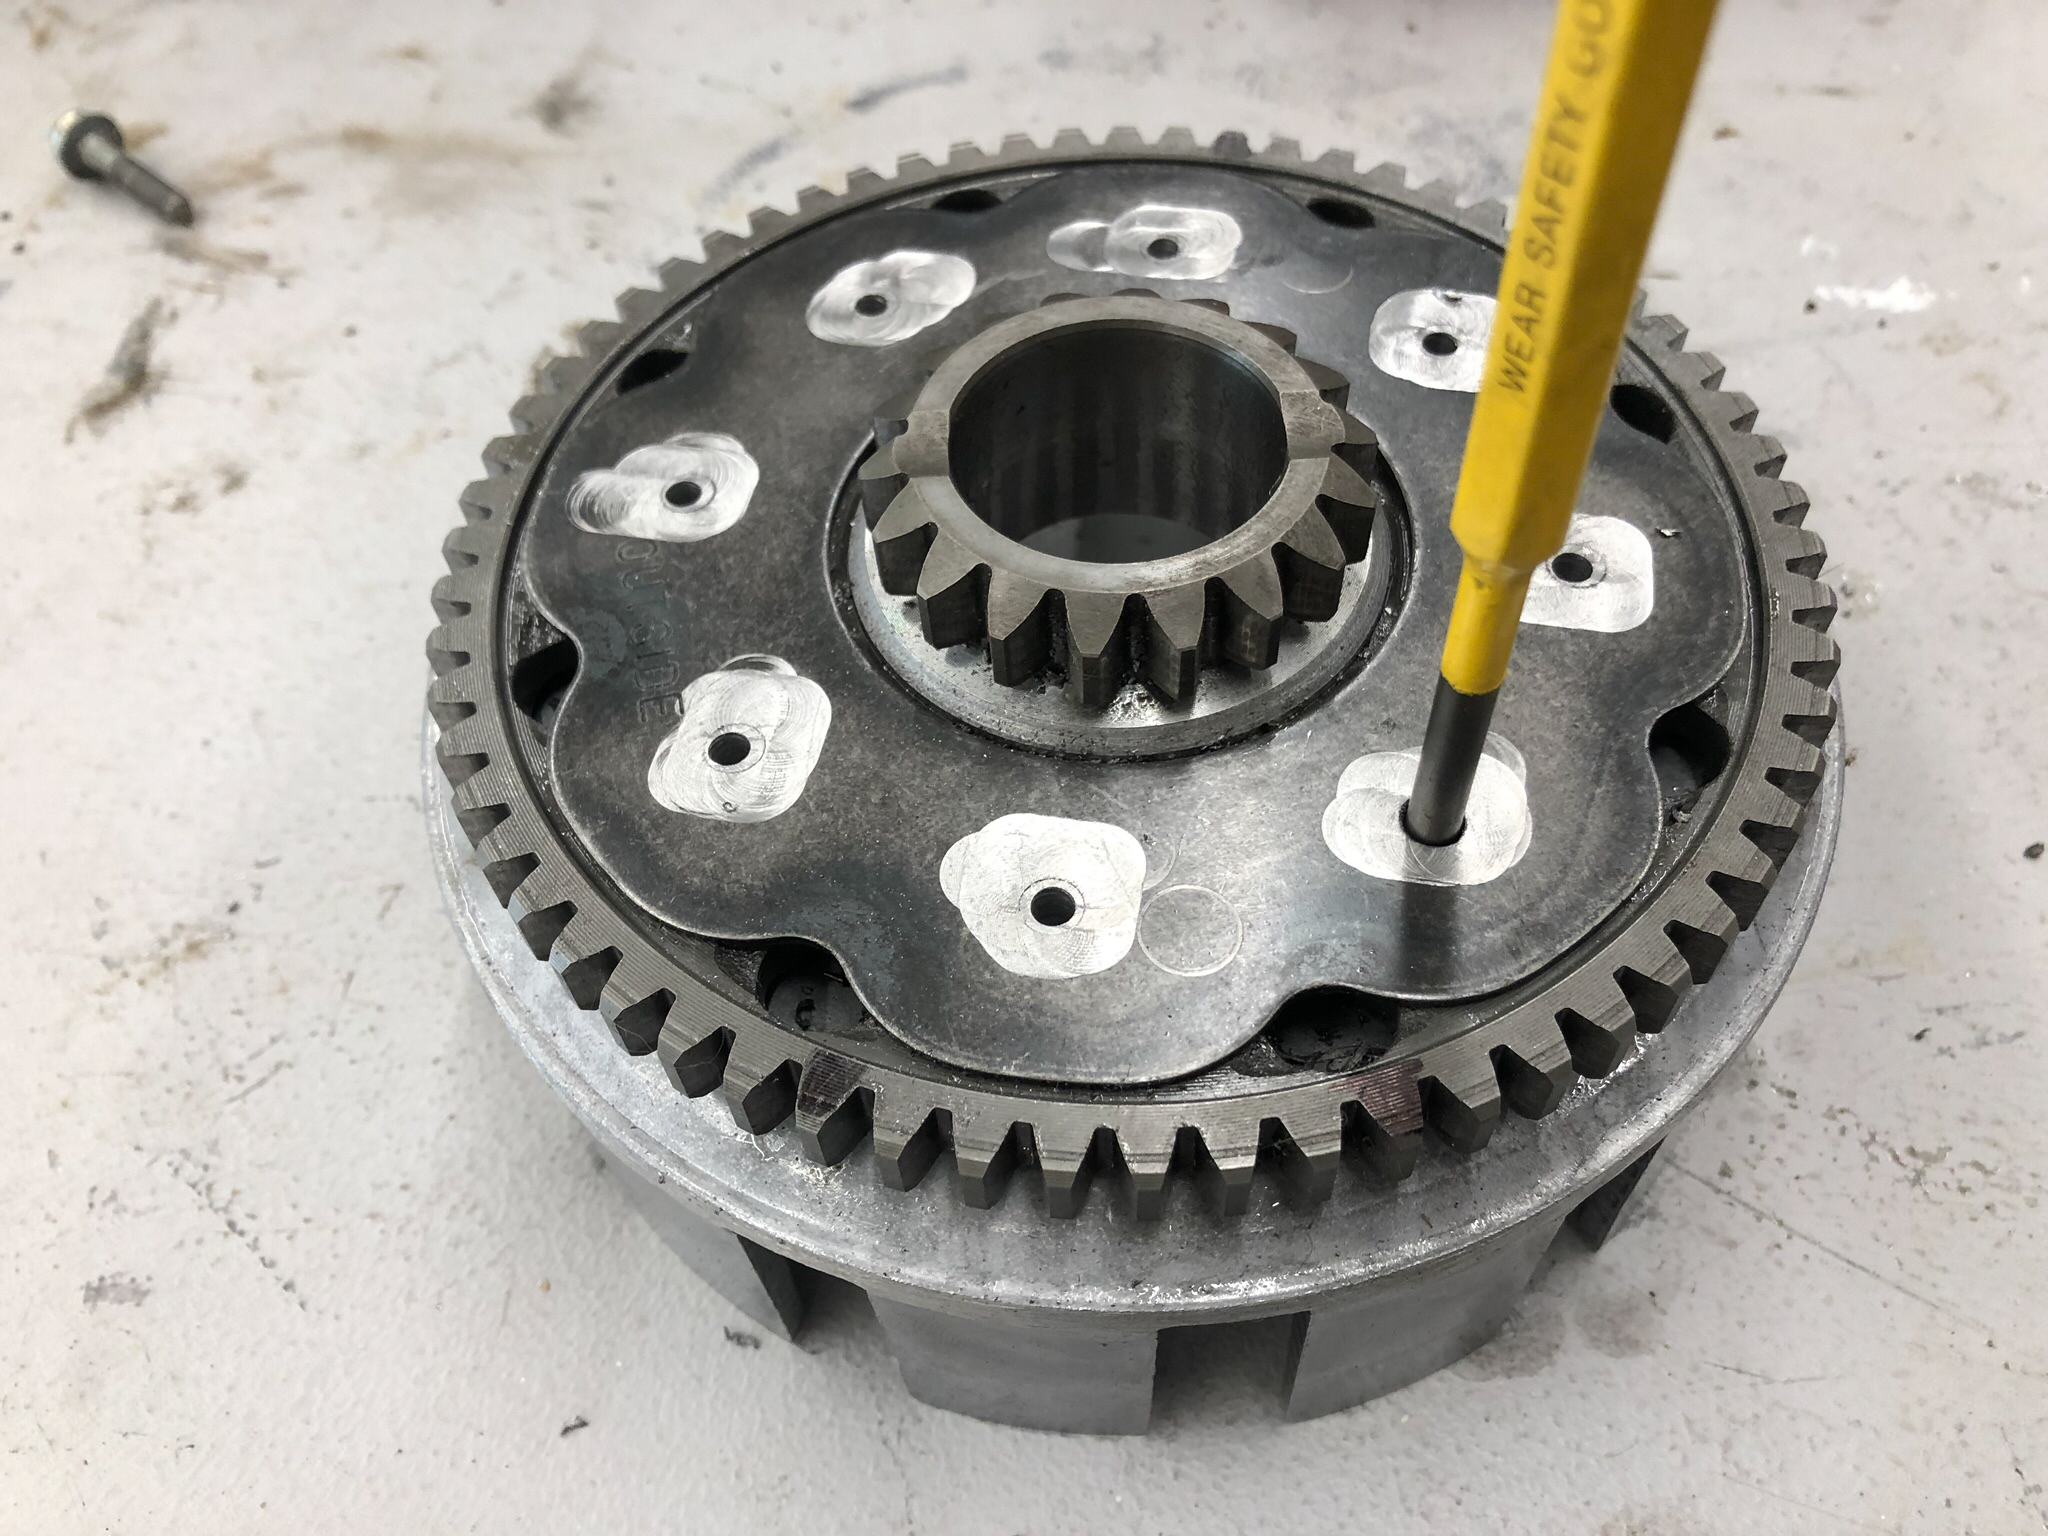
- Mark the backing plate and gear - Use a marker to mark the outside surfaces of the backing plate and gear. Doing so will ensure that these parts are installed in the correct direction when reassembled.
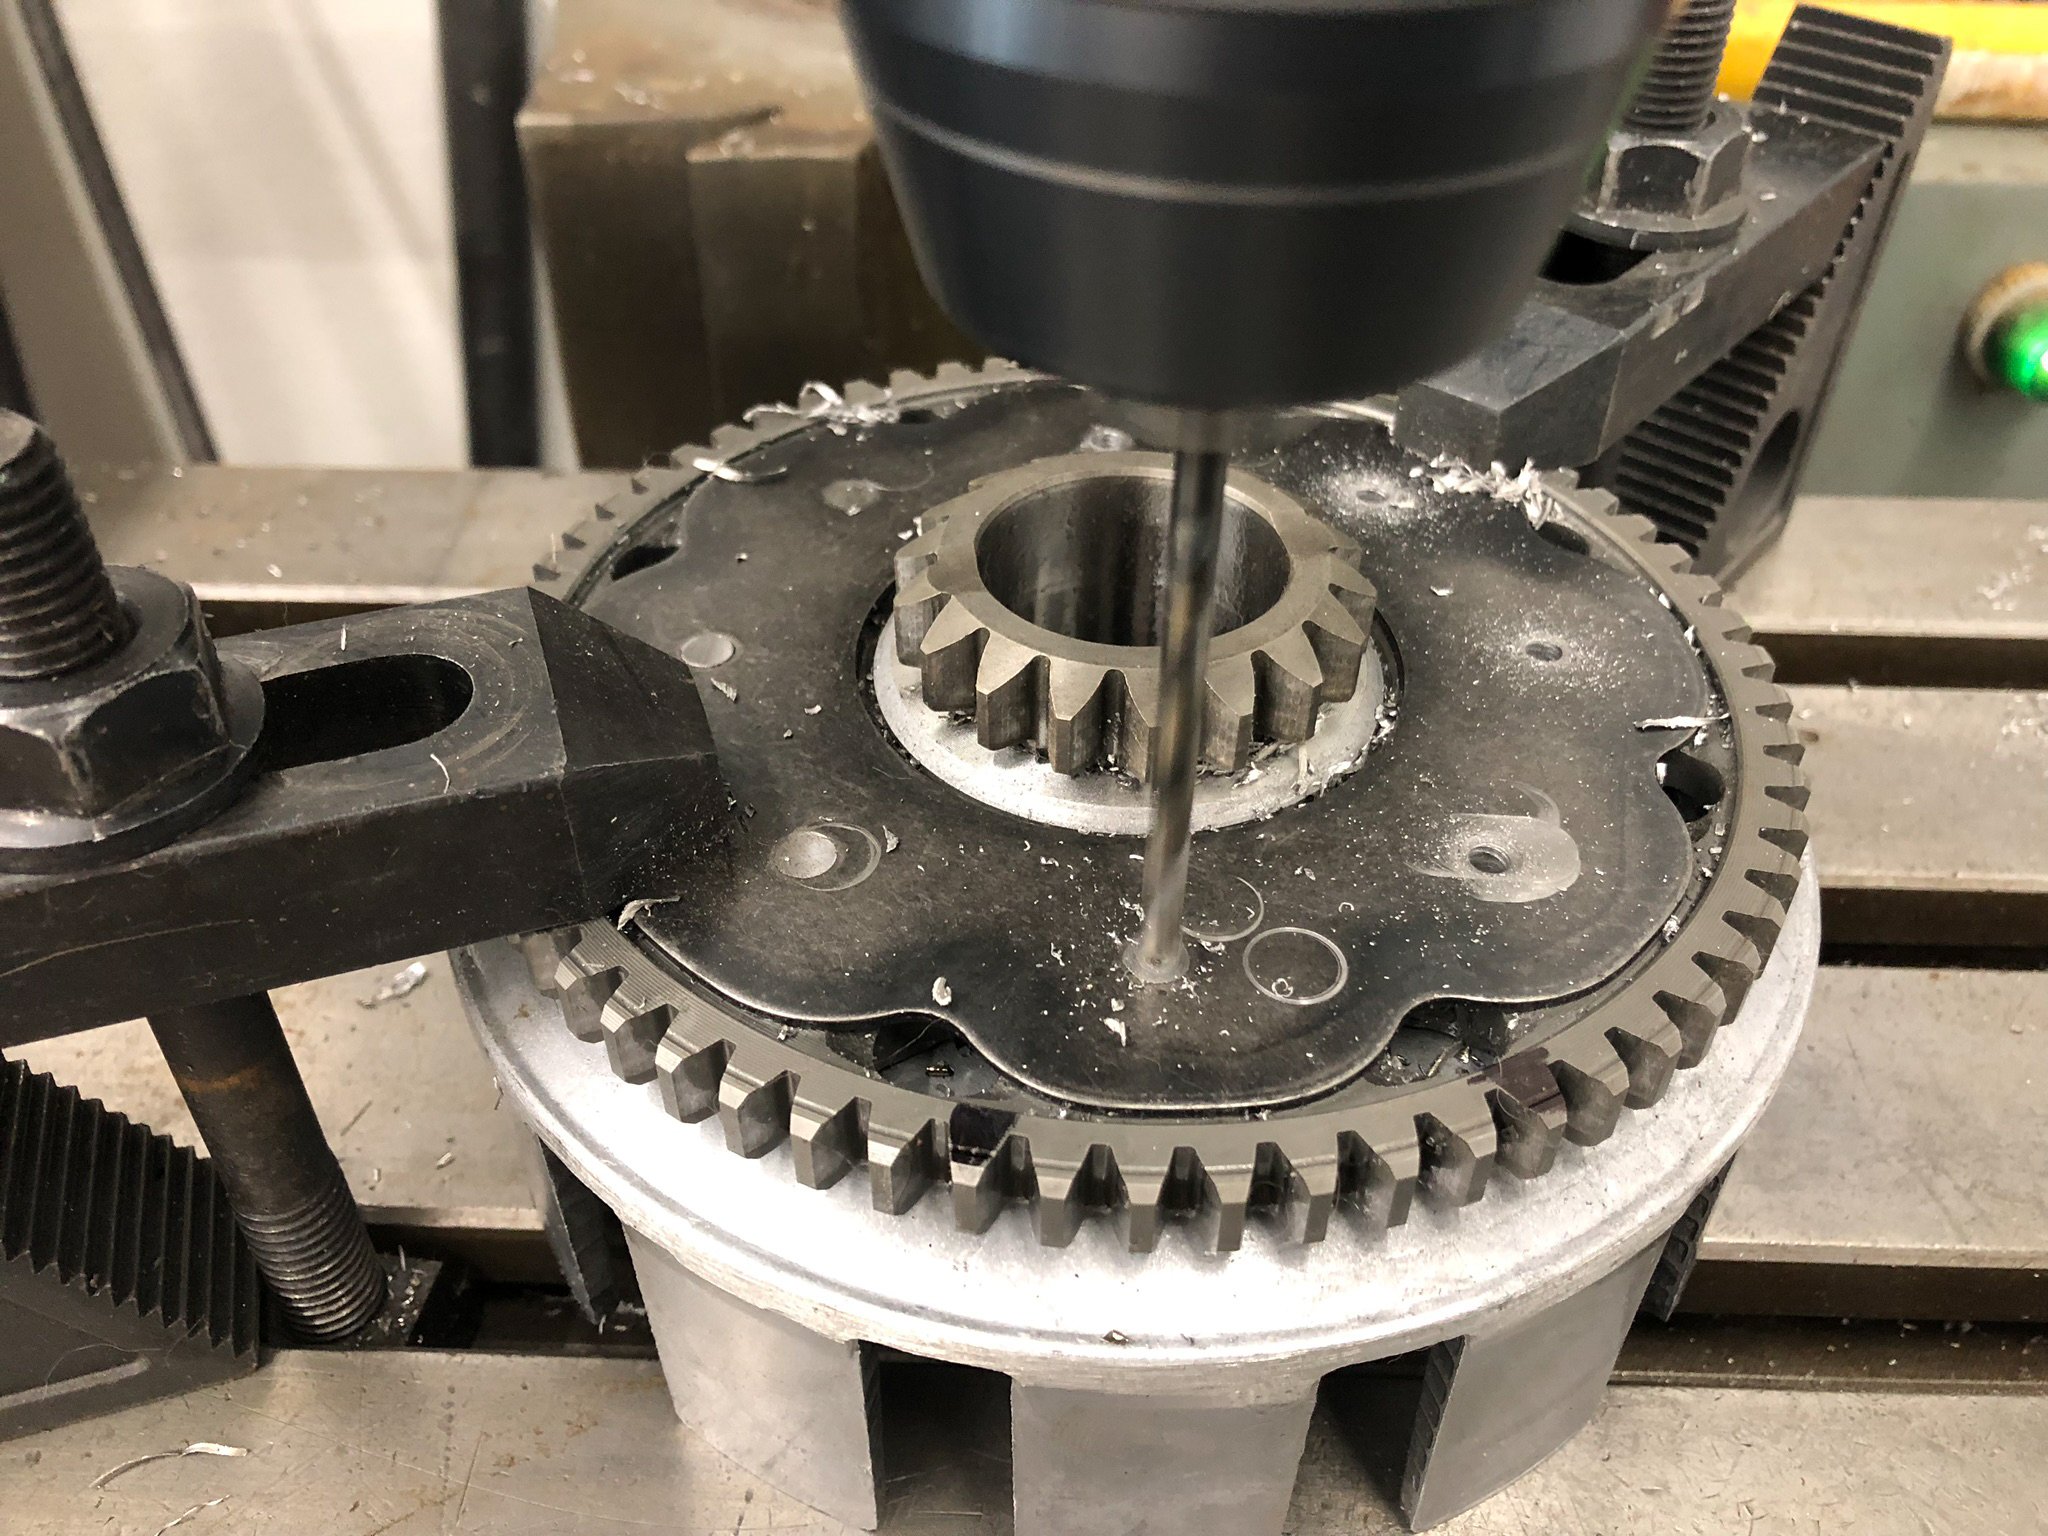
- Removing the rivets - It is preferable to drill the rivet heads off, however, grinding and milling the heads off are also acceptable options. When drilling, it is best to start by using a center punch to indent the center of the rivet so that the drill bit will not walk. Once center punched, start with a small drill bit and work up to a bit that is slightly smaller in diameter than the rivet itself. Only drill down far enough to remove the head from the rivet. Typically, a depth of 0.040 - 0.080” (1-2mm) below the surface is all that is required to drill out the rivet head. After the rivet head has been drilled out, use a punch and hammer to drive the rivet out of the assembly.

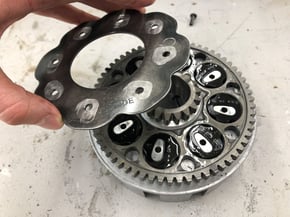
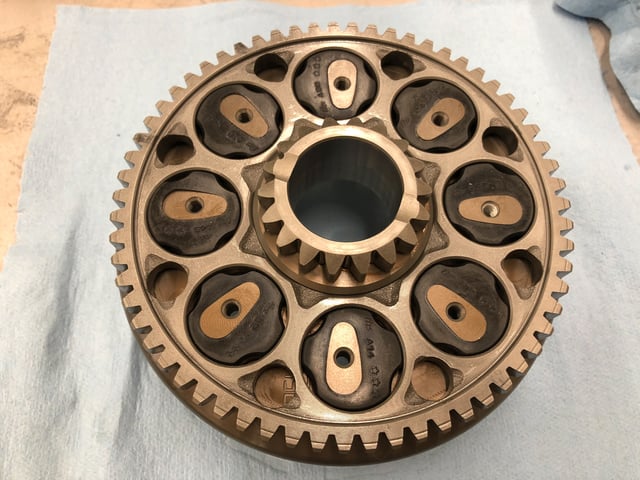
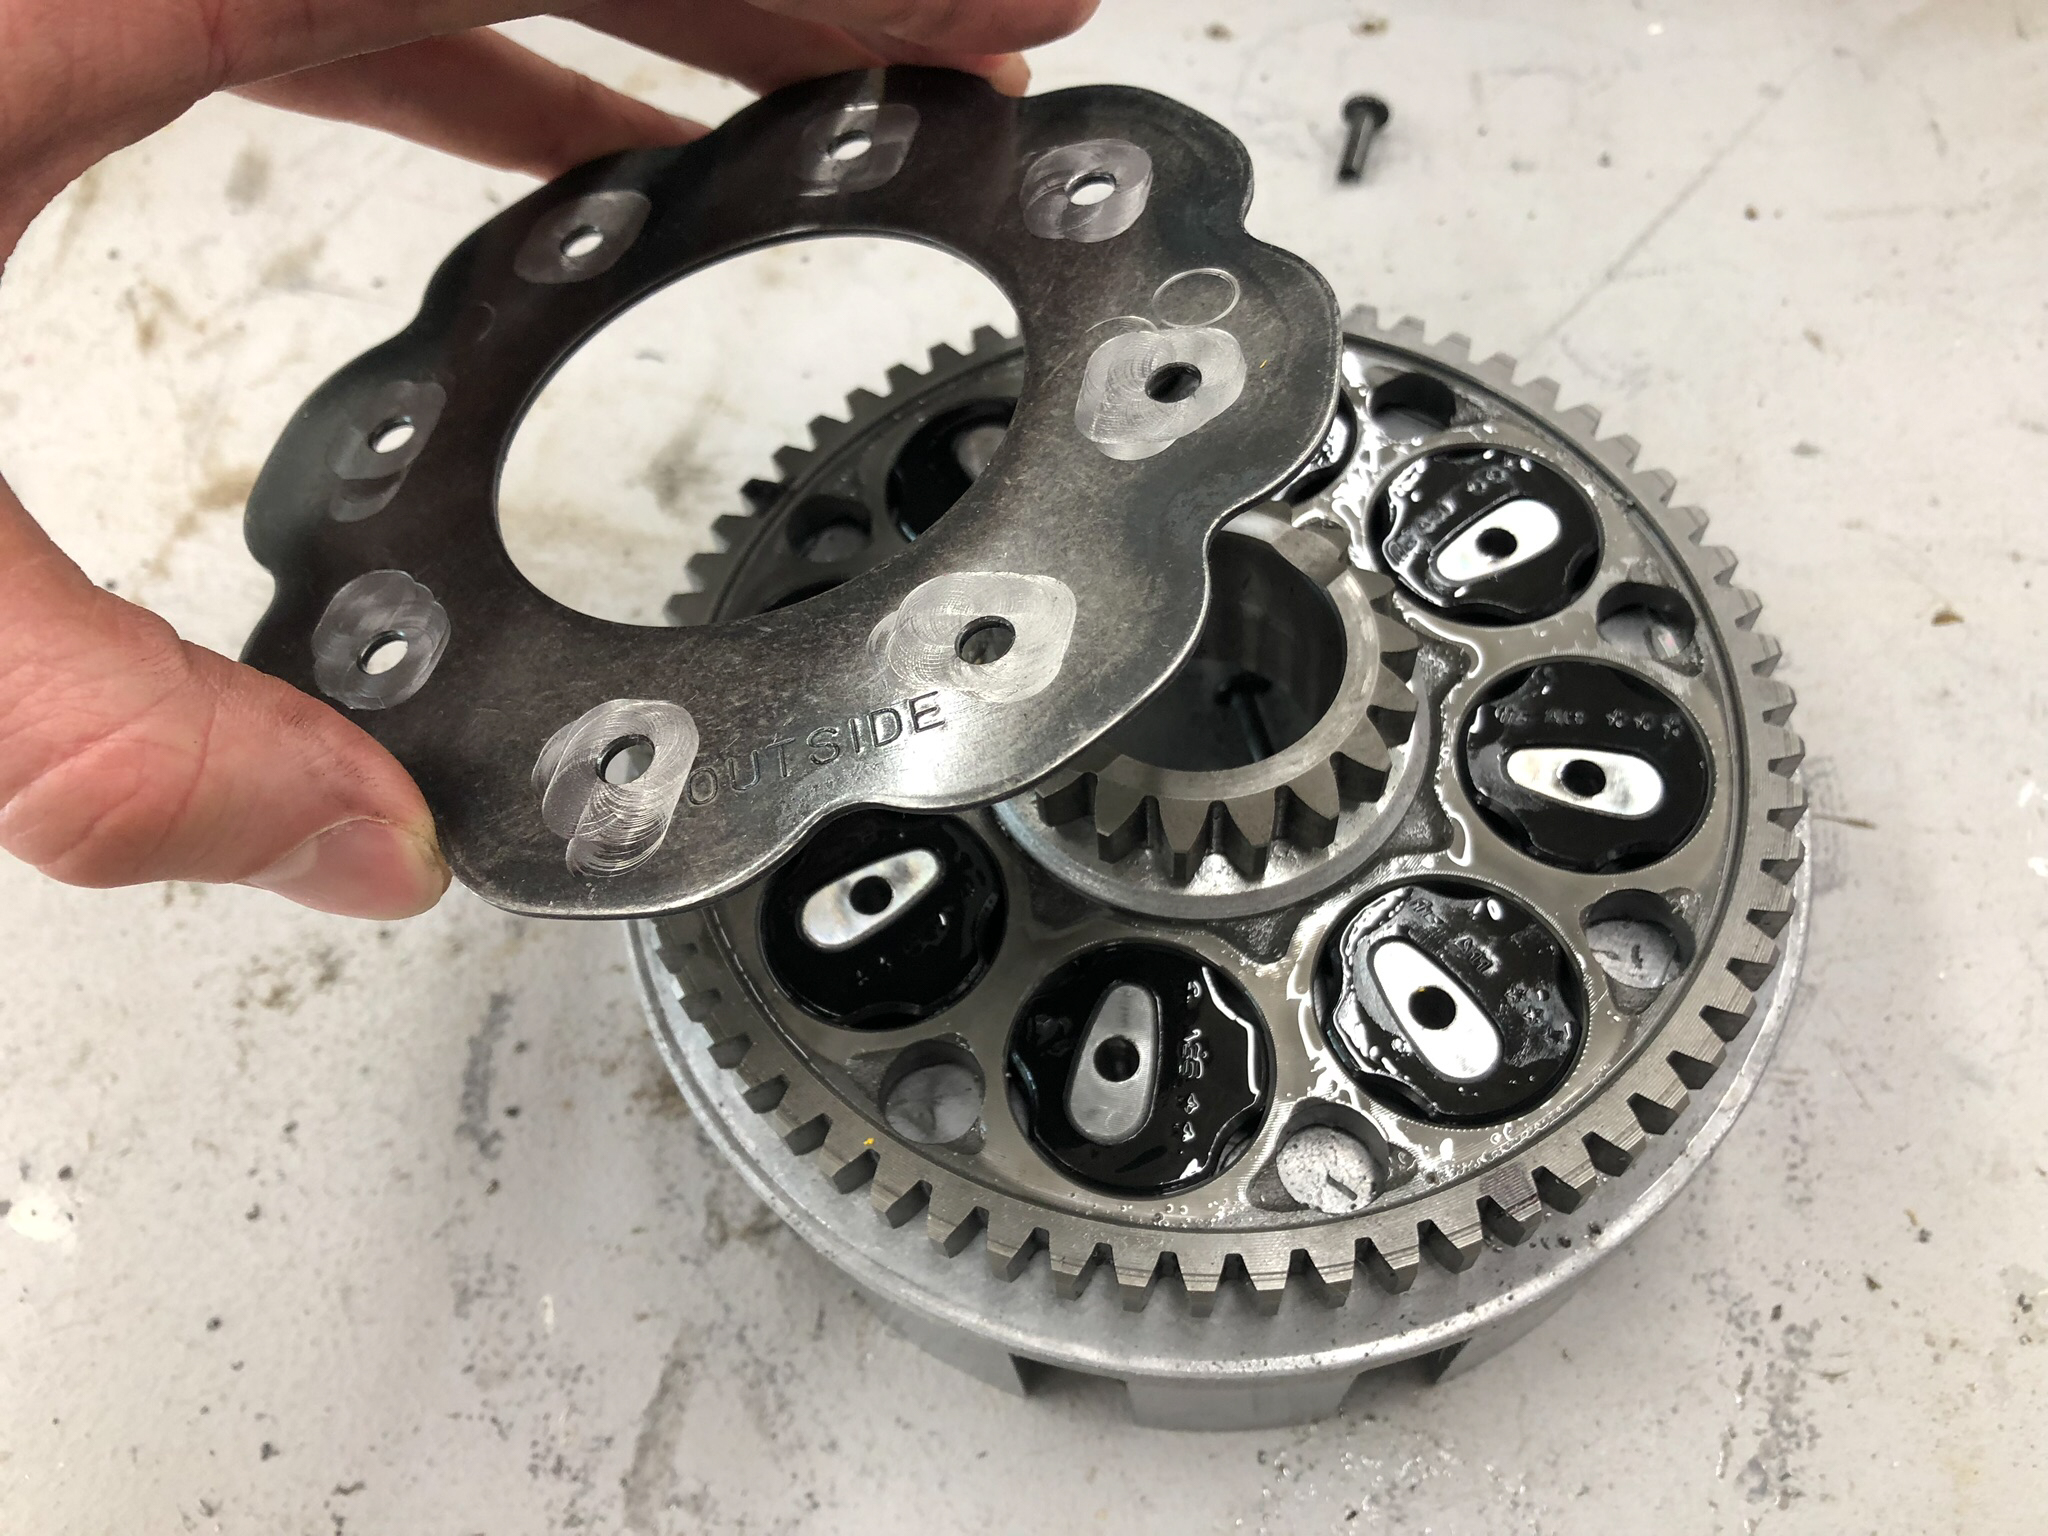
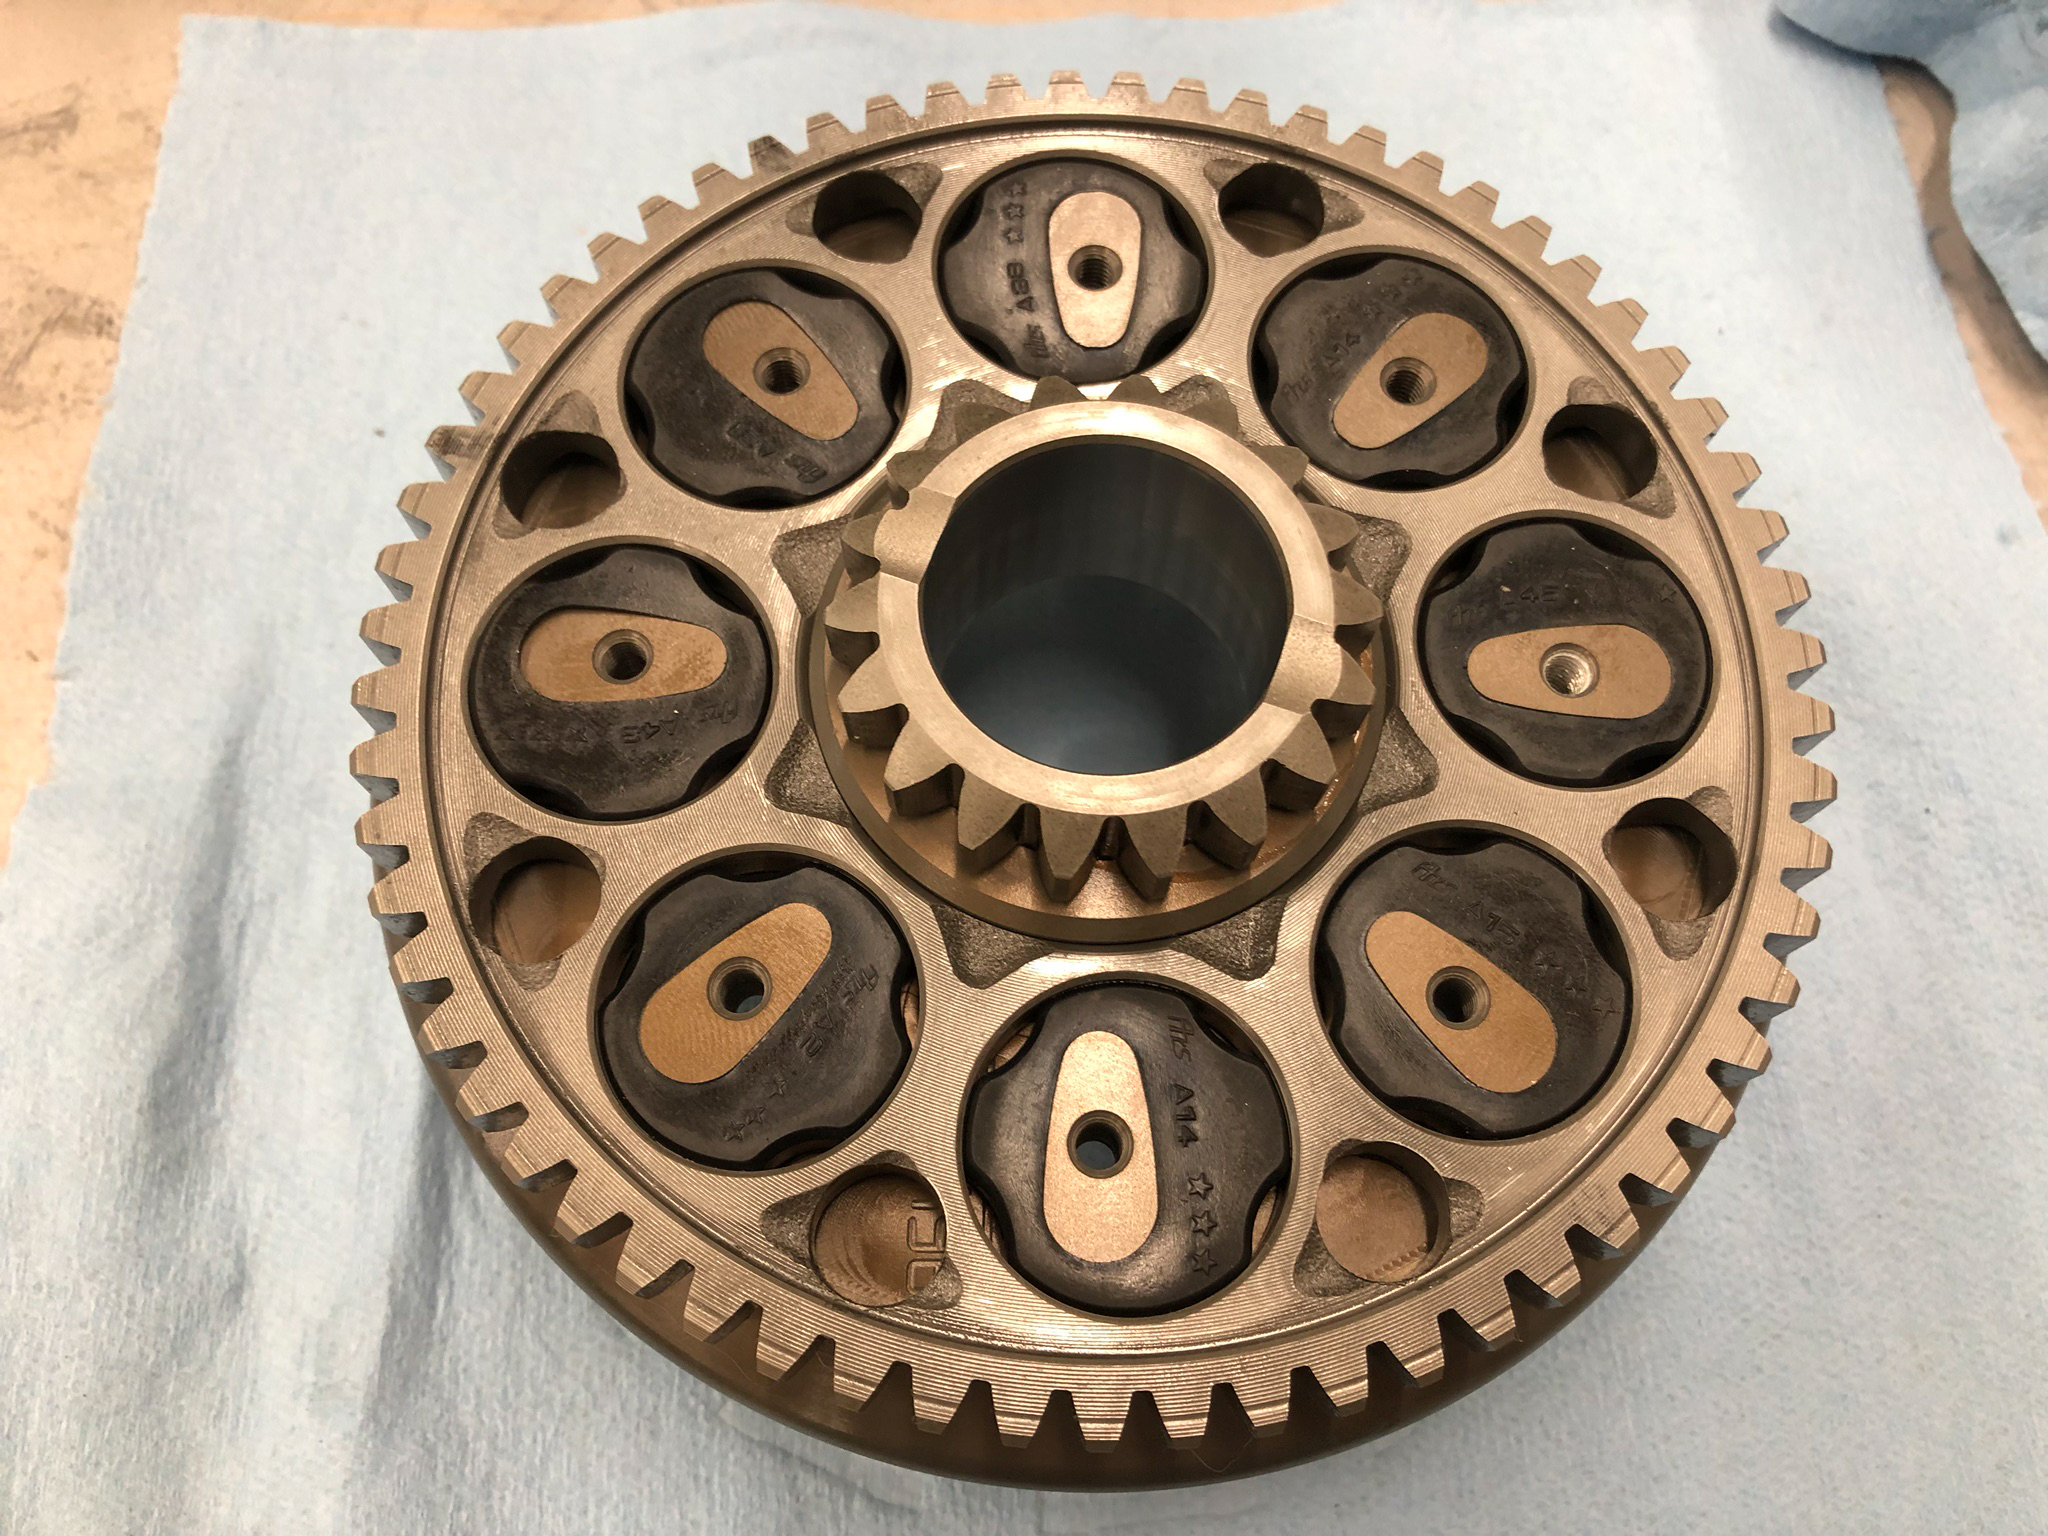
The most recommended method to remove the rivets is to drill the heads off then use a punch to remove the rest of the rivet completely. - Remove the driven gear - Pull the backplate off before removing the driven gear. Note the orientation of the dampers. Take the driven gear off, then remove the dampers.
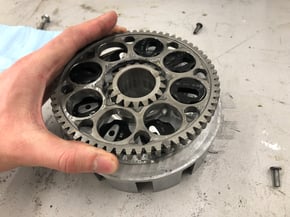
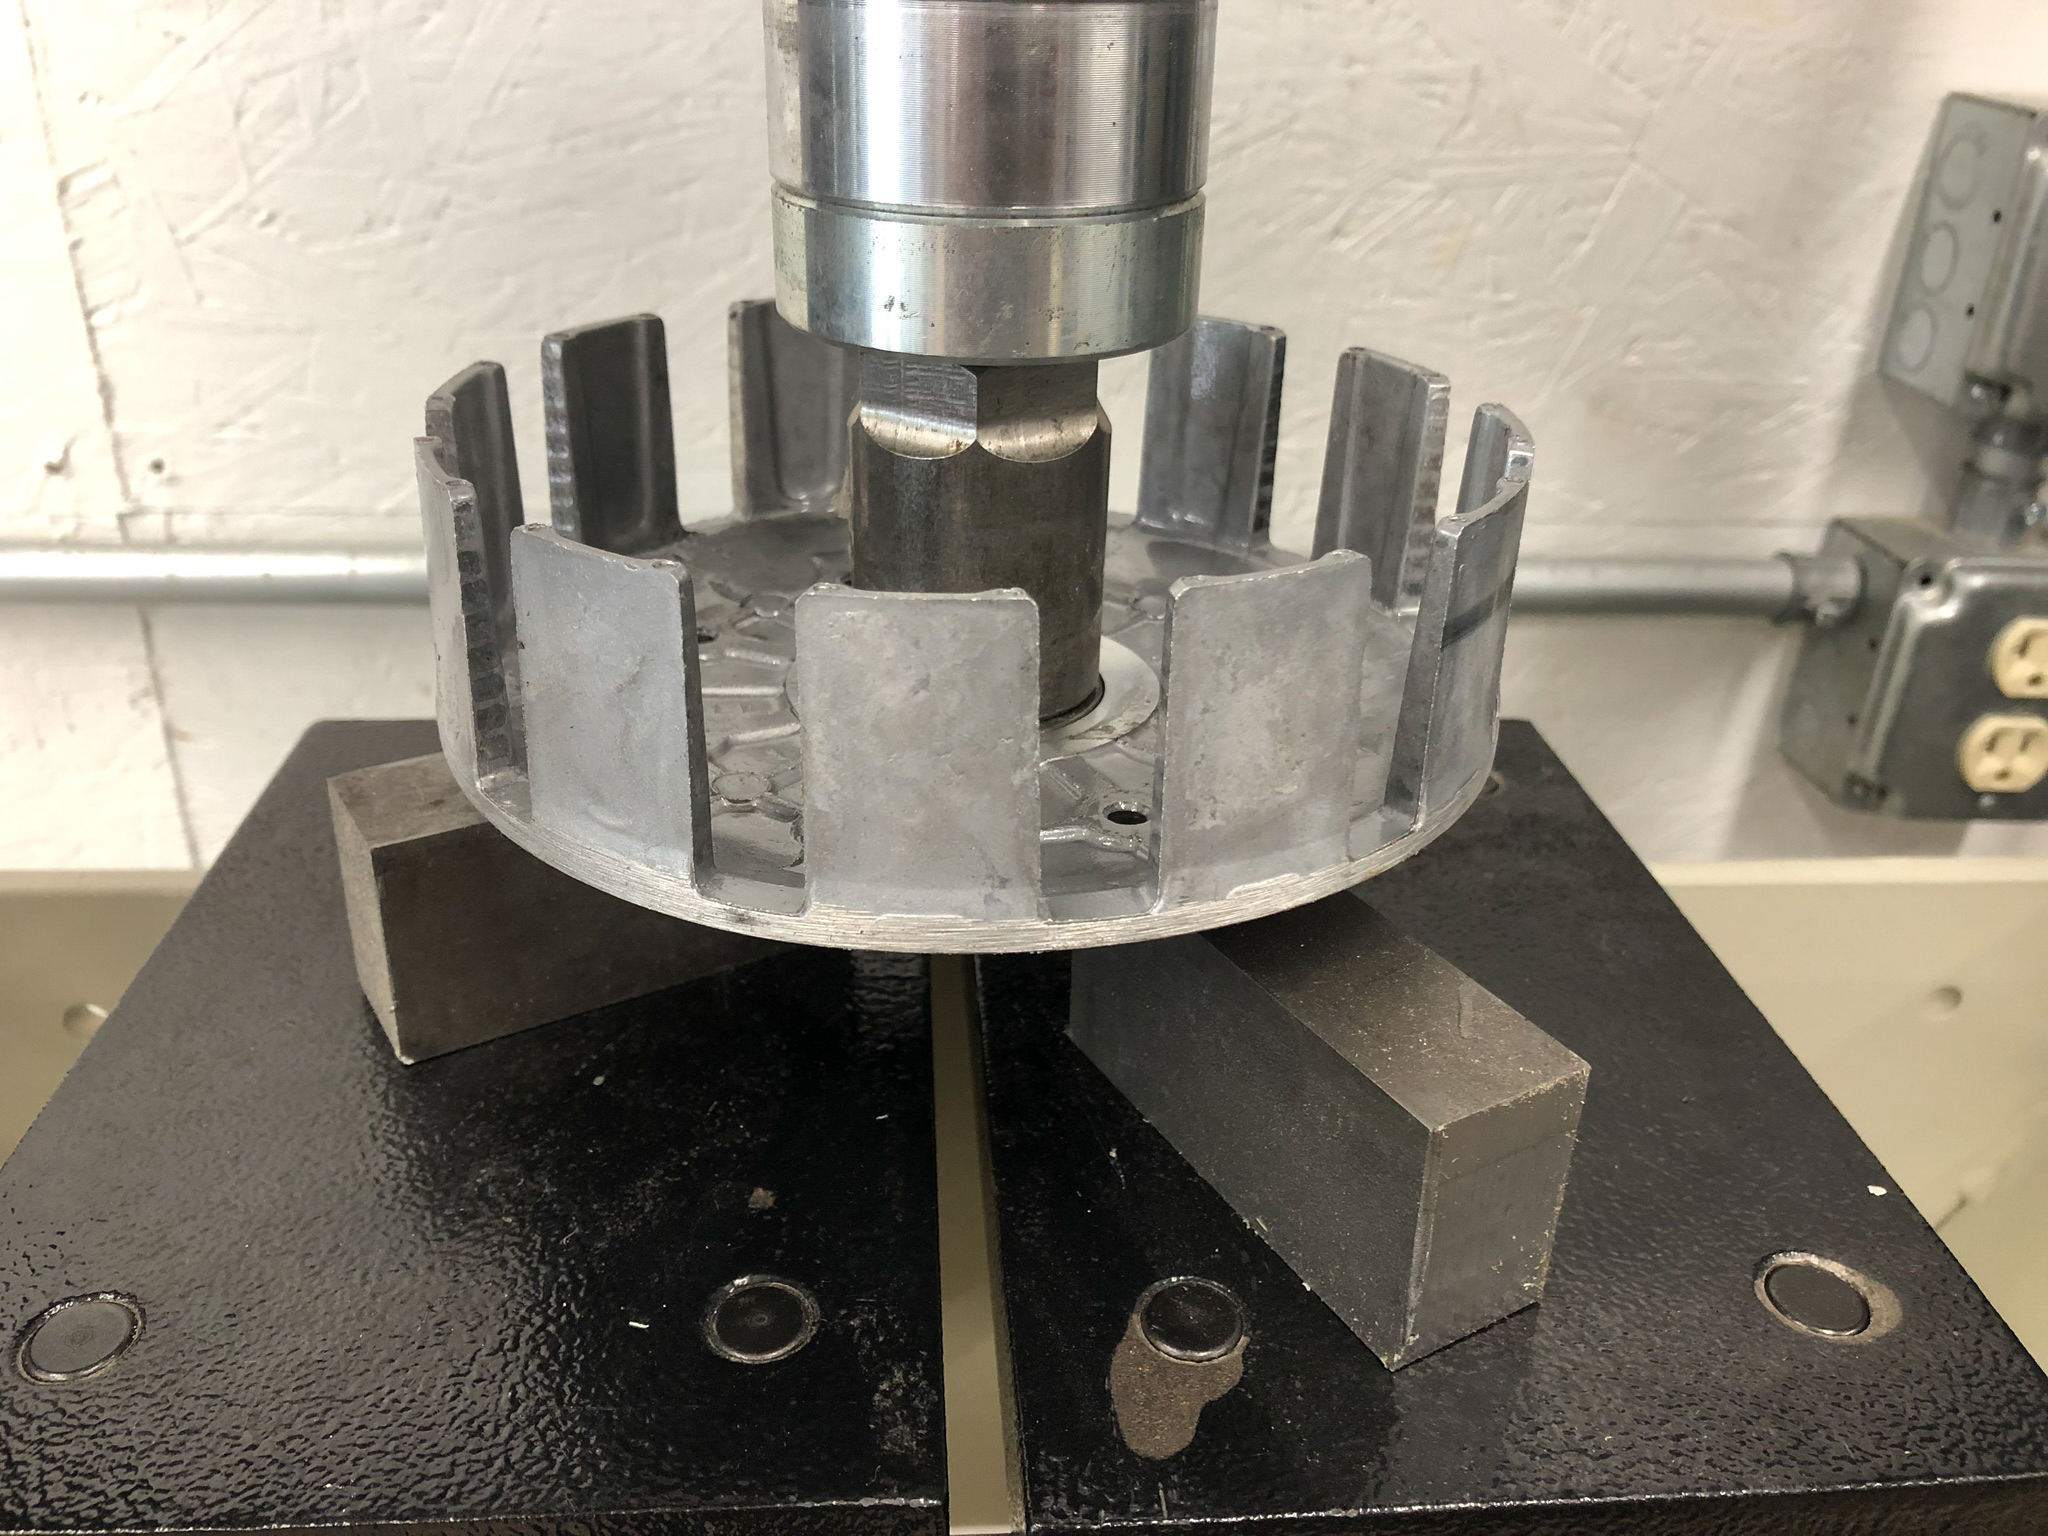
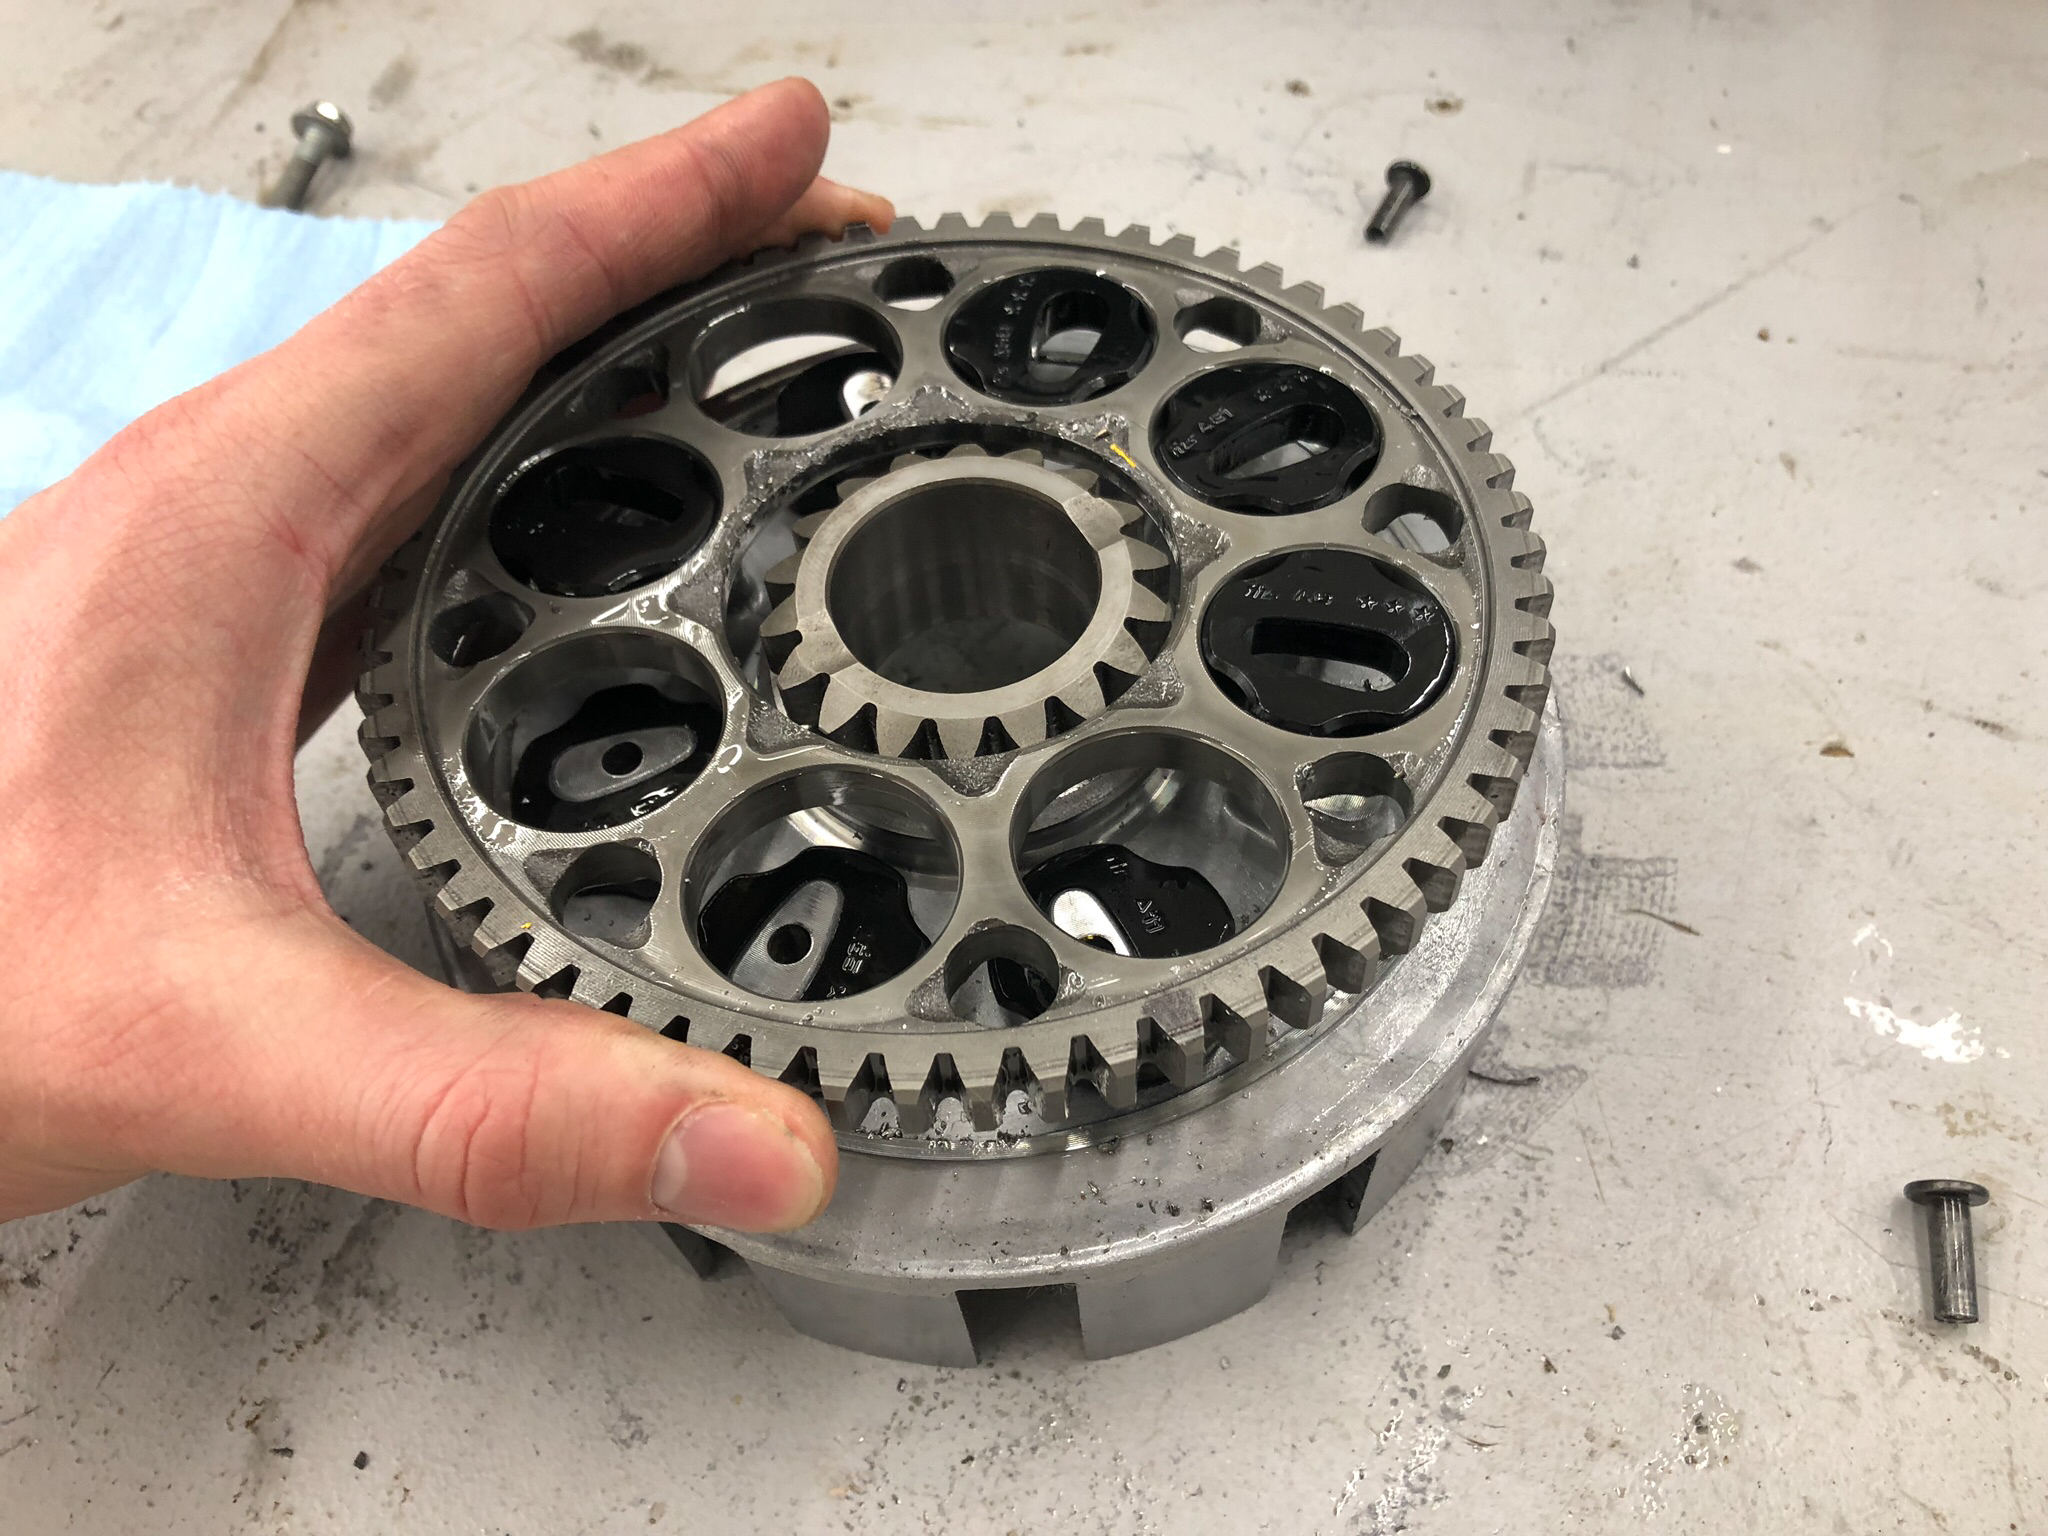
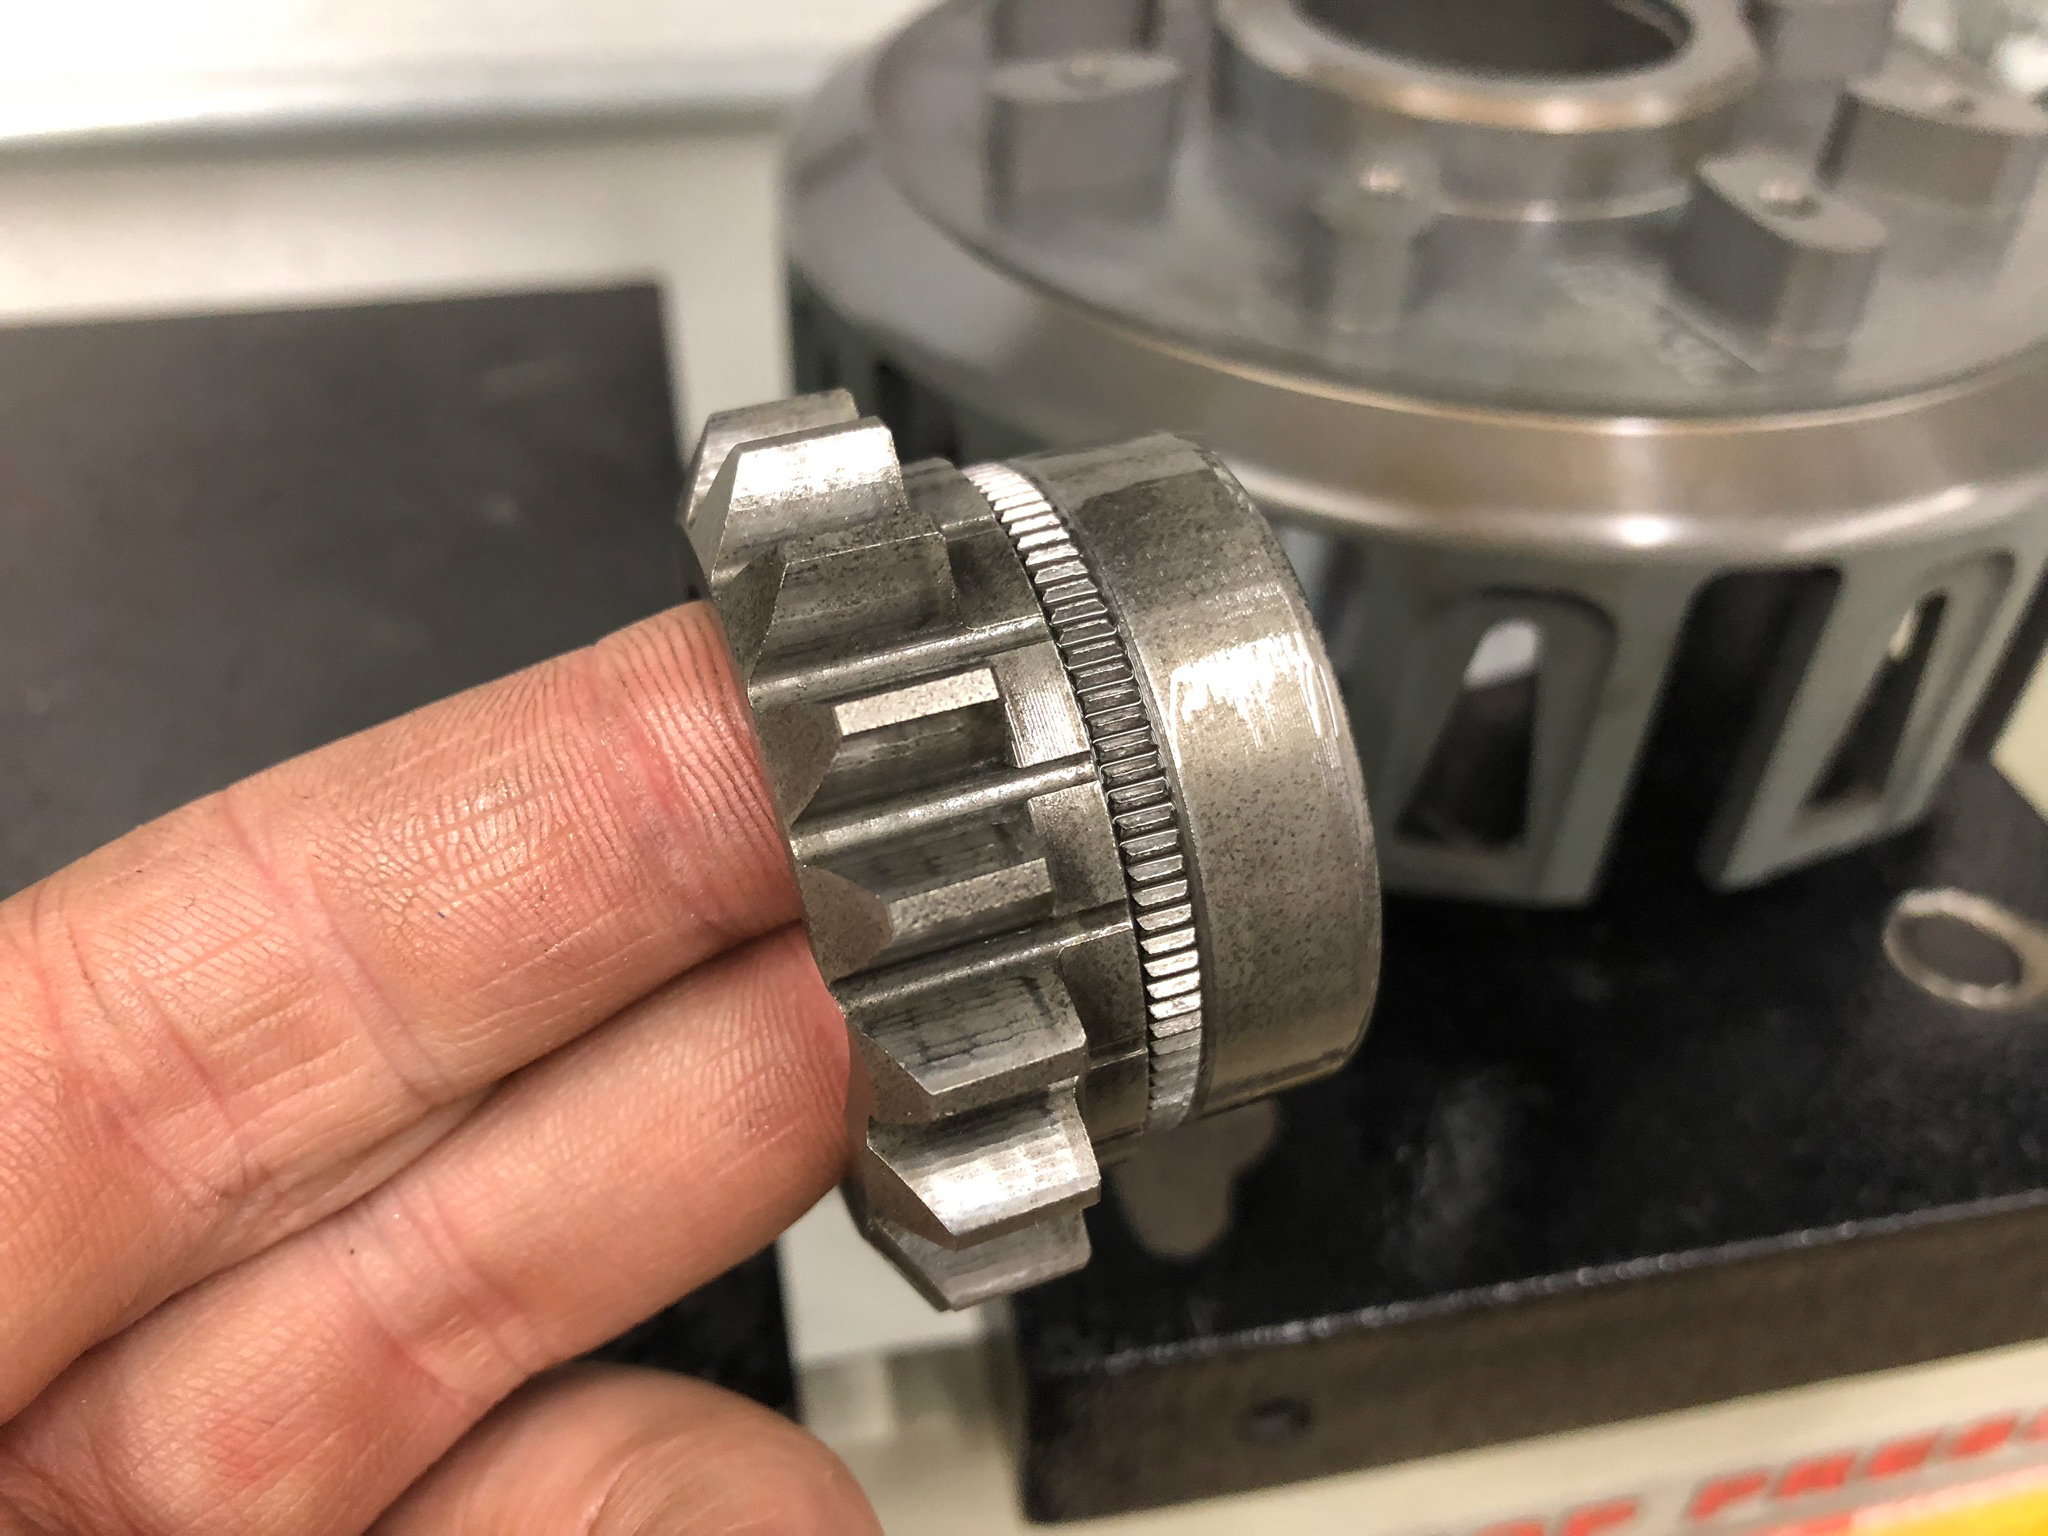
Make sure you note the orientation of the dampers before removing them all after removing the driven gear. - Remove the starter gear - The starter gear utilizes an interference fit with the clutch basket, so it will have to be pressed out. The exact geometry of the starter gear will be model specific. Some starter gears will feature teeth that bite into the clutch basket. Depending on the starter gear geometry and geometry of the clutch basket, it is possible the clutch basket will be destroyed during the removal process.
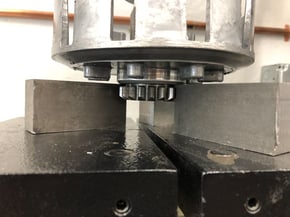
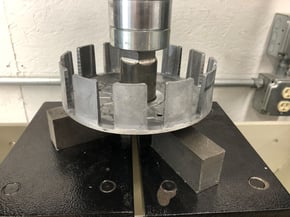
Starter gears will differ depending on the model. Make sure it's adequately supported to press out without damaging the gear.
Adequately support the clutch basket around its base so that loads applied will transfer through the center of the basket. Standoffs may need to be utilized to support the basket properly. Select an appropriately sized spacer to place between the starter gear and press. Appropriately sized sockets can serve as suitable spacers. Carefully press the gear out of the hub.
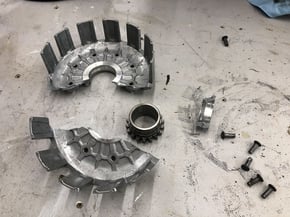

There's a good chance the old basket may break when pressing the starter gear out. This is fine, the focus is on not damaging the gear itself. - Clean the parts - Remove any clinging material from the starter gear, clean the driven gear and backplate.
- Install the starter gear - Apply engine oil to the outside of the starter gear. Carefully position it in the center of the new clutch basket. Before pressing it in, be sure to confirm any specific press-in depth requirements outlined in the instructions. Ensure the clutch basket is adequately supported before pressing the gear in place. The press force required to install the gear will be model specific and highlighted in the installation instructions.
Be sure to oil the starter gear and note any depth and force specifications for your specific application.
On some models, a simple shrink fit is utilized to install the starter gear. When this process is specified, follow the heating instructions for the clutch basket. Once up to temperature, carefully drop in the starter gear. - Install the driven gear and dampers - Place the driven gear on the clutch basket noting any orientation requirements previously identified. Install the new dampers in the correct orientation.
Install your new dampers in the correct orientation and reinstall the primary gear. - Install the backplate - Double check the orientation of the dampers and driven gear. Install the backplate onto the clutch basket, noting any orientation requirements.
- Torque the backplate screws - Consult the installation instructions for the proper torque specs, apply Loctite if the screws are not pre-Loctite, then tighten in a cross-pattern.

Reinstall your back plate with new screws and thread locking compound and torque them to spec.


At this point, the clutch basket is ready for service and can be reinstalled on the engine. Refer to your service manual for assembly instructions and specifications to reinstall your clutch and button up the engine.
The process of replacing a clutch basket is straightforward and can be executed by anyone so long as the necessary steps are followed and tools are available. We hope this write-up simplifies the job and helps our fellow riders and racers get back out there performing better than before!