
Checking and replacing the clutch cable is often an overlooked maintenance practice, even though it's a critical part of the machine. We put a new ProX Racing Parts clutch cable on a YZ250F and put together these tips on clutch cable adjustment and replacement.
Did you know the prescribed inspection interval for checking cable operation outlined in most service manuals for cable operated clutches is after every race or 2.5 hours? To some this may seem excessive, however, ensuring the clutch cable is working correctly is an incredibly important maintenance task. An Improperly adjusted clutch cable can lead to poor clutch control, slippage, or inconsistent operation. In this article, we’ll dive into clutch cable inspections that should be performed and walk through the necessary steps required to replace the cable and install a new one.
Your service or owner’s manual should provide all the pertinent cable adjustment information you need for your specific make/model of machine and should be used to complement the advice and recommendations provided in this write-up. Within the service manual, you should find free play specifications, clutch cable routing information, lubrication info, and the prescribed setup procedure.
Cable Condition
The clutch cable should be visually inspected for damage. Cracks, kinks, corrosion, and severely worn areas due to rubbing should all be cause for concern. Systematically inspect the cable from the handlebar grip to the engine as best as visually possible.

Checking Cable Free Play
Clutch cable free play is typically checked by measuring the distance the clutch lever moves before the clutch begins to disengage. Most makes/models specify 8-13mm of clutch lever free play.
To check free play, the large hexagonal adjuster, if equipped, should be slid out of position so the area where the cable end and adjuster meet can be viewed. Confirm the cable end is fully seated against the adjuster. Lightly pull on the clutch lever and measure the distance the end of the lever travels before you start to feel resistance. The point resistance is felt is the point where the lever starts to disengage the clutch. A ruler, caliper, or scale can be held at the end of the lever to measure the free play.

Checking Clutch Actuation
Some insight into how the clutch is working can be gained simply by pulling the clutch lever. The lever should pull smoothly through its range of motion and return to its original position consistently. Occasionally, the lever can be obstructed by handguards that have been bumped out of position, which can lead to partial clutch disengagement. Any notchiness felt may be indicative of kinks or tight spots in the cable or clutch basket wear. If the lever does not return consistently, one of the cable ends may not be seating correctly.
Clutch Cable Adjustment
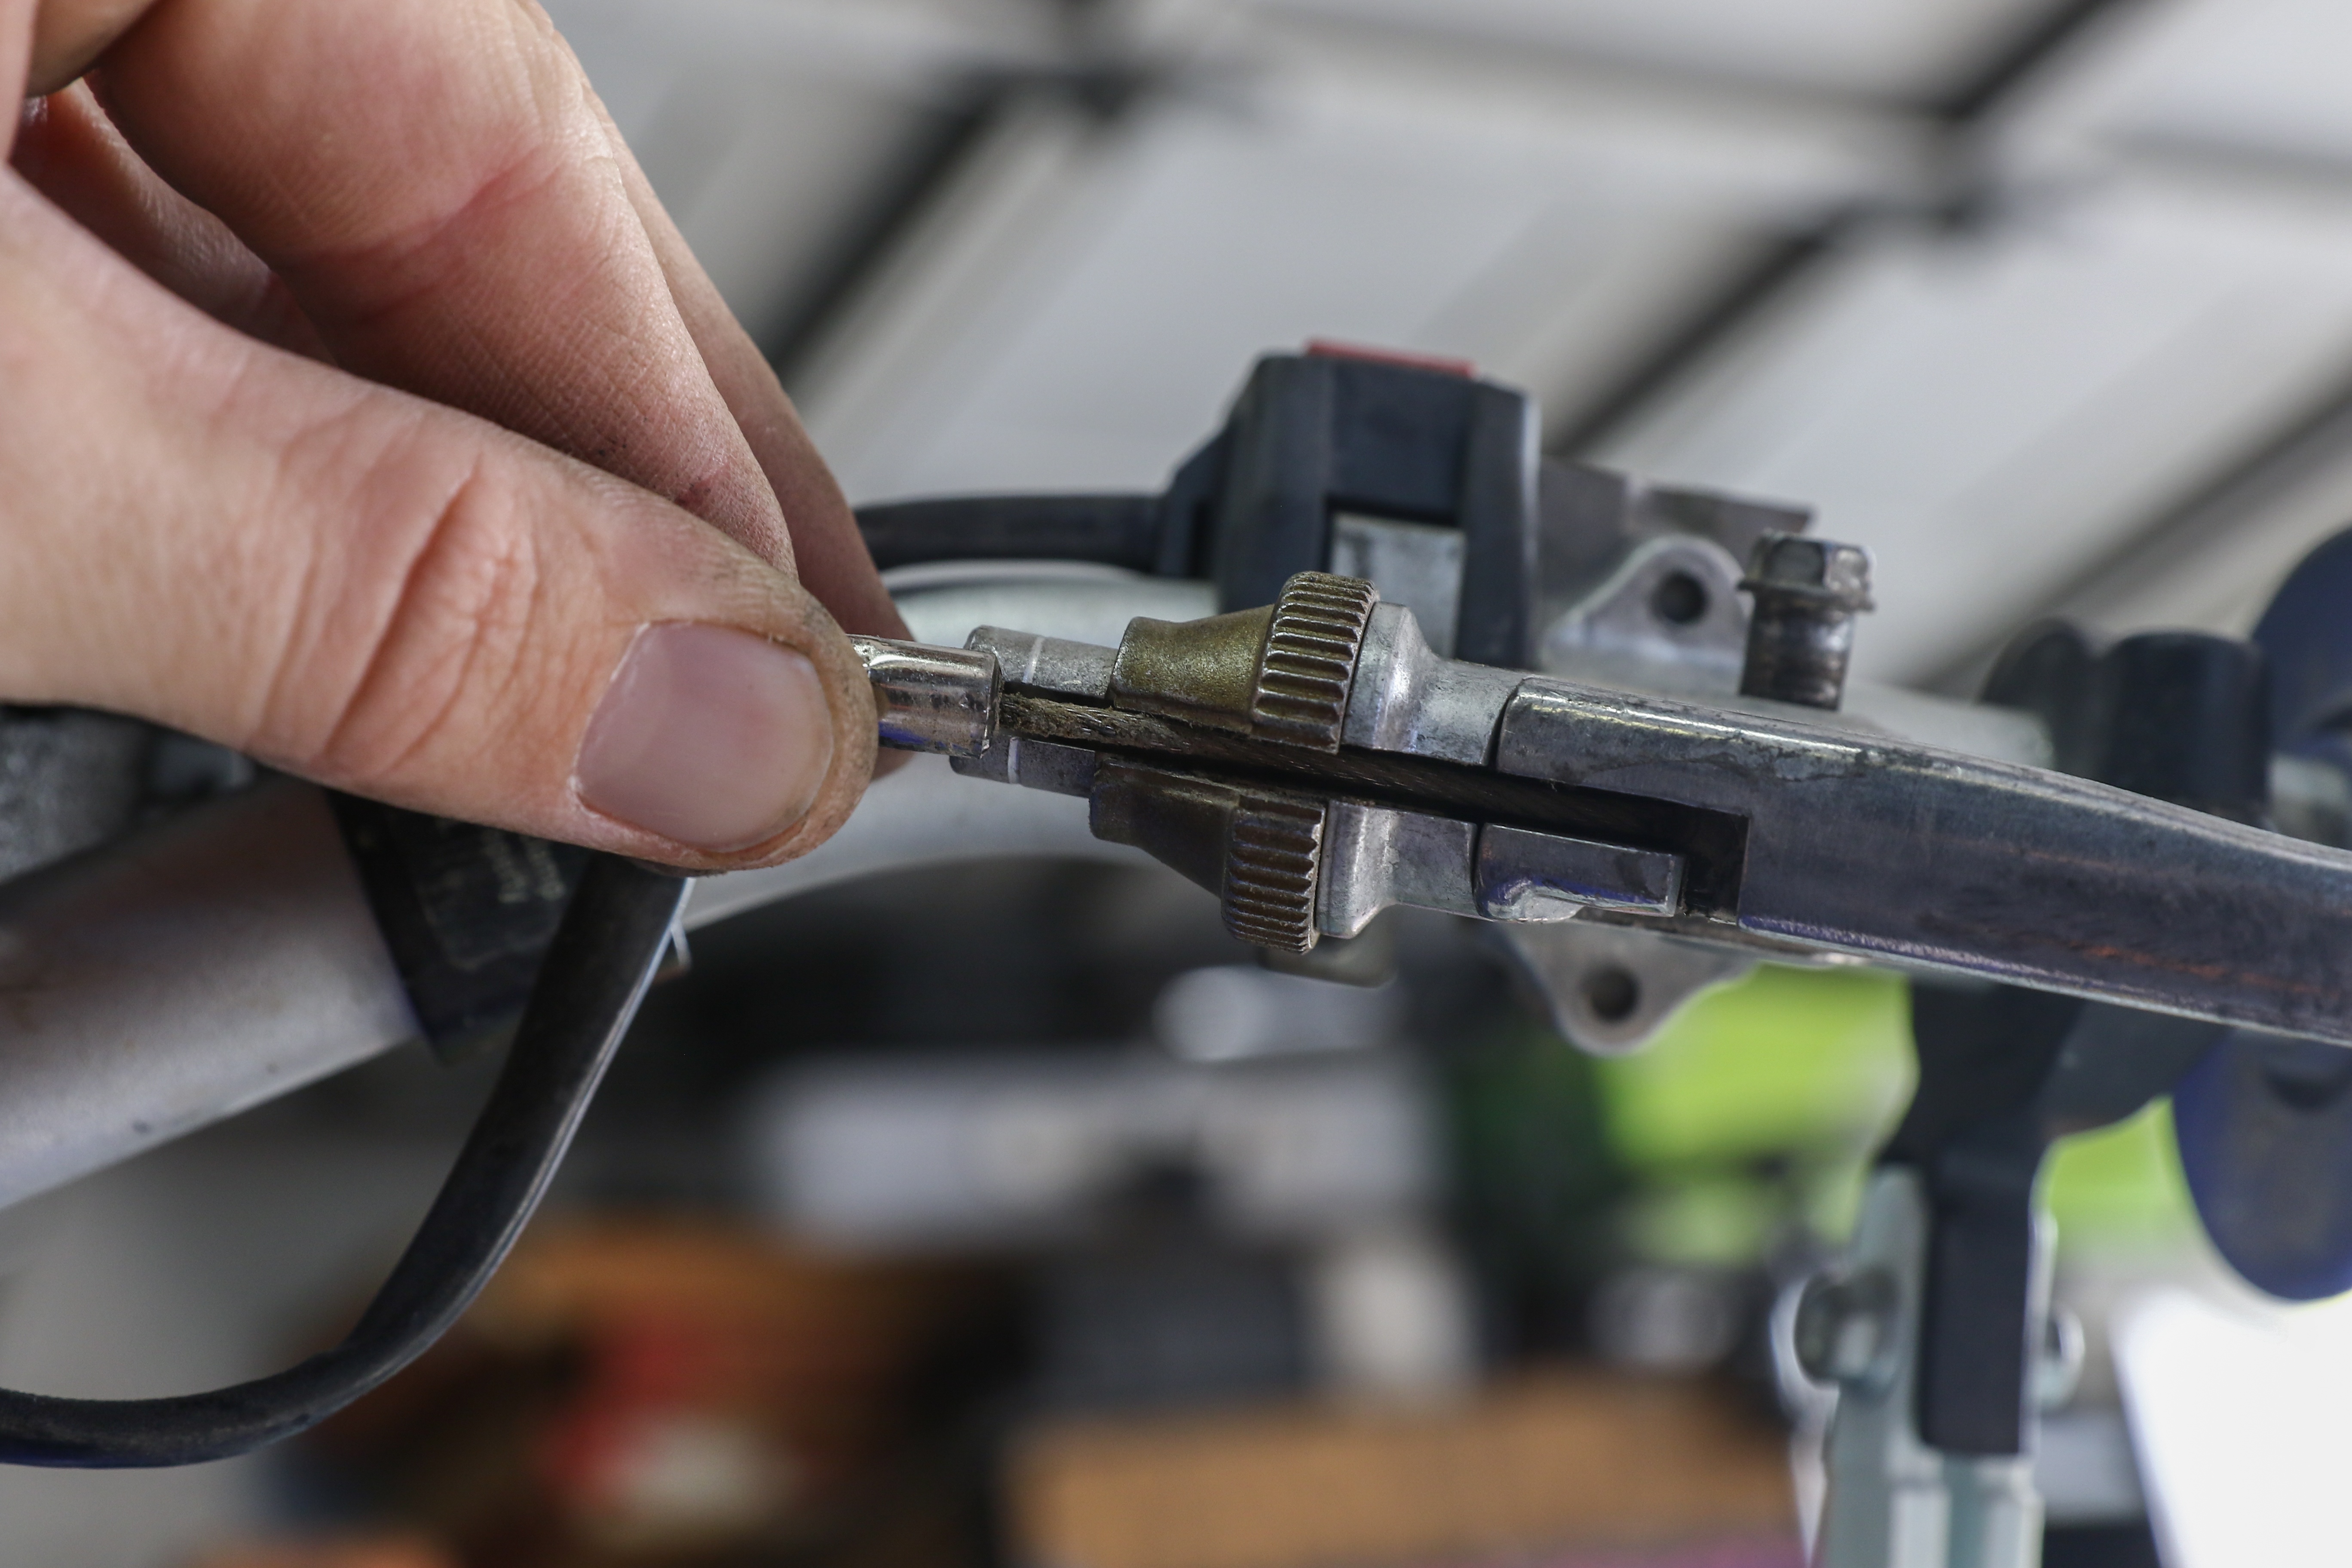
Clutch cable free play can easily be adjusted to correct for too little or too much free play. Most makes/models utilize two adjustments points. The first adjustment point is at the clutch perch, and usually features a large hexagonal adjuster knob that can be turned to increase or decrease free play. The second adjustment point is typically located near the handlebar end of the cable and features a lock nut and adjuster. The adjustment point at the clutch perch is typically utilized when making on the fly adjustments and minor refinements to cable free play. The adjustment point spliced into the cable is usually used to make large adjustments.


Small Adjustments at the Clutch Perch Adjuster
Simply turn the adjuster knob in or out to increase or decrease free play. Once an adjustment has been made, recheck free play as previously discussed. Occasionally the adjustment knob may slip and spin independently of the cable adjuster. This can be a common problem on older machines. If this happens, changes to the free play will not occur. To remedy this issue, simply pull the adjuster knob out of the way and adjust the cable adjuster directly to induce free play changes.

Large Adjustments at the Spliced in Adjuster
To alter the free play, simply loosen the lock nut and screw the adjuster in or out to increase or decrease free play. If adjustments are carried out using this adjuster, it is best to attempt to reset the handlebar adjuster so that it is in the beginning to middle of its useful range. This way, if further adjustments are required, the adjustment knob can easily be utilized without fear of running out of adjustment. Once any adjustments have been carried out using the cable adjuster, the free play should be checked, lock nuts tightened, and any dust covers slid back in place.
Clutch Cable Replacement
In the event that the clutch cable warrants replacement, this can be accomplished fairly easily. Selecting and sourcing a new clutch cable is equally as important as carrying out the work. Direct OEM components can be overpriced, but options from ProX offer OEM quality and specifications at a fair price. ProX clutch and throttle cables are made to exact OEM fitment specifications, and feature a PVC outer jacket, pre-lubricated nylon inner sleeve, and steel inner cables. They are made by the same OEM suppliers, so you don't have to worry about fitment, smooth operation, or durability.
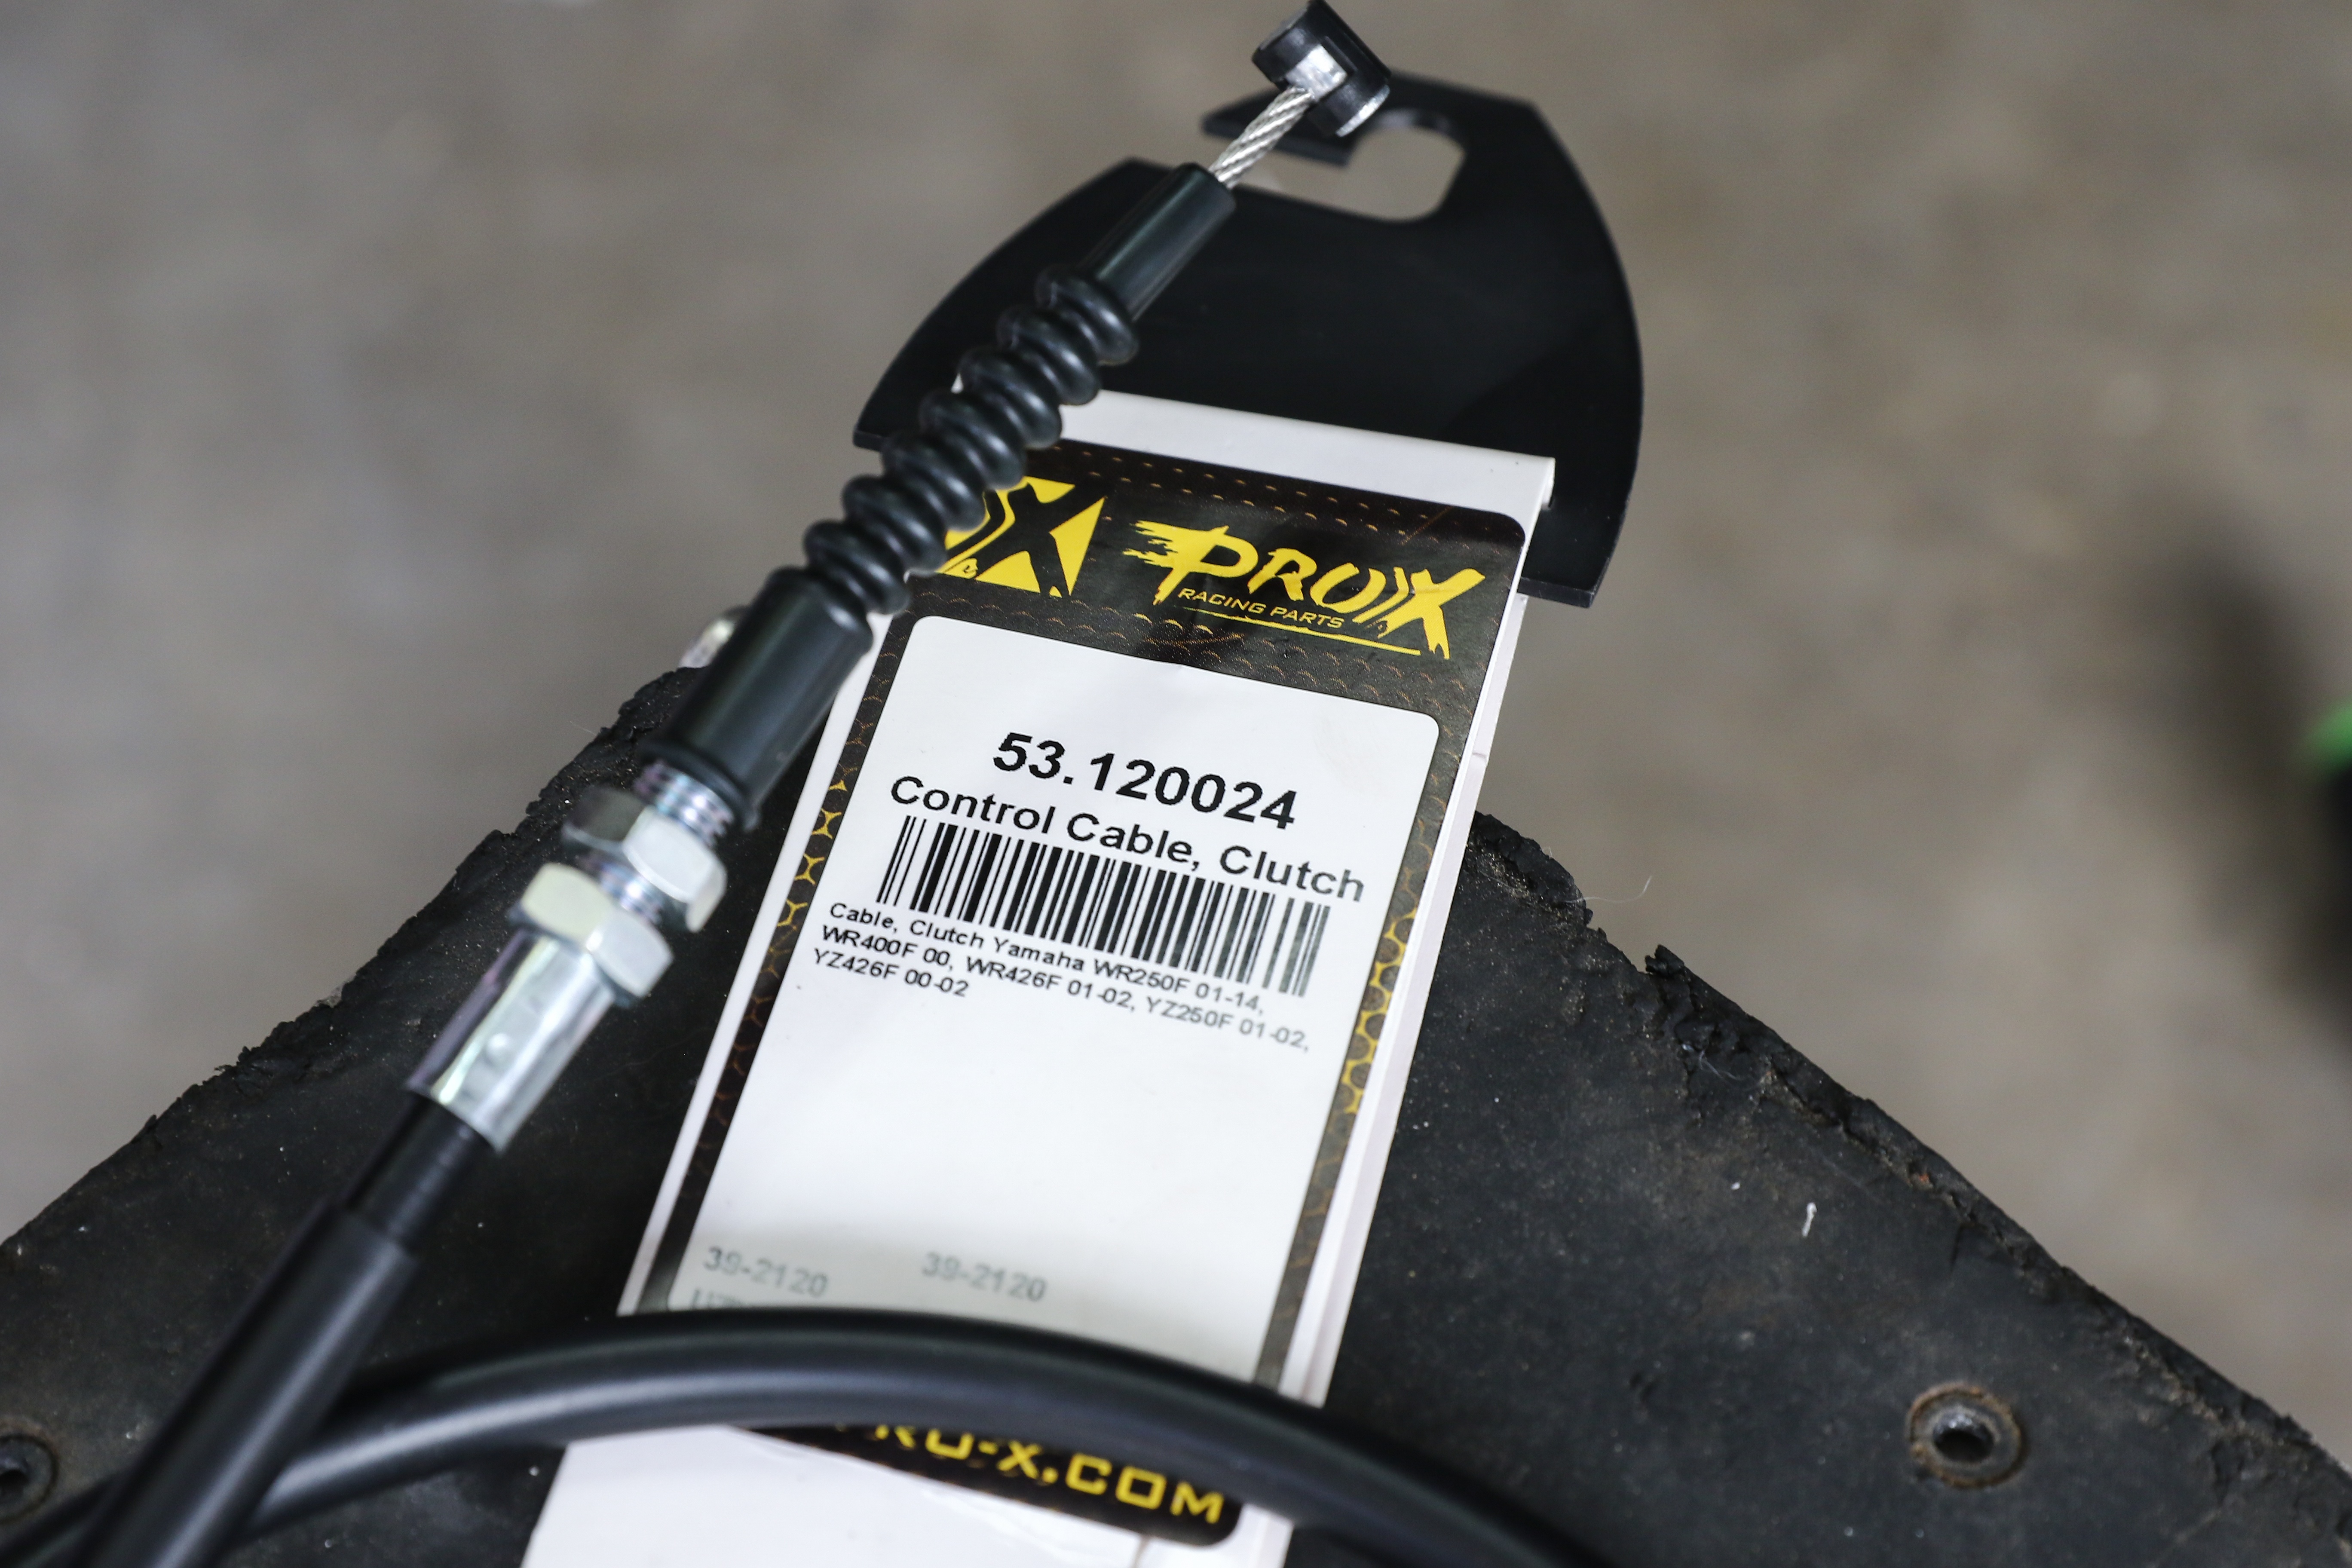
Find ProX cables for your machine here.
The architecture of your specific machine will largely dictate what must be removed to successfully replace your clutch cable. Typically, the following components will need to be removed:
- Front number plate
- Radiator shroud
- Radiator screen (if equipped)
- Radiator mounting bolts

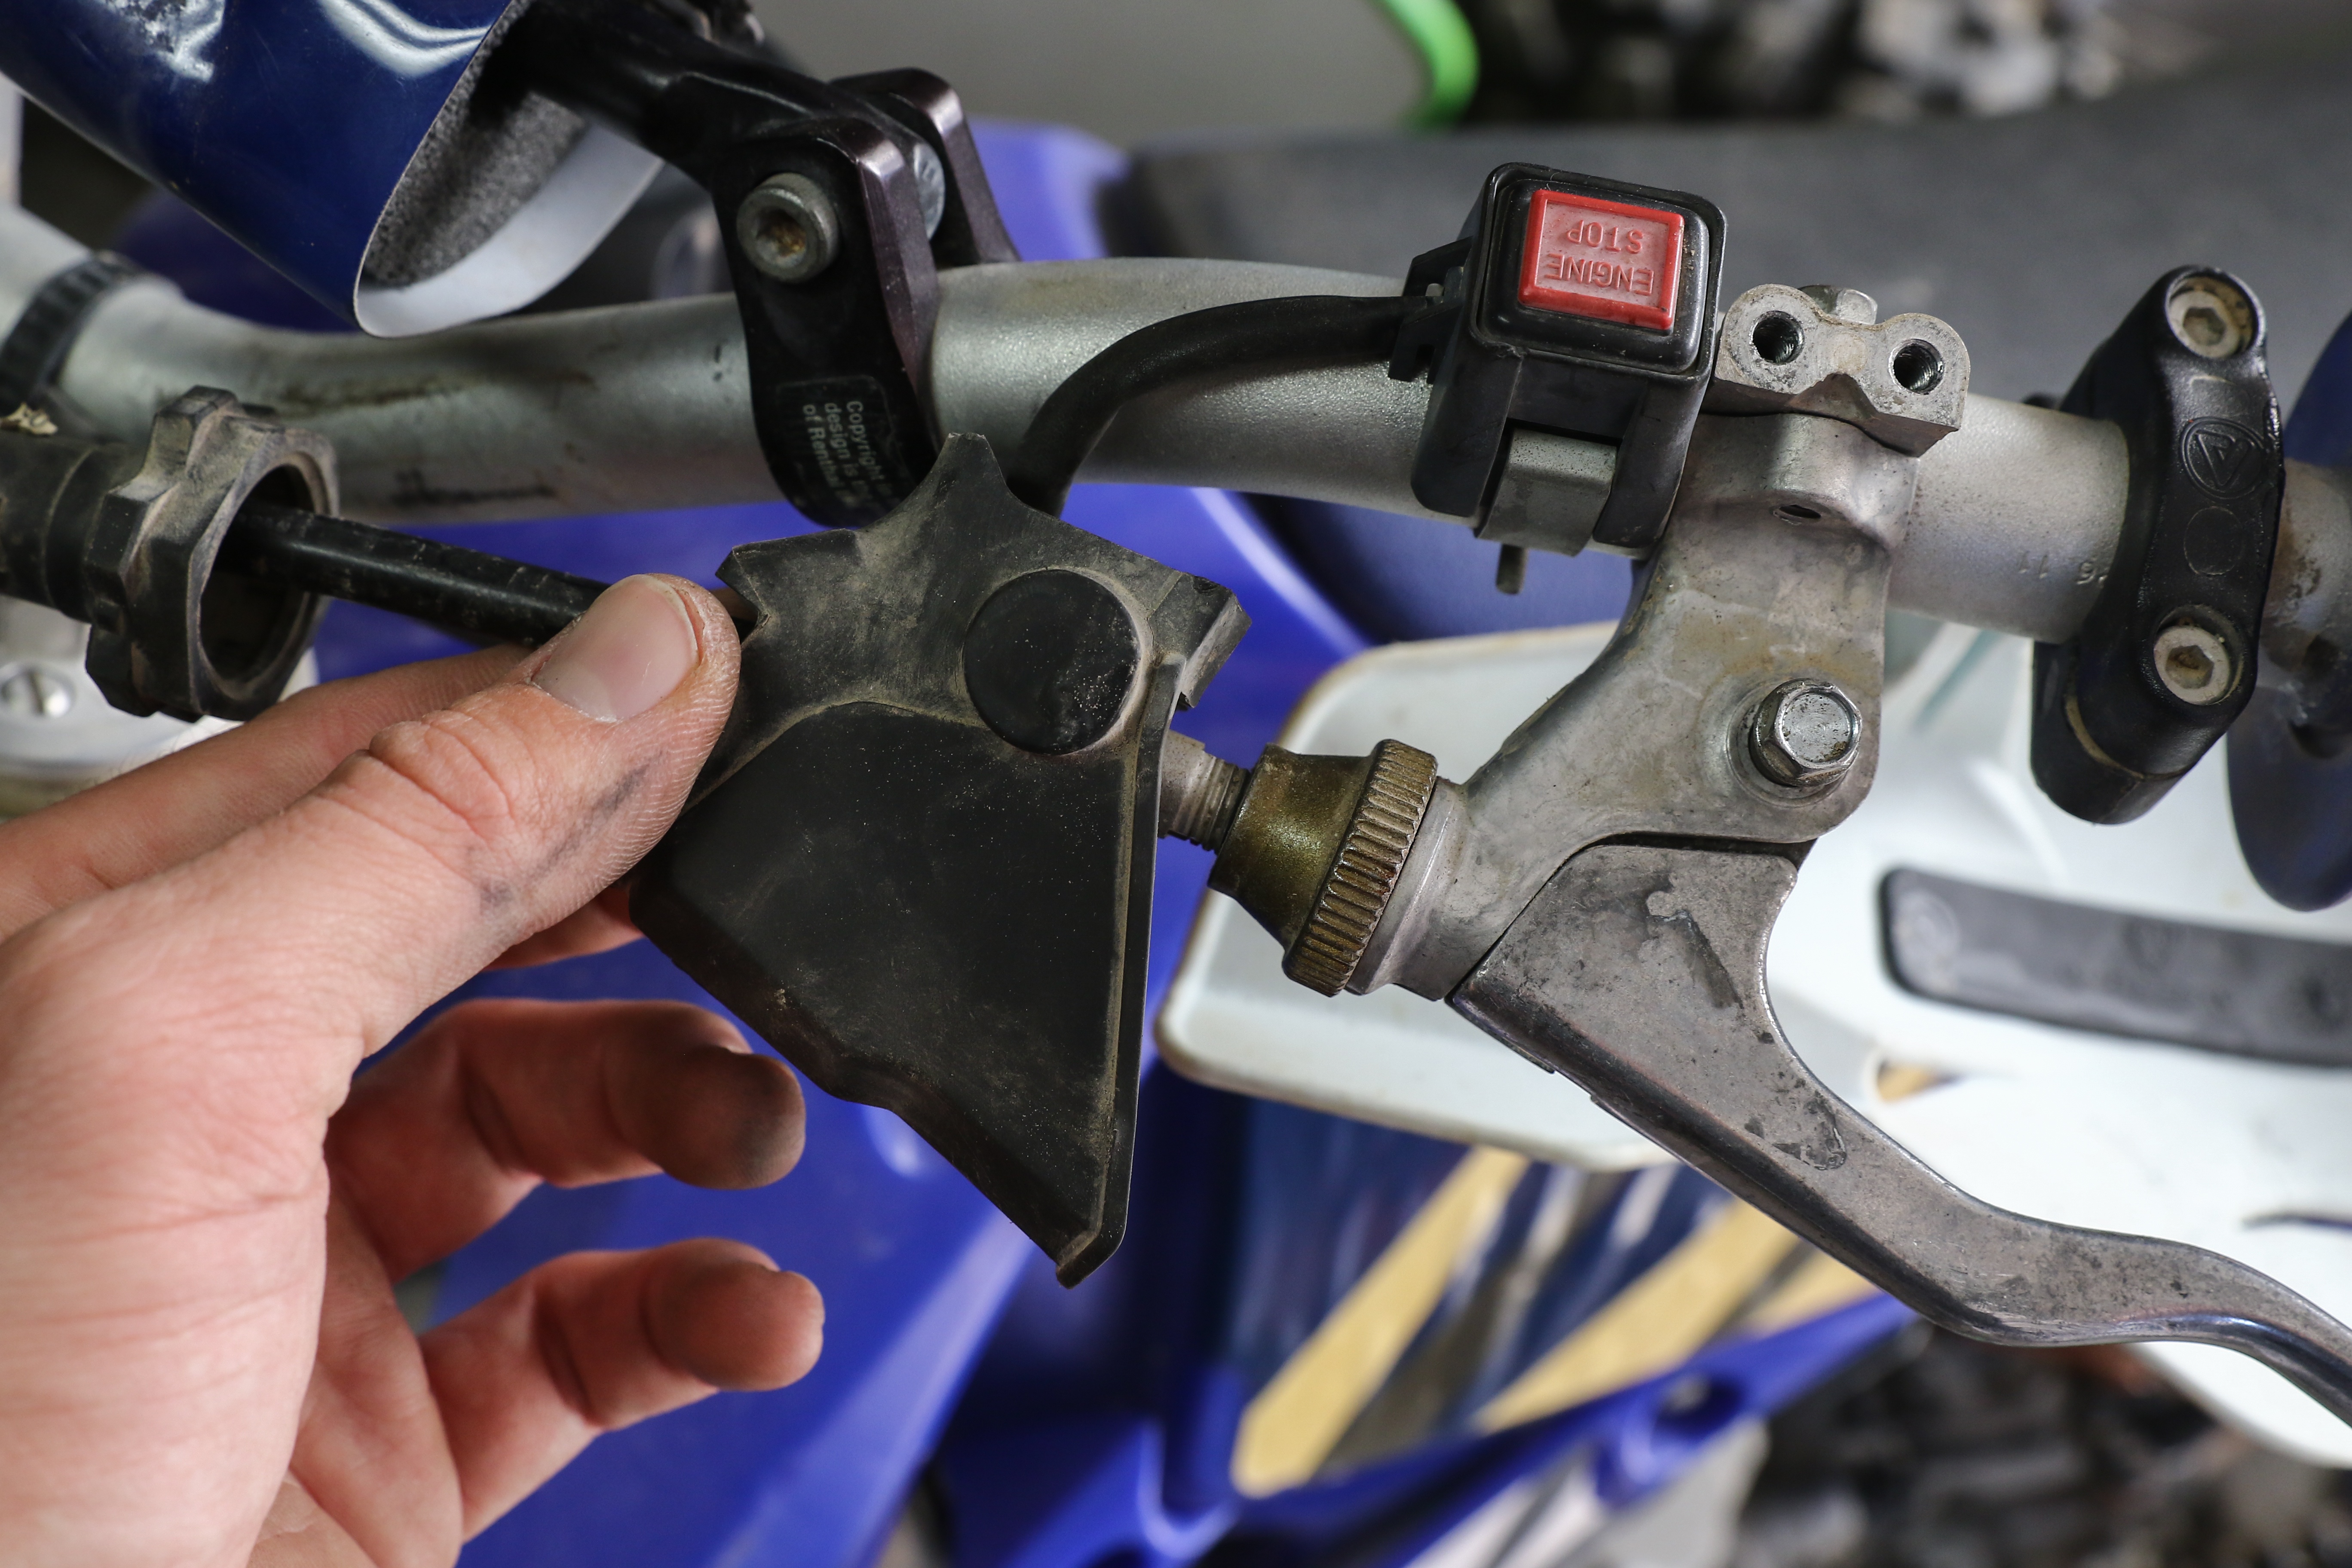
Once the necessary components have been removed, replacing the clutch cable is straightforward. Start by loosening the lock nut on the cable adjuster that is spliced into the clutch cable. Once loose, turn the adjuster all the way in so that cable sheath length is minimized, which will slacken the cable. Next, at the clutch perch adjuster, slide any necessary dust covers out of the way as well as the large adjustment knob.Turn the adjuster in to further minimize cable sheath length.

Then, align the slit in the adjuster to the slit in the clutch lever. At this point, there should be enough slack in the cable so that the cable end can be pulled out and away from the adjuster. Once out, the cable end can be disconnected from the clutch lever by aligning the cable with the slit in the clutch lever.

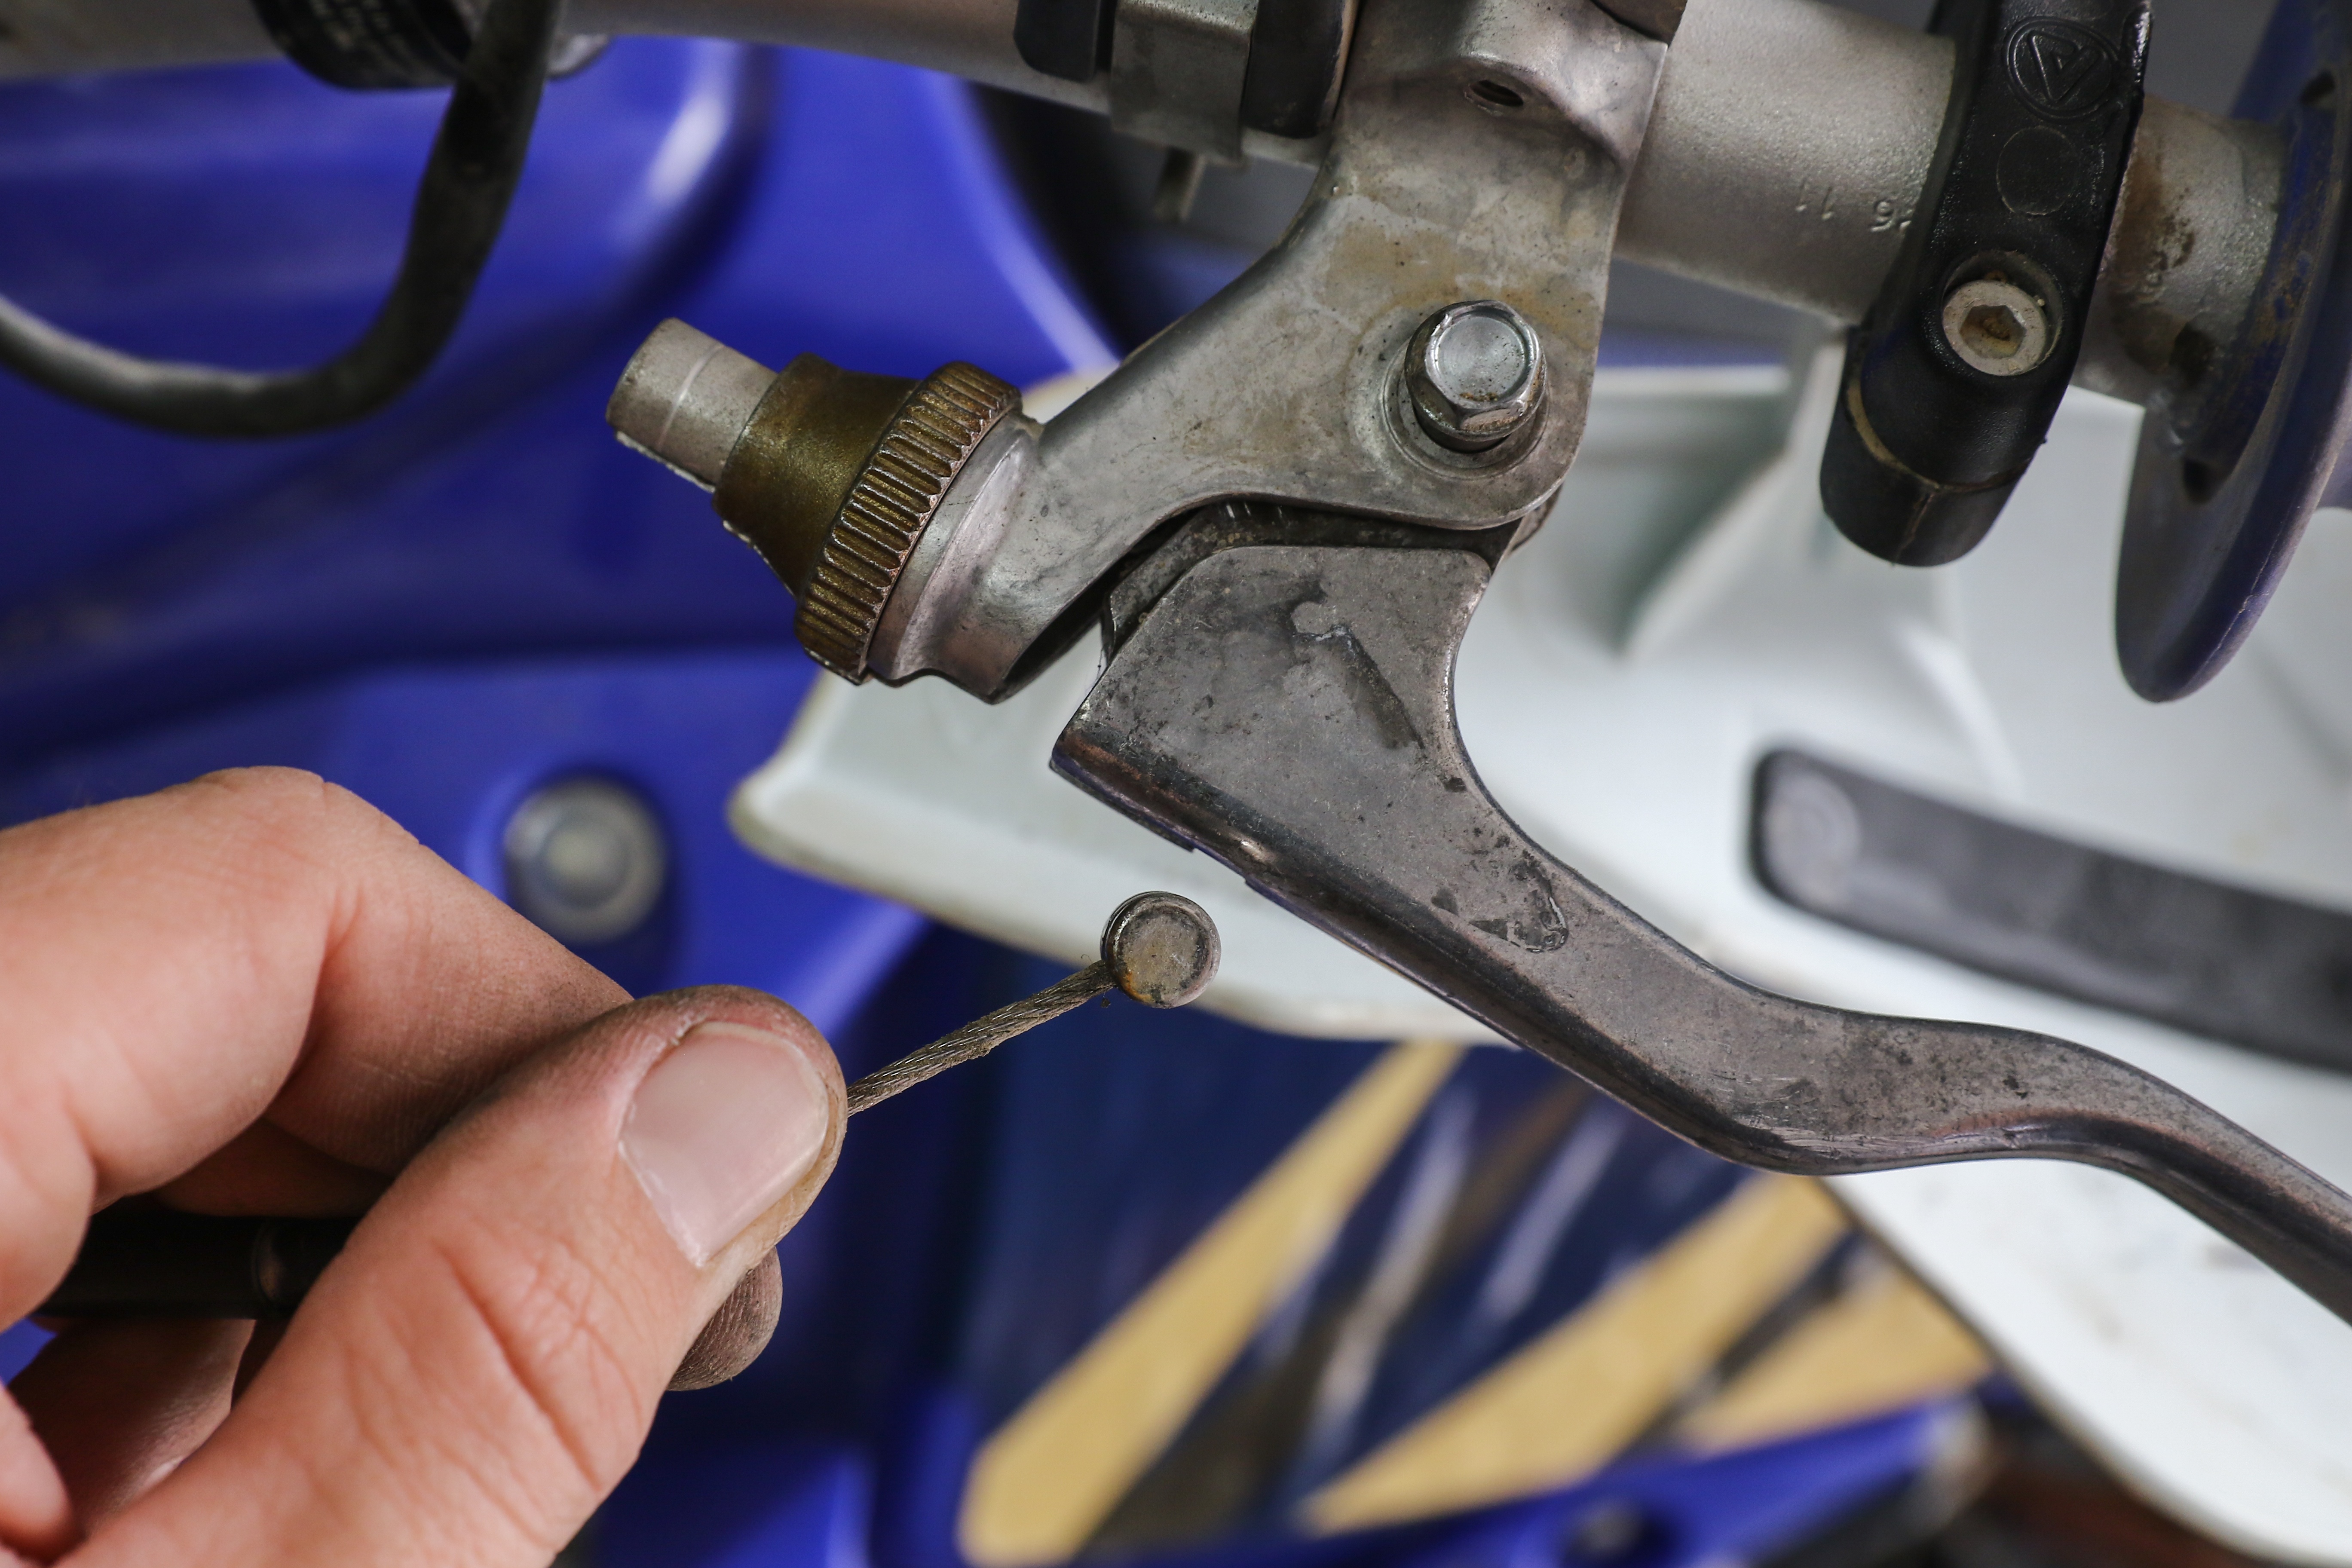
With the clutch cable free of the clutch perch and lever, the cable end can be disconnected from the engine. To do this, slide the cable sheath end back from the holder on the engine. Then align the cable end with the slit on the actuation arm to free it. At this point, the clutch cable can be carefully removed from the machine.


Prepare the new clutch cable by applying cable lube to both ends of the cable. Check the smoothness of the cable by moving it back and forth prior to installation. Using the old cable routing or service manual as a reference, guide the new clutch cable into position.
Install the appropriate cable end into the clutch actuation arm by aligning the necessary features. Next, install the cable sheath end into the cable holder located on the engine. Double check the cable routing, then install the remaining cable end into the clutch lever. Slide the cable through the slits in the lever and adjuster so that the cable sheath end can be seated in the adjuster on the clutch perch. Reinstall any components that were removed and torque corresponding fasteners to the specifications outlined in your service manual.


Set the cable adjuster on the clutch perch so that the adjuster is turned out approximately ¼ of its useful travel. Next, use the cable adjuster spliced into the cable to correctly set the free play. Reference the aforementioned instructions for setting and adjusting free play. Once the free play is set, confirm all lock nuts, dust covers, and adjusters are properly tensioned or in place.Turn the handlebars from stop to stop and check clutch lever operation at each stop. Any changes in lever operation may indicate that the cable is pinched or bound, and the routing should be double checked. Assuming everything checks out, the job is done and the bike can be test ridden. Check clutch and cable operation during the test ride and confirm the free play has not changed afterward.

