Jetting is critical in carbureted dirt bikes and ATVs and it's important to understand how carburetor tuning works to make sure your machine is running optimally. Check out our guide to carburetor jetting adjustments here.
Over the years, two and four-stroke carburetors designed for powersports machines have evolved into technological marvels with numerous features that allow engines to deliver state of the art performance. However, most carburetor designs still require proper tuning to deliver that performance. The difference between a properly jetted carburetor and one that is out of tune can result in consistent race wins or consistently bad performance, or worse yet, engine failures. So, we wanted to cover the basics of jetting, including an overview of why jetting is important, where to find the necessary info to make good jetting decisions, tools required to re-jet, where to buy jets, and tips and tricks to make carburetor adjustments easy.
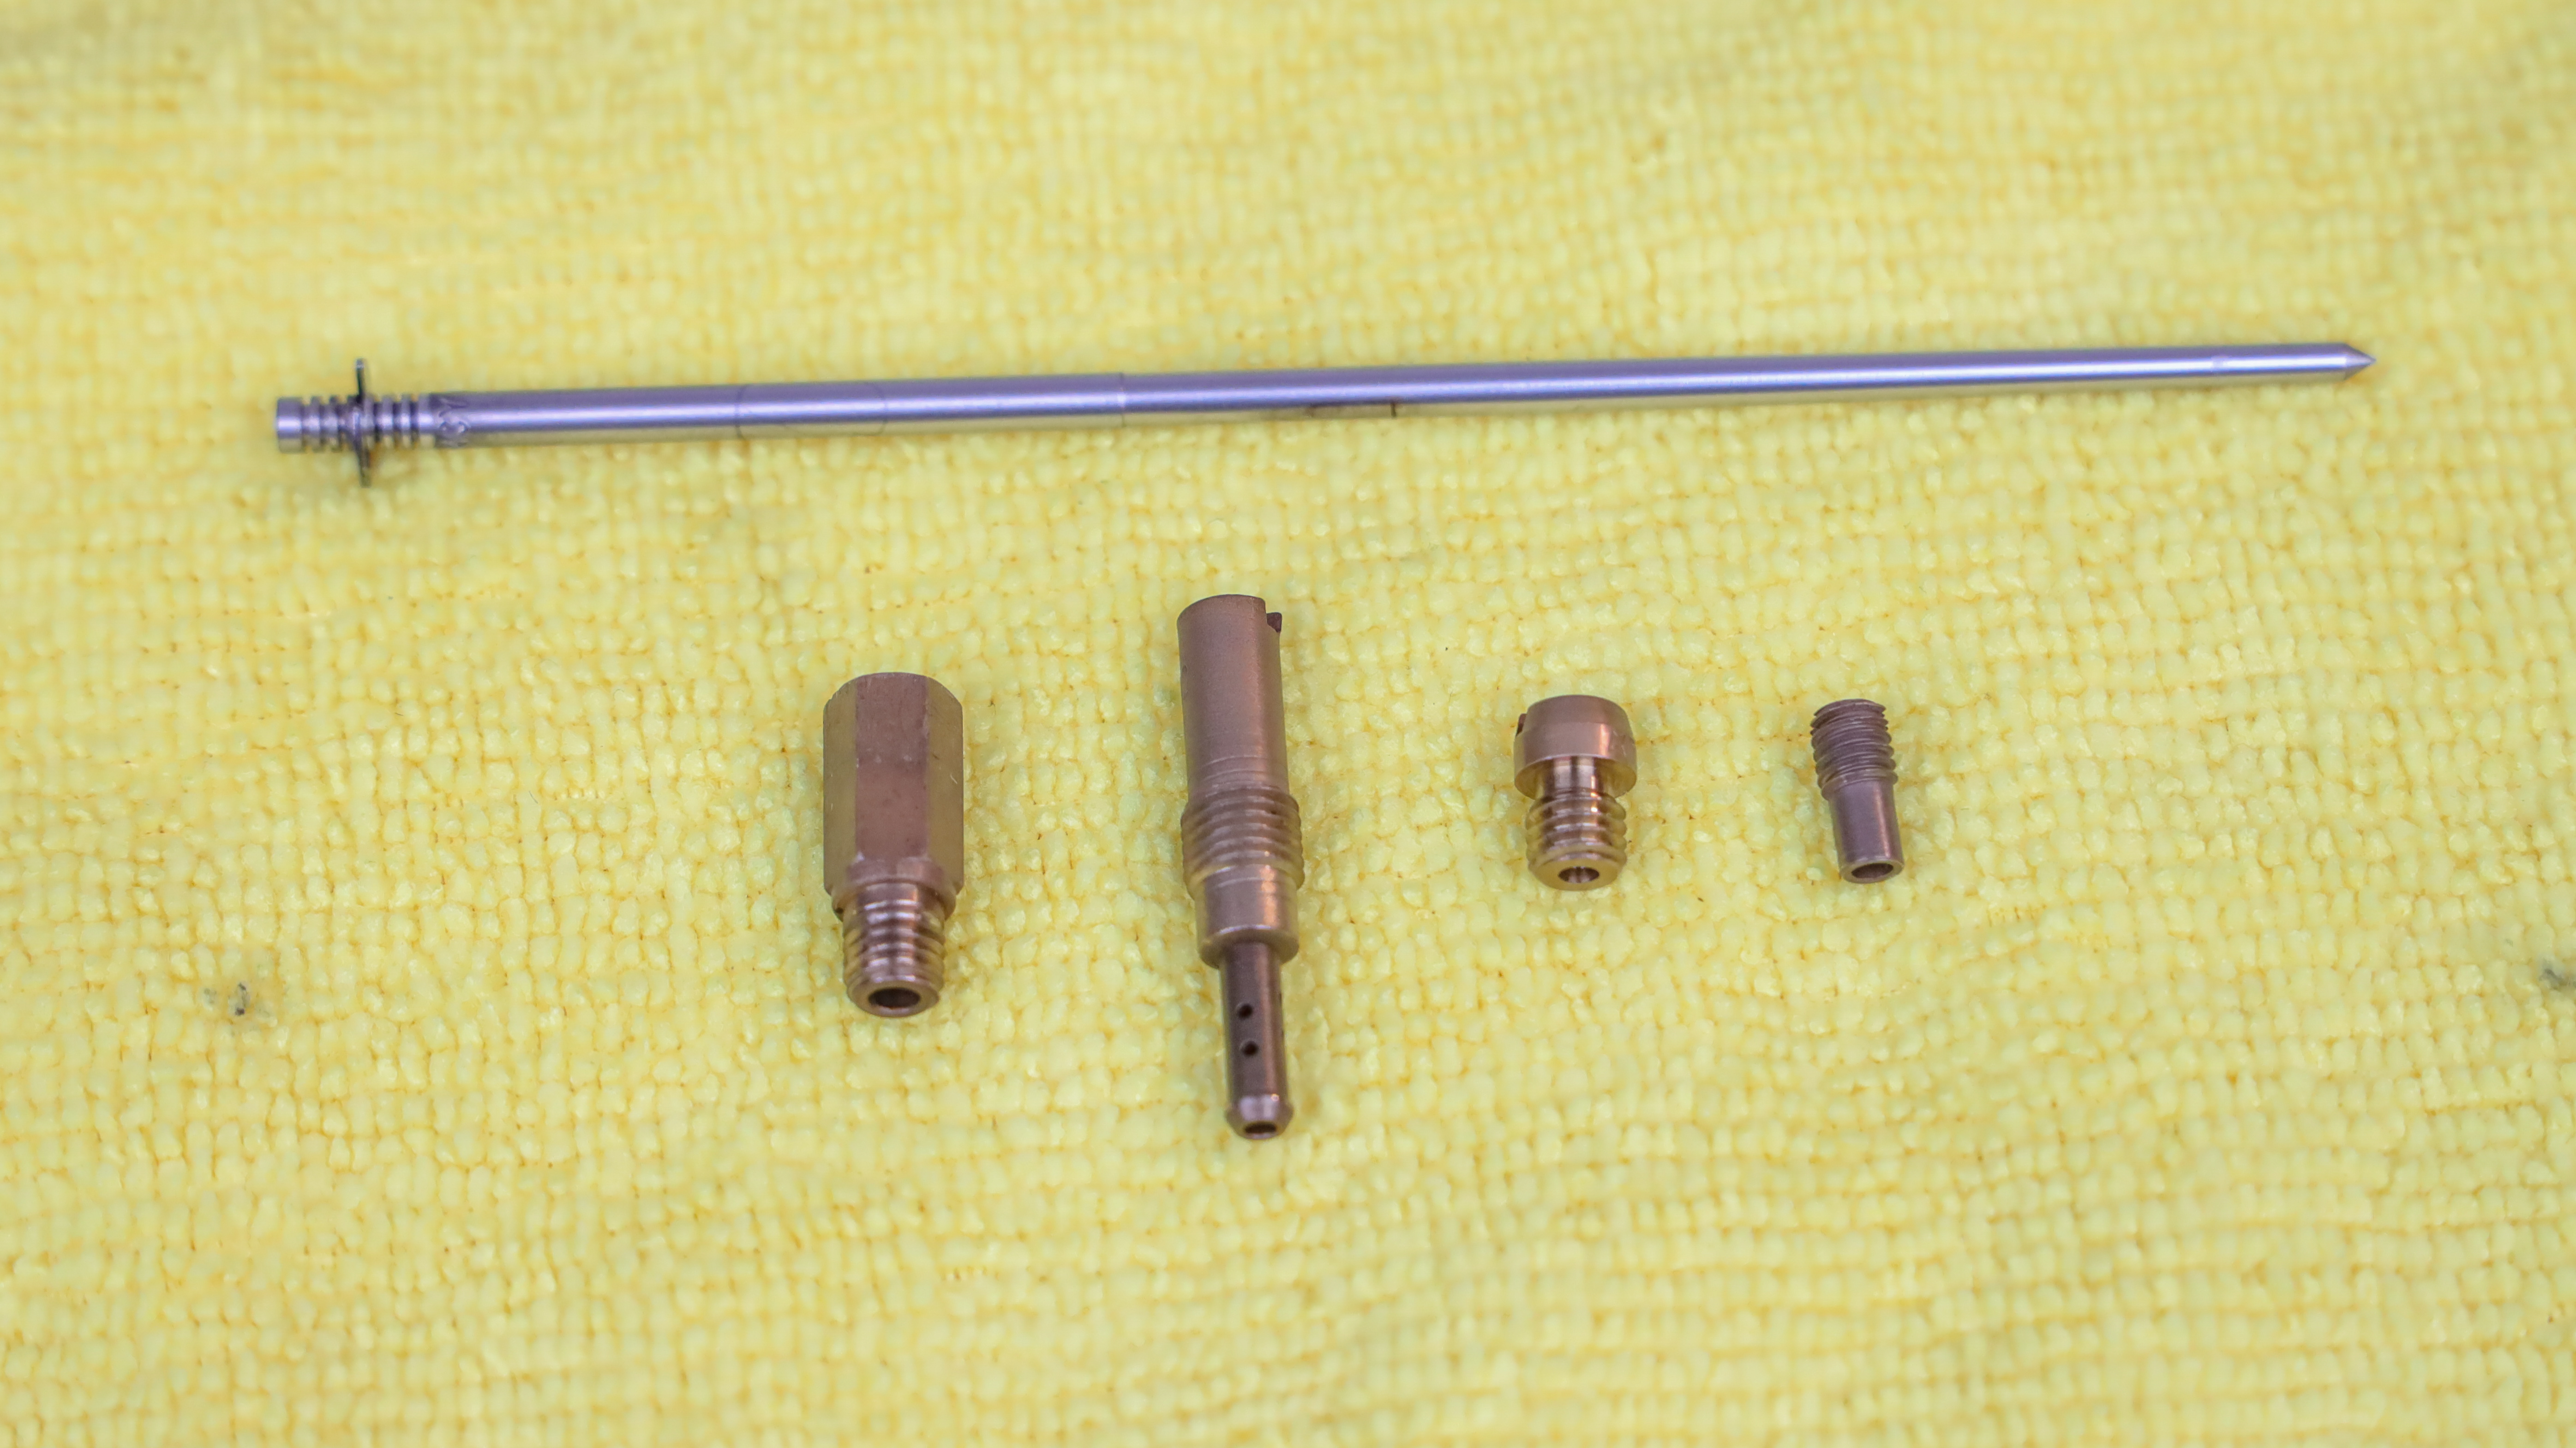
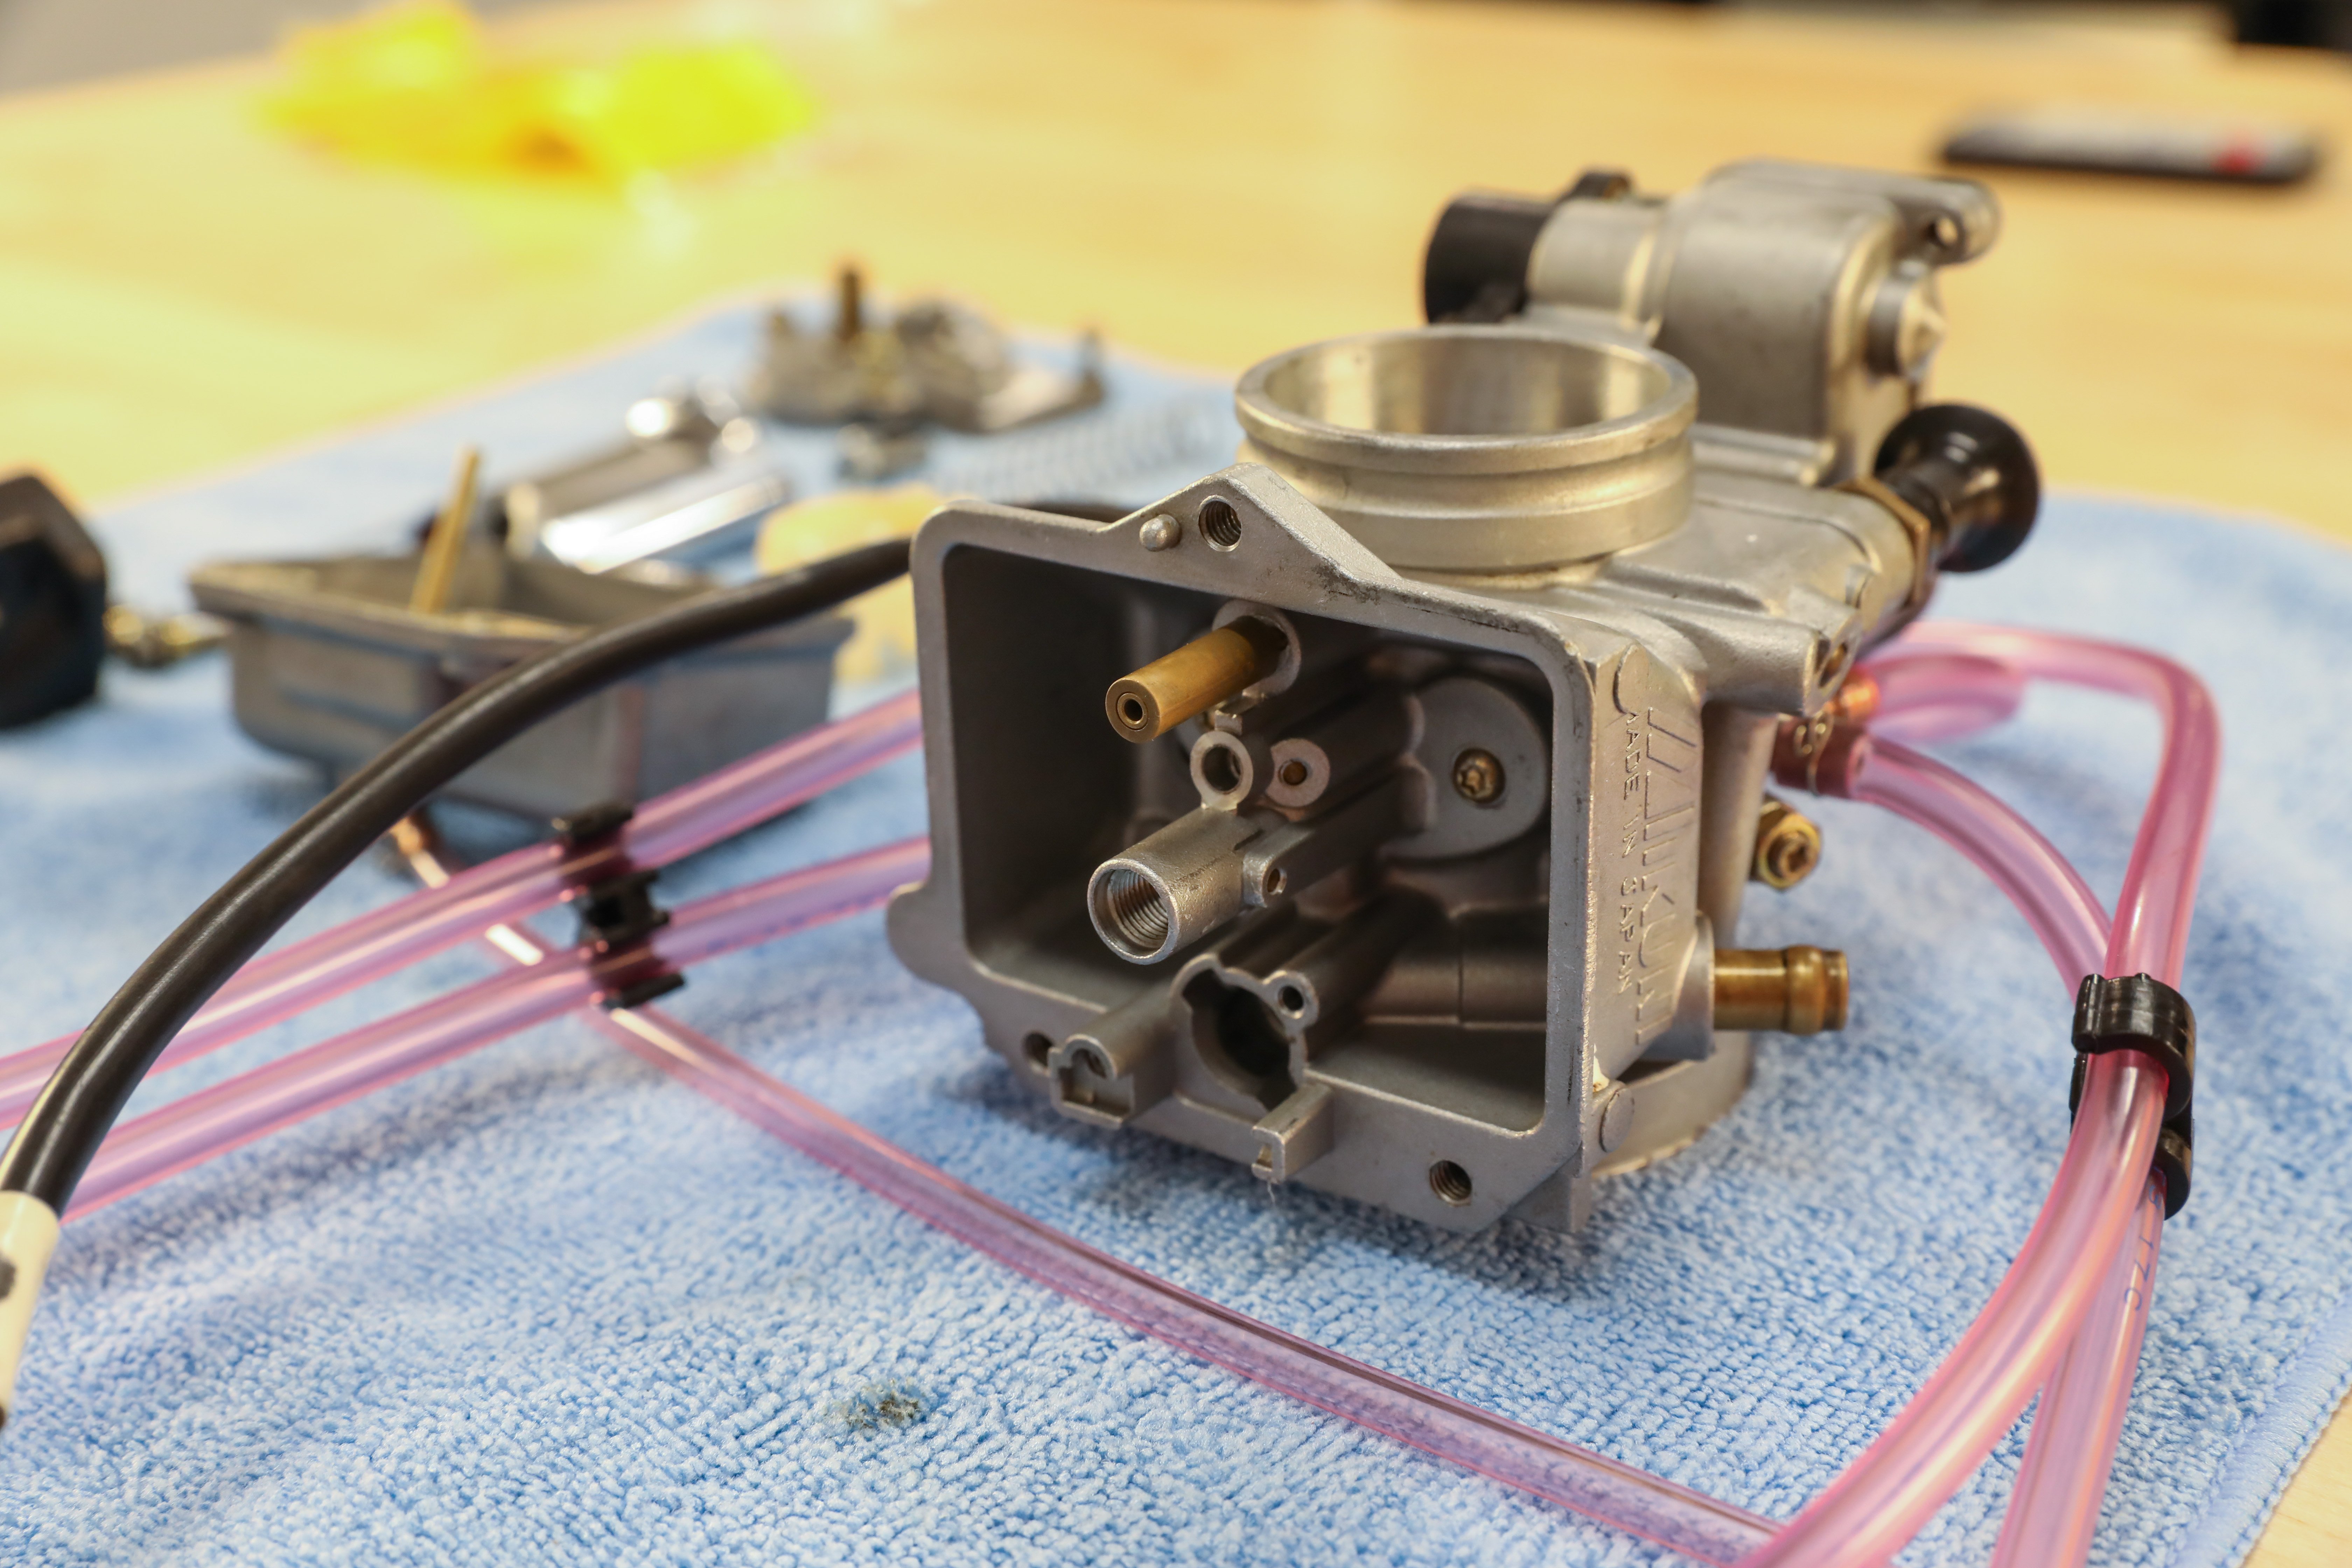
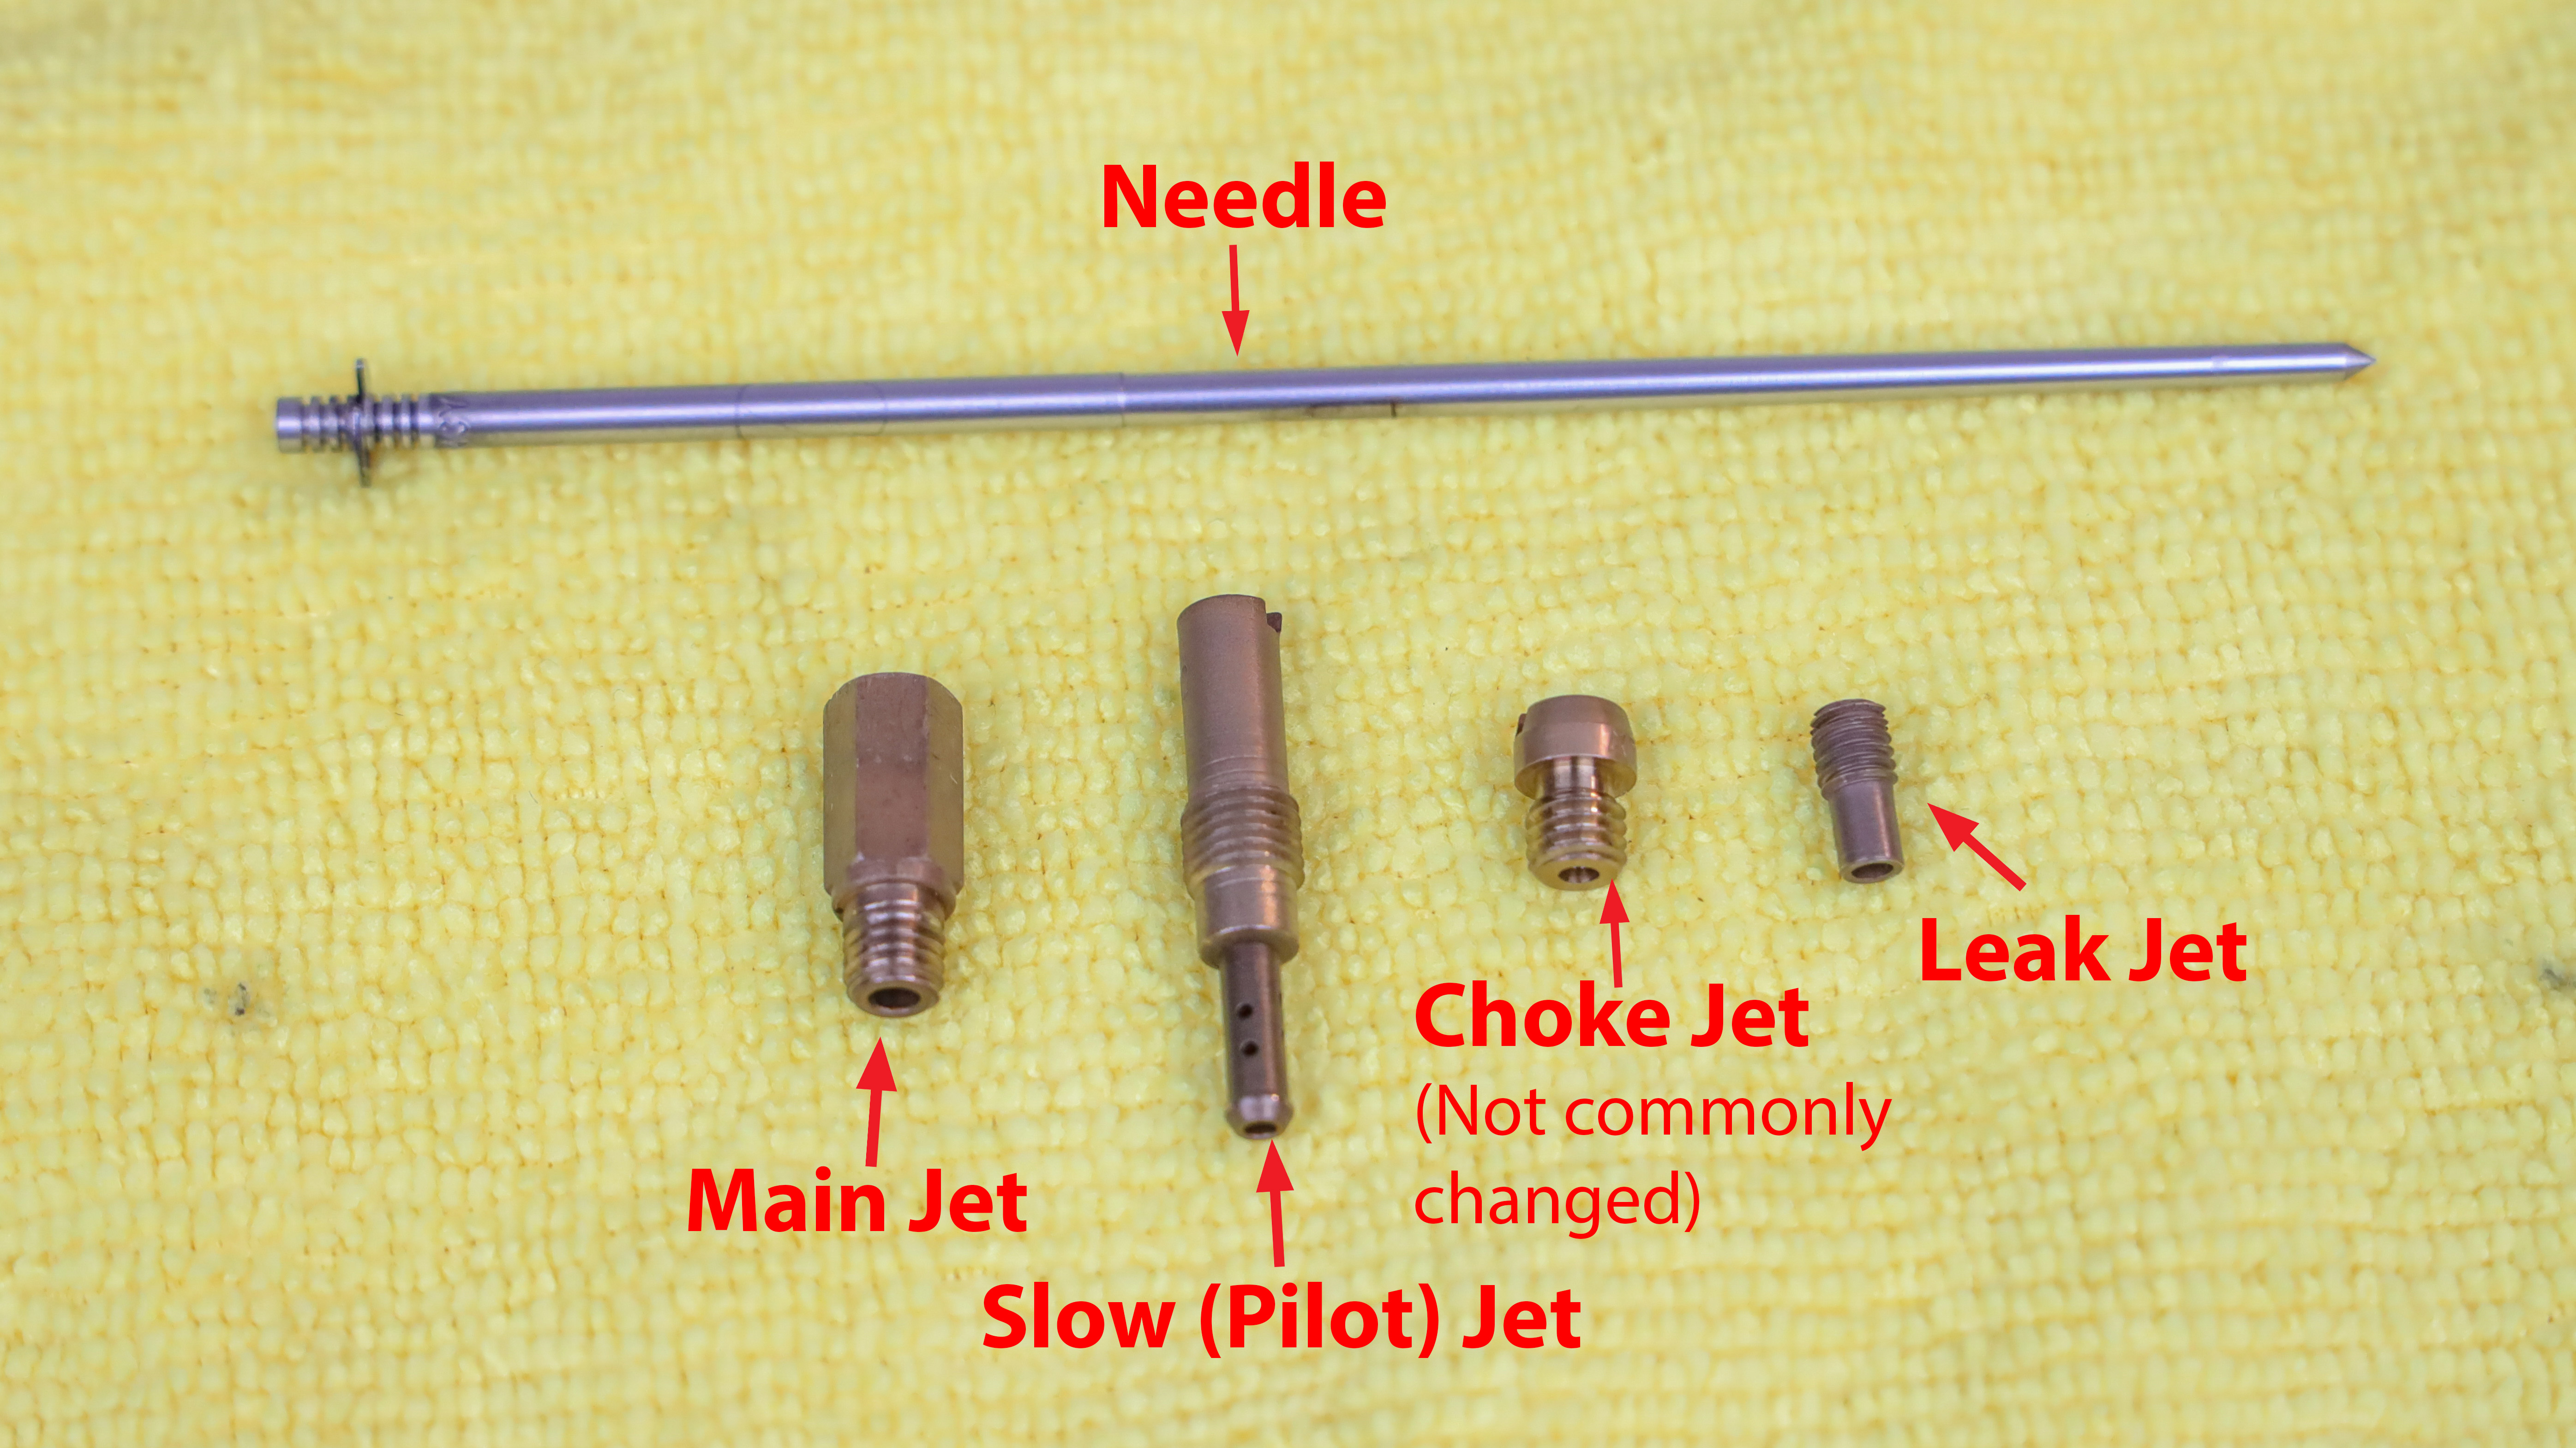
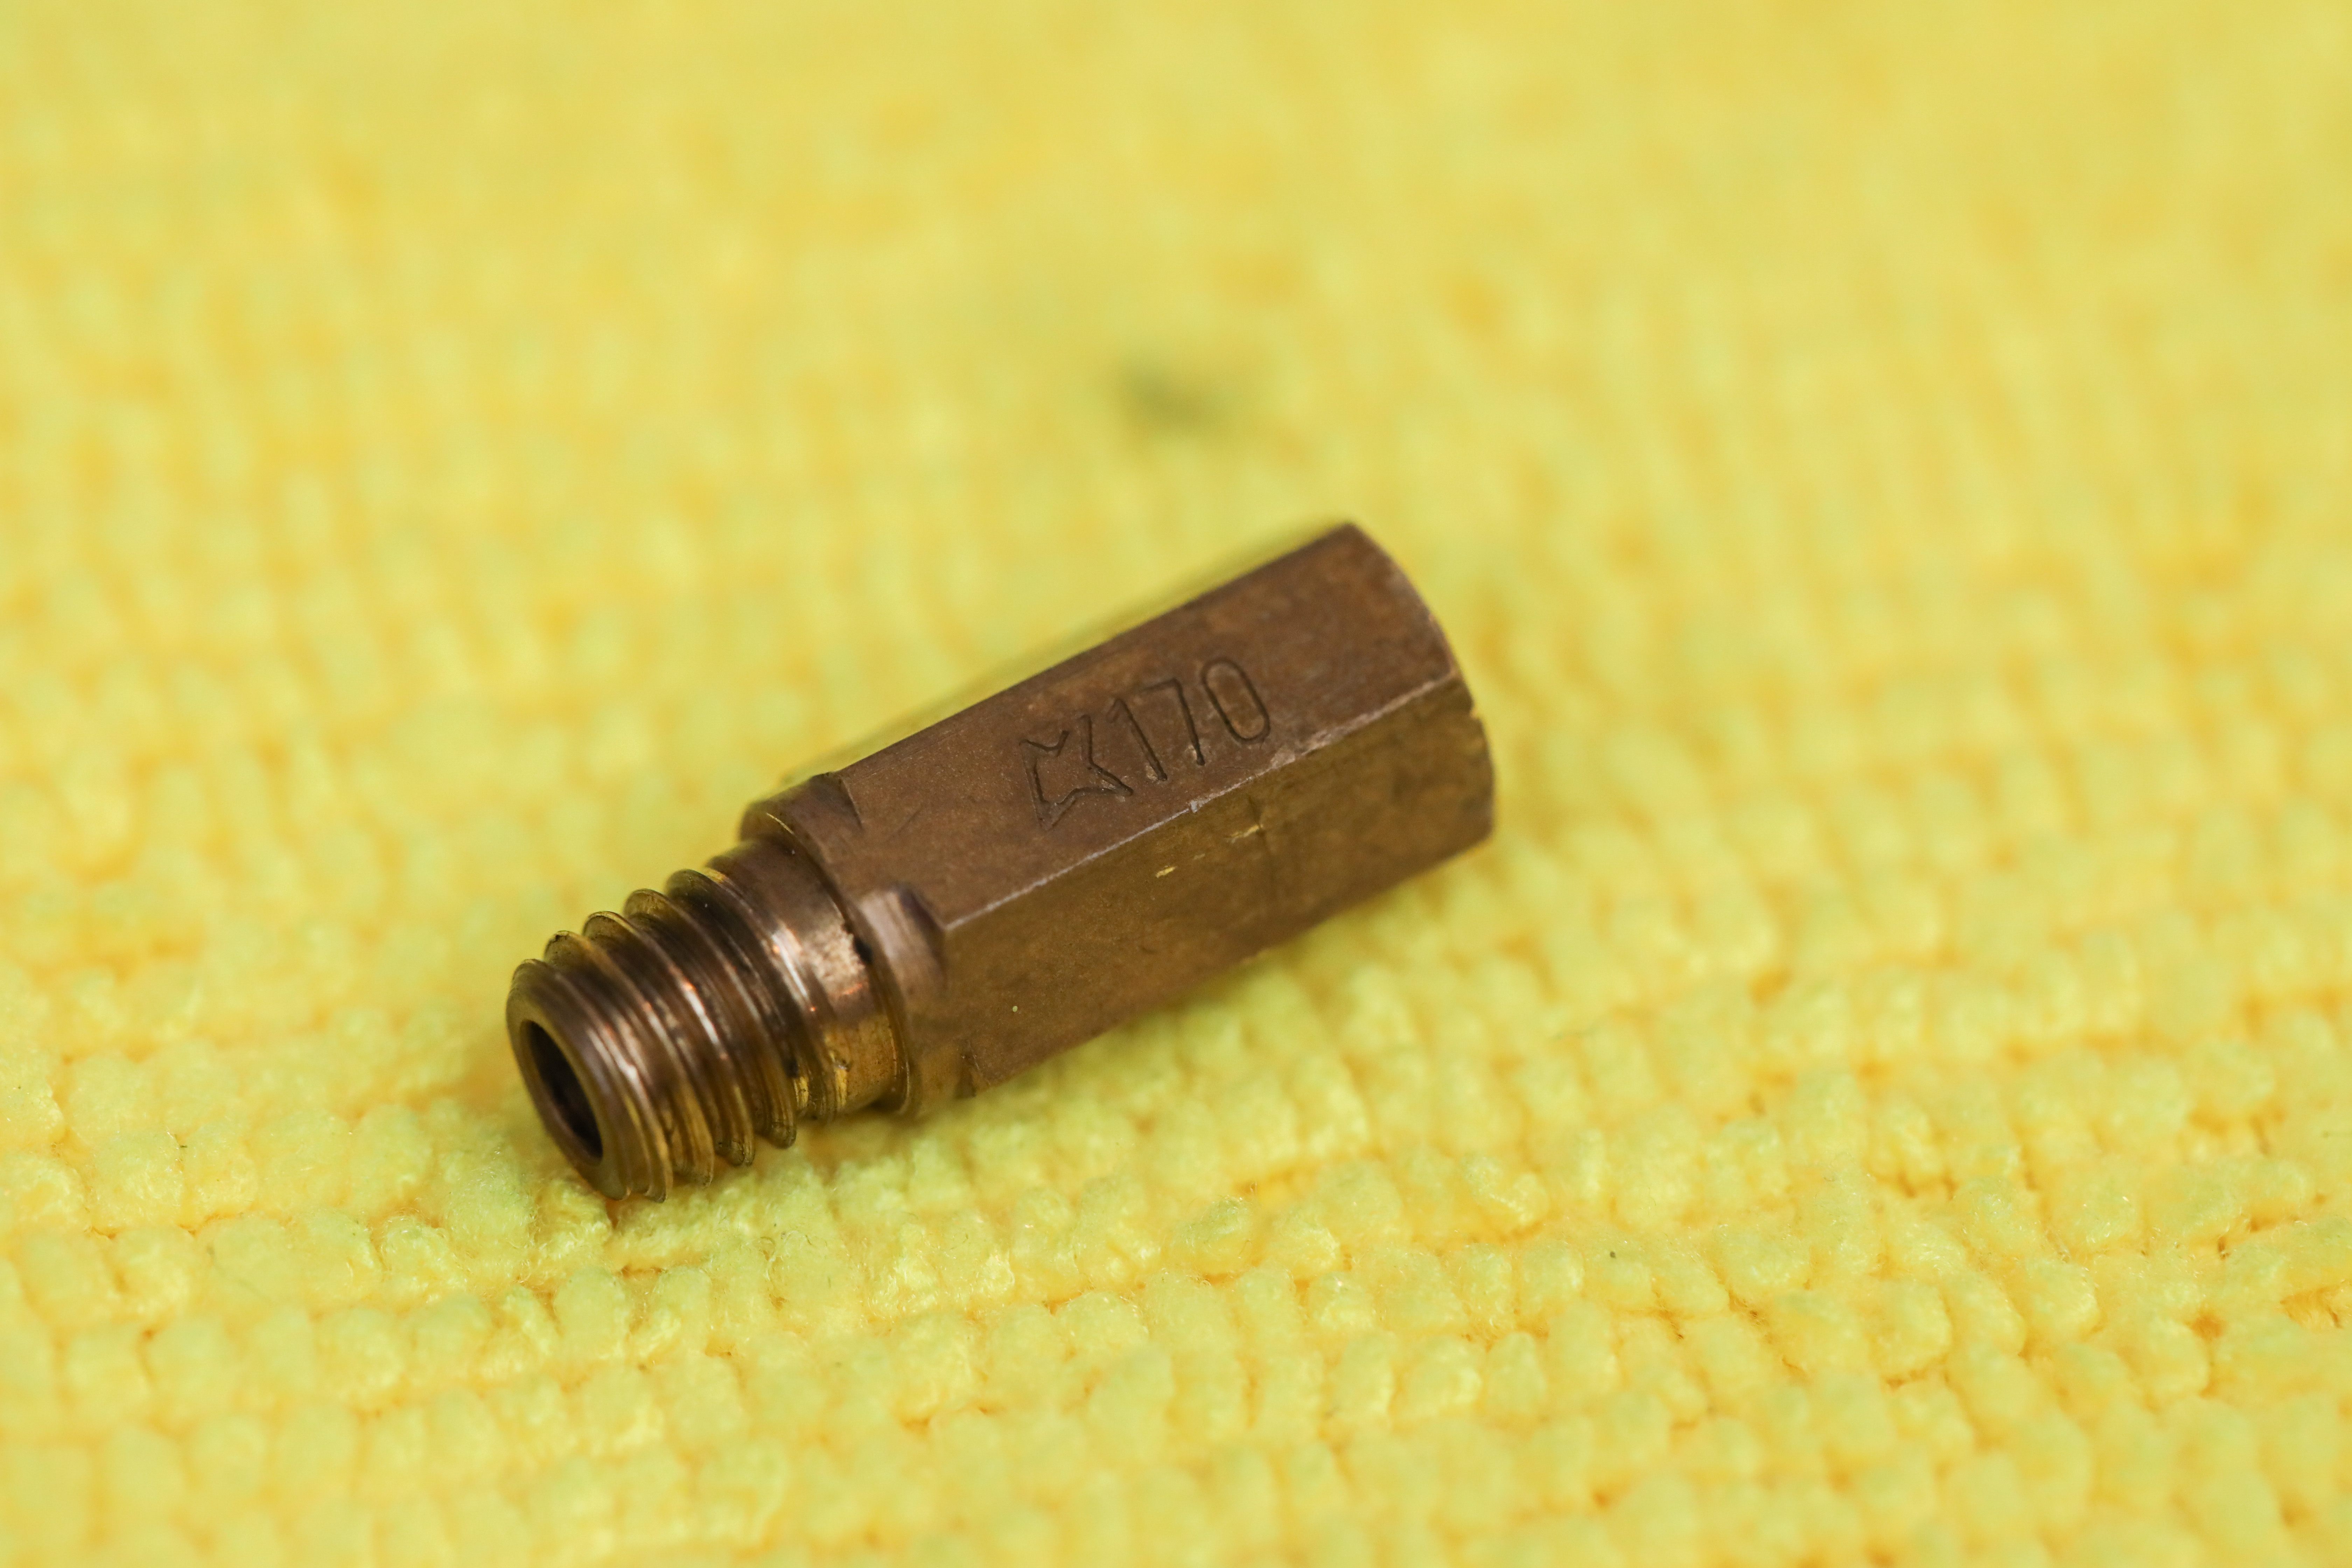
To understand the criticality of jetting, we only have to go so far as to understand the function of the carburetor. The carburetor’s job is to precisely and repeatedly deliver the appropriate amount of fuel to the engine throughout its entire speed and load range. To do this, carburetors utilize several different circuits that control different parts of the speed/load range of the engine. These circuits are metered by small brass inserts called jets and by a needle situated in the slide of the carburetor. Jets come in different orifice sizes so that the amount of fuel being delivered to each circuit can either be increased or decreased. Needles are offered with various profiles but are predominately adjusted by altering their height within the carburetor. This is done by changing the needle’s clip position.
The amount of fuel that must be delivered to the engine is dependent on the atmospheric conditions in which it operates. Specifically, engine performance is dependent on ensuring the air to fuel ratio is optimal. While carburetors are very good at metering precise amounts of fuel, most of them cannot account for changes in air conditions. There are two variables that affect the ambient air conditions: temperature and pressure. Temperature and pressure ultimately affect the density of the incoming air, which has a significant effect on the engine’s air to fuel ratio.
A couple of practical examples that highlight how air density changes include when temperatures or elevation changes from the baseline conditions the carburetor and engine were tuned for. As temperatures increase, air density decreases and when temperatures decrease, air density increases. Similarly, as the operating altitude of the engine increases, air density decreases due to decreasing air pressure. The opposite is true when altitude decreases.
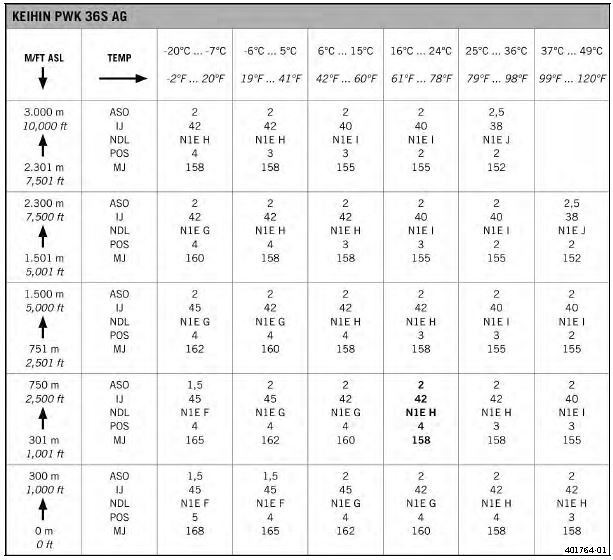
Since the world is a diverse landscape and atmospheric conditions are always changing, it is not possible to set up a carburetor correctly for all conditions. Instead, manufacturers utilize jetting charts which provide the operator guidance on how to configure the carburetor for specific temperatures and elevations. Jetting charts can be found in the operator’s manual that comes with the machine or in the service manual which is usually sold separately. A standard jetting chart for two and four-stroke carburetors provides guidance on the attributes of the pilot screw, slow jet, needle clip position, needle type, and main jet.
Jetting requirements can also change when engine modifications are carried out. When engine modifications, such as the addition of a performance exhaust system, are incorporated the air flow through the engine changes necessitating carburetor adjustments. Depending on the modifications being made to the engine, fueling adjustments may need to be richened in certain throttle ranges and/or leaned out in others. When adjusting carburetor settings to account for engine modifications, it is always best to start with the setting recommended by the supplier of the aftermarket components, and then test to confirm optimal performance.
Technically, none of the metering circuits found within a carburetor are completely independent of one another, which means that any changes made to one circuit will have a small impact on another circuit. However, from an adjustment standpoint, the circuits and what parts of the speed/load range they primarily effect are shown below:
- Pilot Screw - fine idle adjustment
- Slow (Pilot) Jet - idle to off idle
- Needle Clip Position - ¼ to ¾ throttle
- Needle Type - ¼ to ¾ throttle
- Main Jet – ¾ to wide open throttle
- Leak jet - four-strokes only
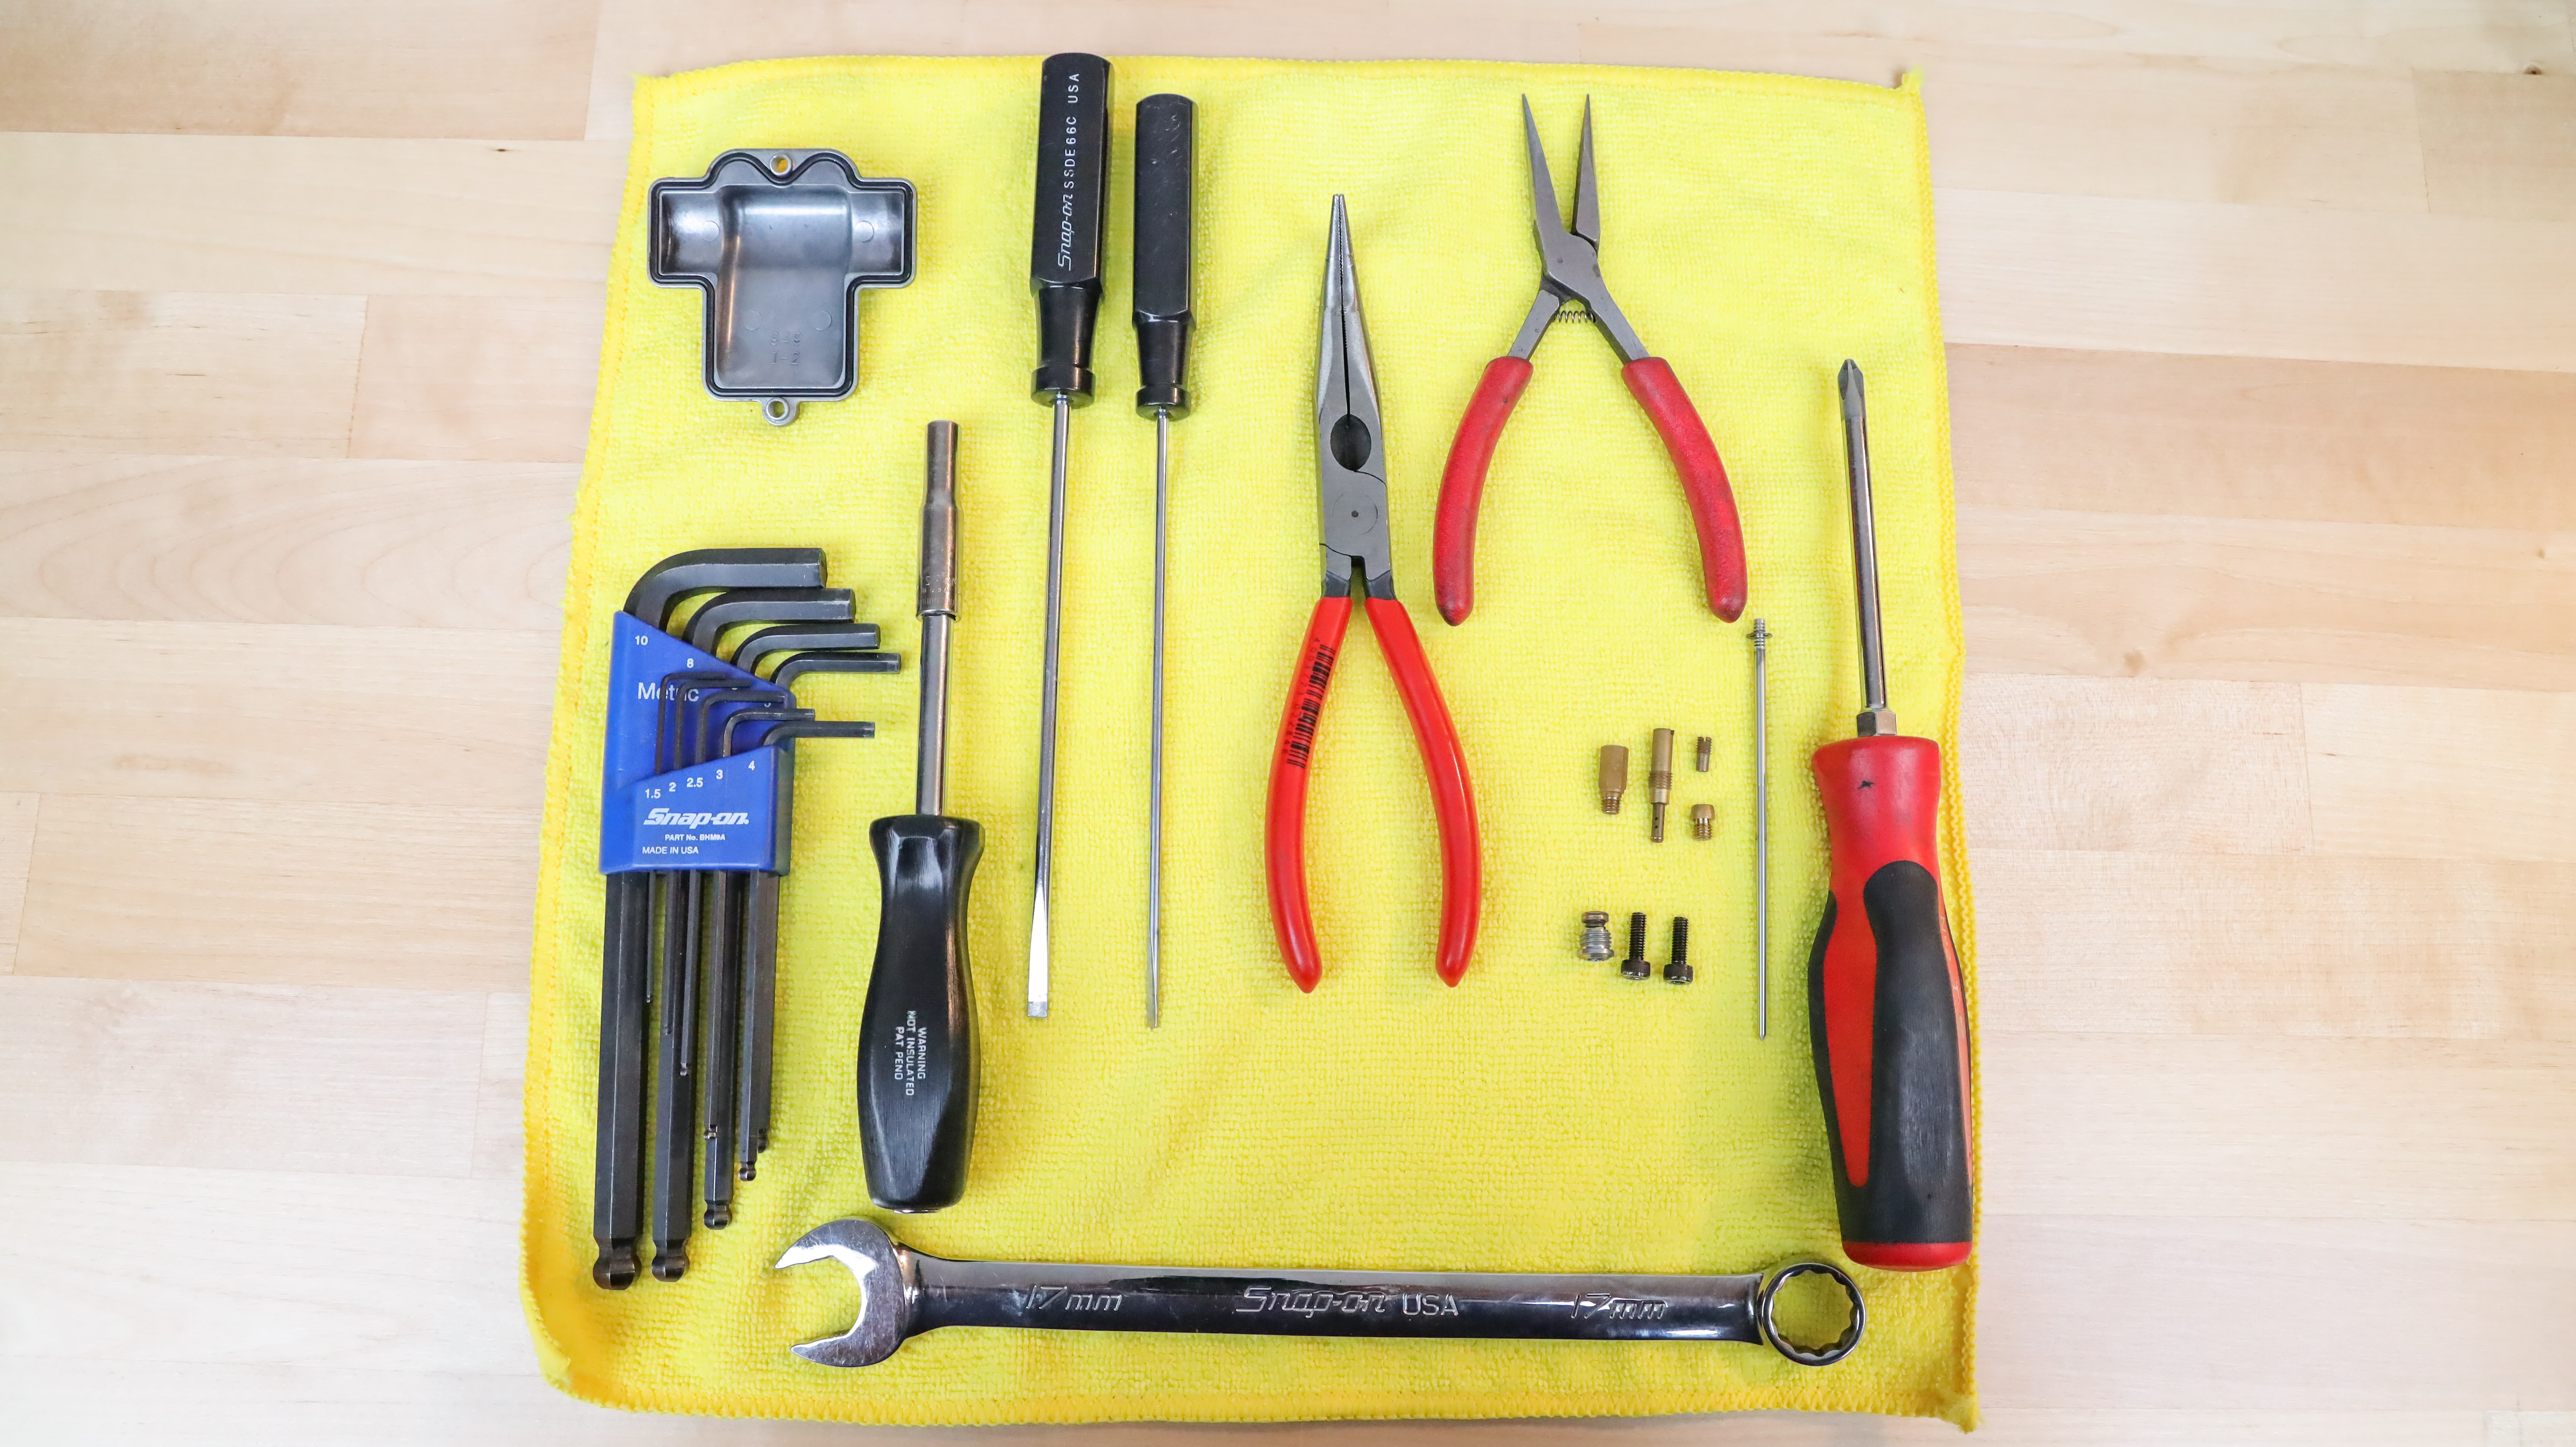
The tools required to re-jet a carburetor are basic in nature and predominantly consist of the usual tools needed to service your machine such as sockets, wrenches, allen wrenches, and screwdrivers. A set of small medium-length flat head screwdrivers is necessary to remove the small jets found within the carburetor. On machines with limited space between the carburetor and engine cases, a low-profile float bowl wrench may be necessary to remove the float bowl plug.
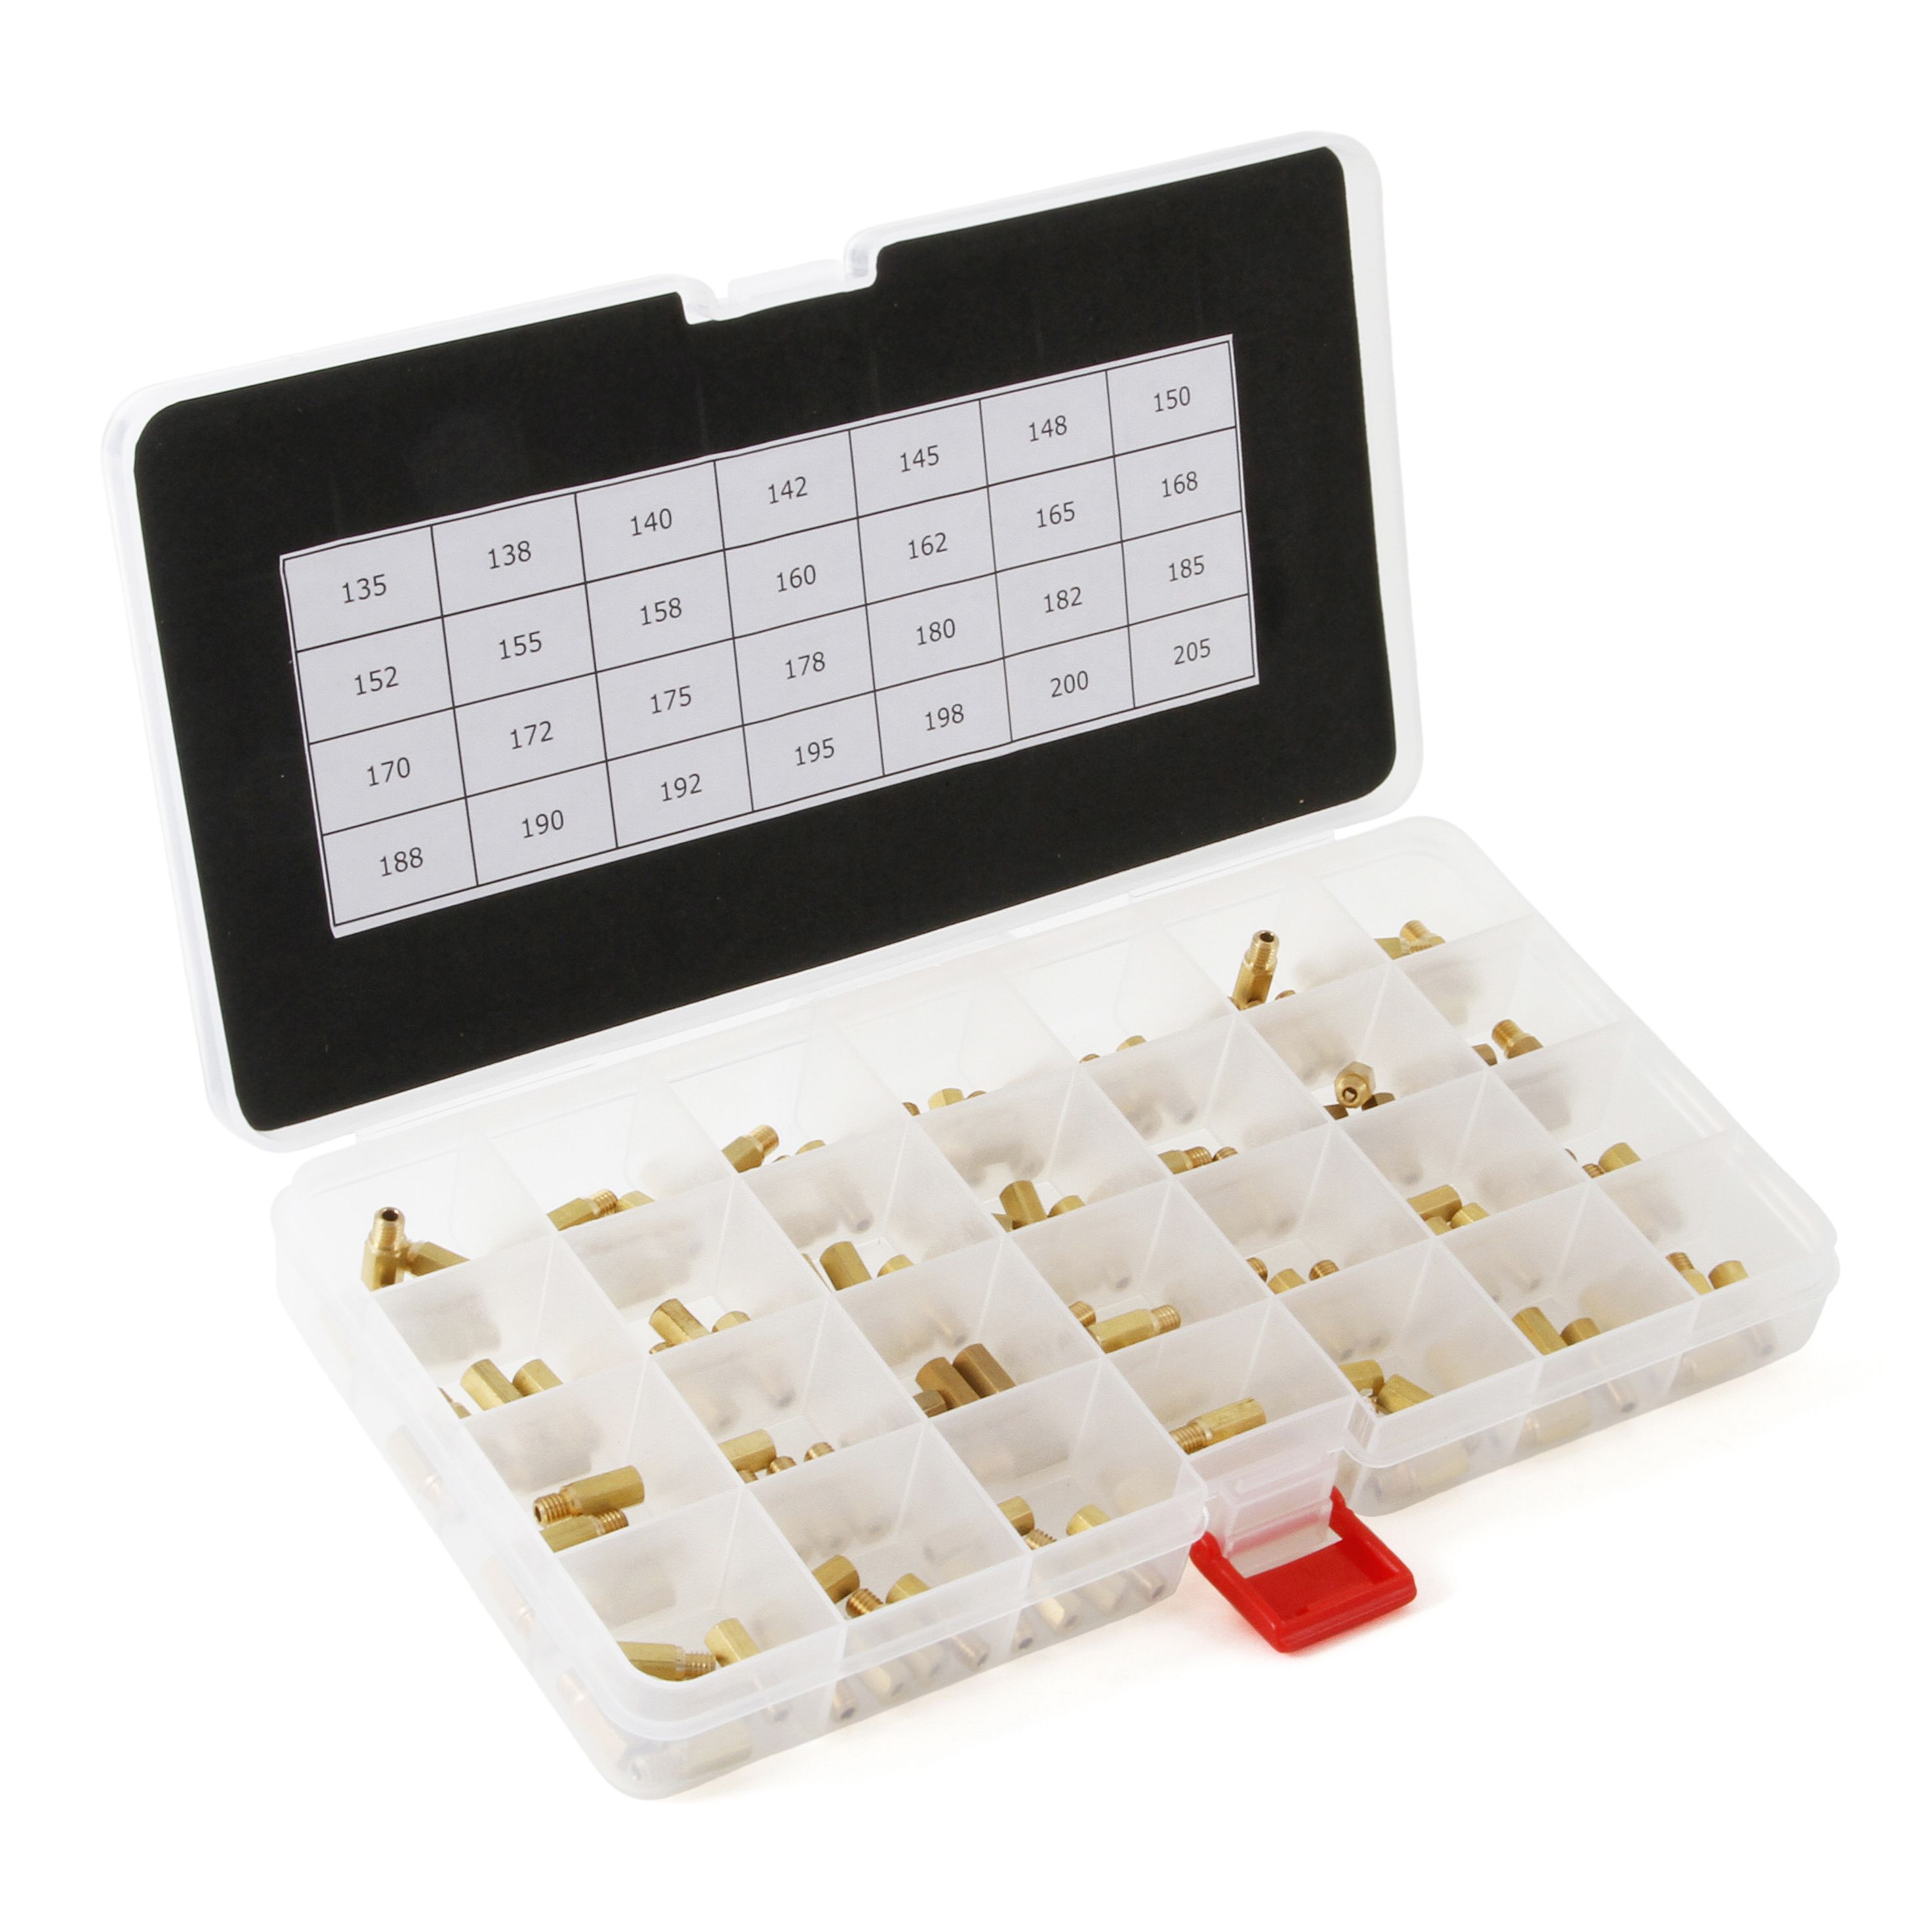
ProX offers jets for Keihin and Mikuni carburetors in a wide range of sizes so that no matter where you ride or what modifications you make you can precisely adjust your carburetor to ensure your engine runs optimally. ProX provides jets for all types of two and four-stroke carburetors which include FCR, PWM, CR roundslide, PJ, PWK, and PWM to name but a few. ProX jets are manufactured in Japan to exact OEM specifications and are available at cost effective prices.
Click here to find available jets and jet kits for your machine.

Before making jetting changes, it is best to ride and warm up the machine. Whether you’re putting in laps or tearing up trail, be overly cognizant of how the engine is running at various throttle positions. Take note of idle quality, transitions, mid-range, and wide-open throttle. Note any areas of concern then compare your notes to the conditions for the day and determine how they compare.
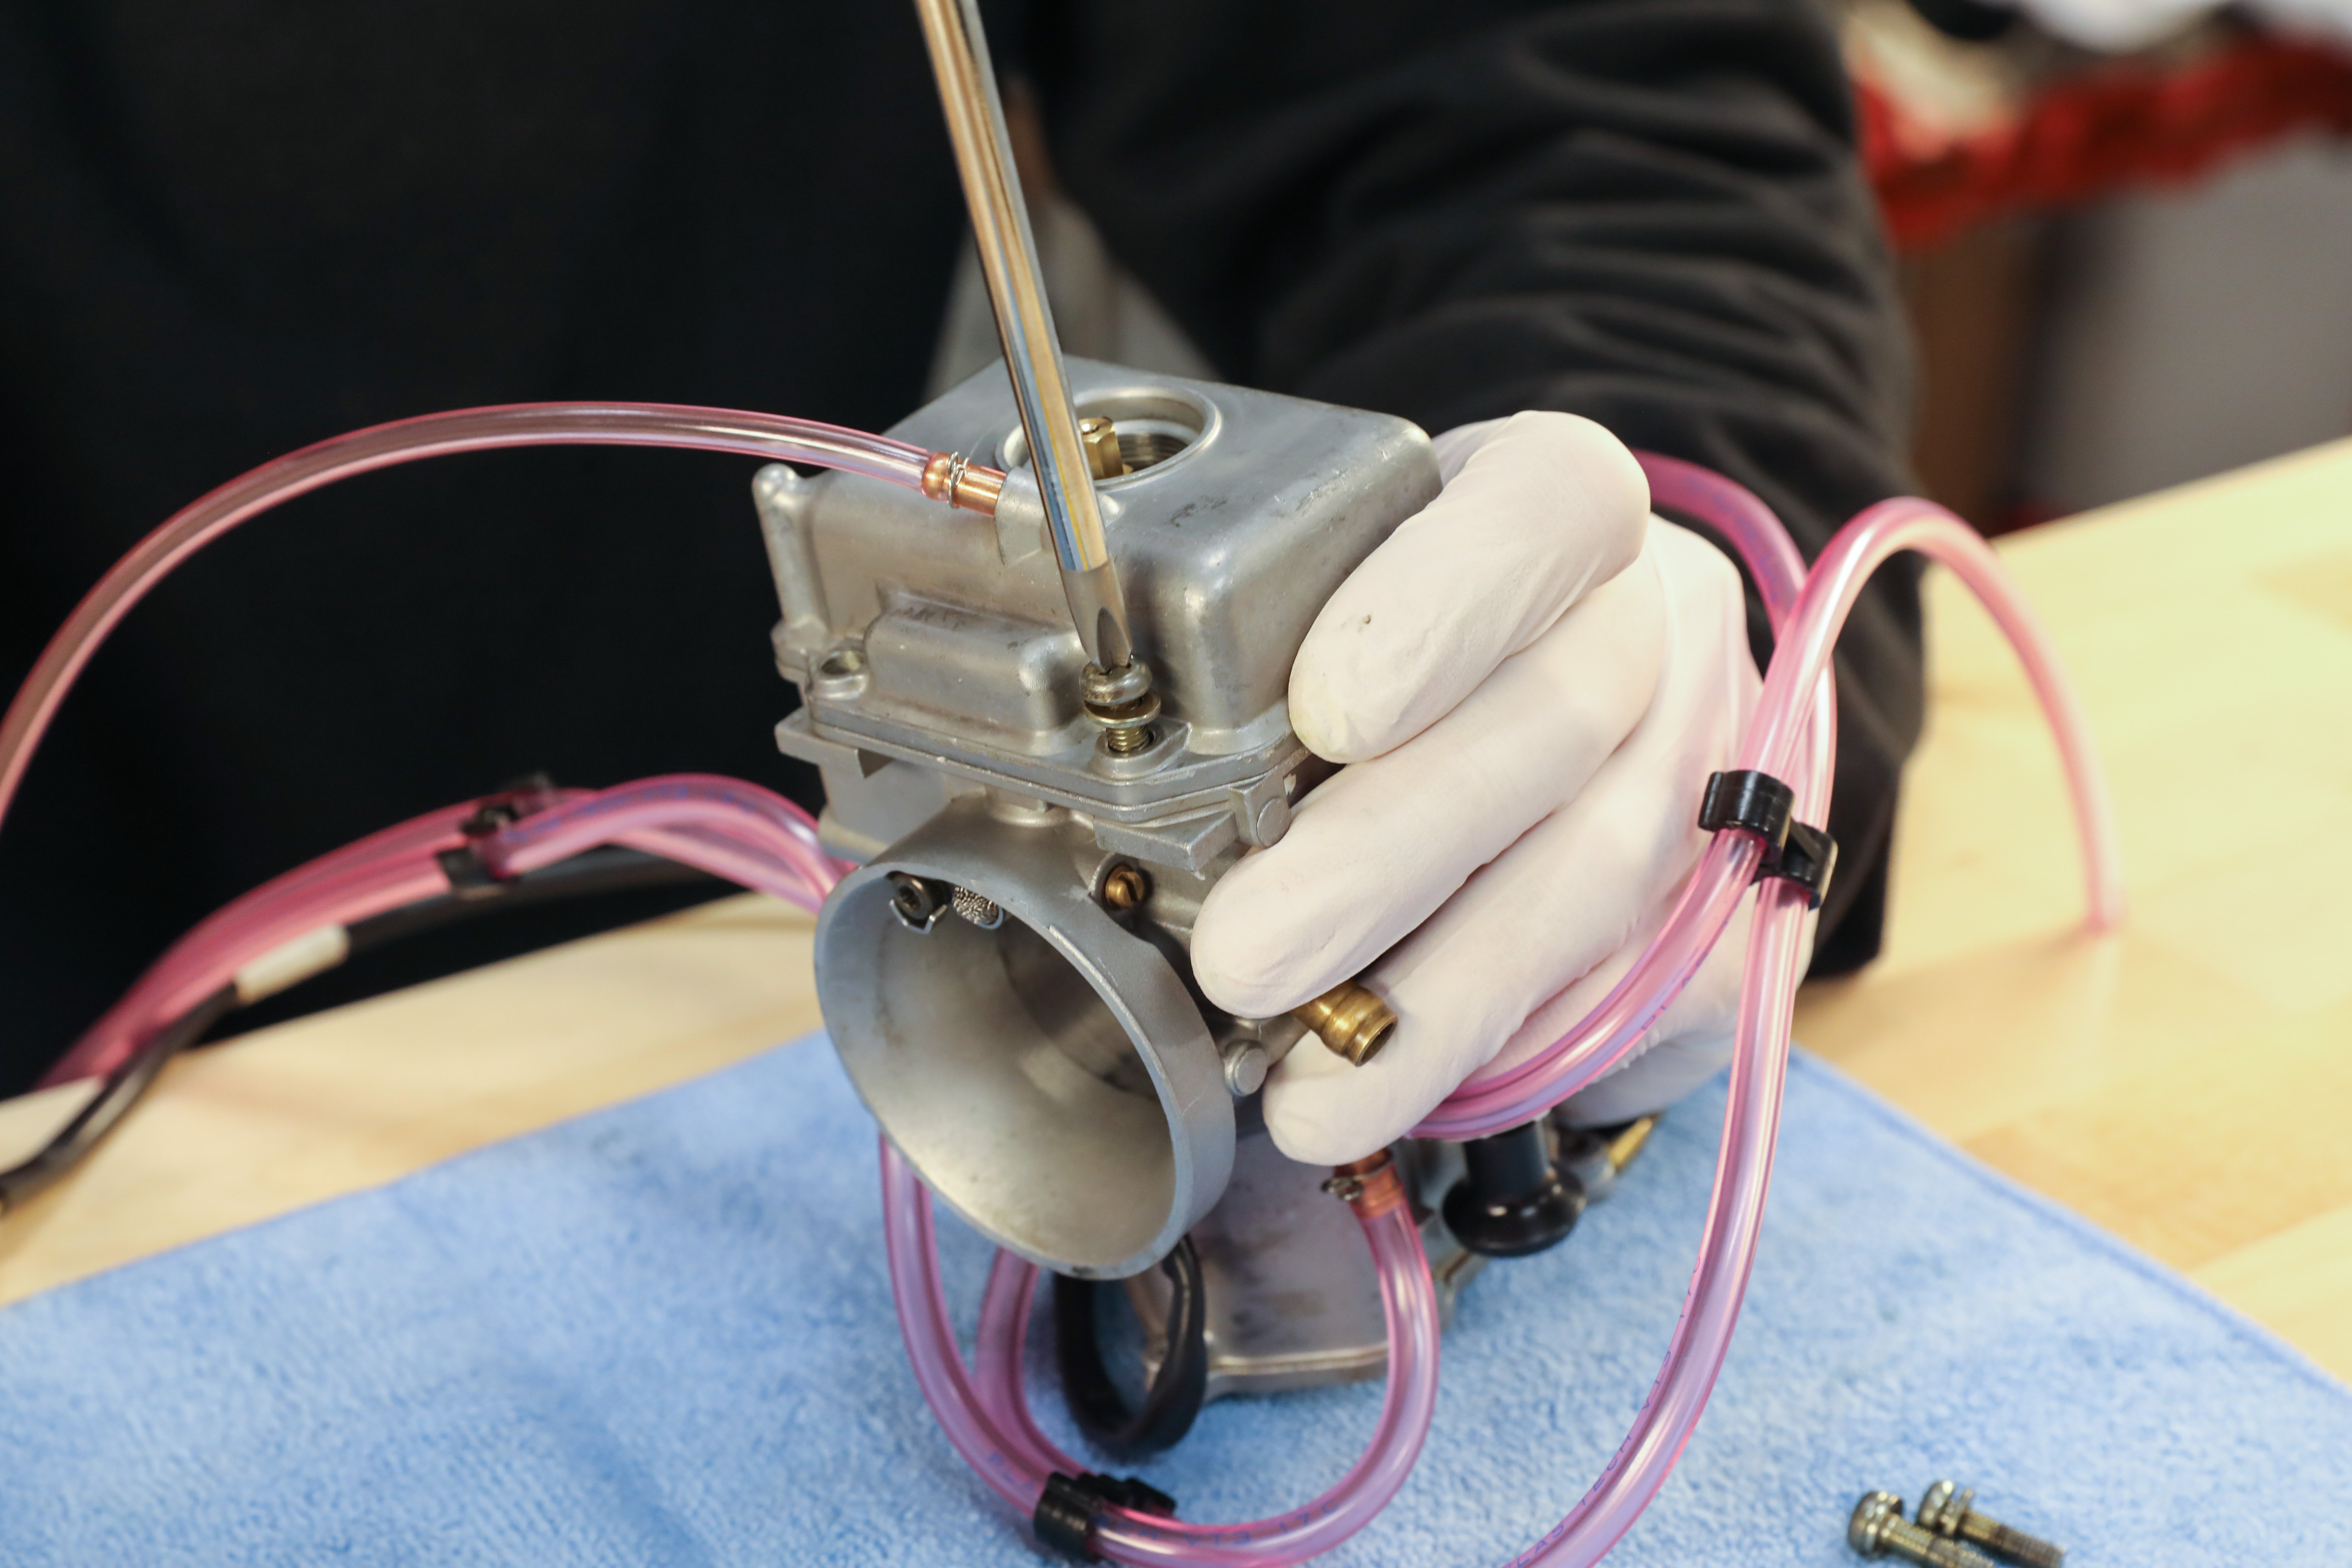
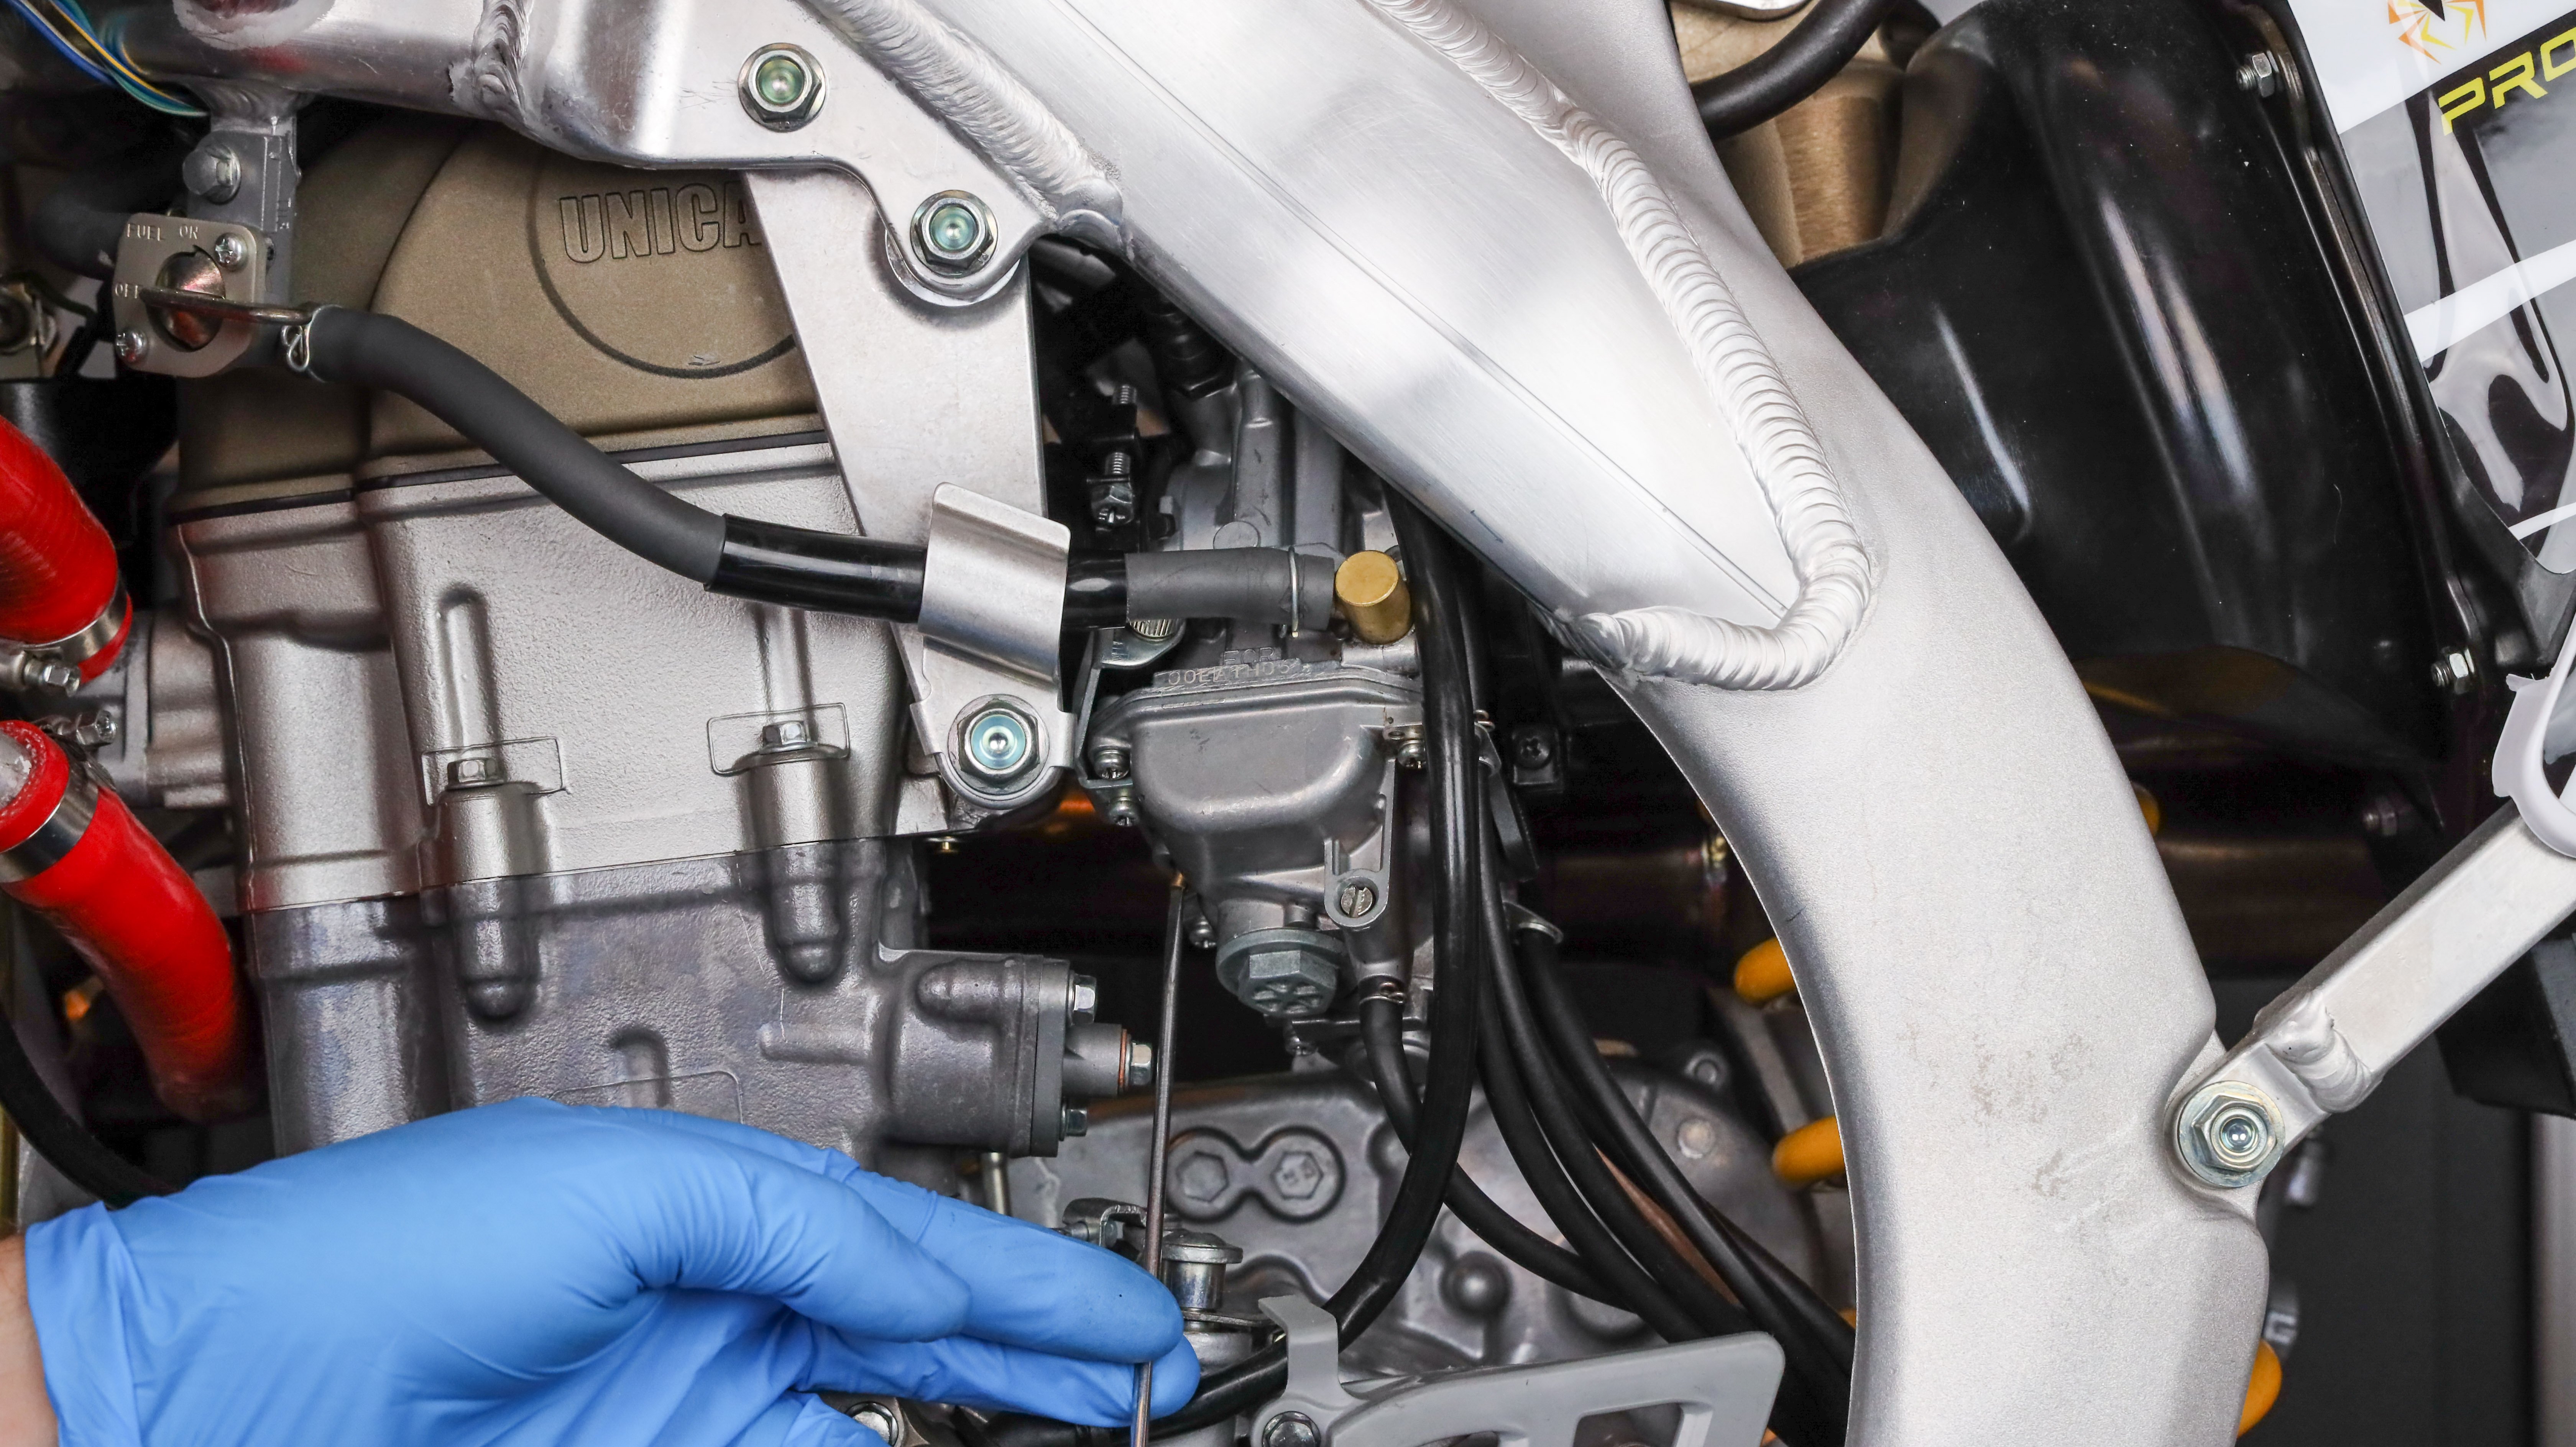
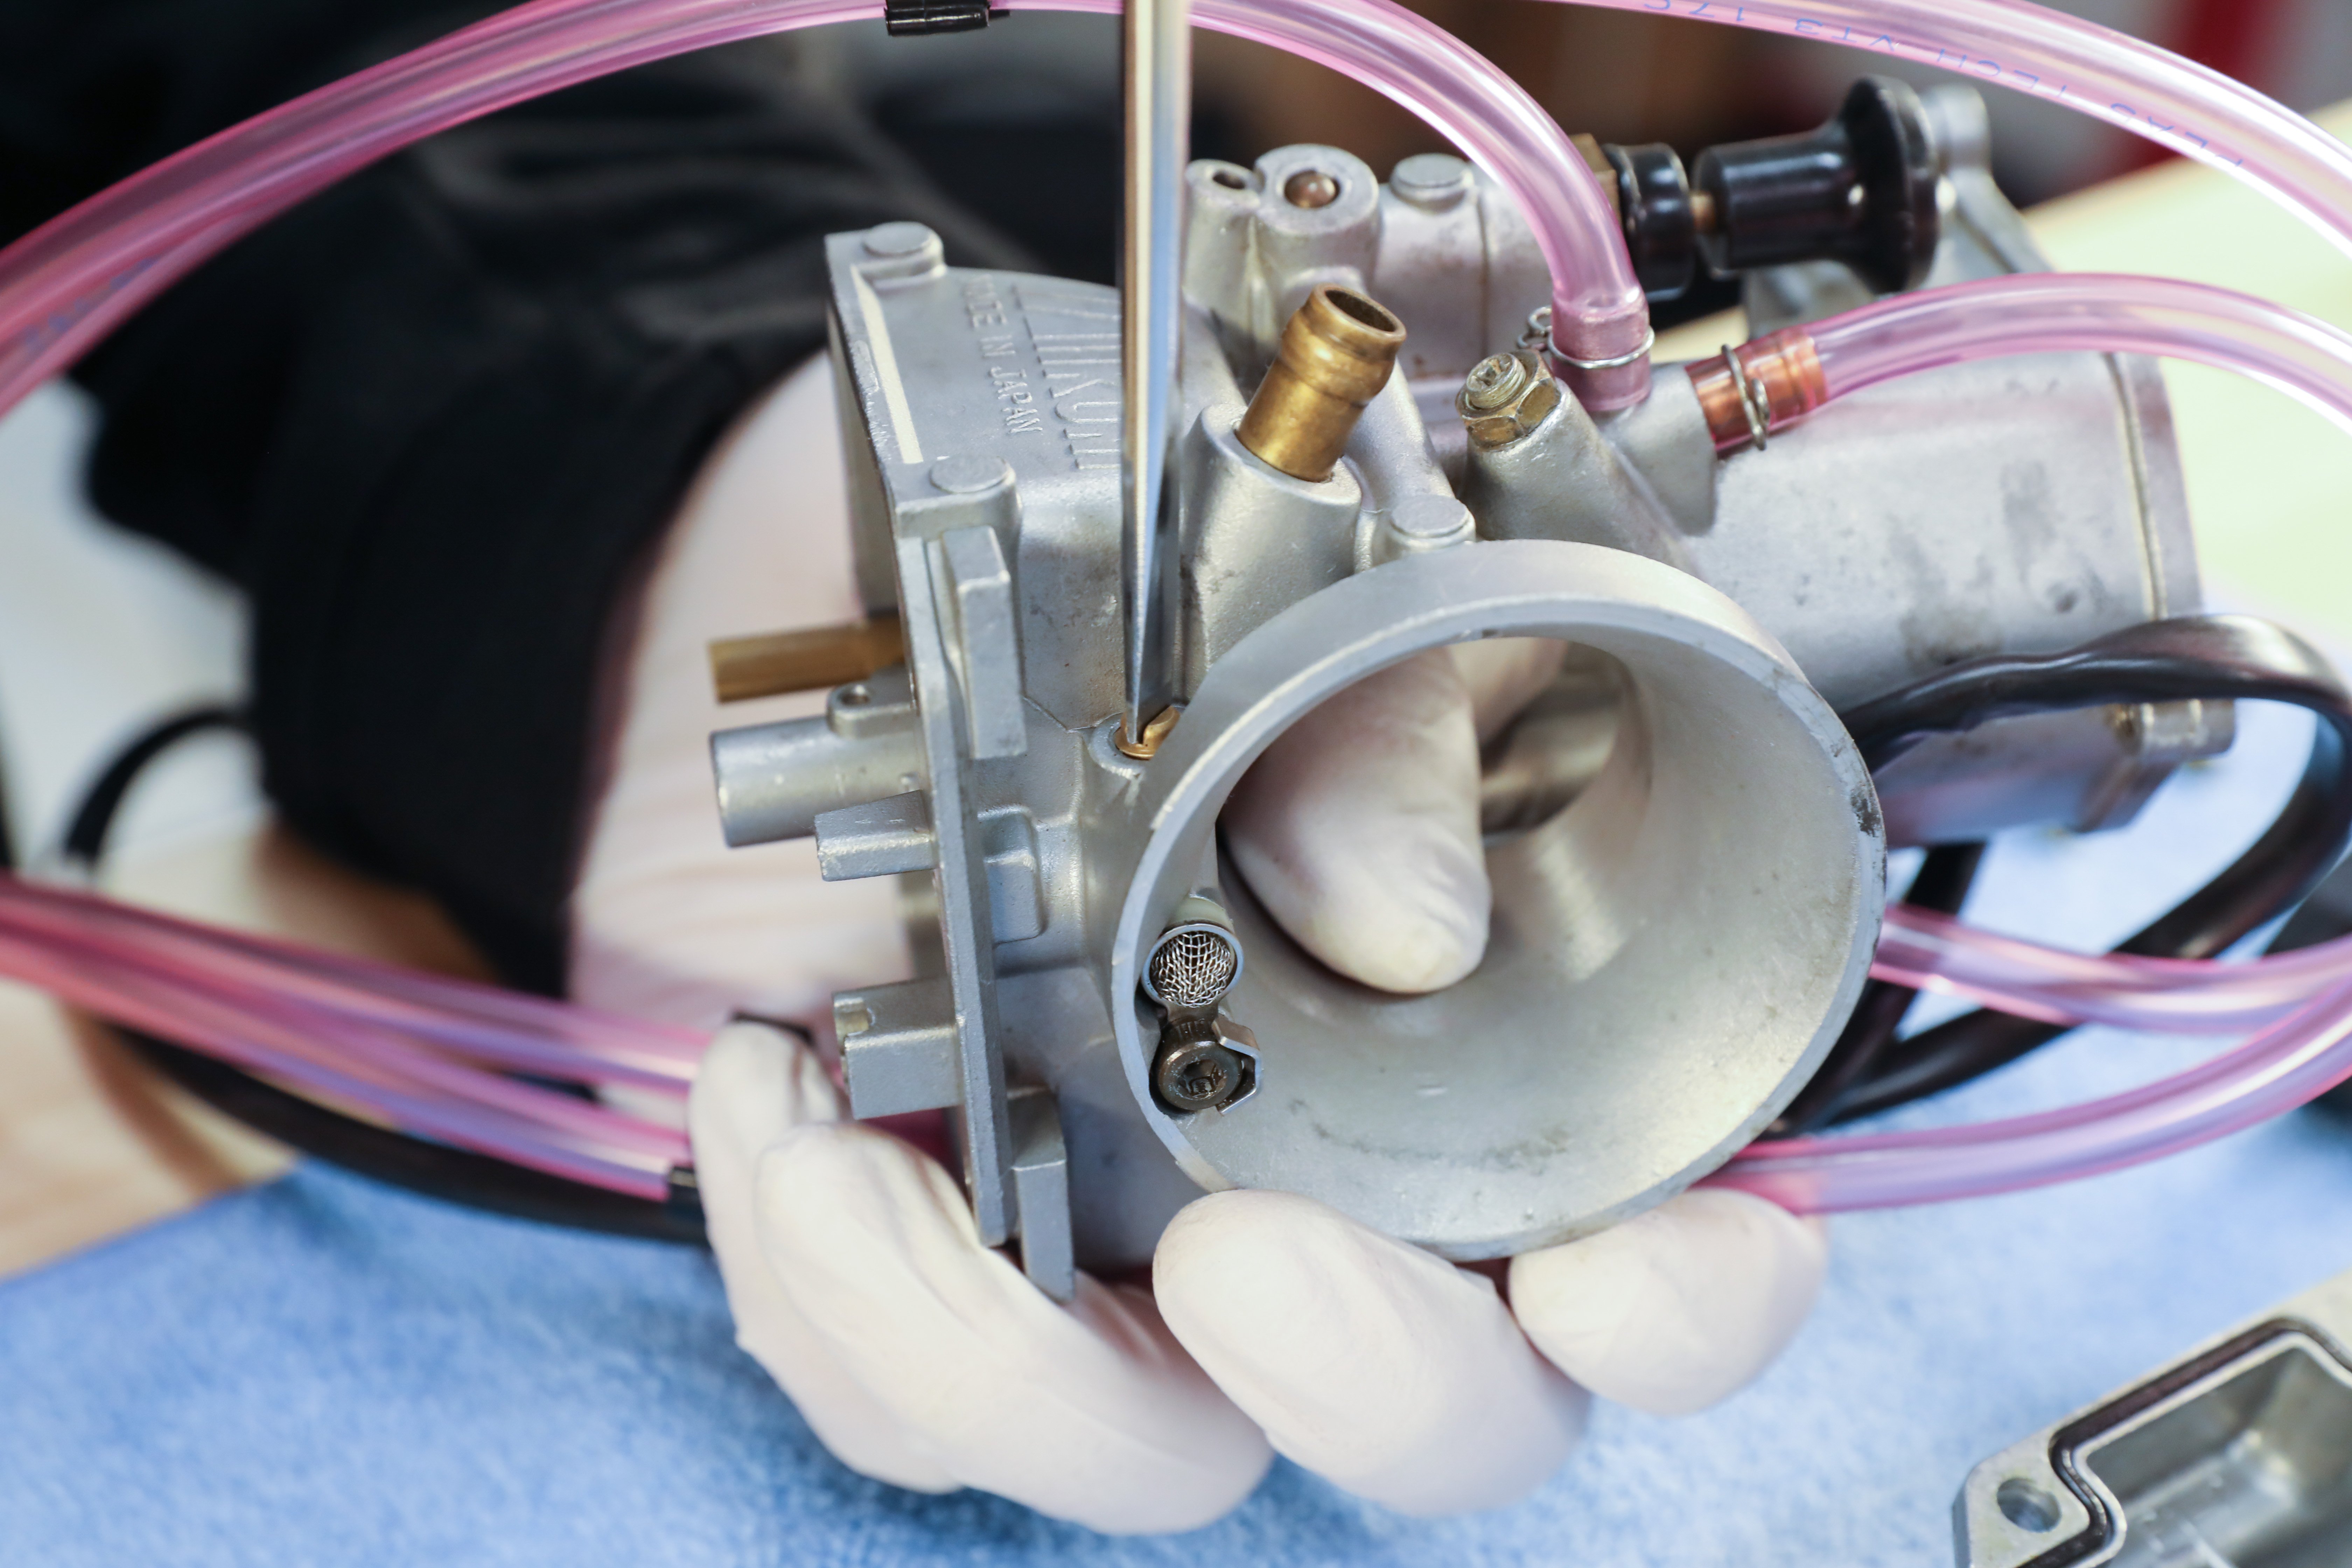
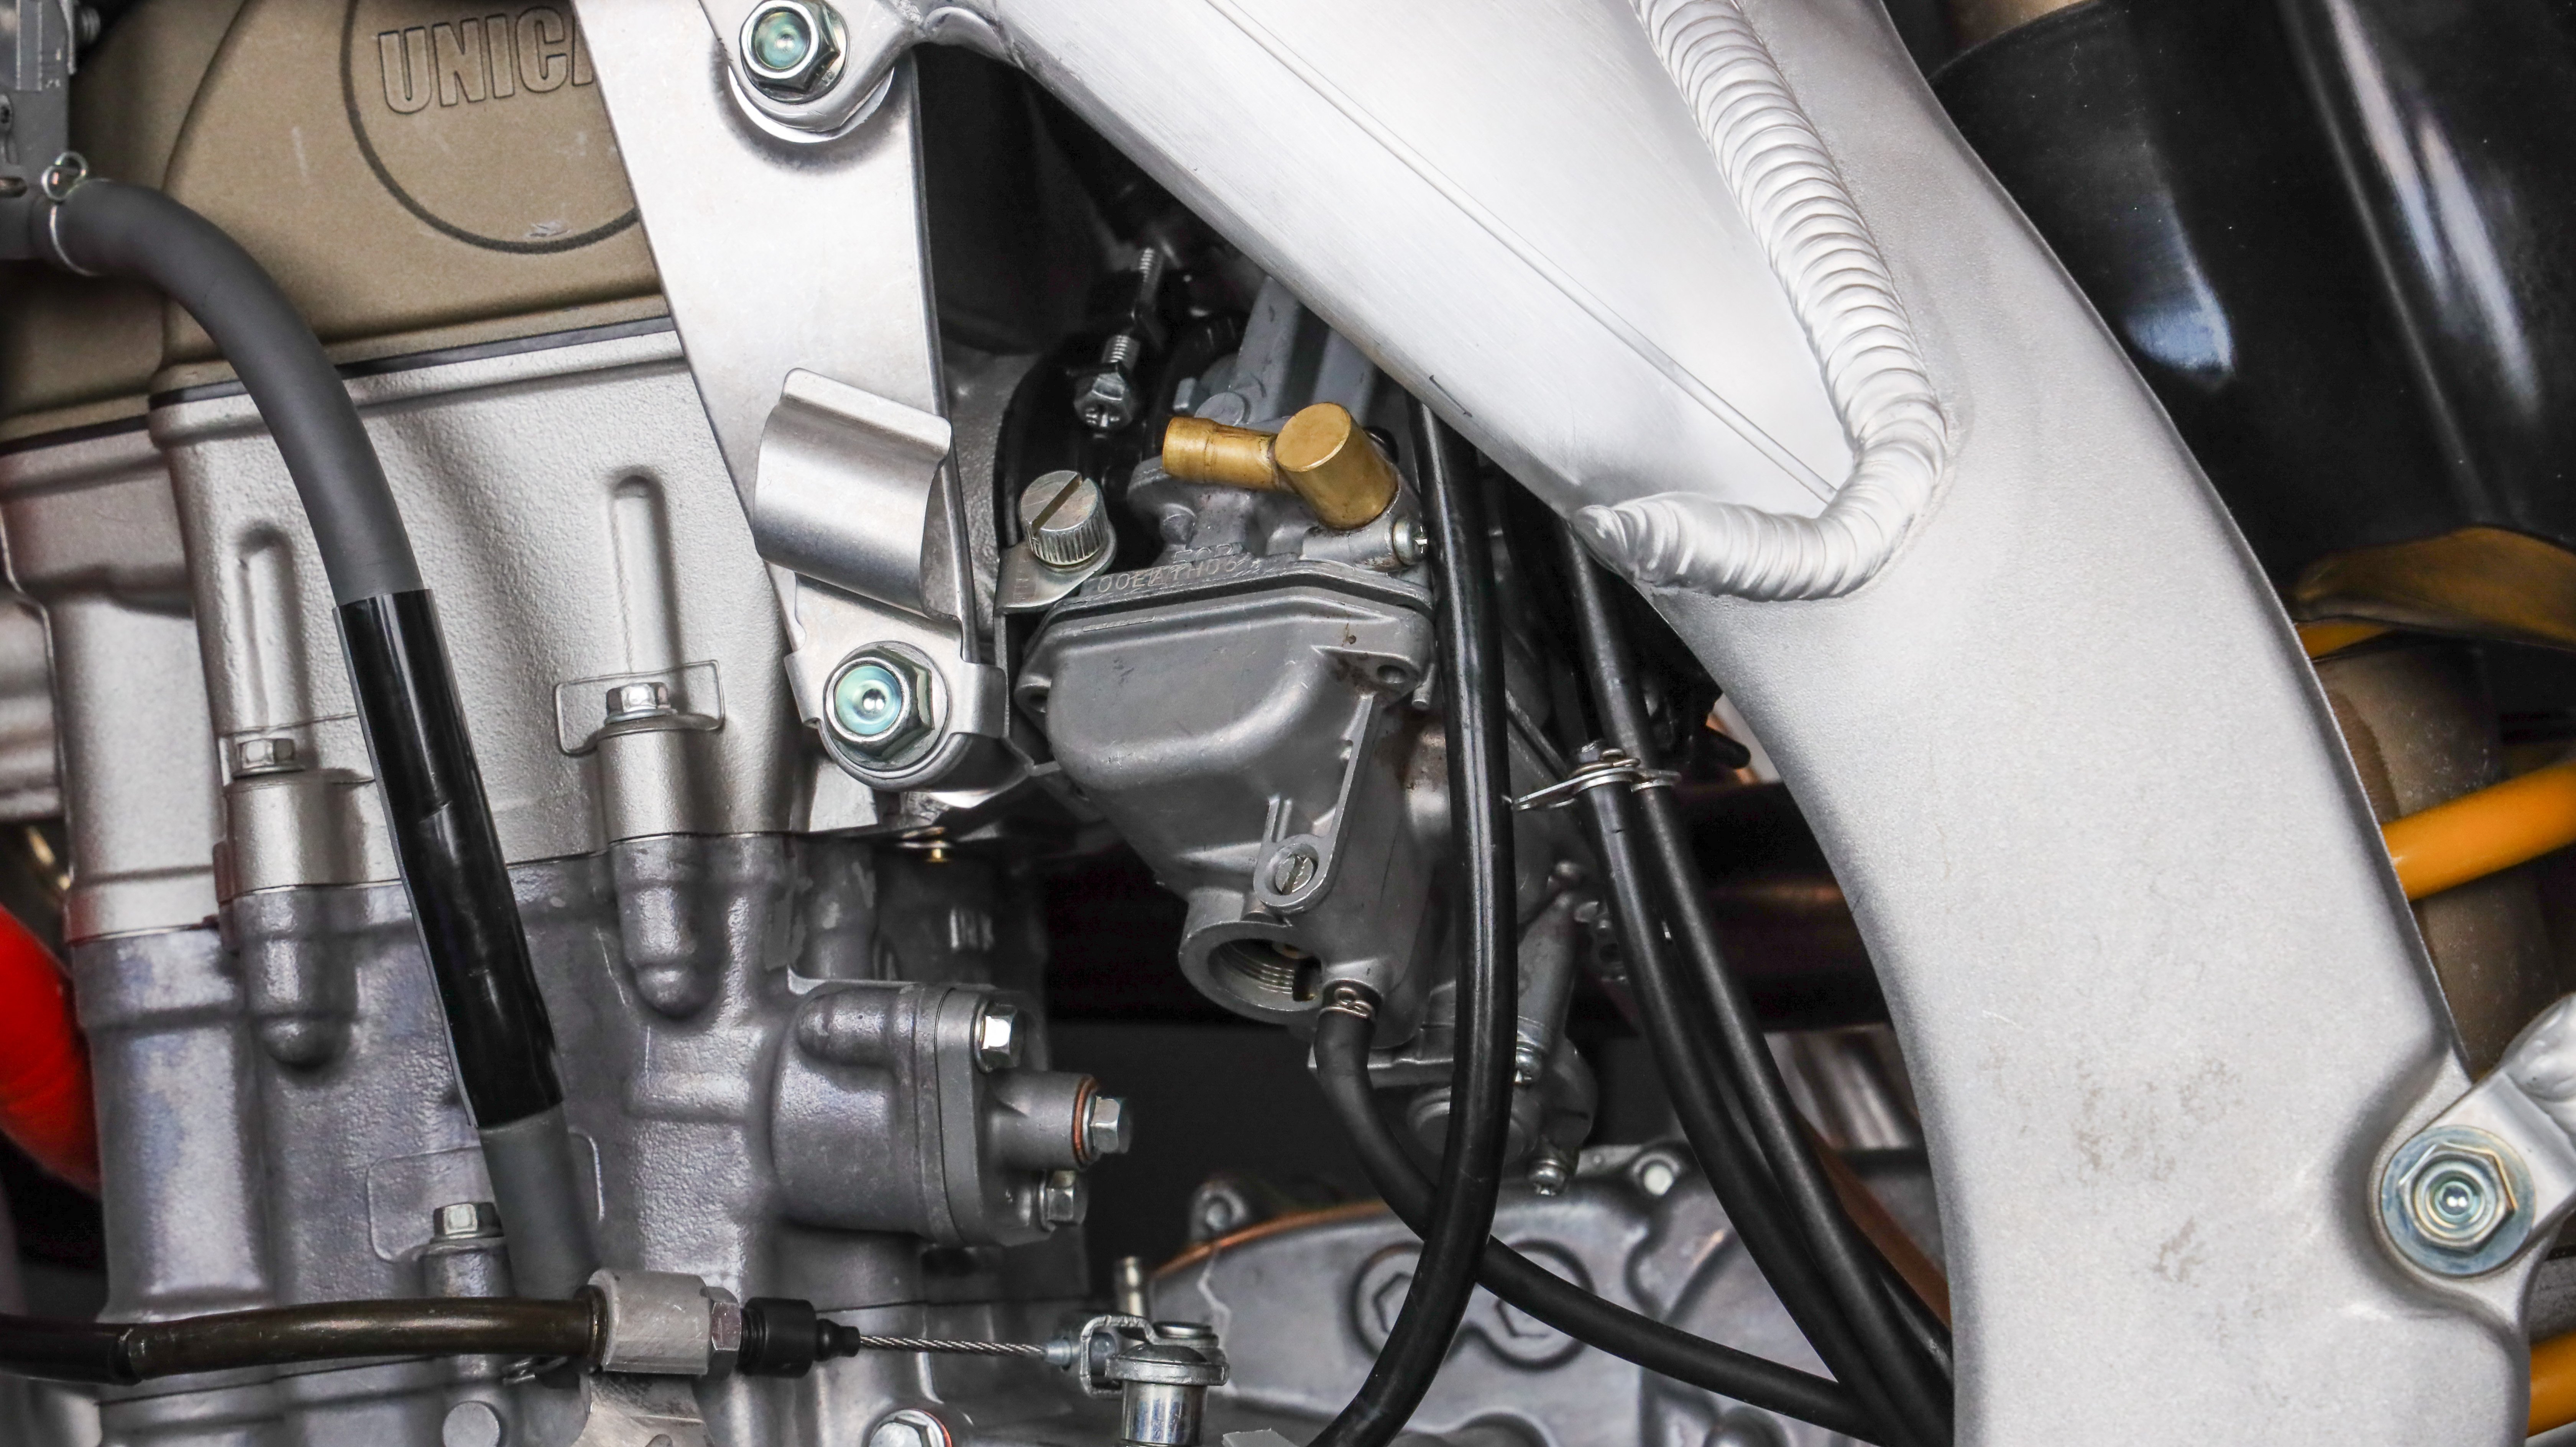
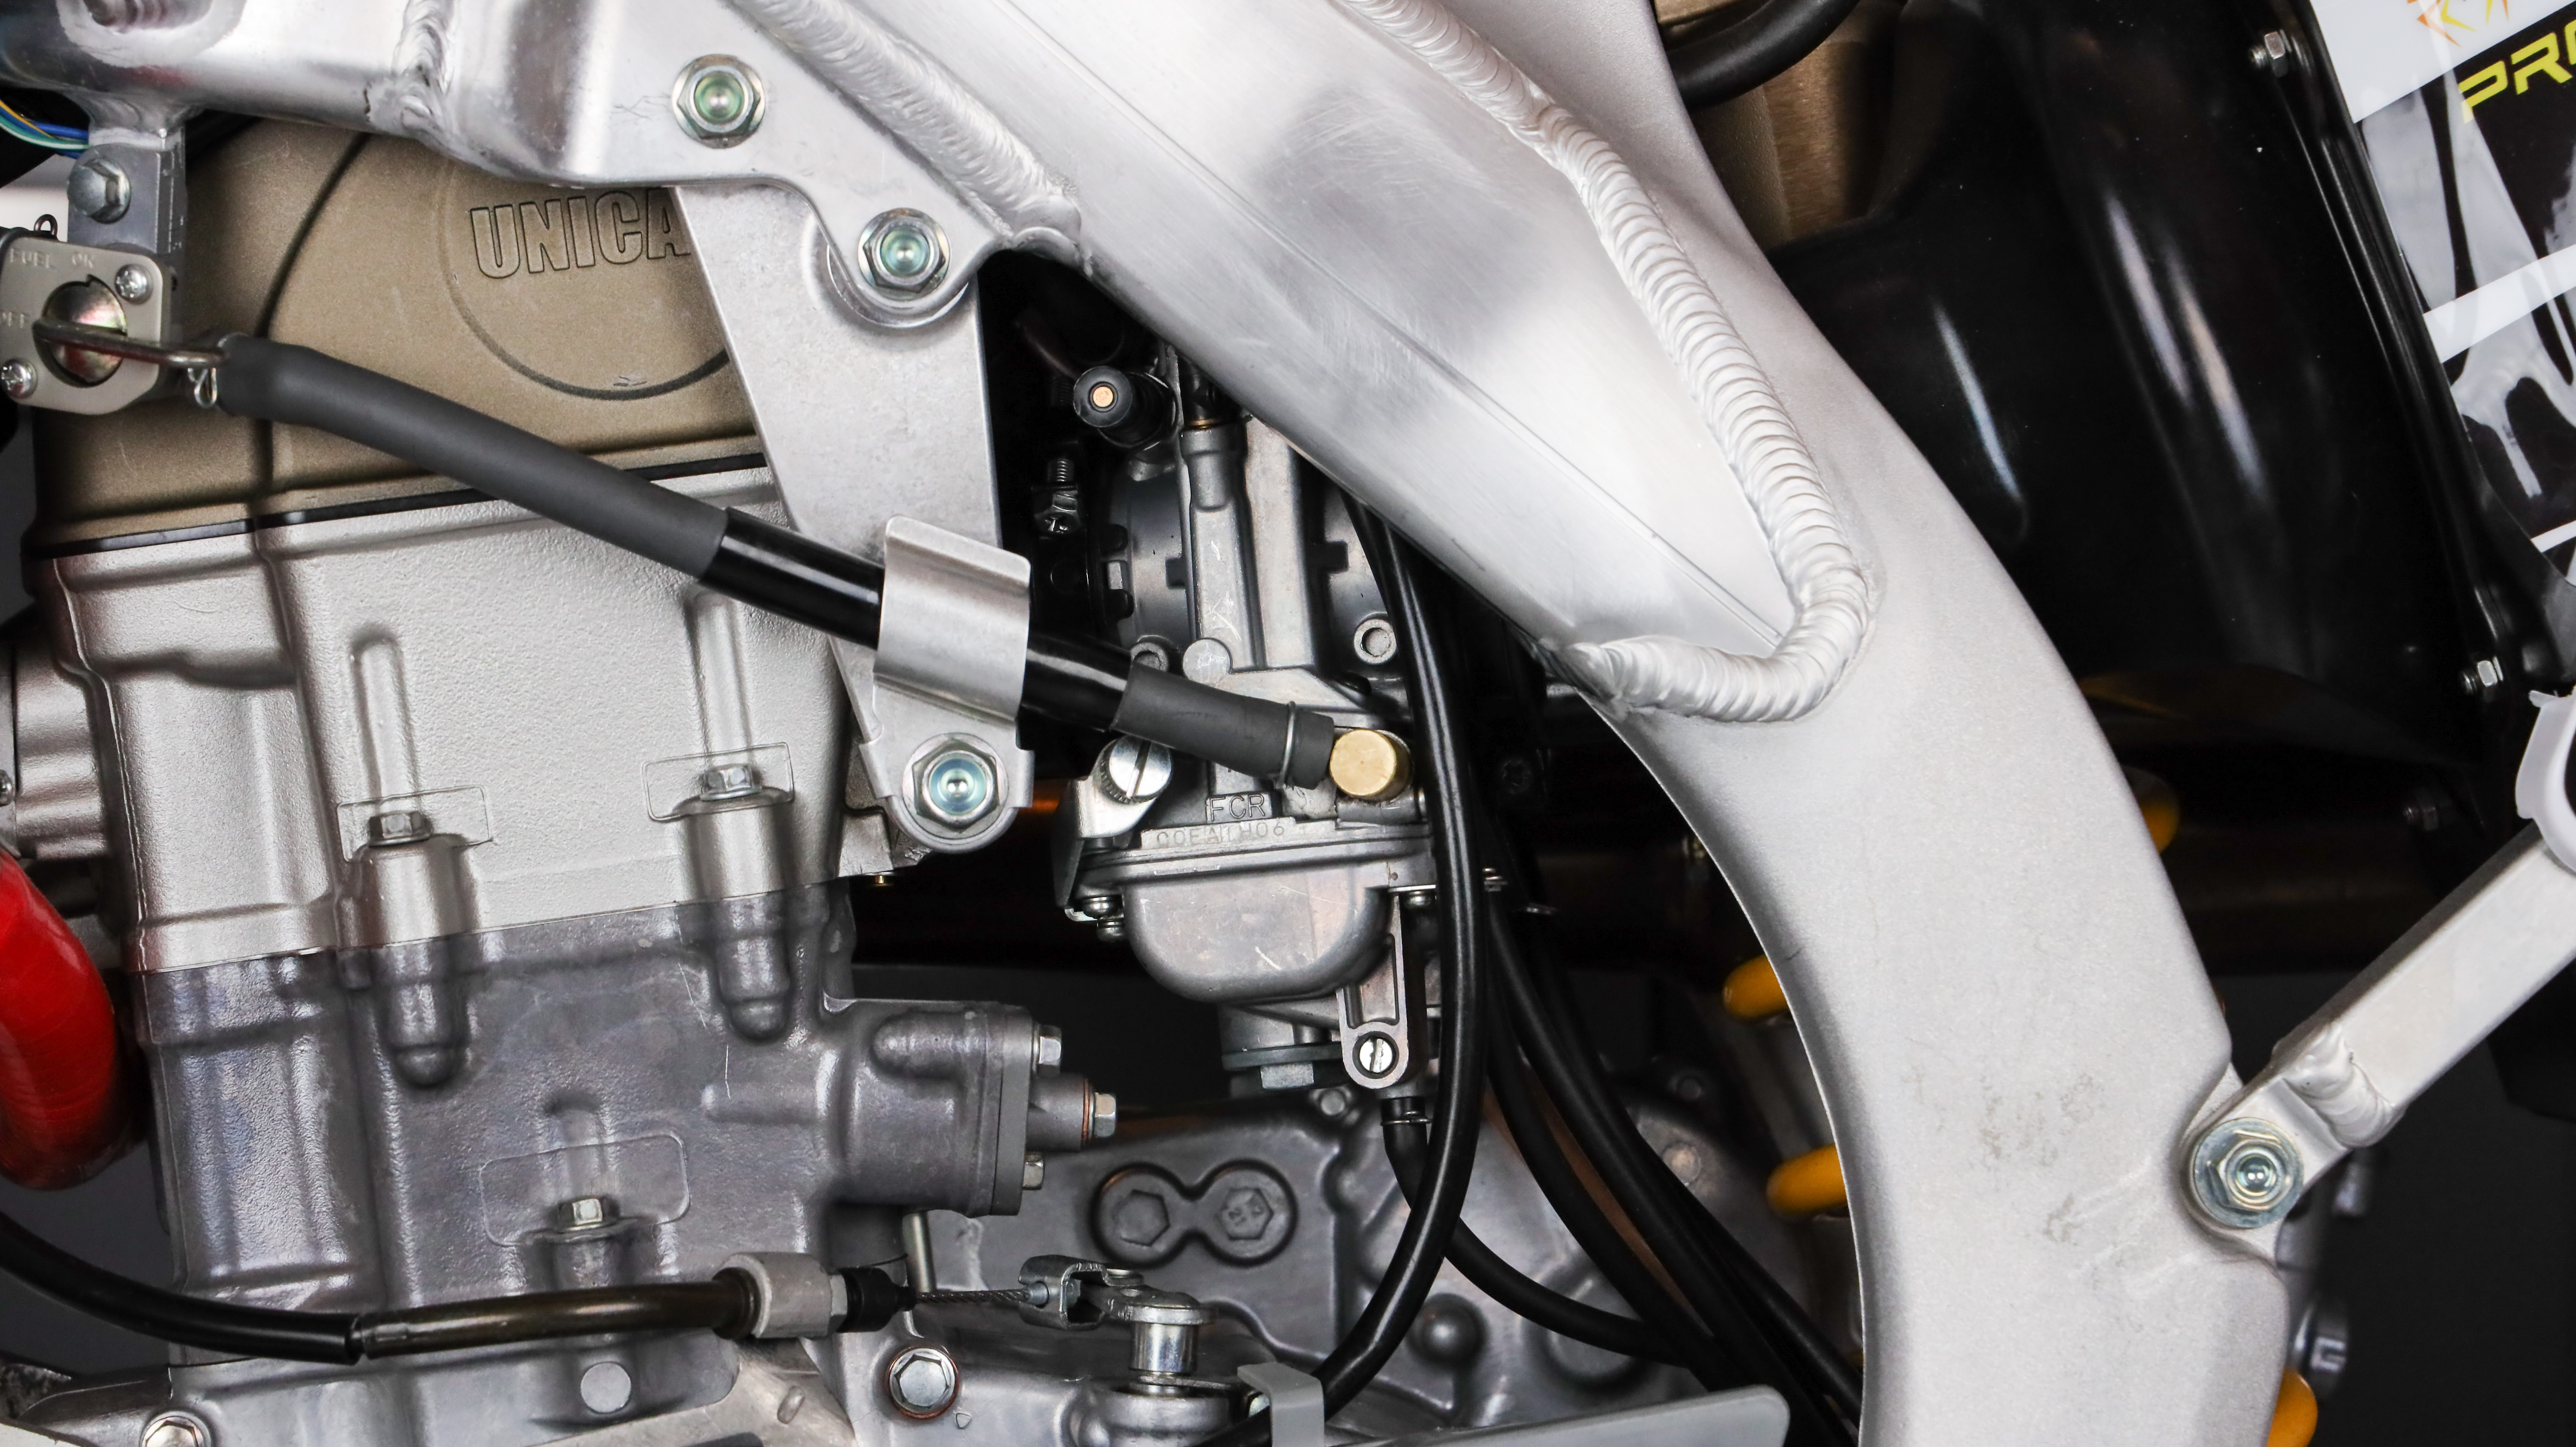
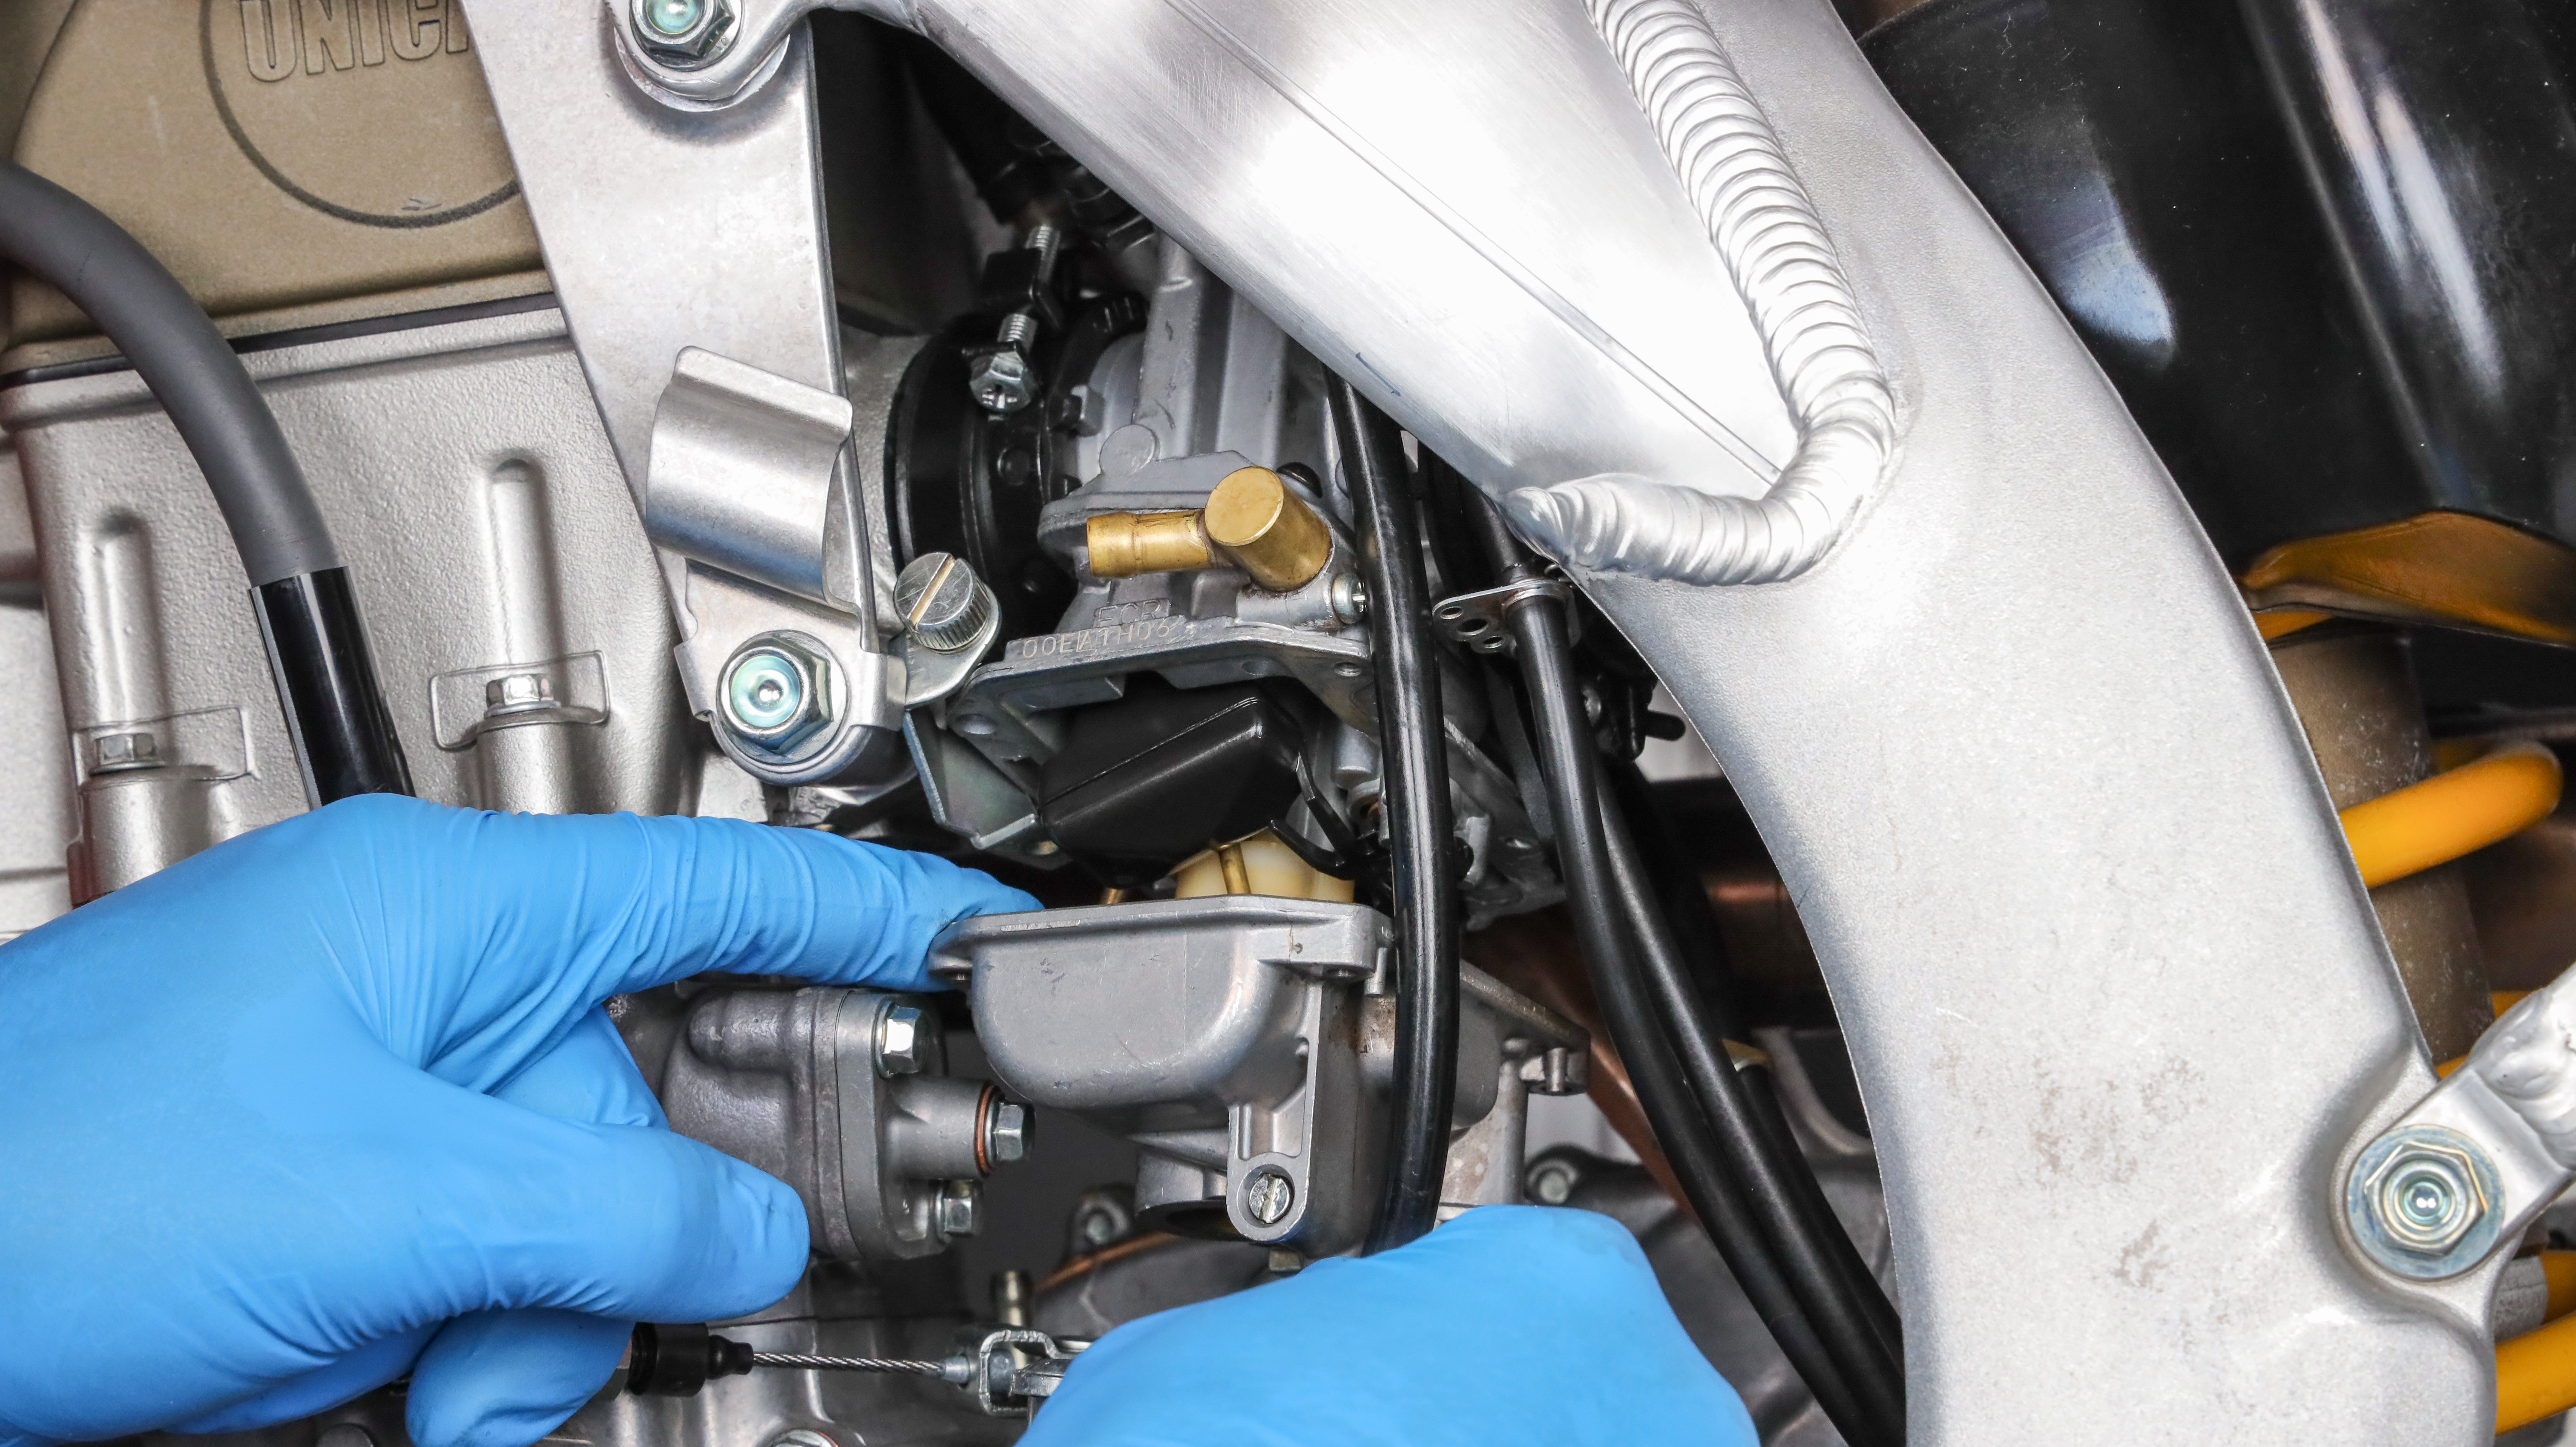
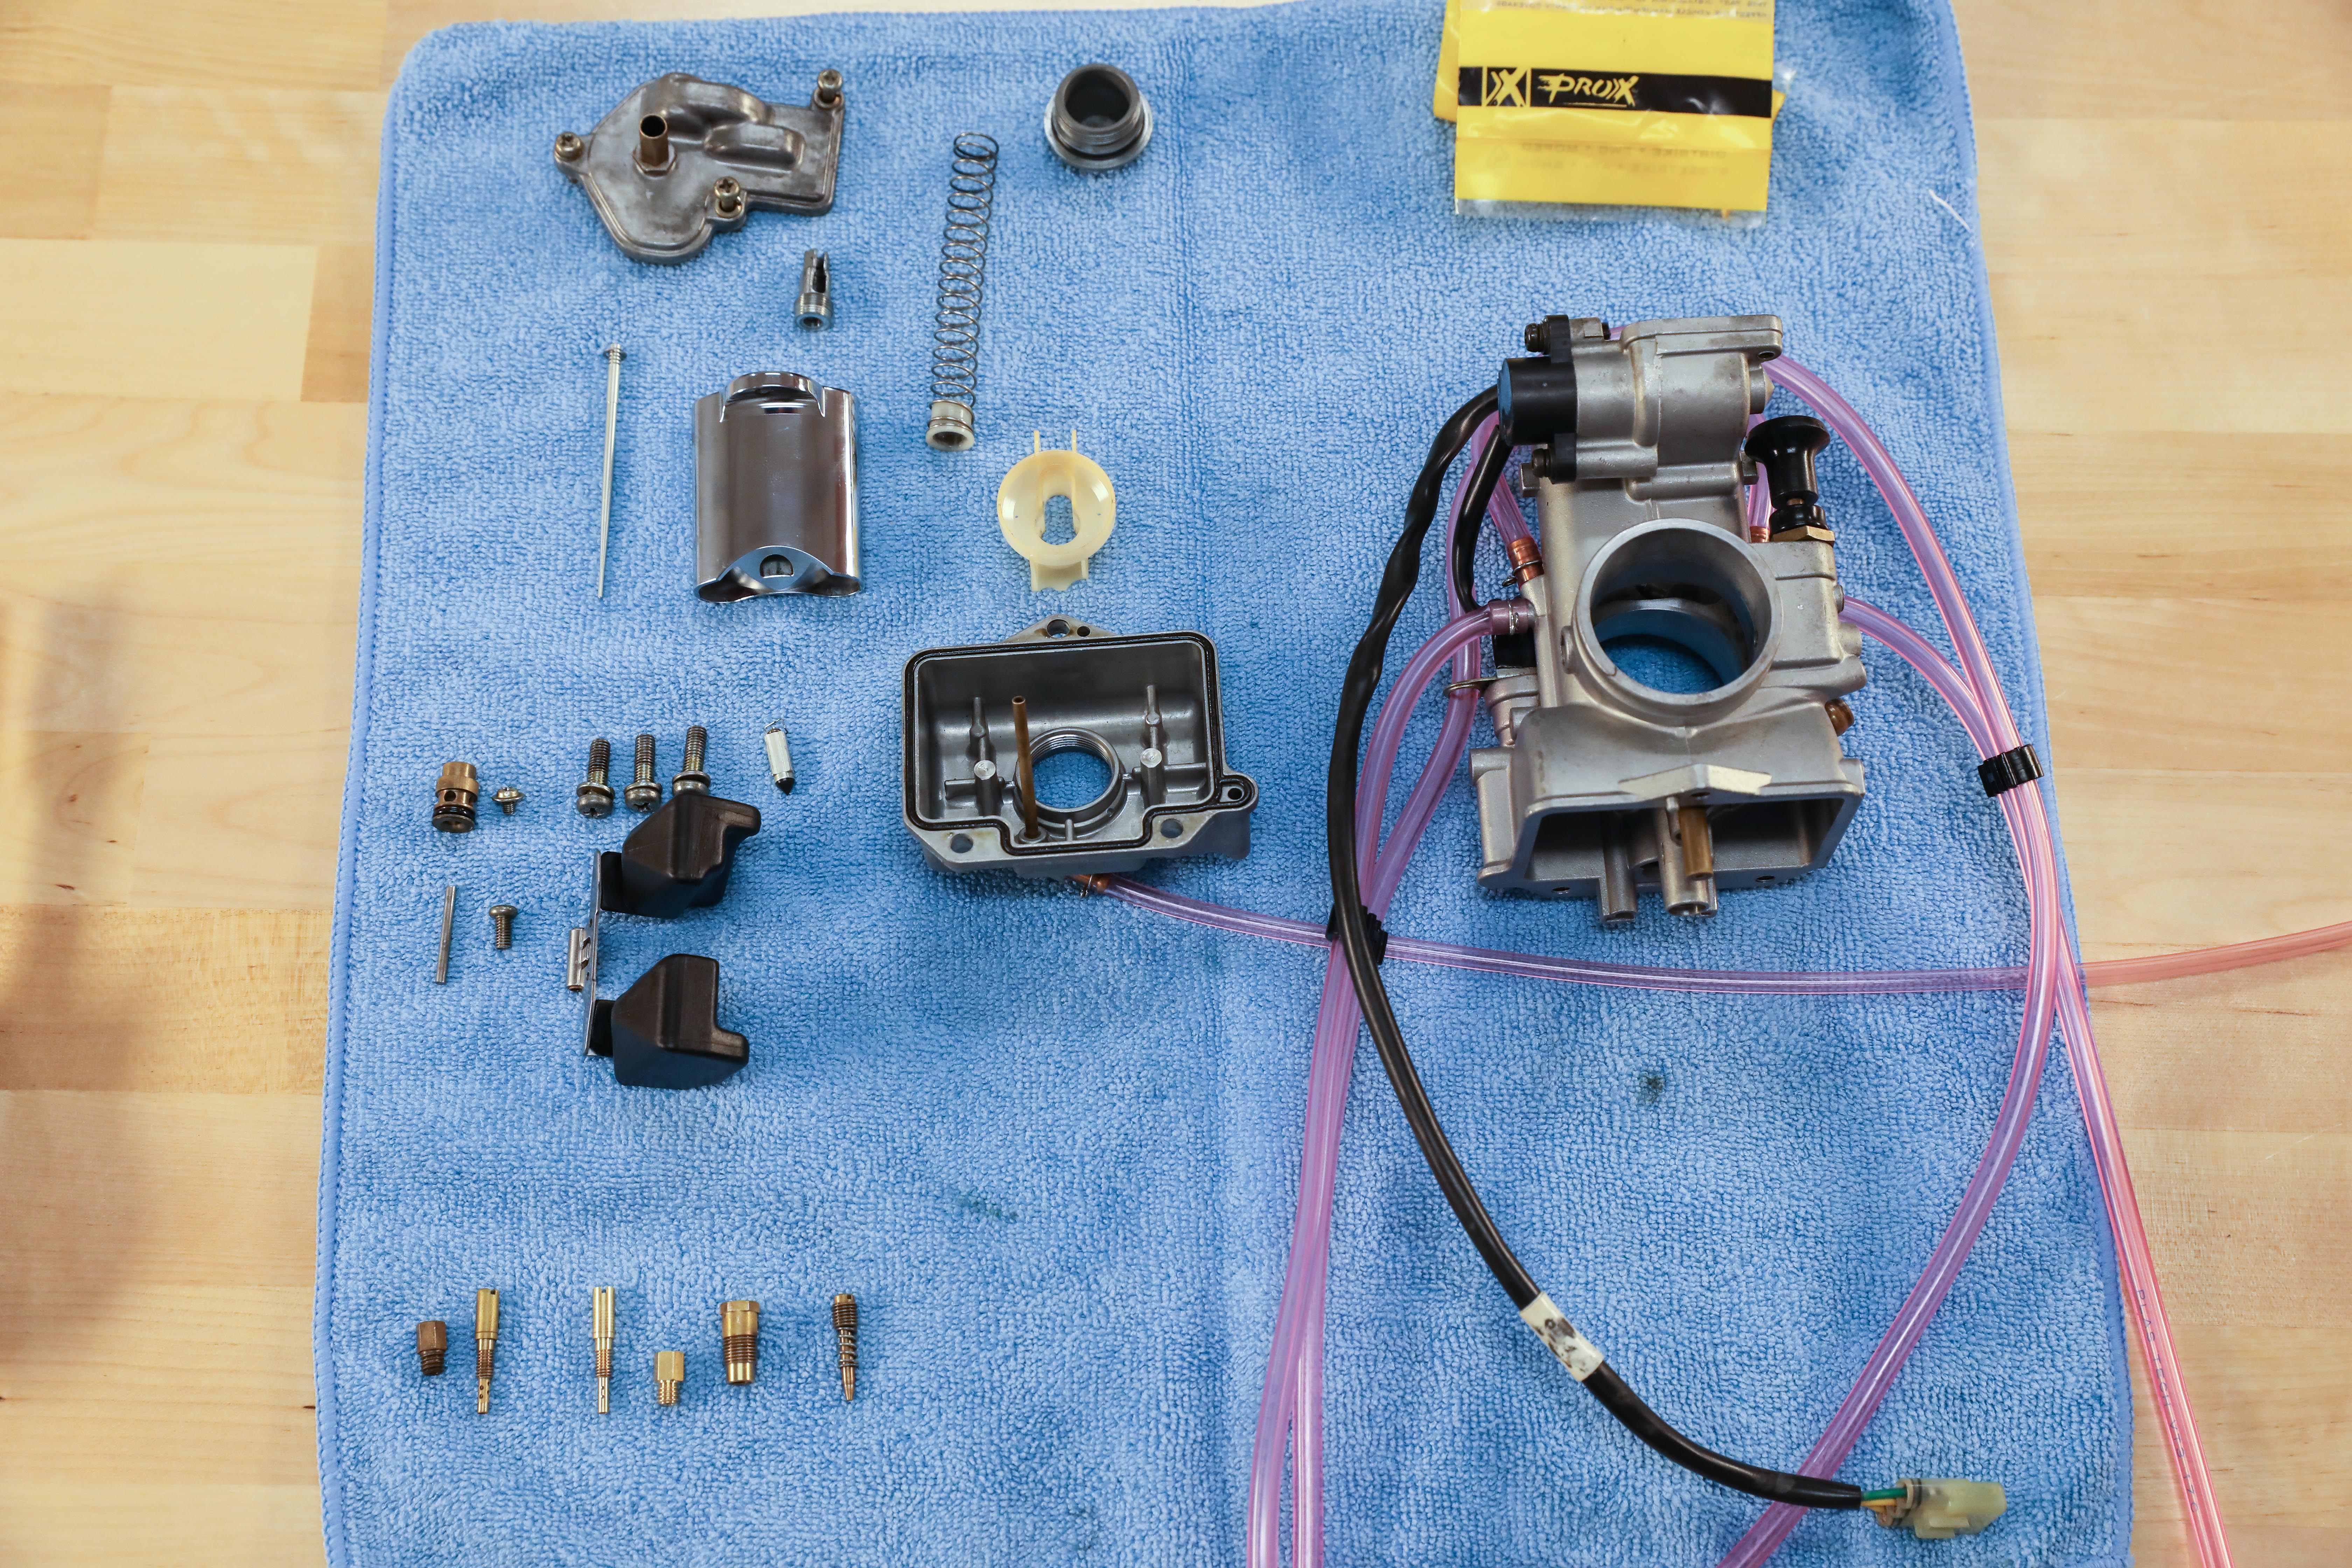
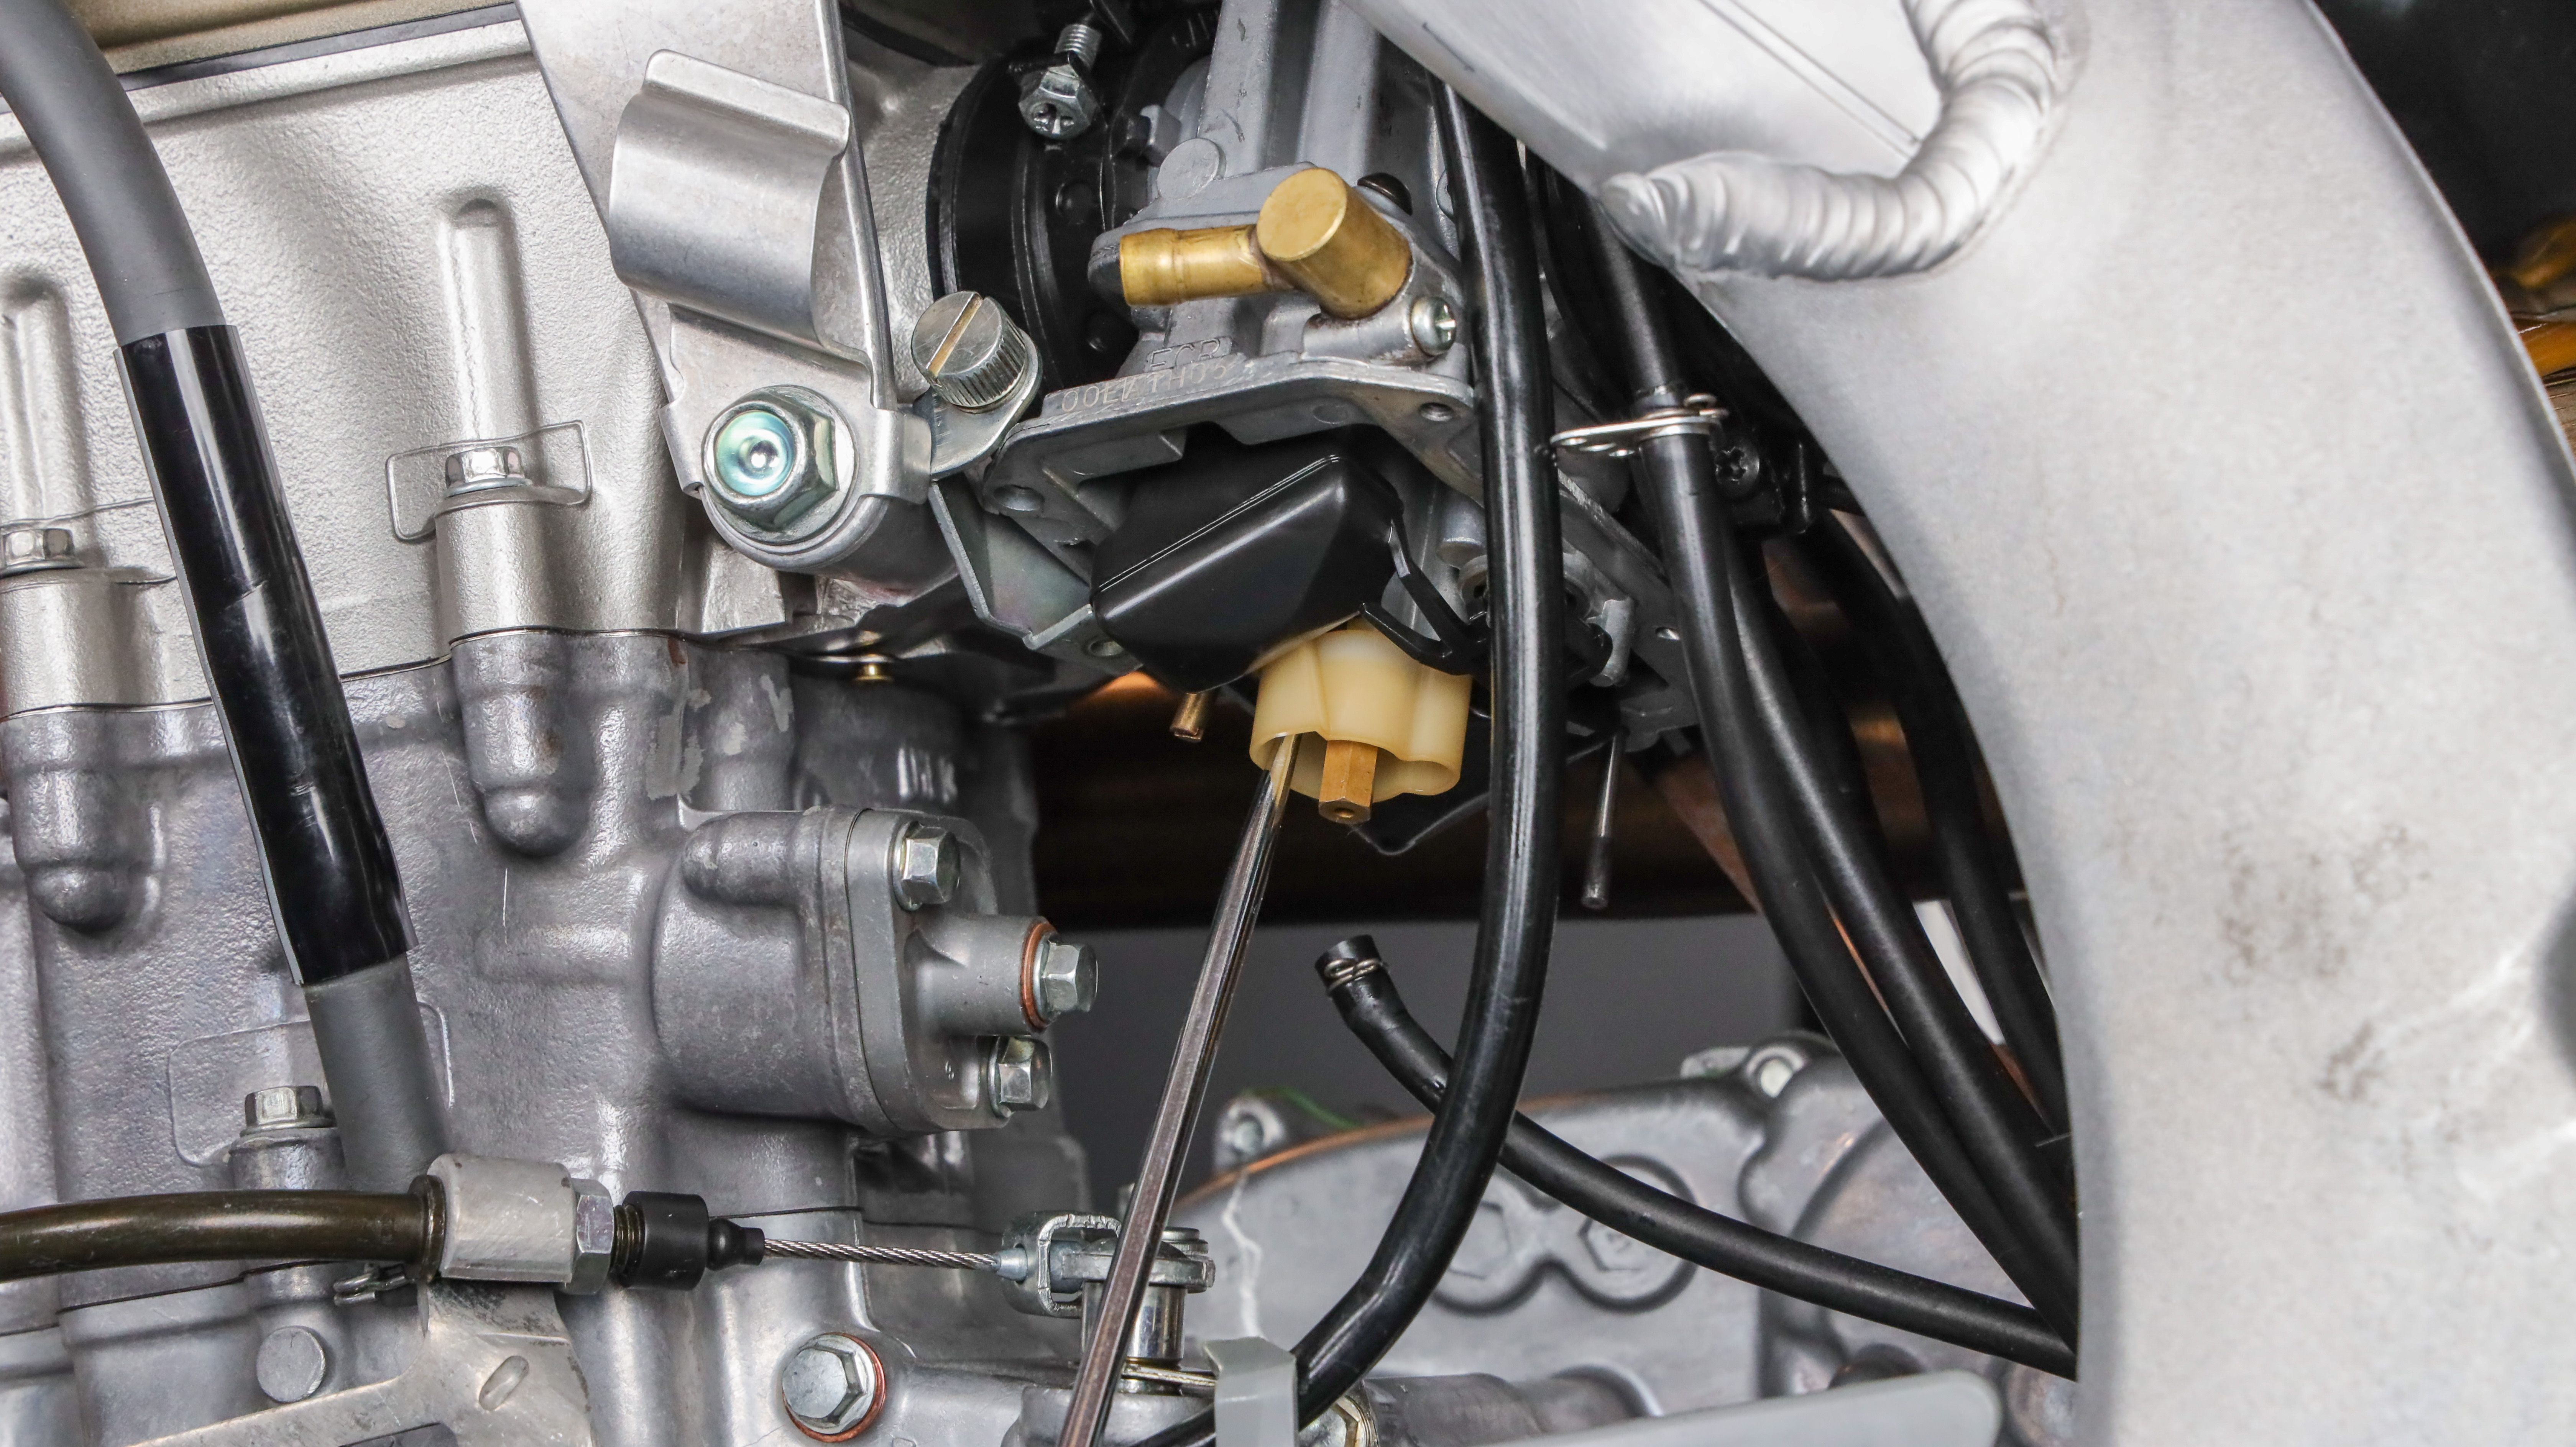
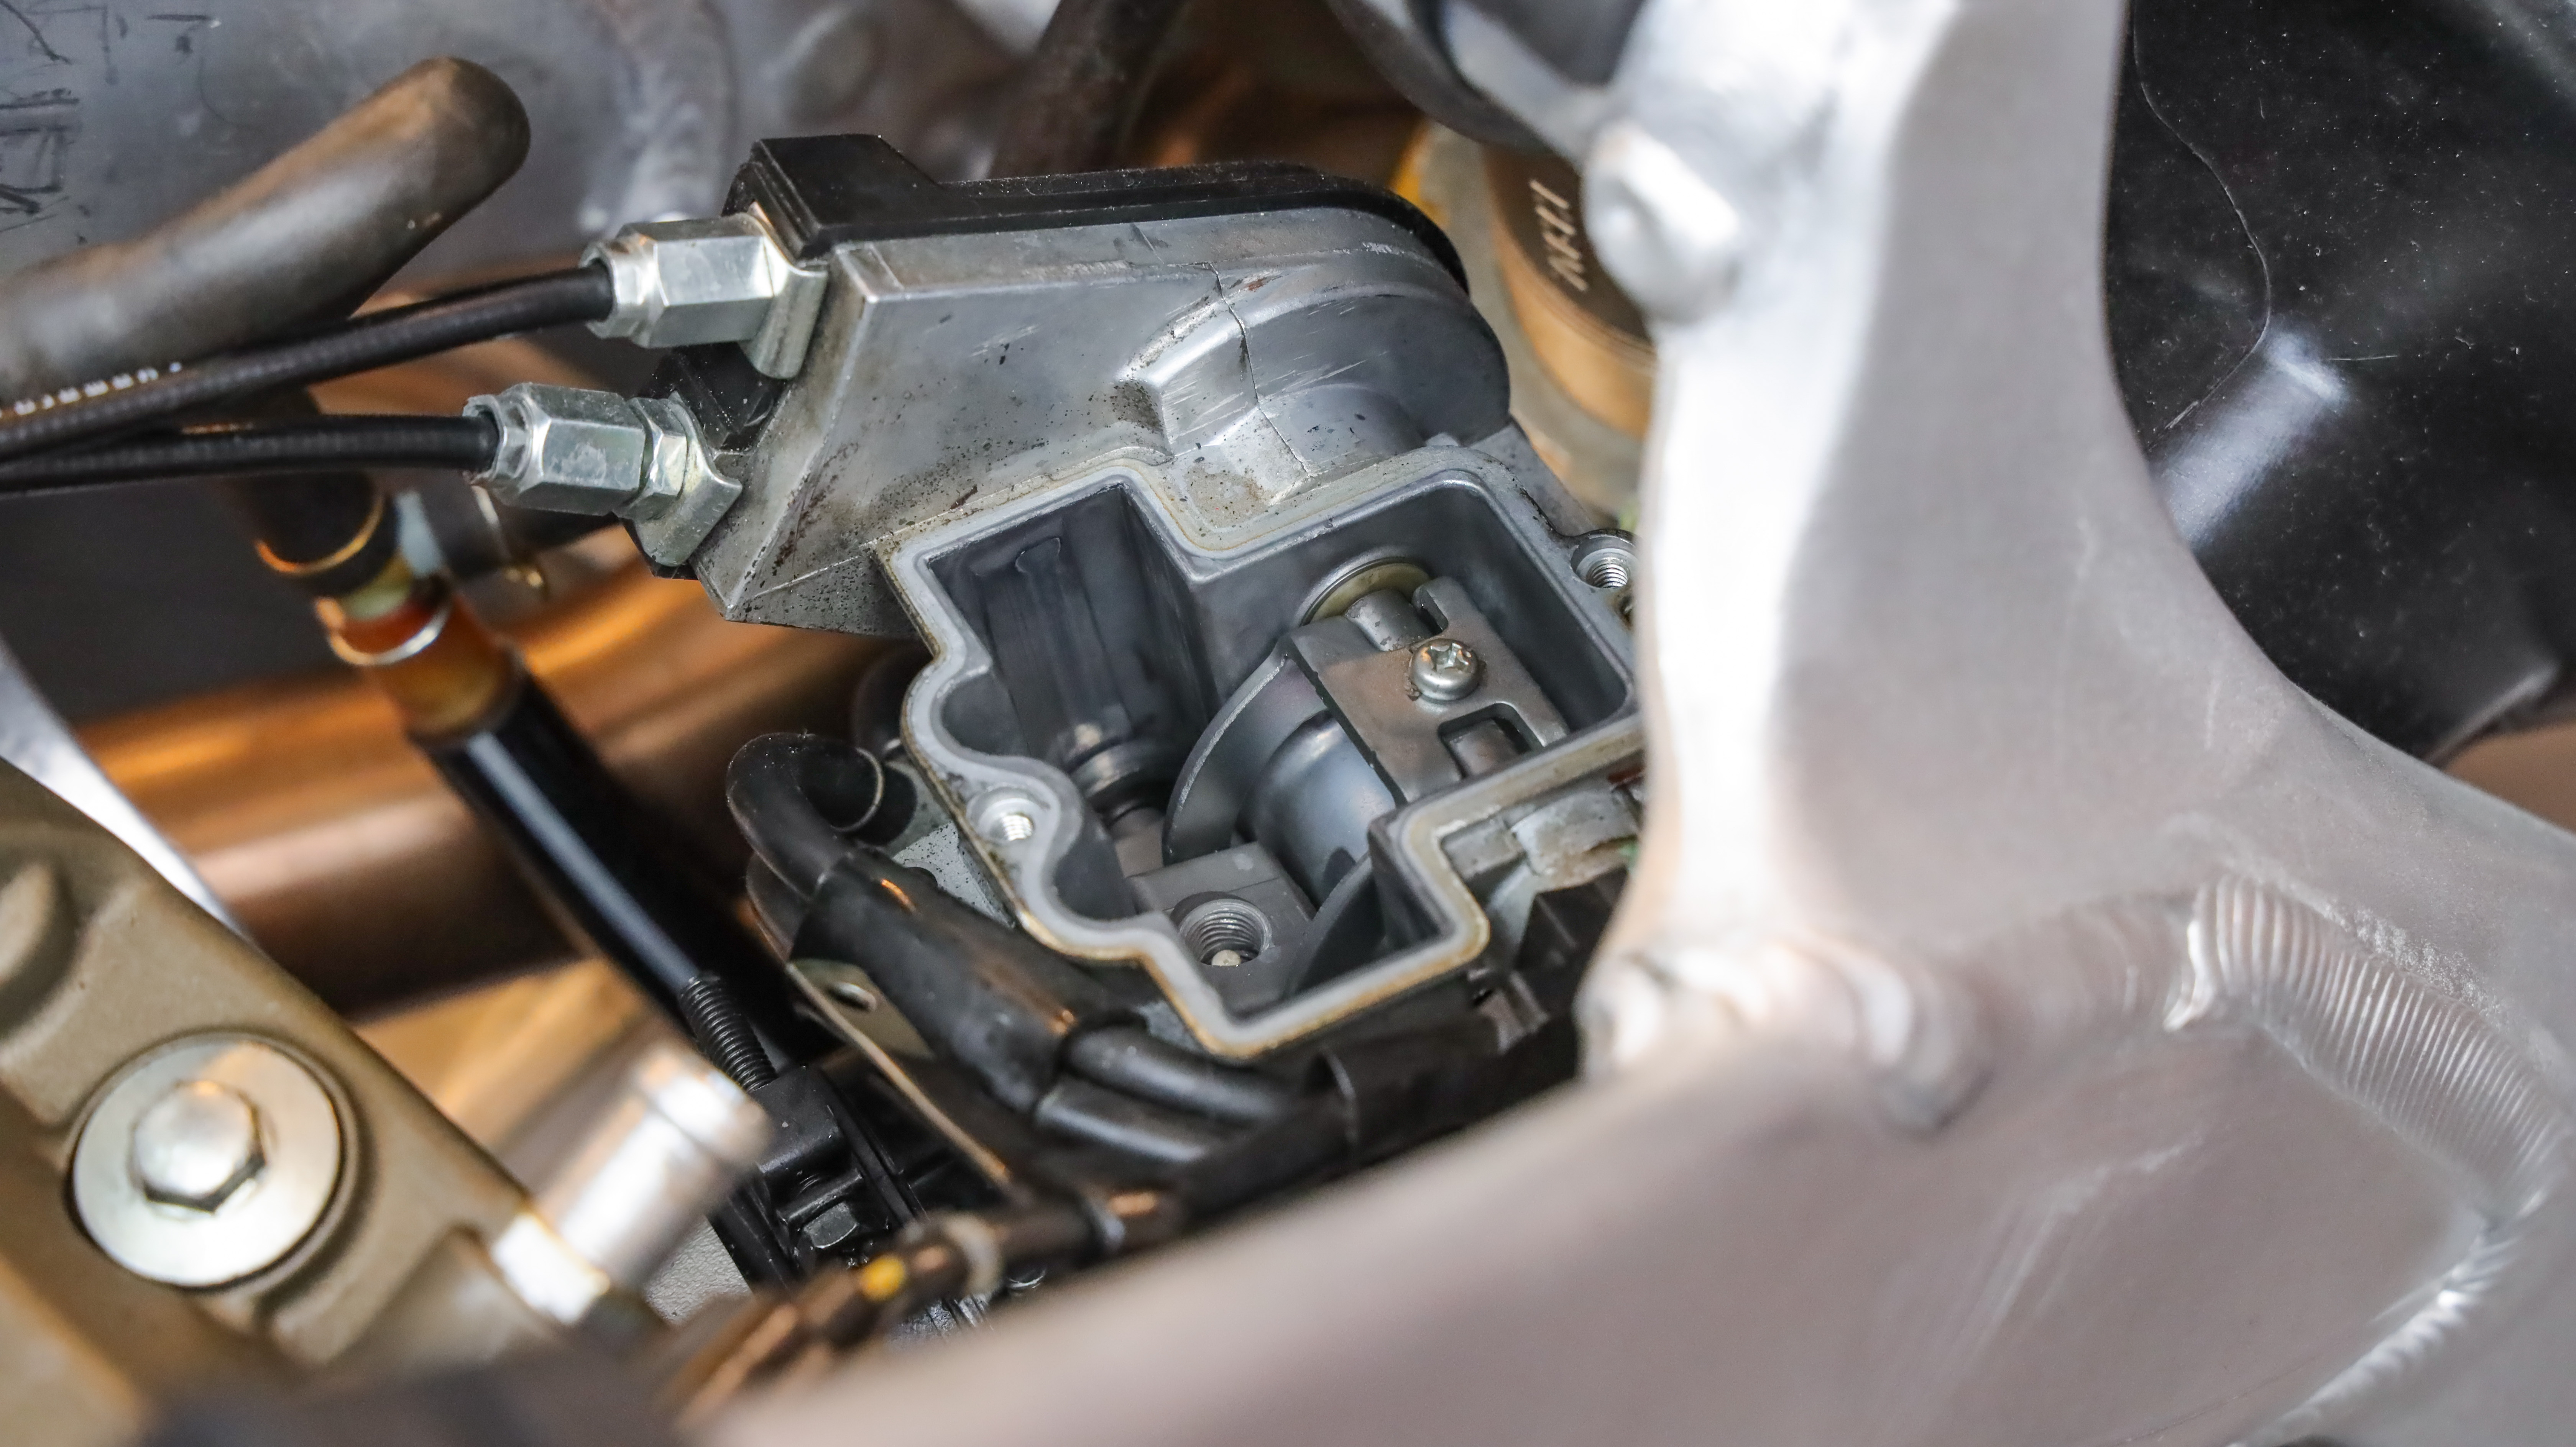
The layout of your machine will greatly influence how much work is required to make jetting changes, however, most machines are designed so that the carburetor jets can be changed without completely removing the carburetor. For specific information on how to service your carburetor to make jetting adjustments, refer to your machine’s factory service manual. The following information is provided as an overview. To gain access to the slow and main jets, the intake clamps are loosened and the carburetor can be rotated to expose the bottom of the float bowl.
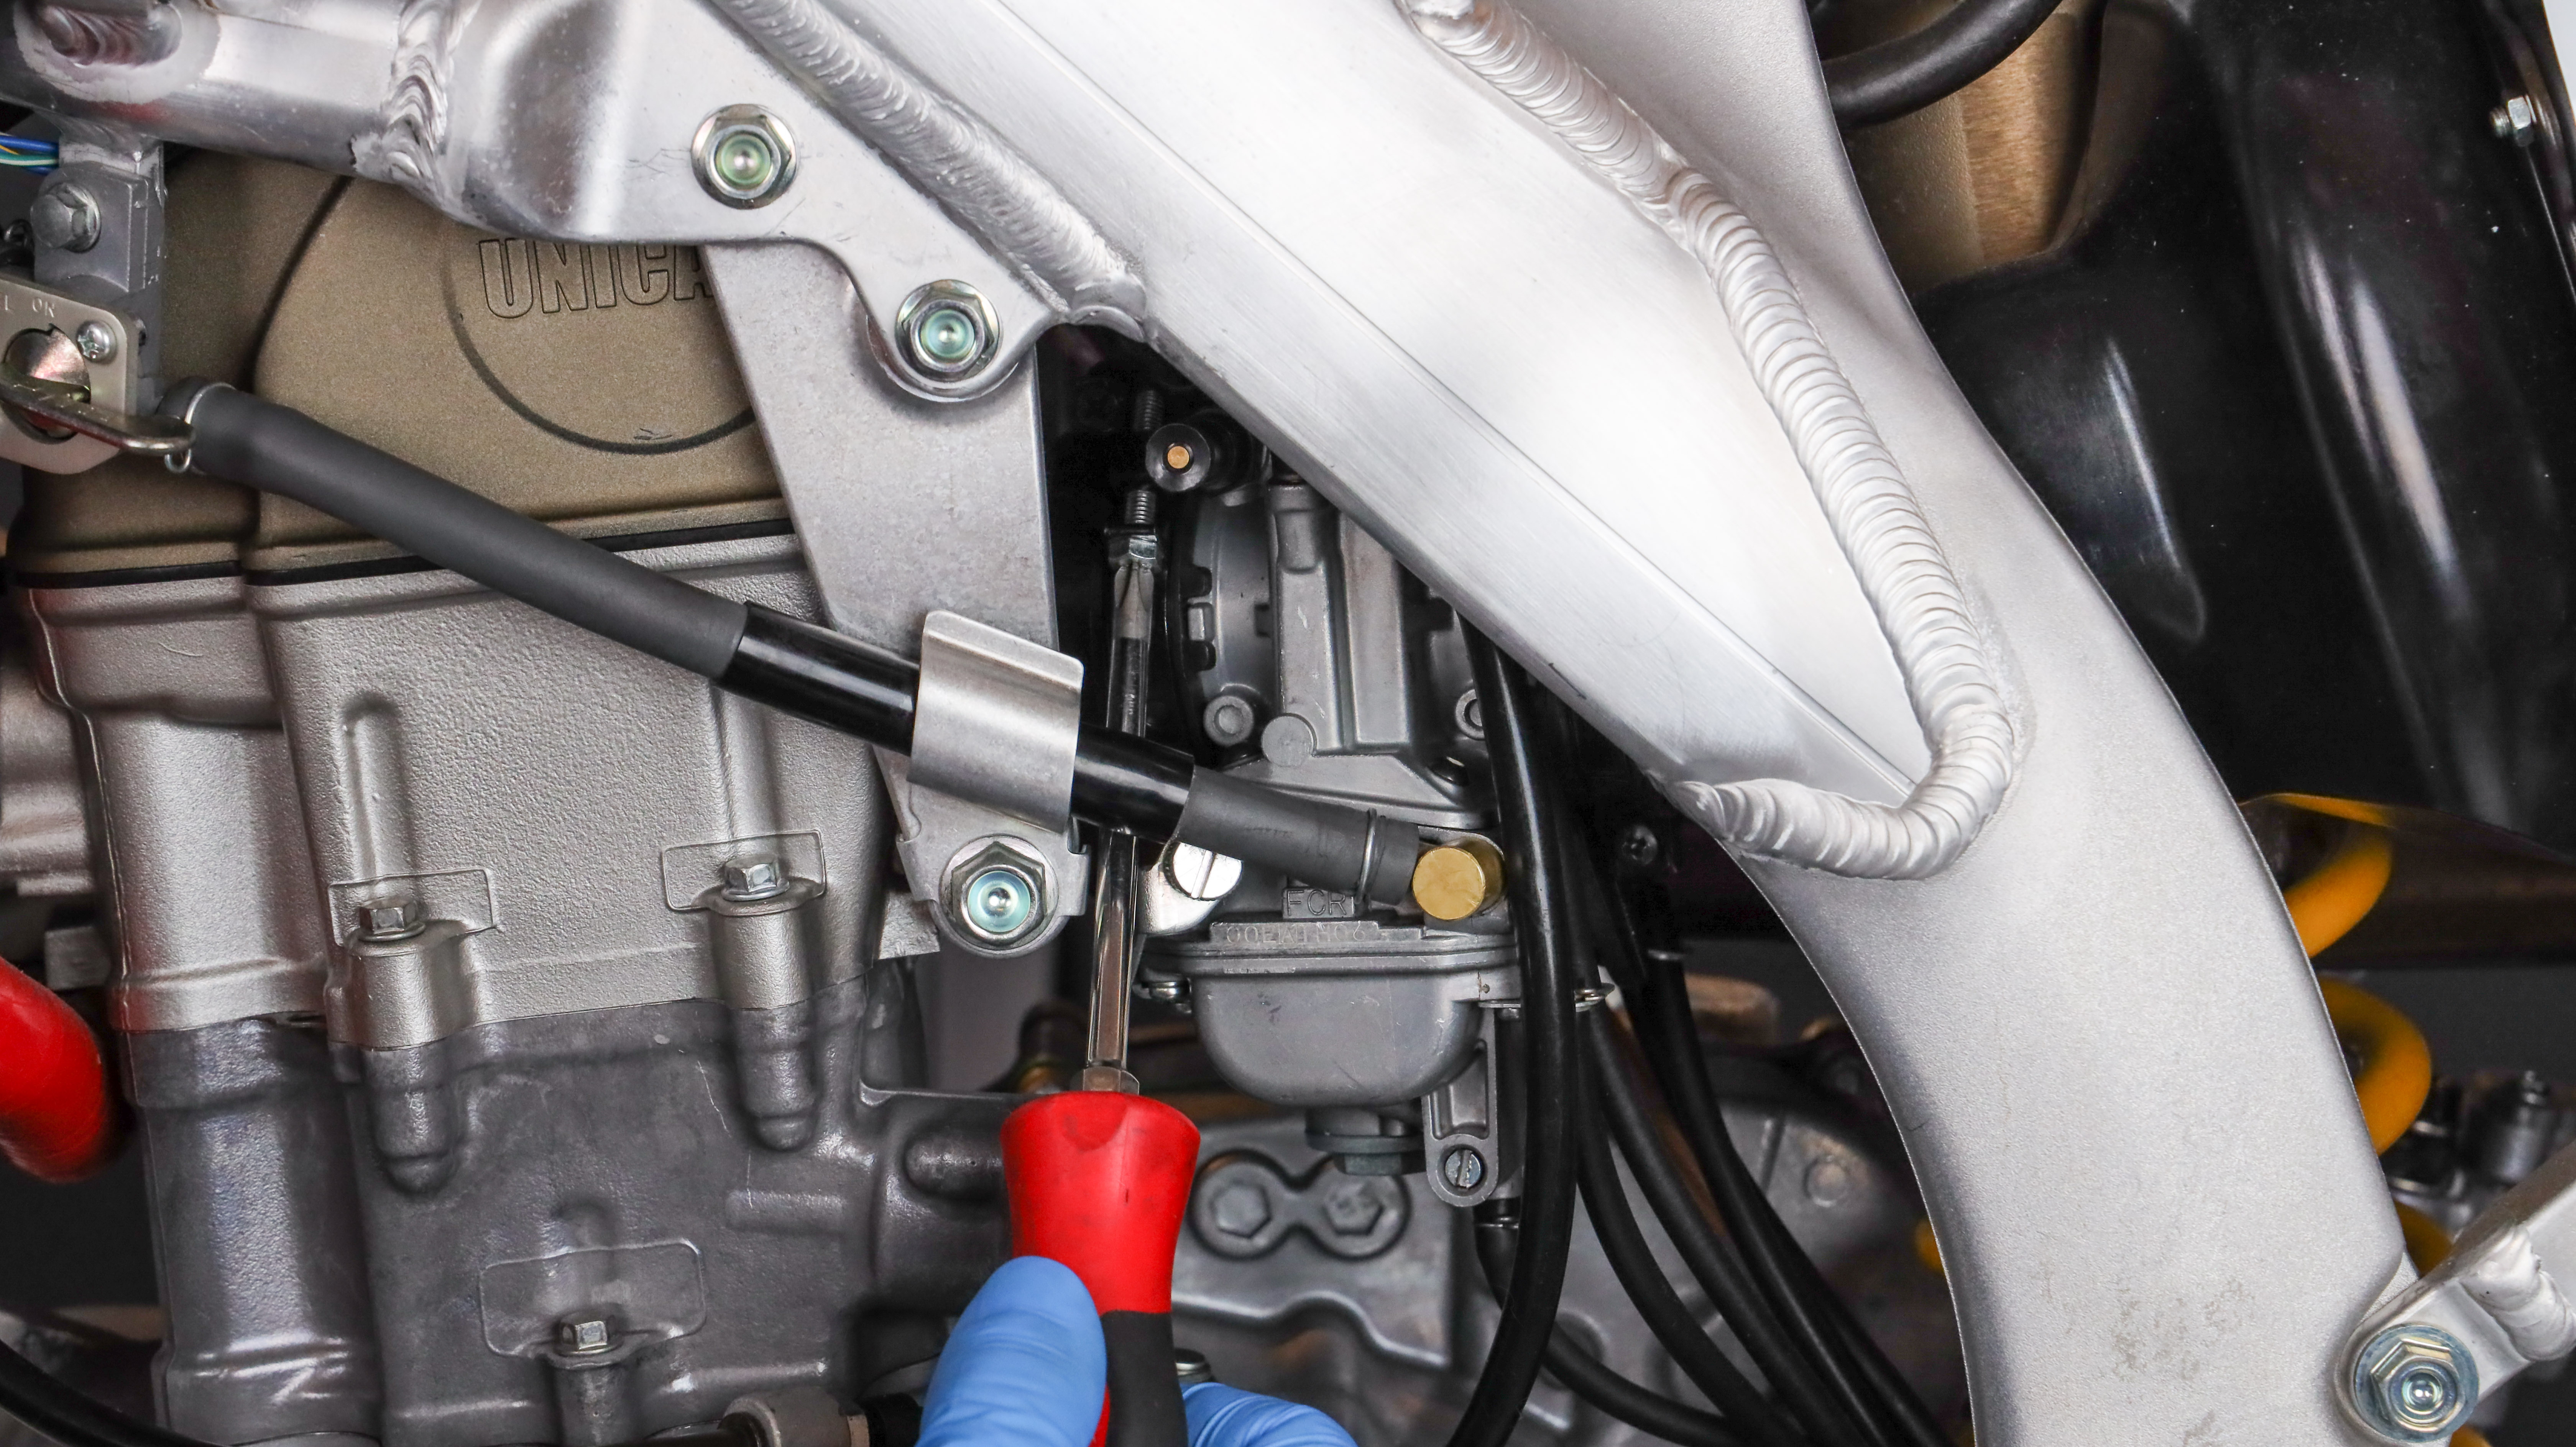
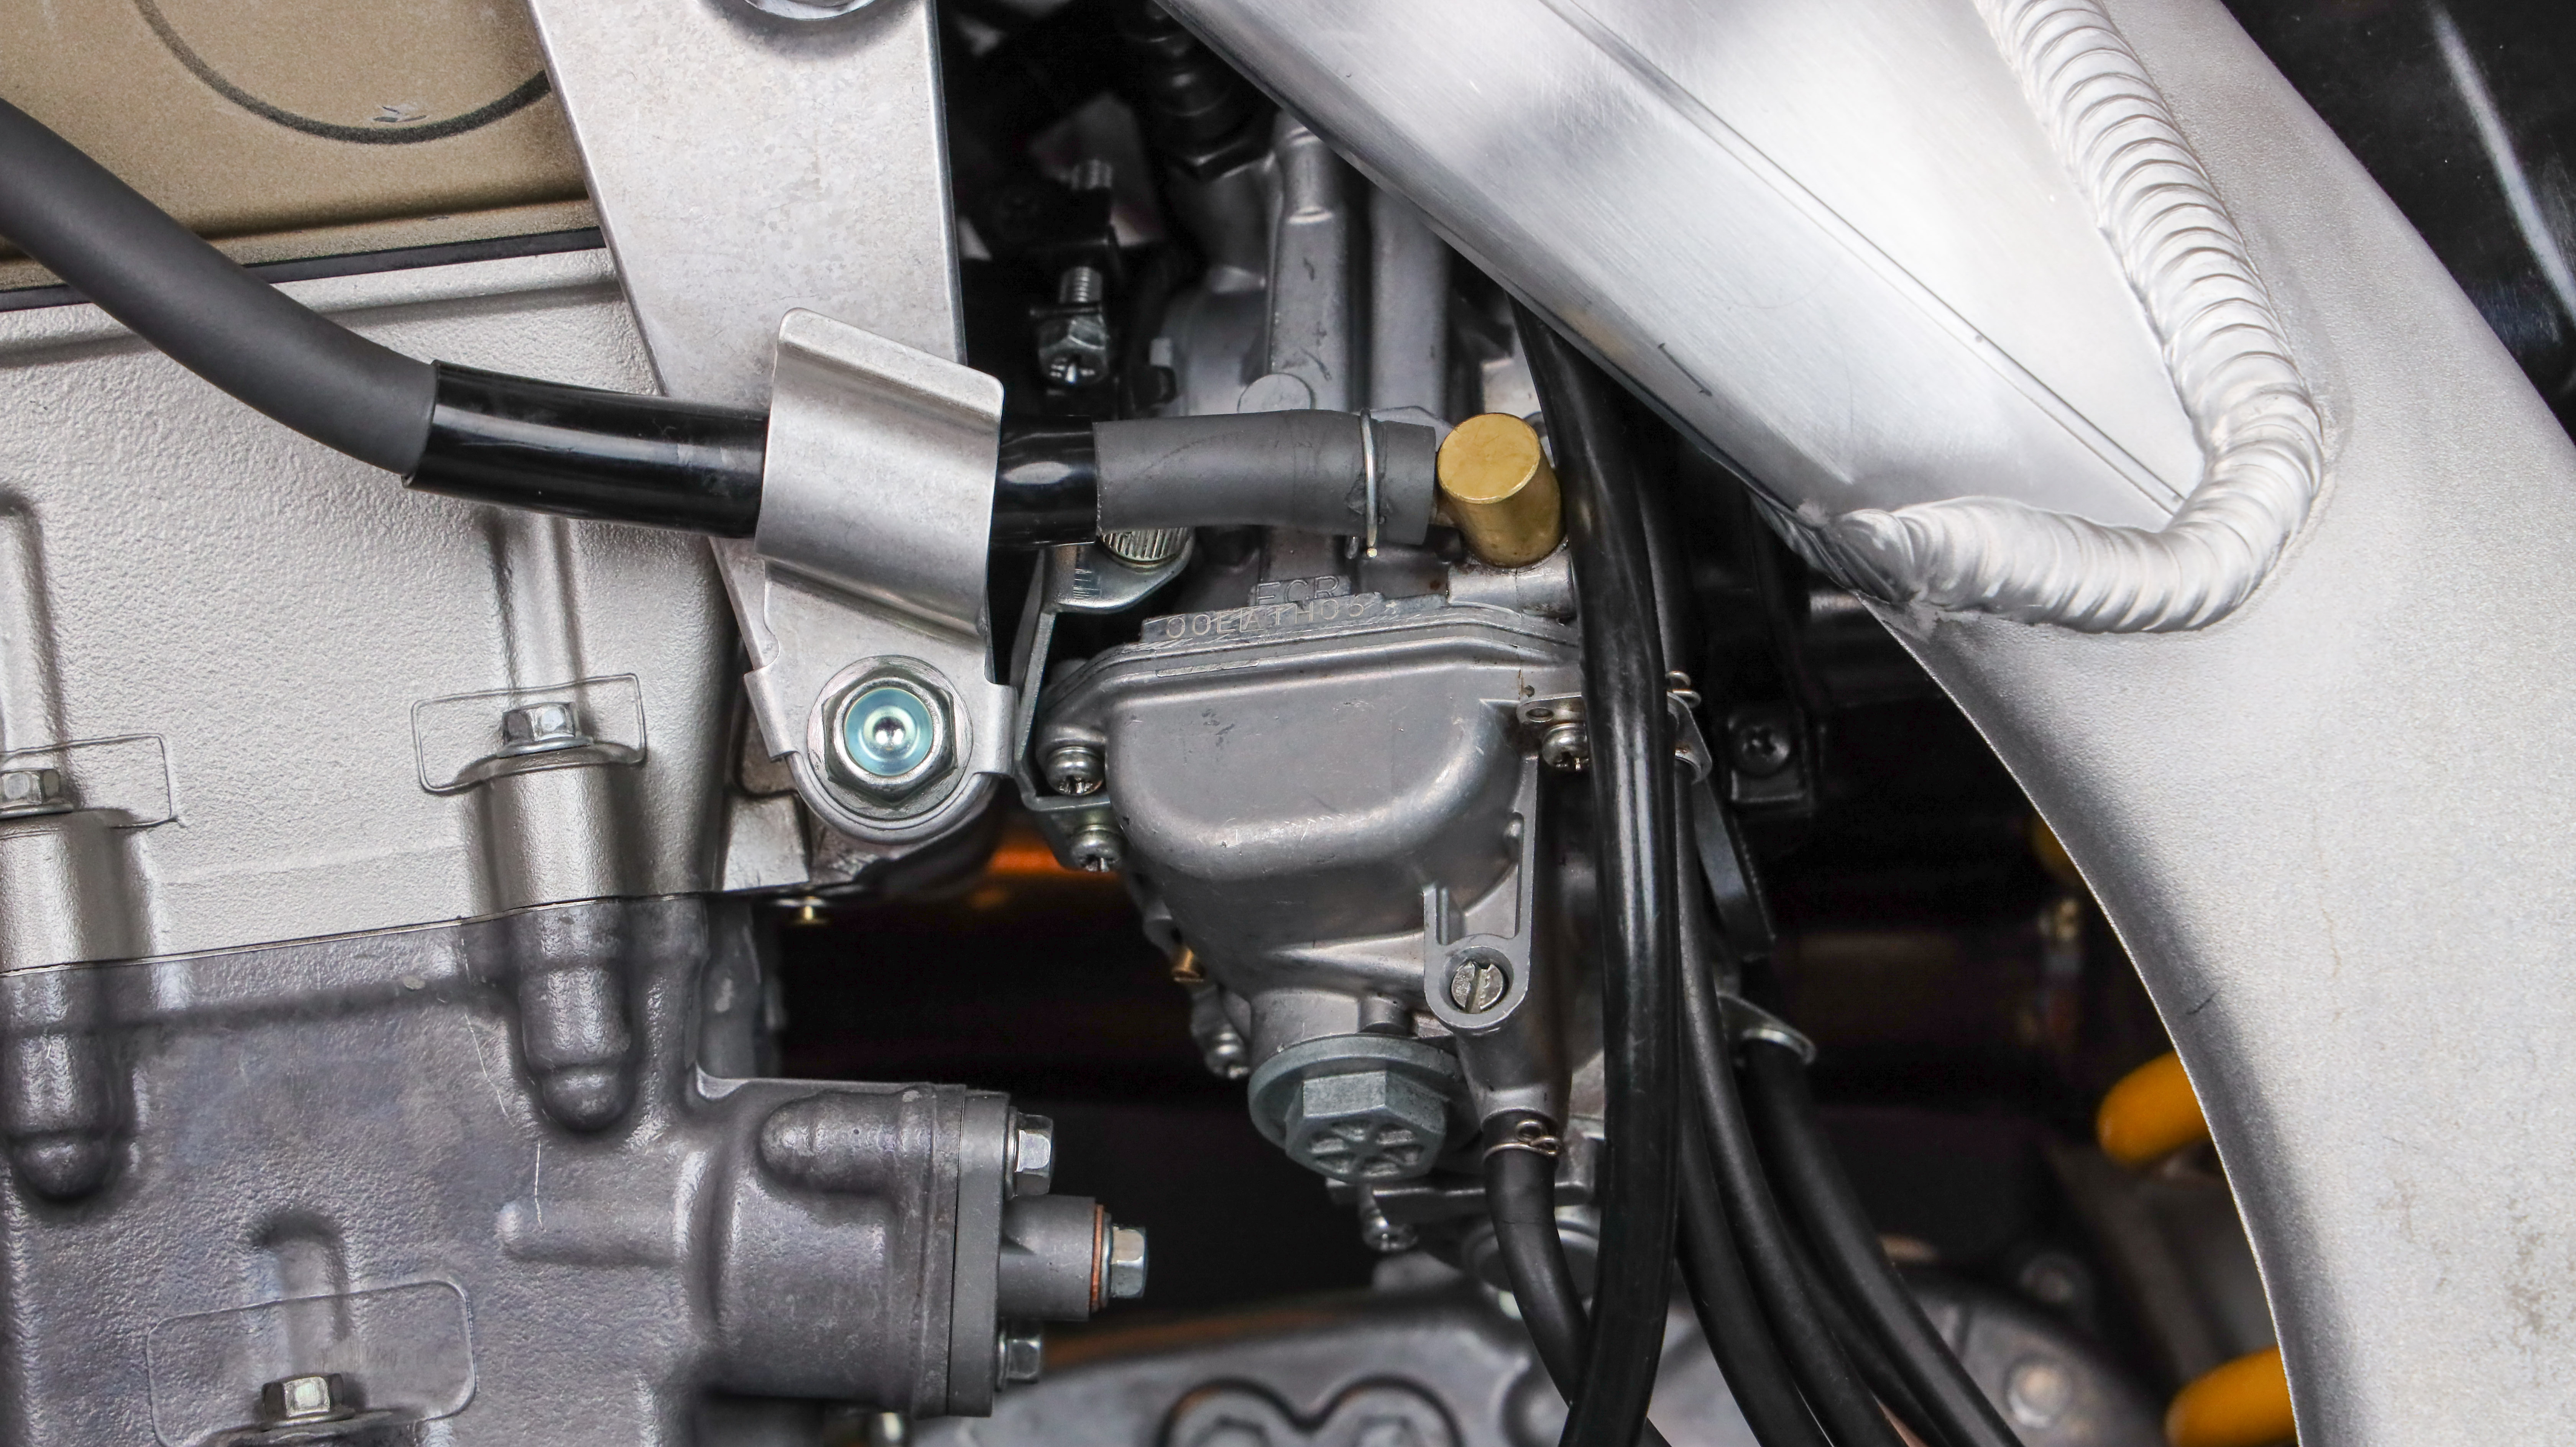
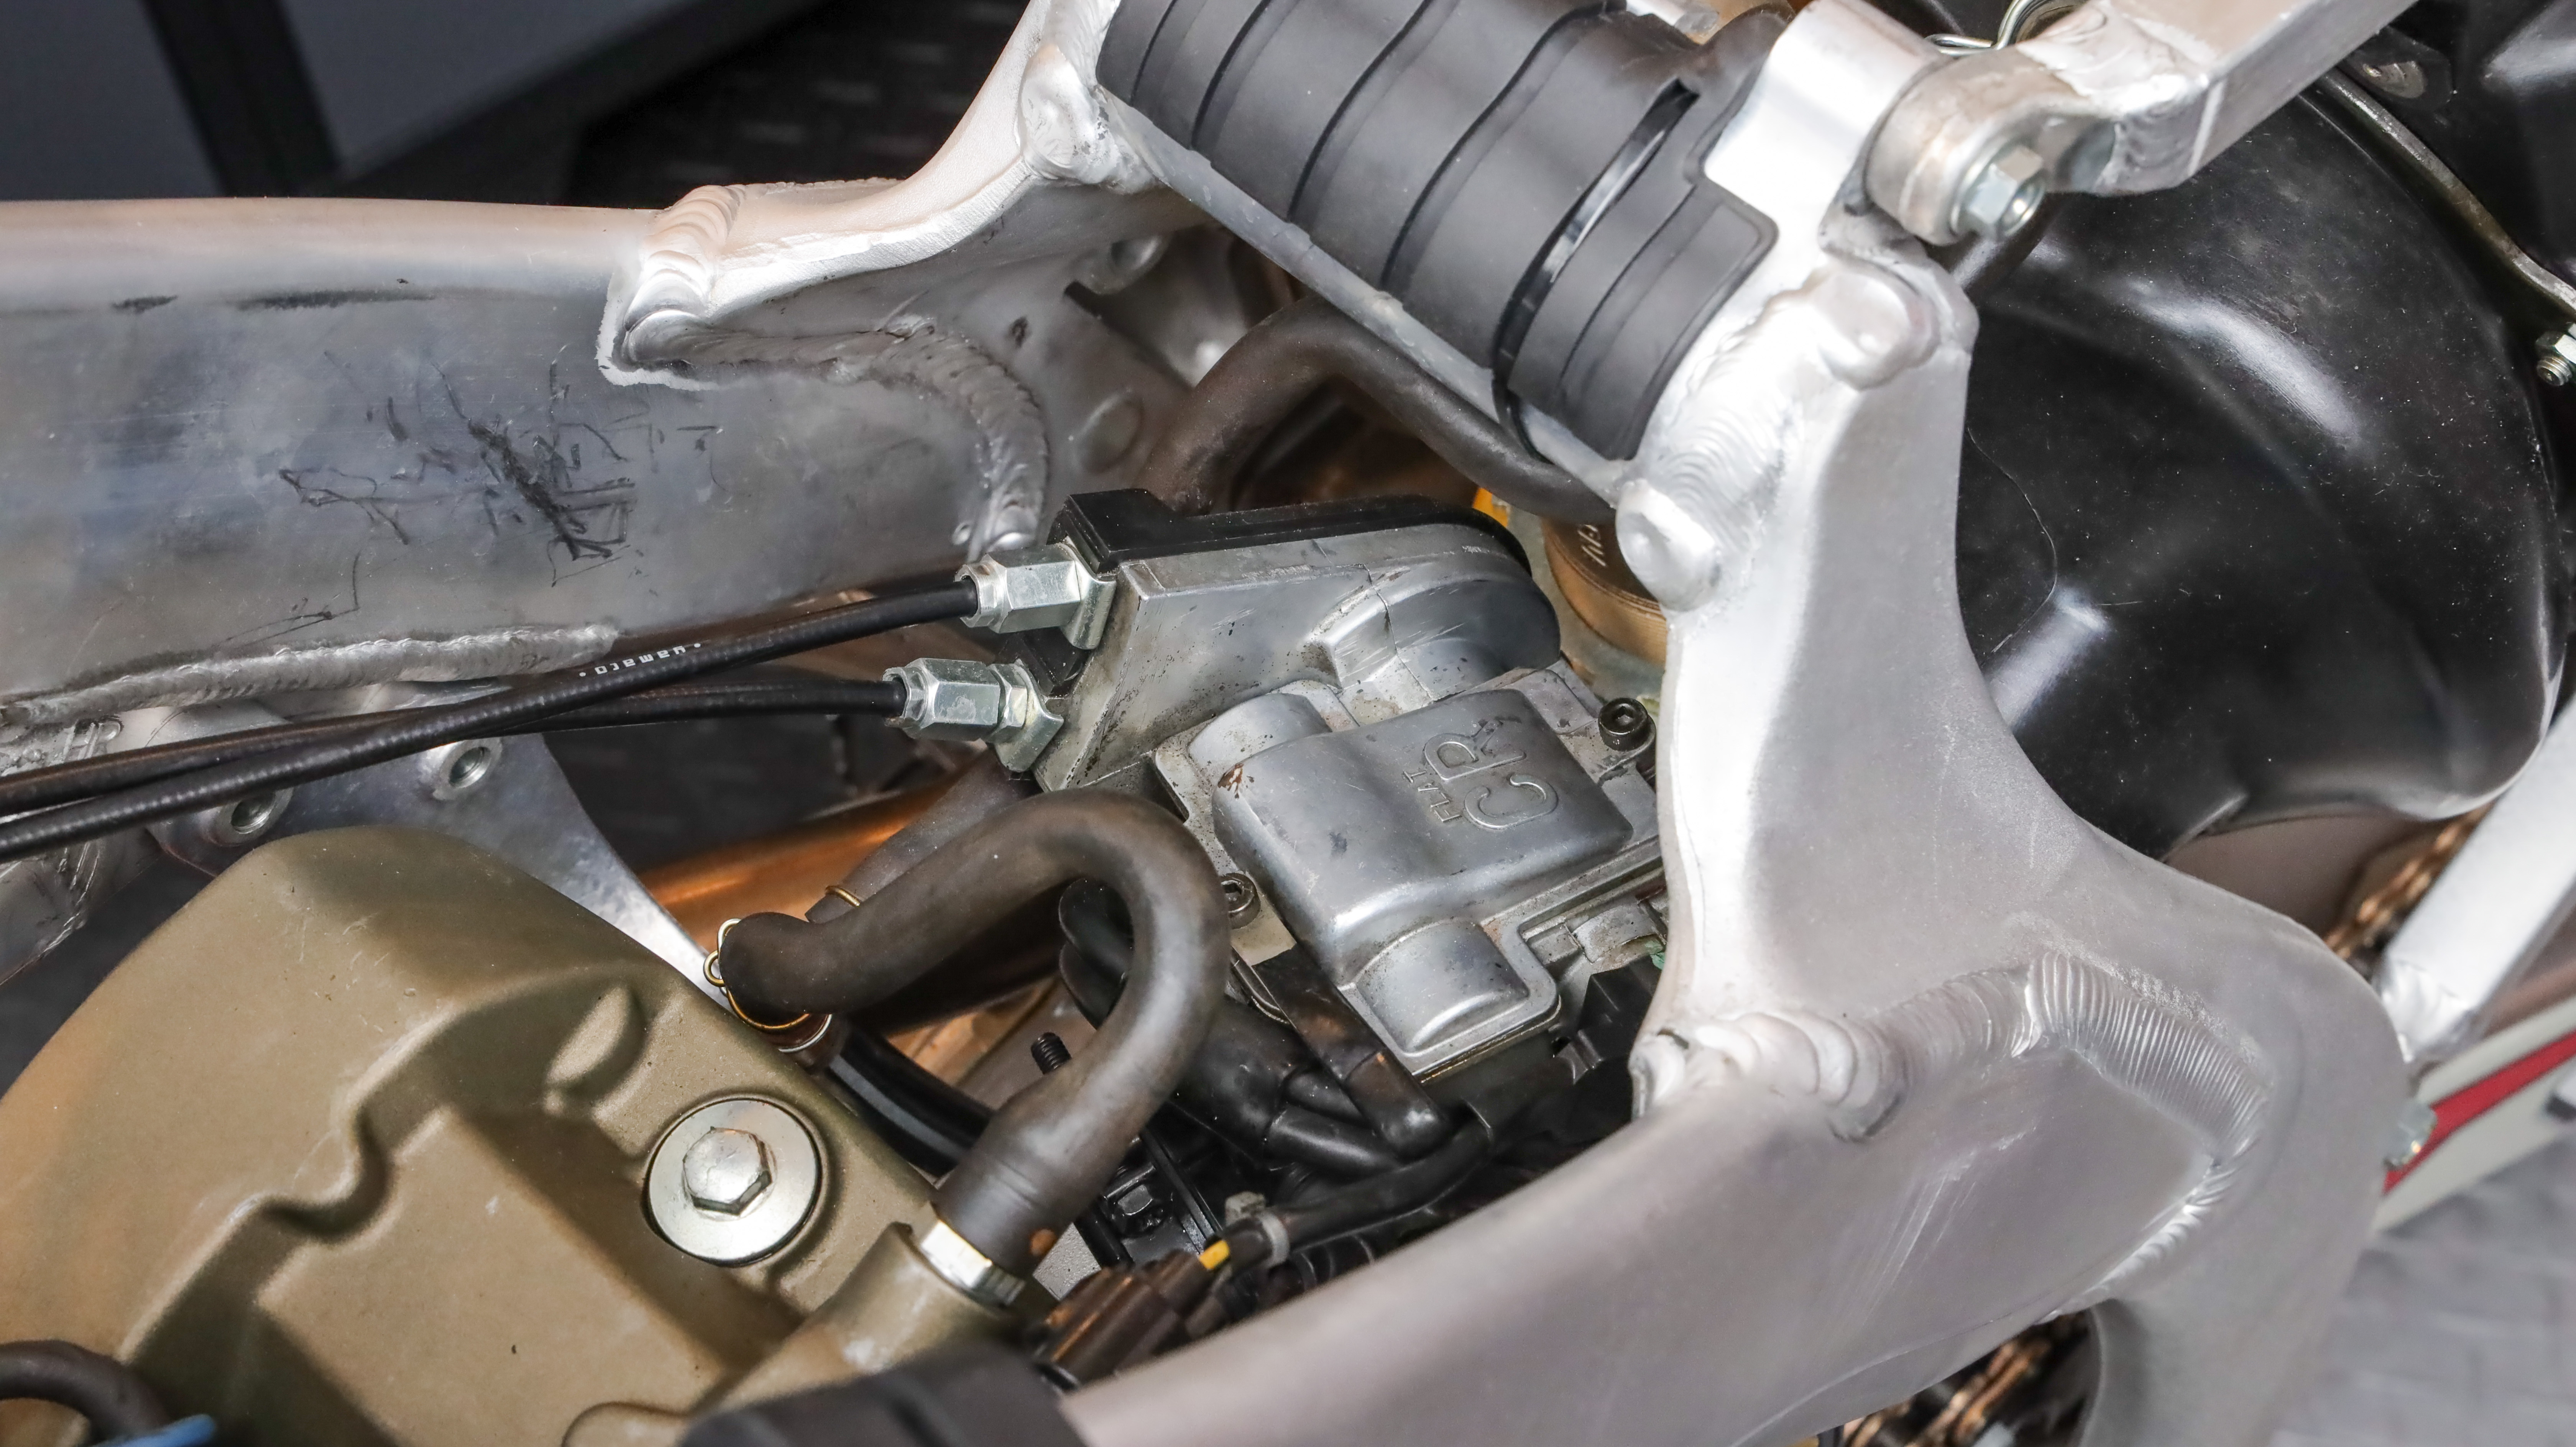
To service the needle, the carburetor may be able to be rotated so the slide cover is oriented outside of the frame, otherwise, the seat and fuel tank can be removed to gain access from above. When adjusting the position of the carburetor on models equipped with a throttle position sensor, make certain that the wires are not pinched or strained in any way. Prior to making any adjustments, ensure the fuel supply is turned off. If the carburetor is equipped with a float bowl, it should also be drained.
- Pilot screw adjustments can be made without repositioning the carburetor.
- Pilot screw adjustments are made by counting the number of turns out from the fully seated position.
- Pilot screws are brass needle valves and can be damaged by overtightening. When seating the pilot screw only turn it enough so that it stops, don’t overdo it.
- Use the screwdriver slot as a reference when counting the required number of turns.

Slow (Pilot) Jet
- On most carburetors, the slow jet -- also called the pilot jet by many -- is recessed farther from the float bowl plug and smaller in size than the main jet.
- Due to their size, slow jets are the most likely to become clogged.
- If the engine is hard starting the slow jet may simply be clogged as opposed to out of tune for conditions.
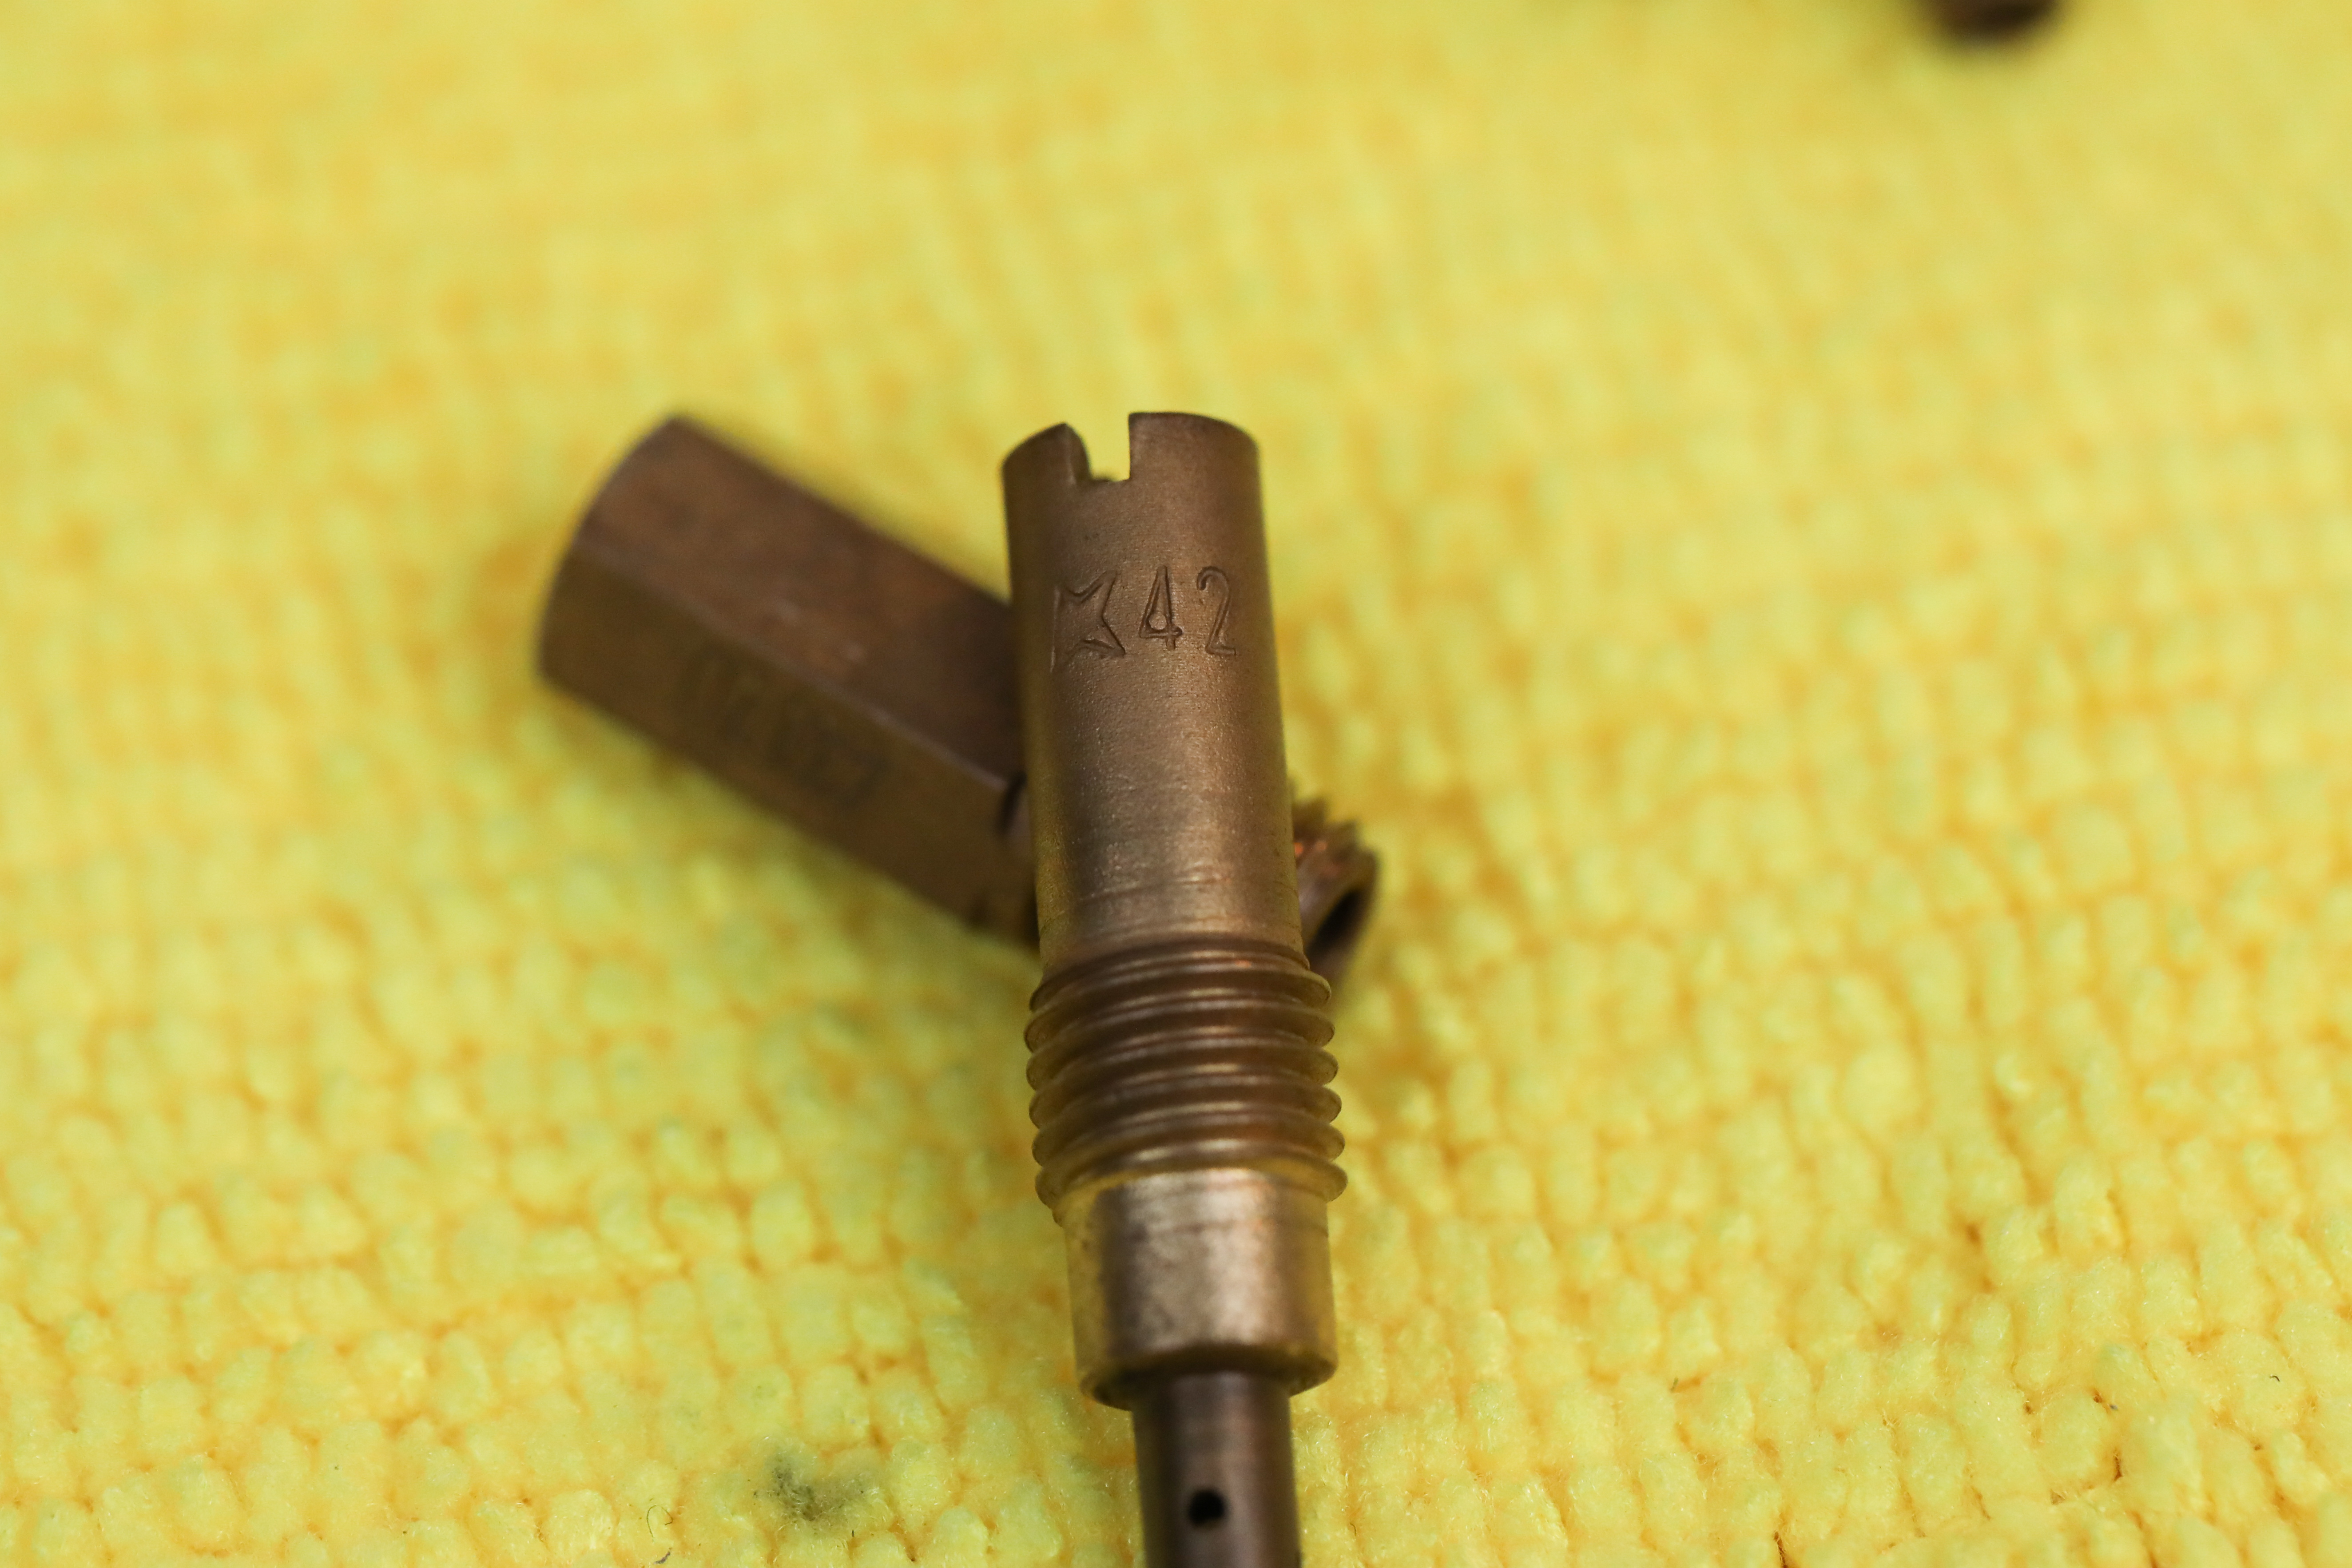
- The size of the slow jet is inscribed on the jet.
Needle
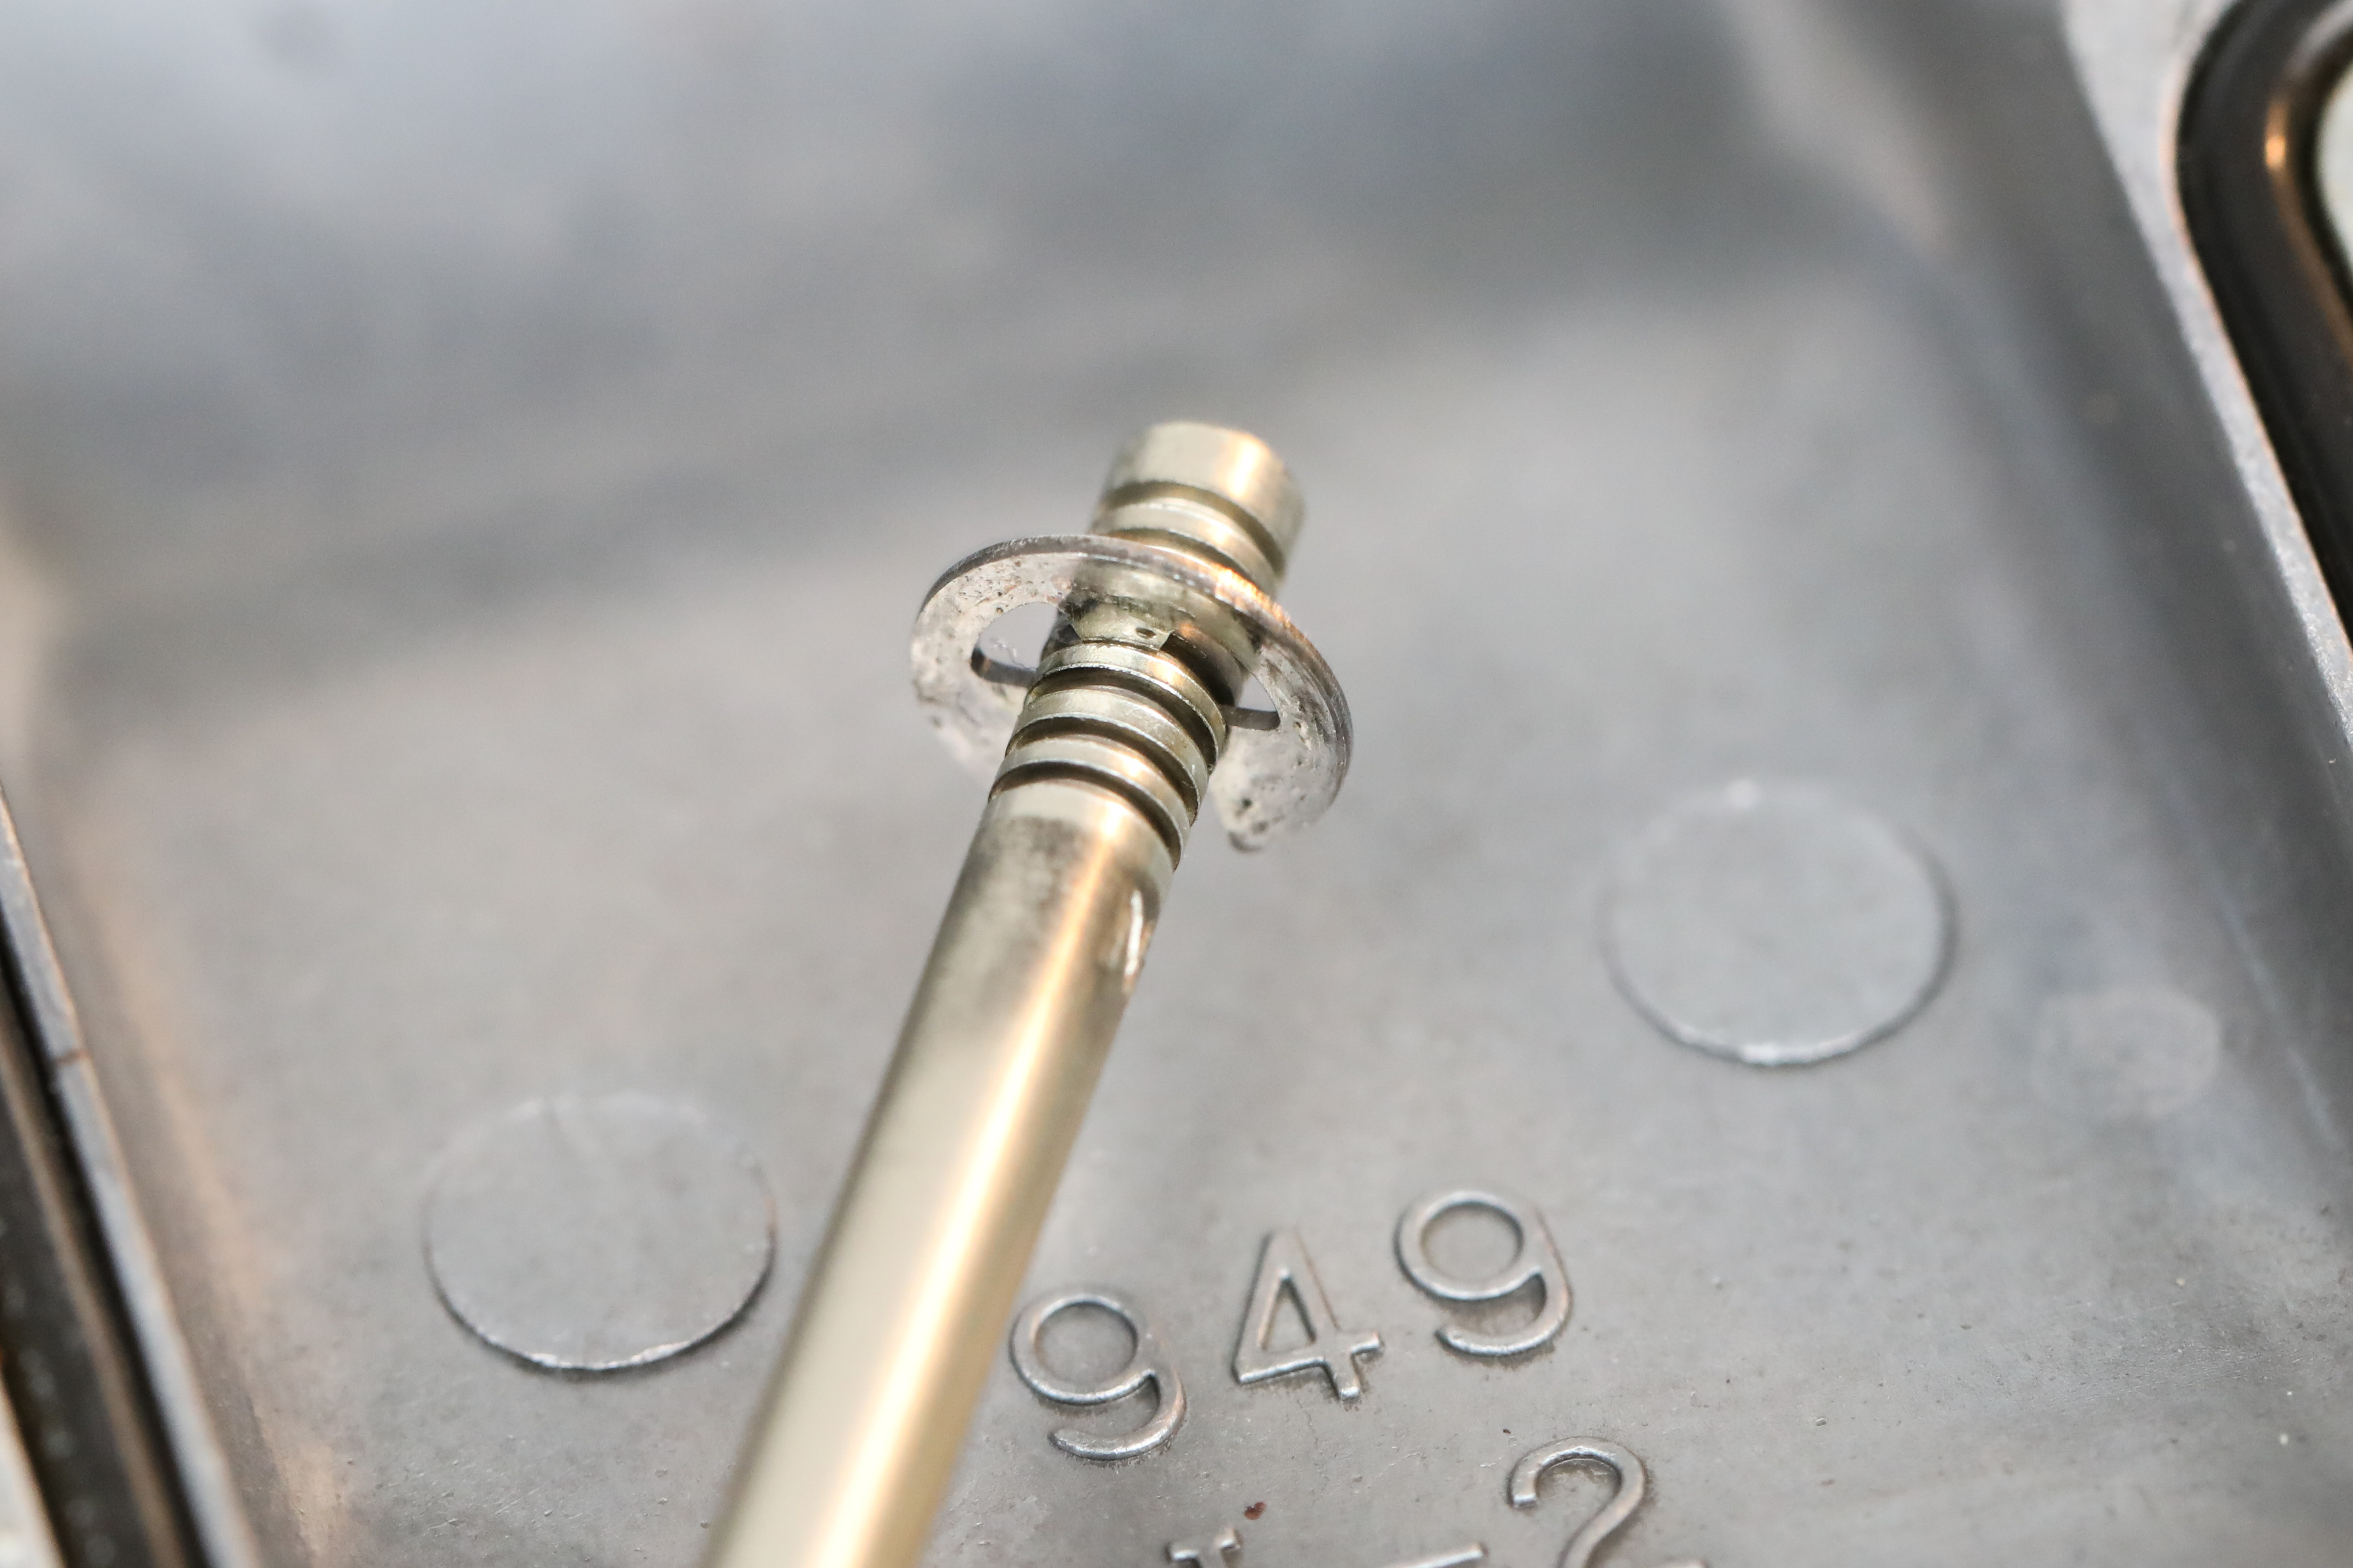
- The needle type designation is inscribed on the needle’s shaft for reference.
- When making clip position adjustments, confirm the reference point the adjustment is made from. Usually, the clip position is referenced from the top of the needle.
- A retaining clip is used to set the needle position. The retaining clip should be snug to the needle’s shaft and should not rotate. Retaining clips eventually relax after repeated adjustments and should be replaced if they do not yield a snug fit.
- Ensure any slide cover gaskets or o-rings are in good condition prior to reusing them.
Main Jet
- The size of the main jet is inscribed on the jet.
- Use care when installing the main jet so that it does not cross-thread.
- Do not overtighten the main jet. Typical tightening torque is 1.1 ft.lbs (1.5Nm).

Once jetting changes have been completed, carefully reinstall all components and hardware. Repeat the warm-up and test riding process, then carefully note differences in engine performance from the previous session. If the jetting charts or instructions provided were adhered to, engine performance should notably improve.