Is it time to rebuild your PWC after a long summer? Check out this how-to guide with photos from our SX-R 800 top end rebuild.
Click here for our original feature on The Watercraft Journal.
The world of stand-up personal watercraft market has been consistently growing, with many people buying both used and brand new skis. Kawasaki even came out with a brand-new version of their SX-R after discontinuing it over 5 years ago.
Riding these PWCs is so much fun, it’s almost addicting. However, many of us have trouble resisting the urge to make modifications and buy shiny aftermarket parts to make our skis go faster and handle better. Whether your ski is all stock or modified, things don’t always go as planned, and sometimes we fry a piston or two.
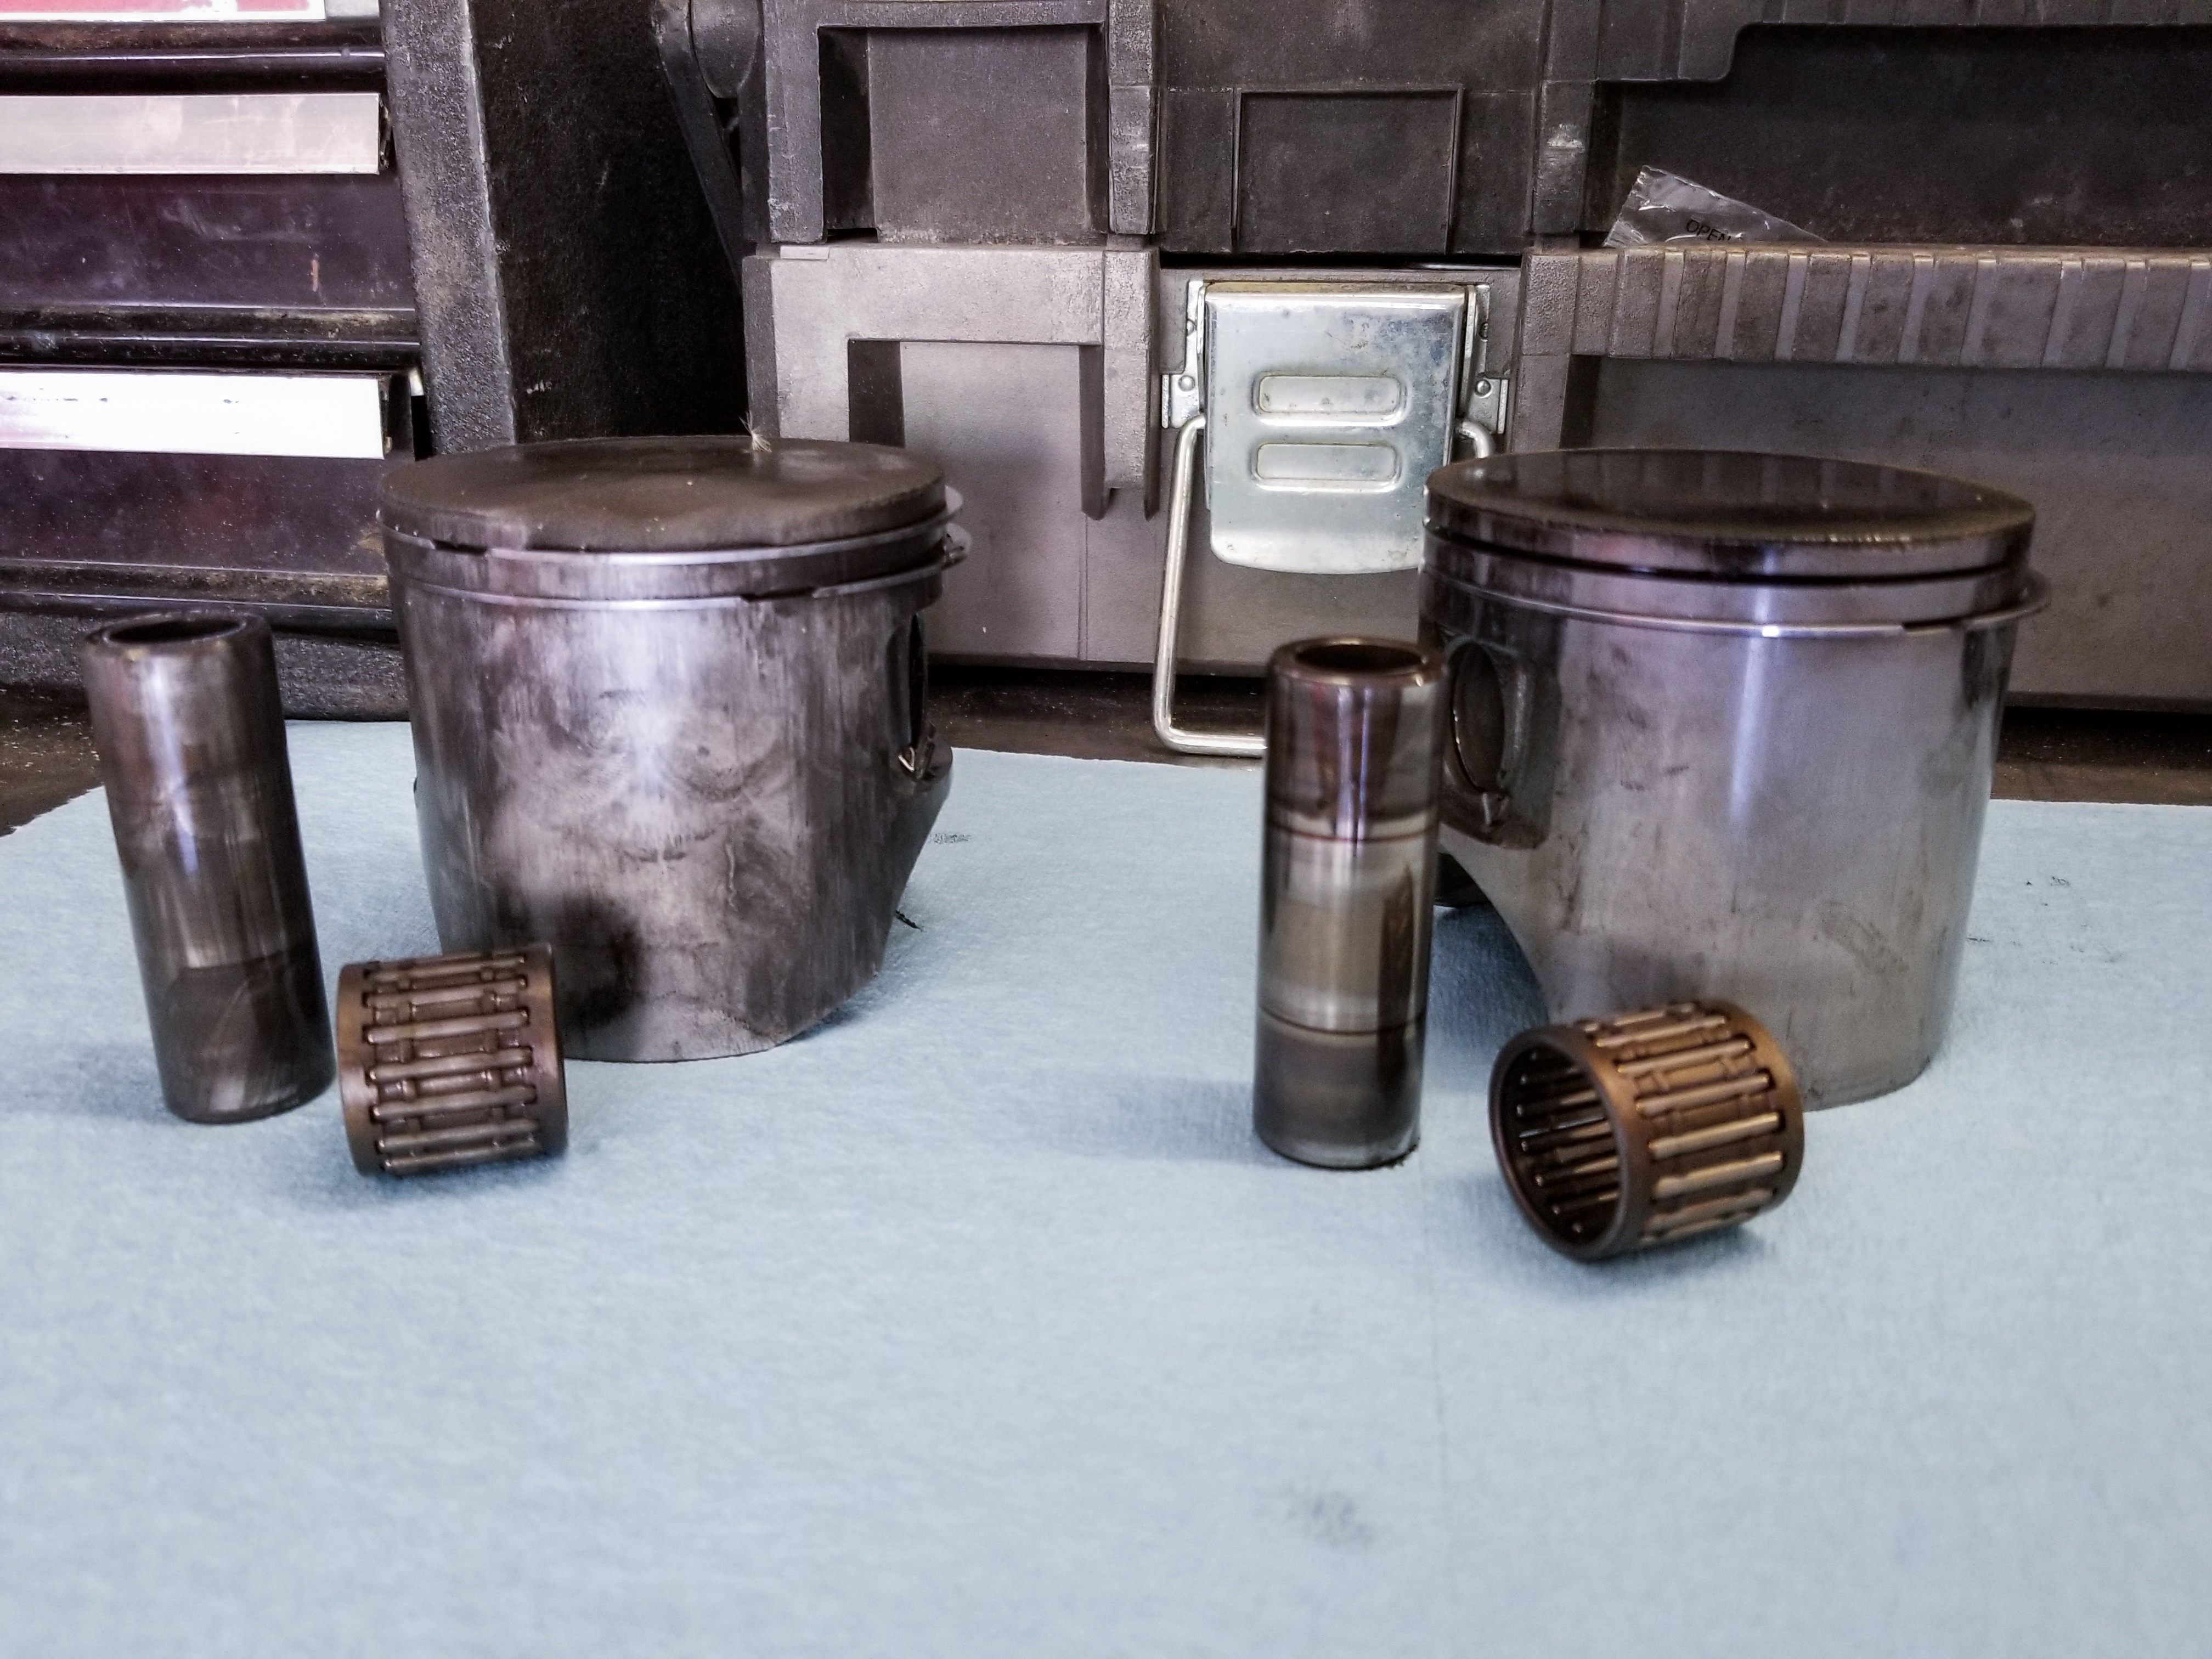
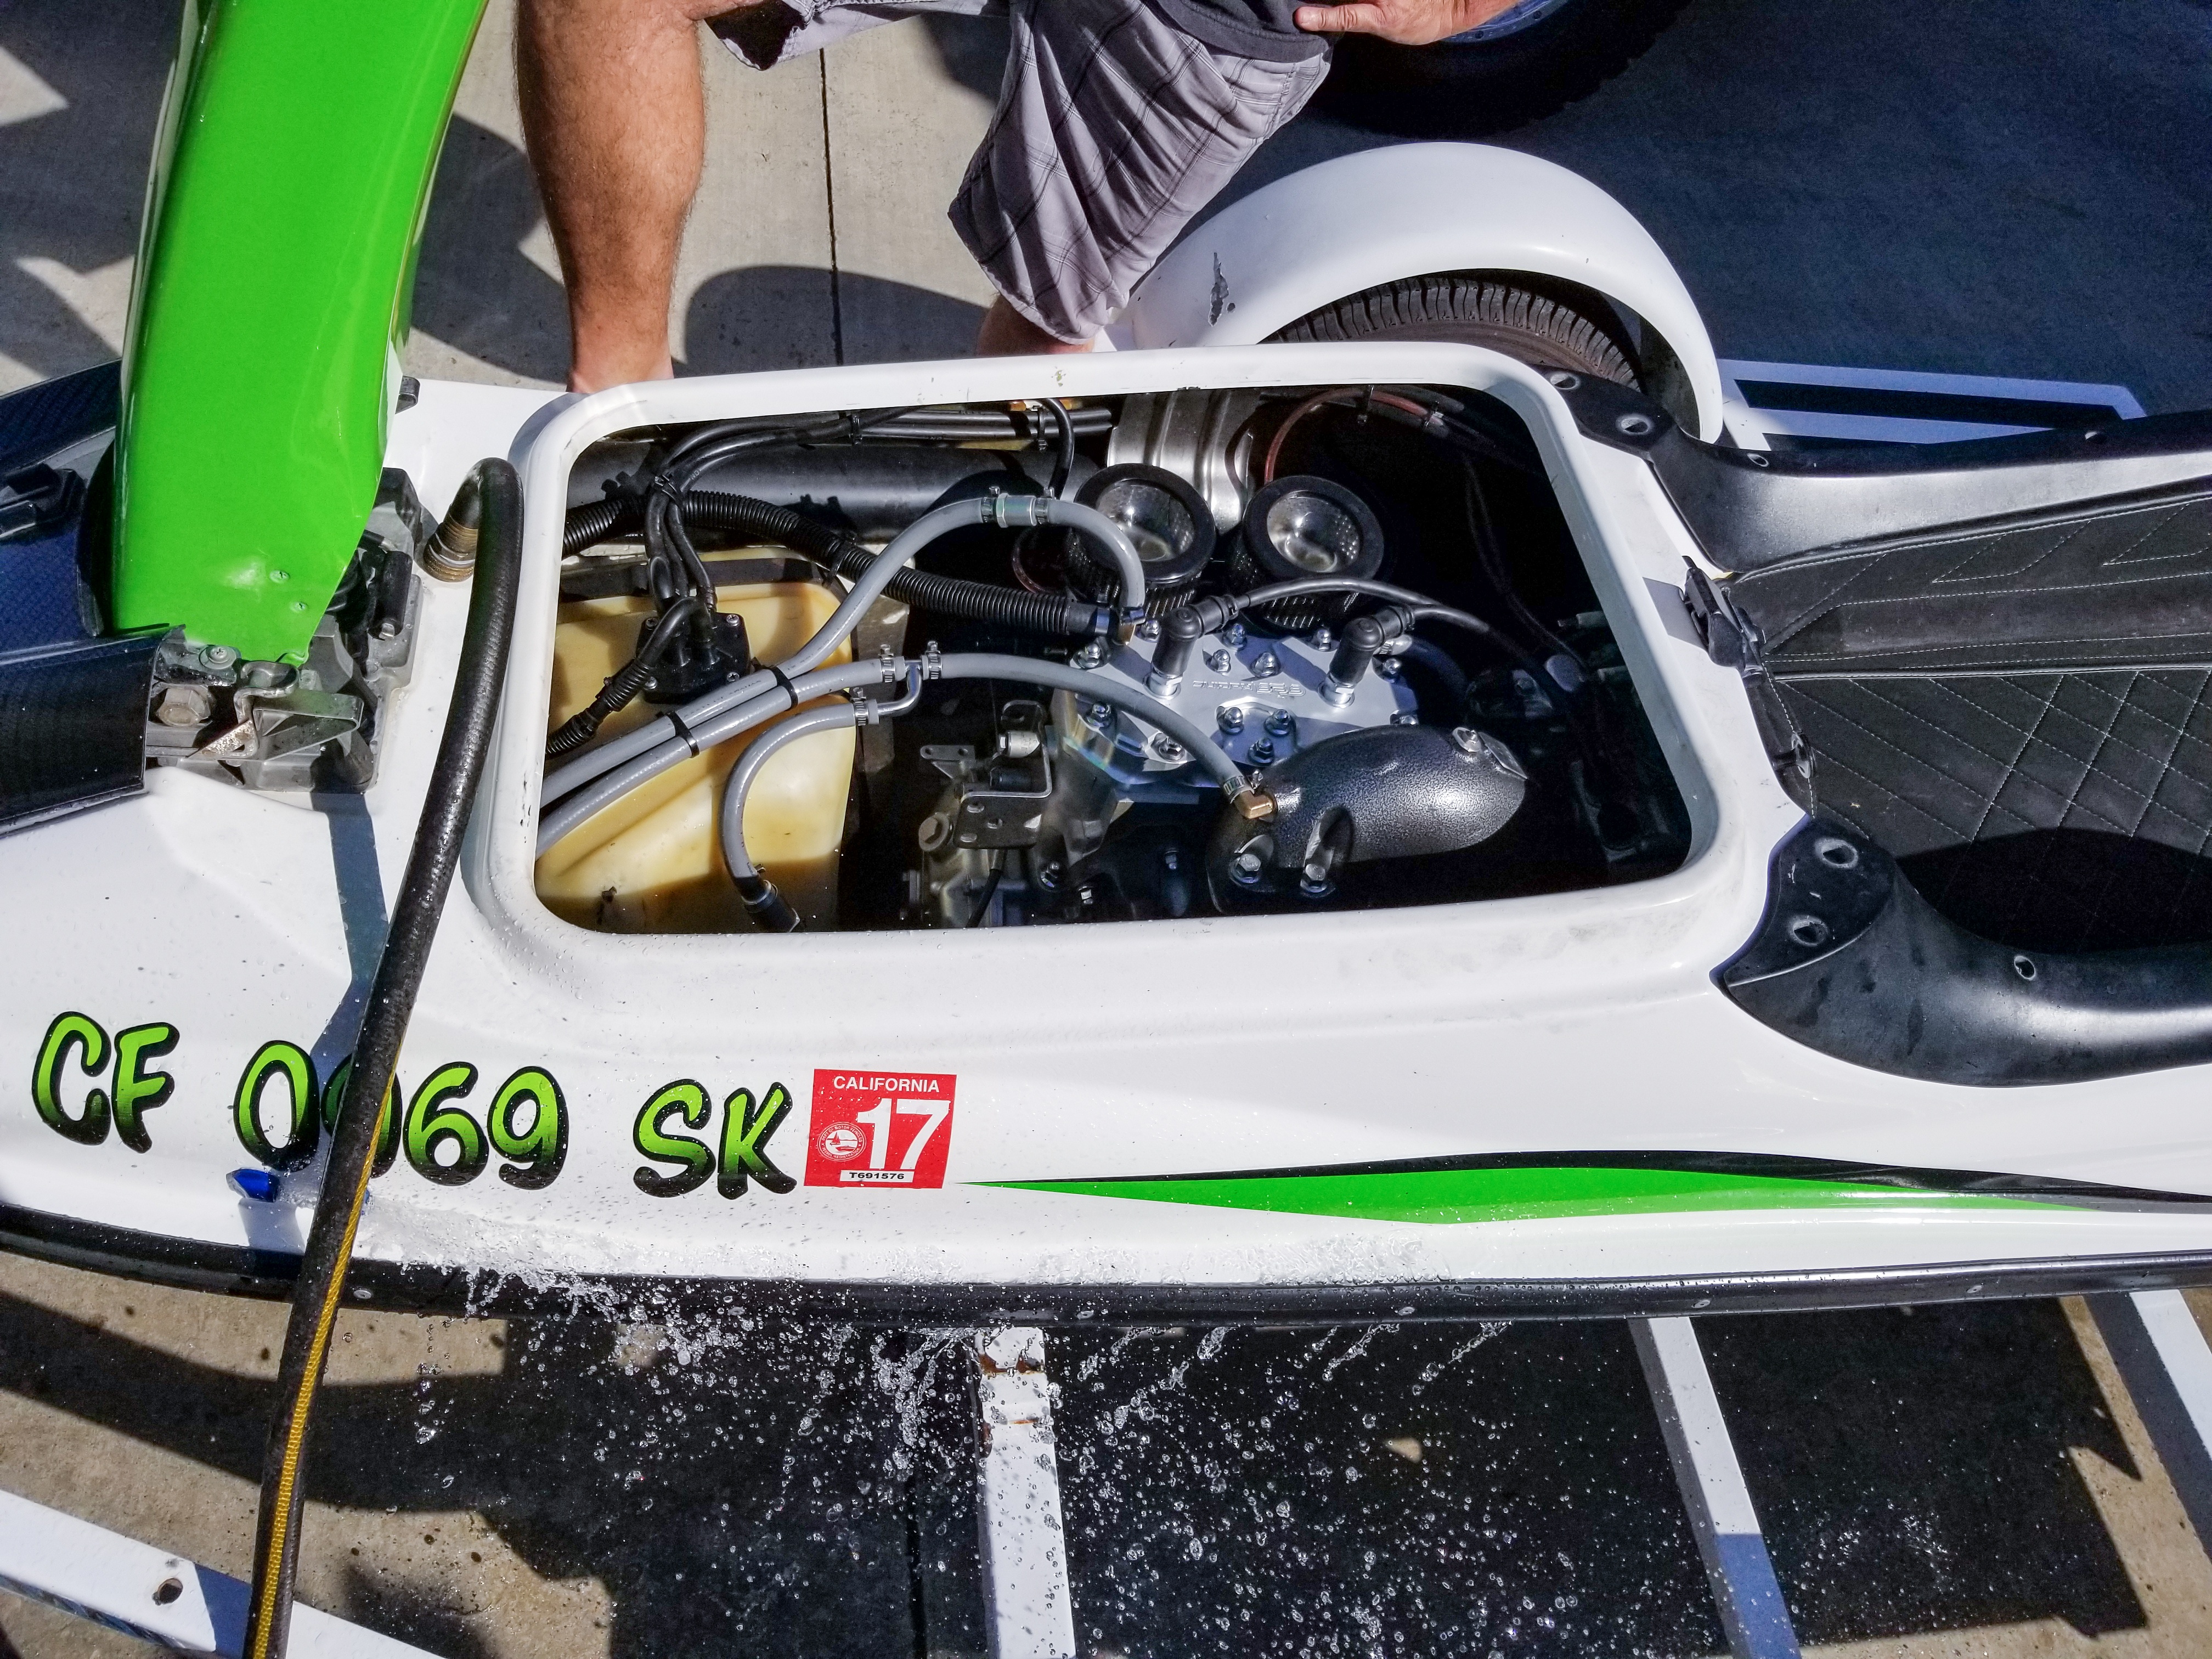
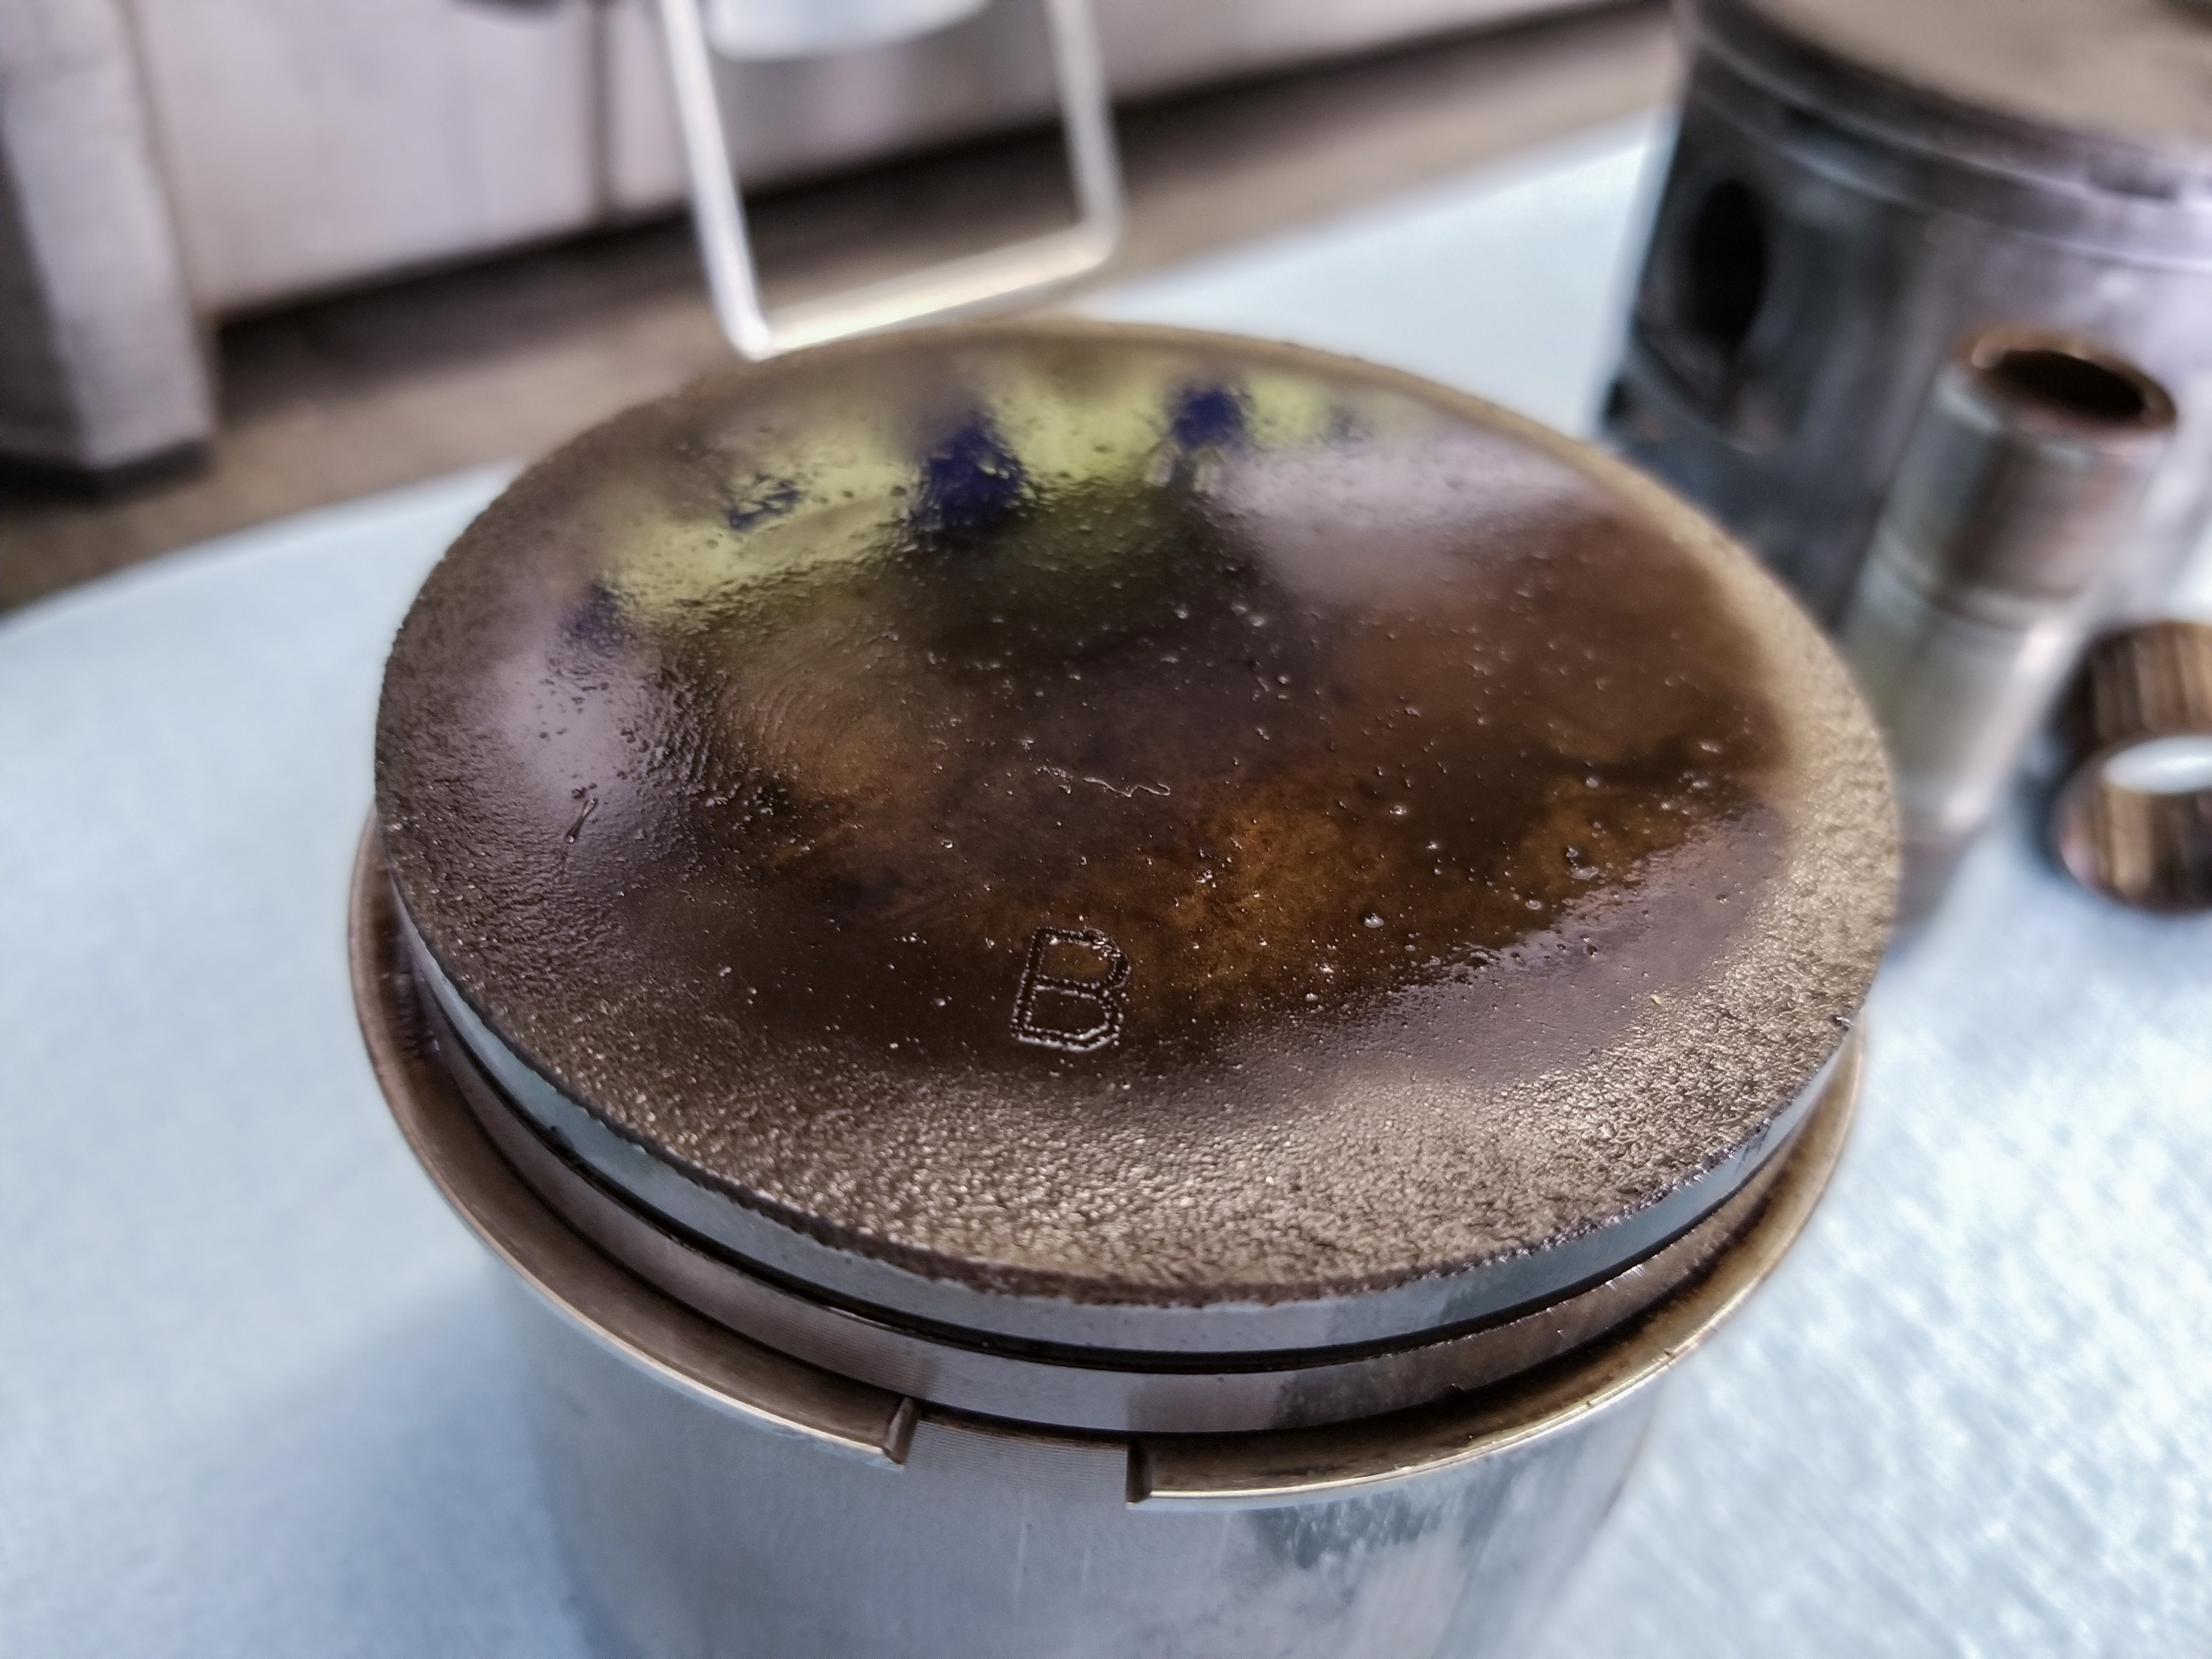
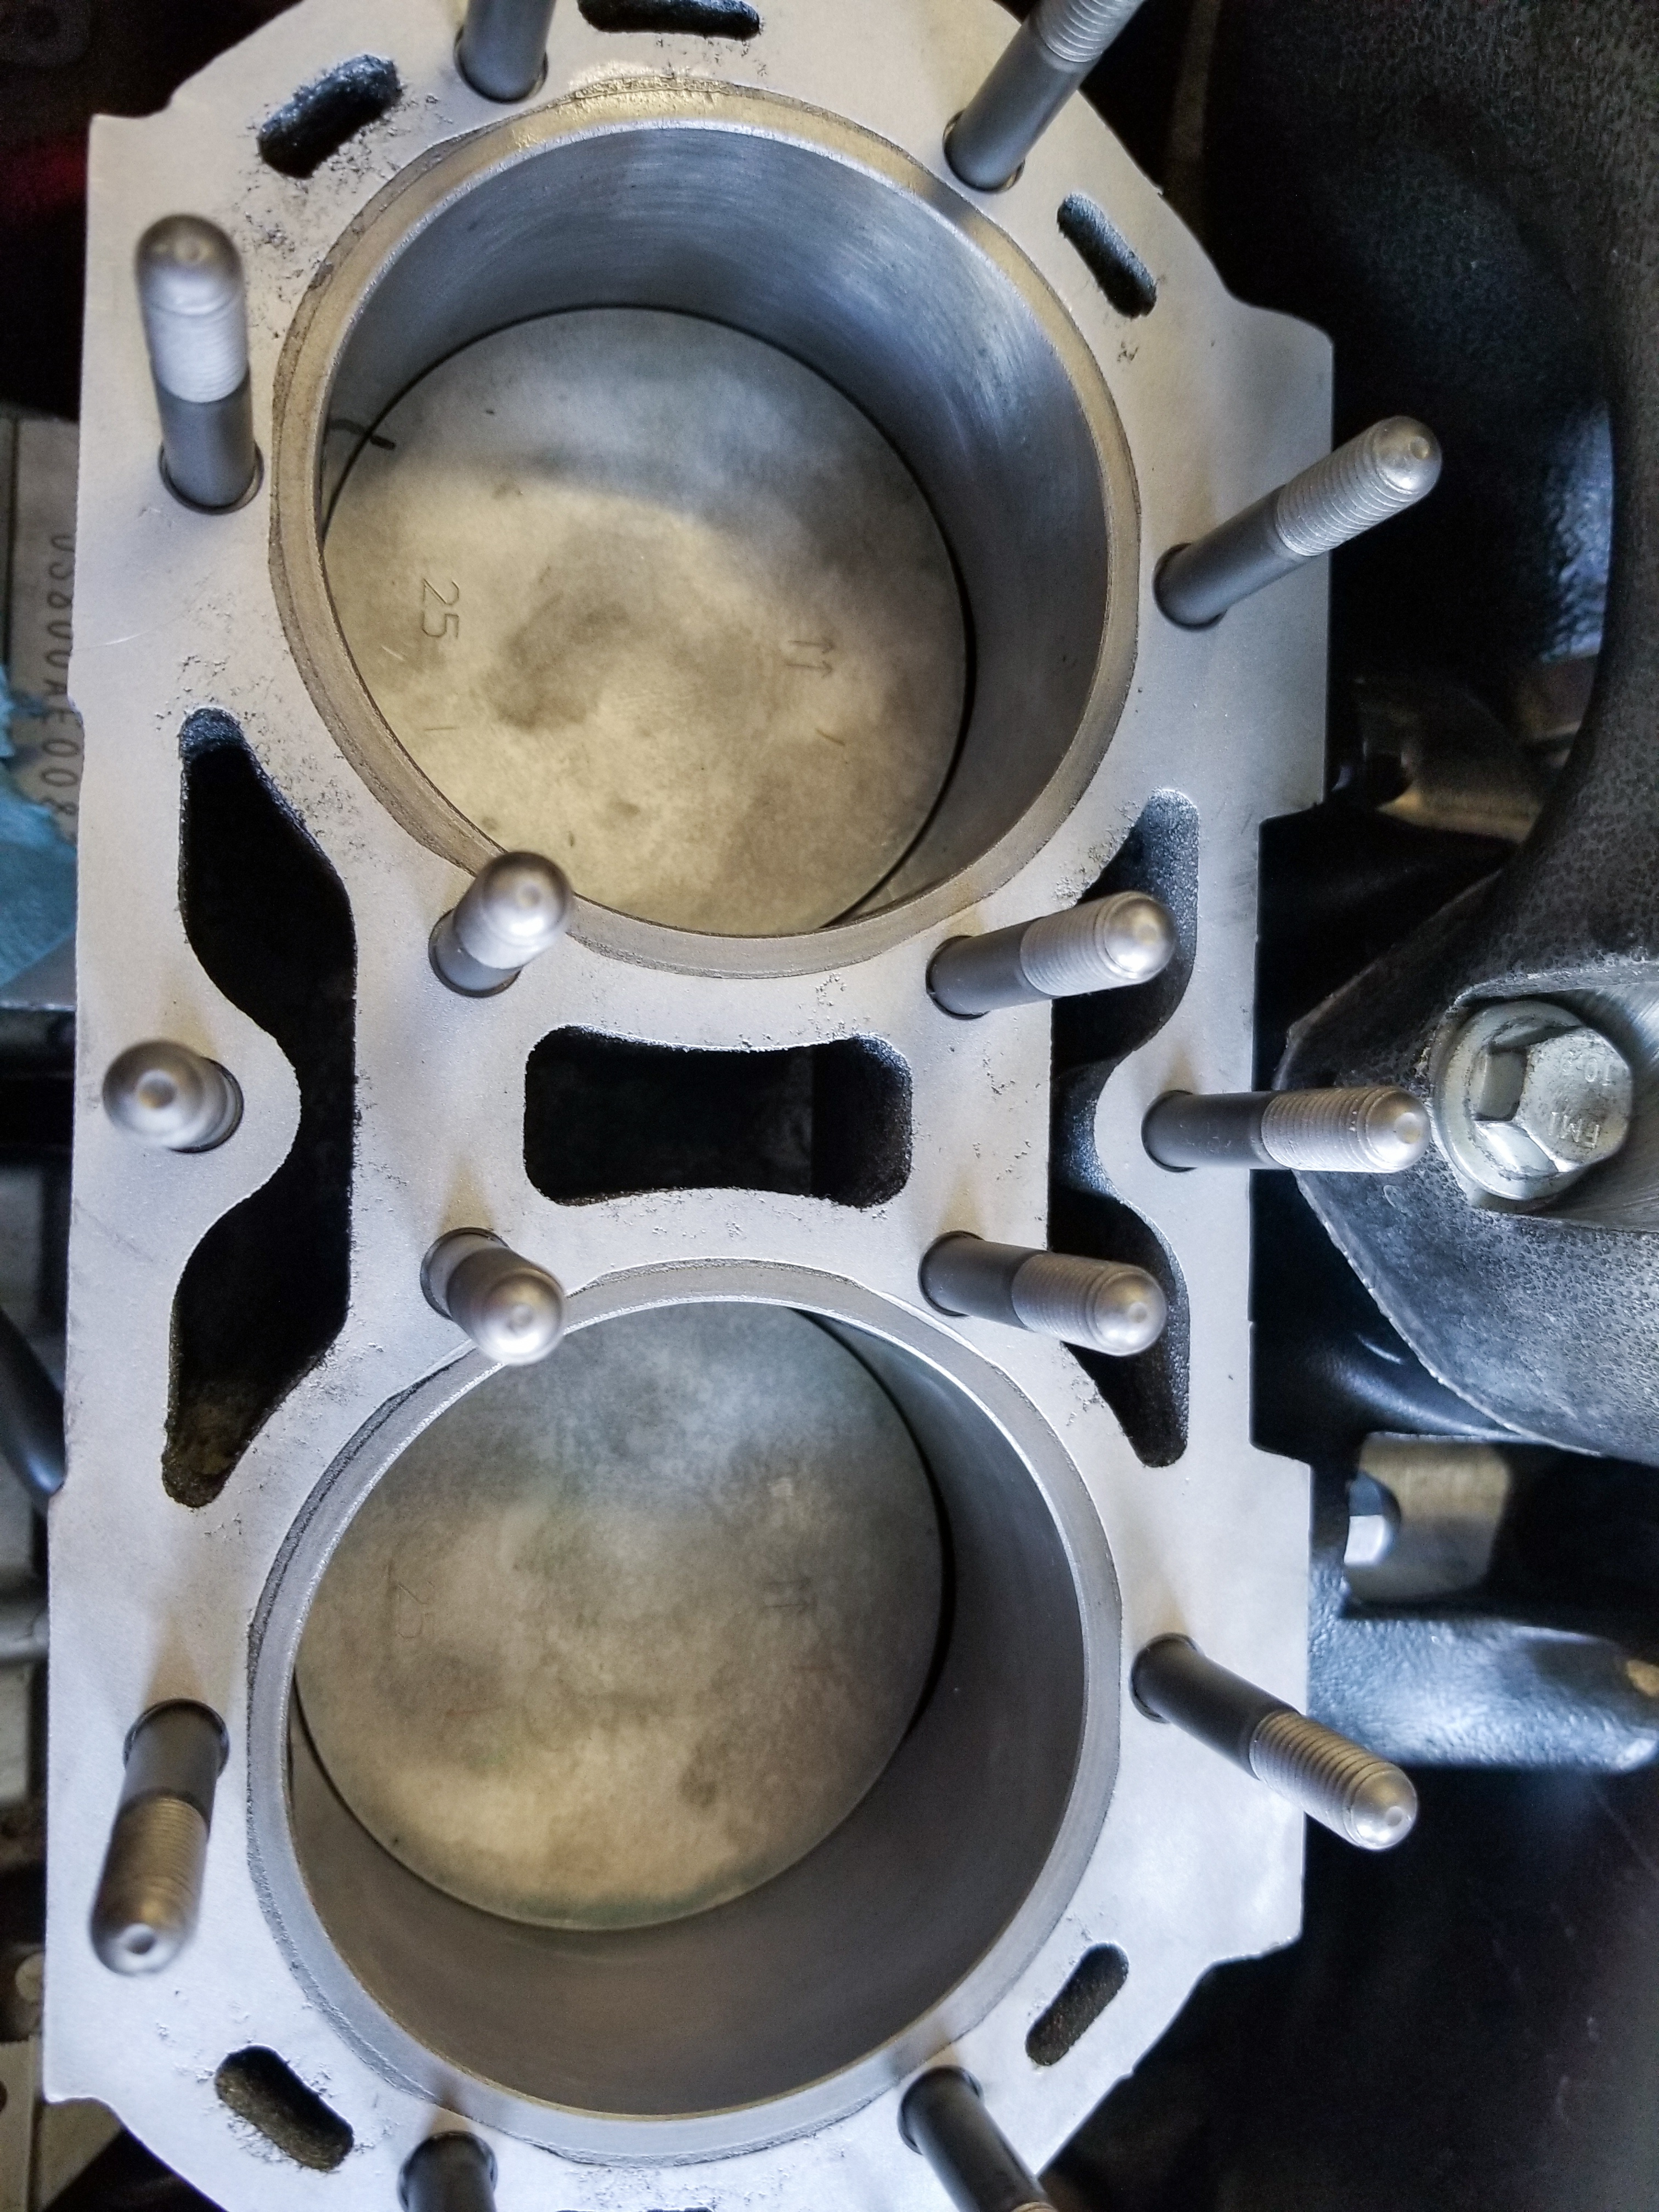
Today we’re going to look at the top end rebuild process in a 2006 Kawasaki SX-R 800. This ski had an all original top end, aftermarket head, and aftermarket exhaust. In this particular case, there was a base gasket failure, causing an air leak, which created a lean condition in the cylinder, raising the internal engine temperatures too high and causing piston damage. The piston crowns are eroded from the immense heat, and you can see where the hottest spot was, causing the most piston damage. There was also some evidence of excessive contact with the cylinder wall, likely due to lack of oil lubrication and material expansion in the overheating cylinder.
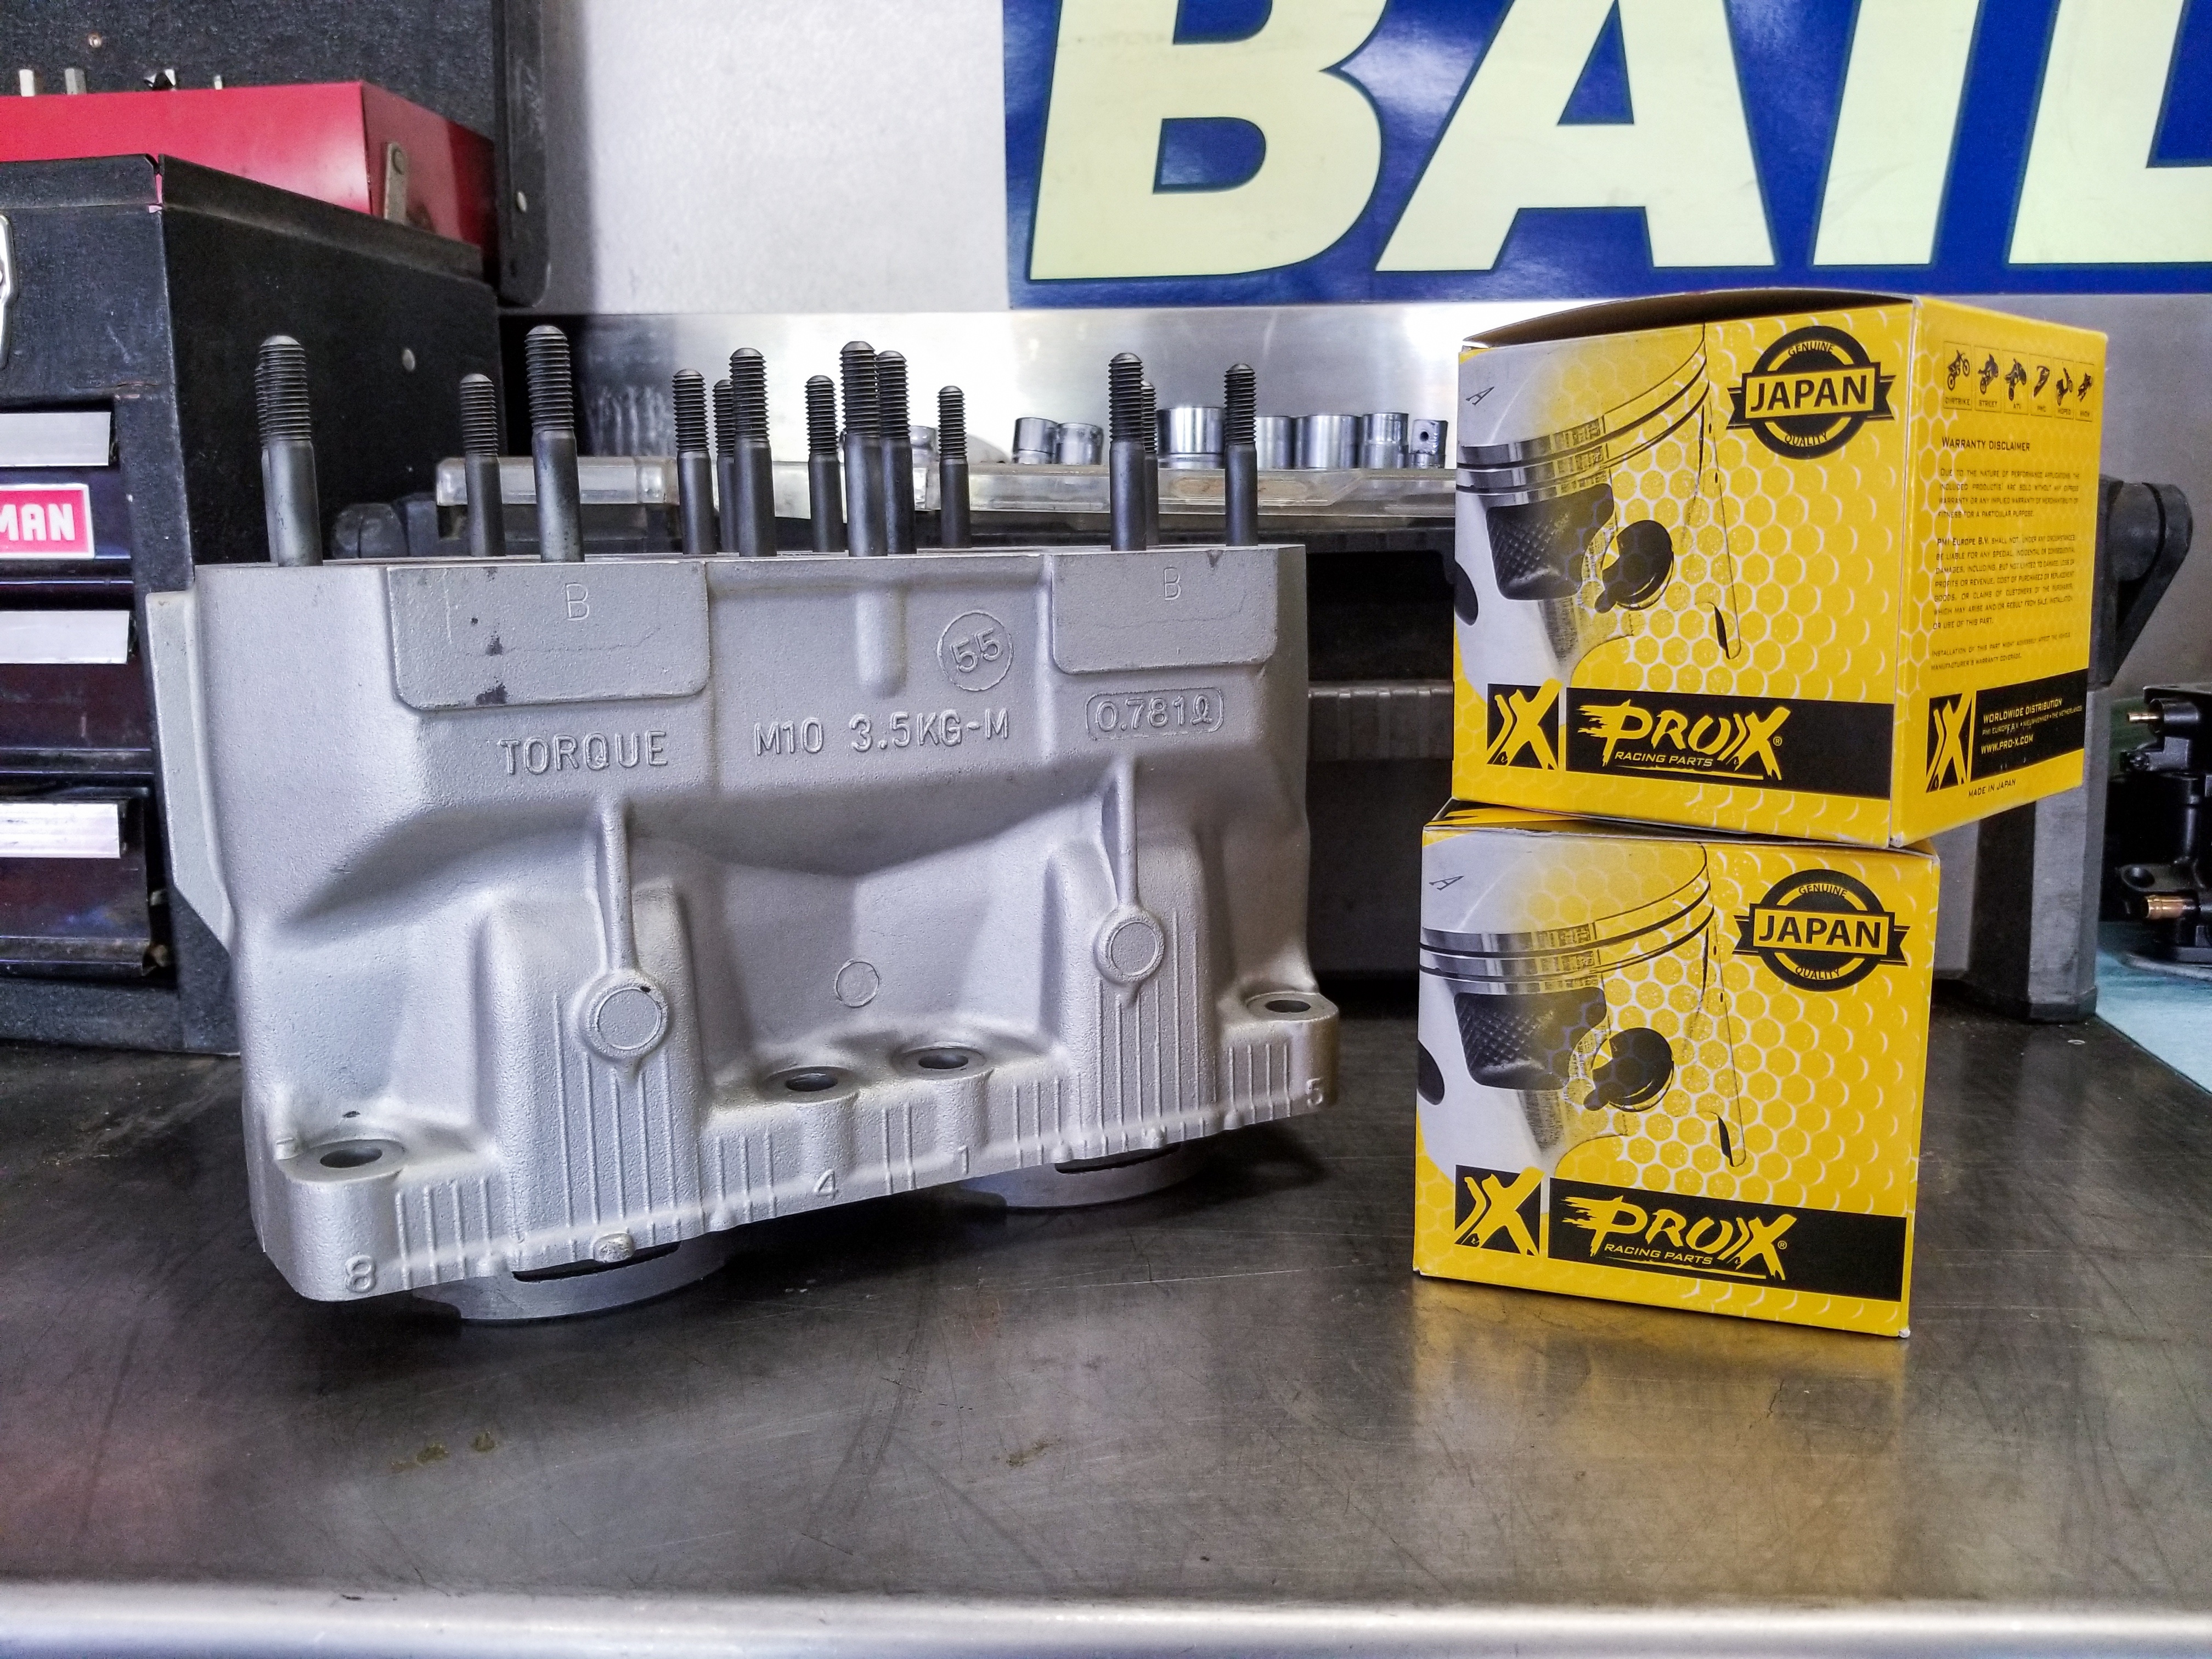
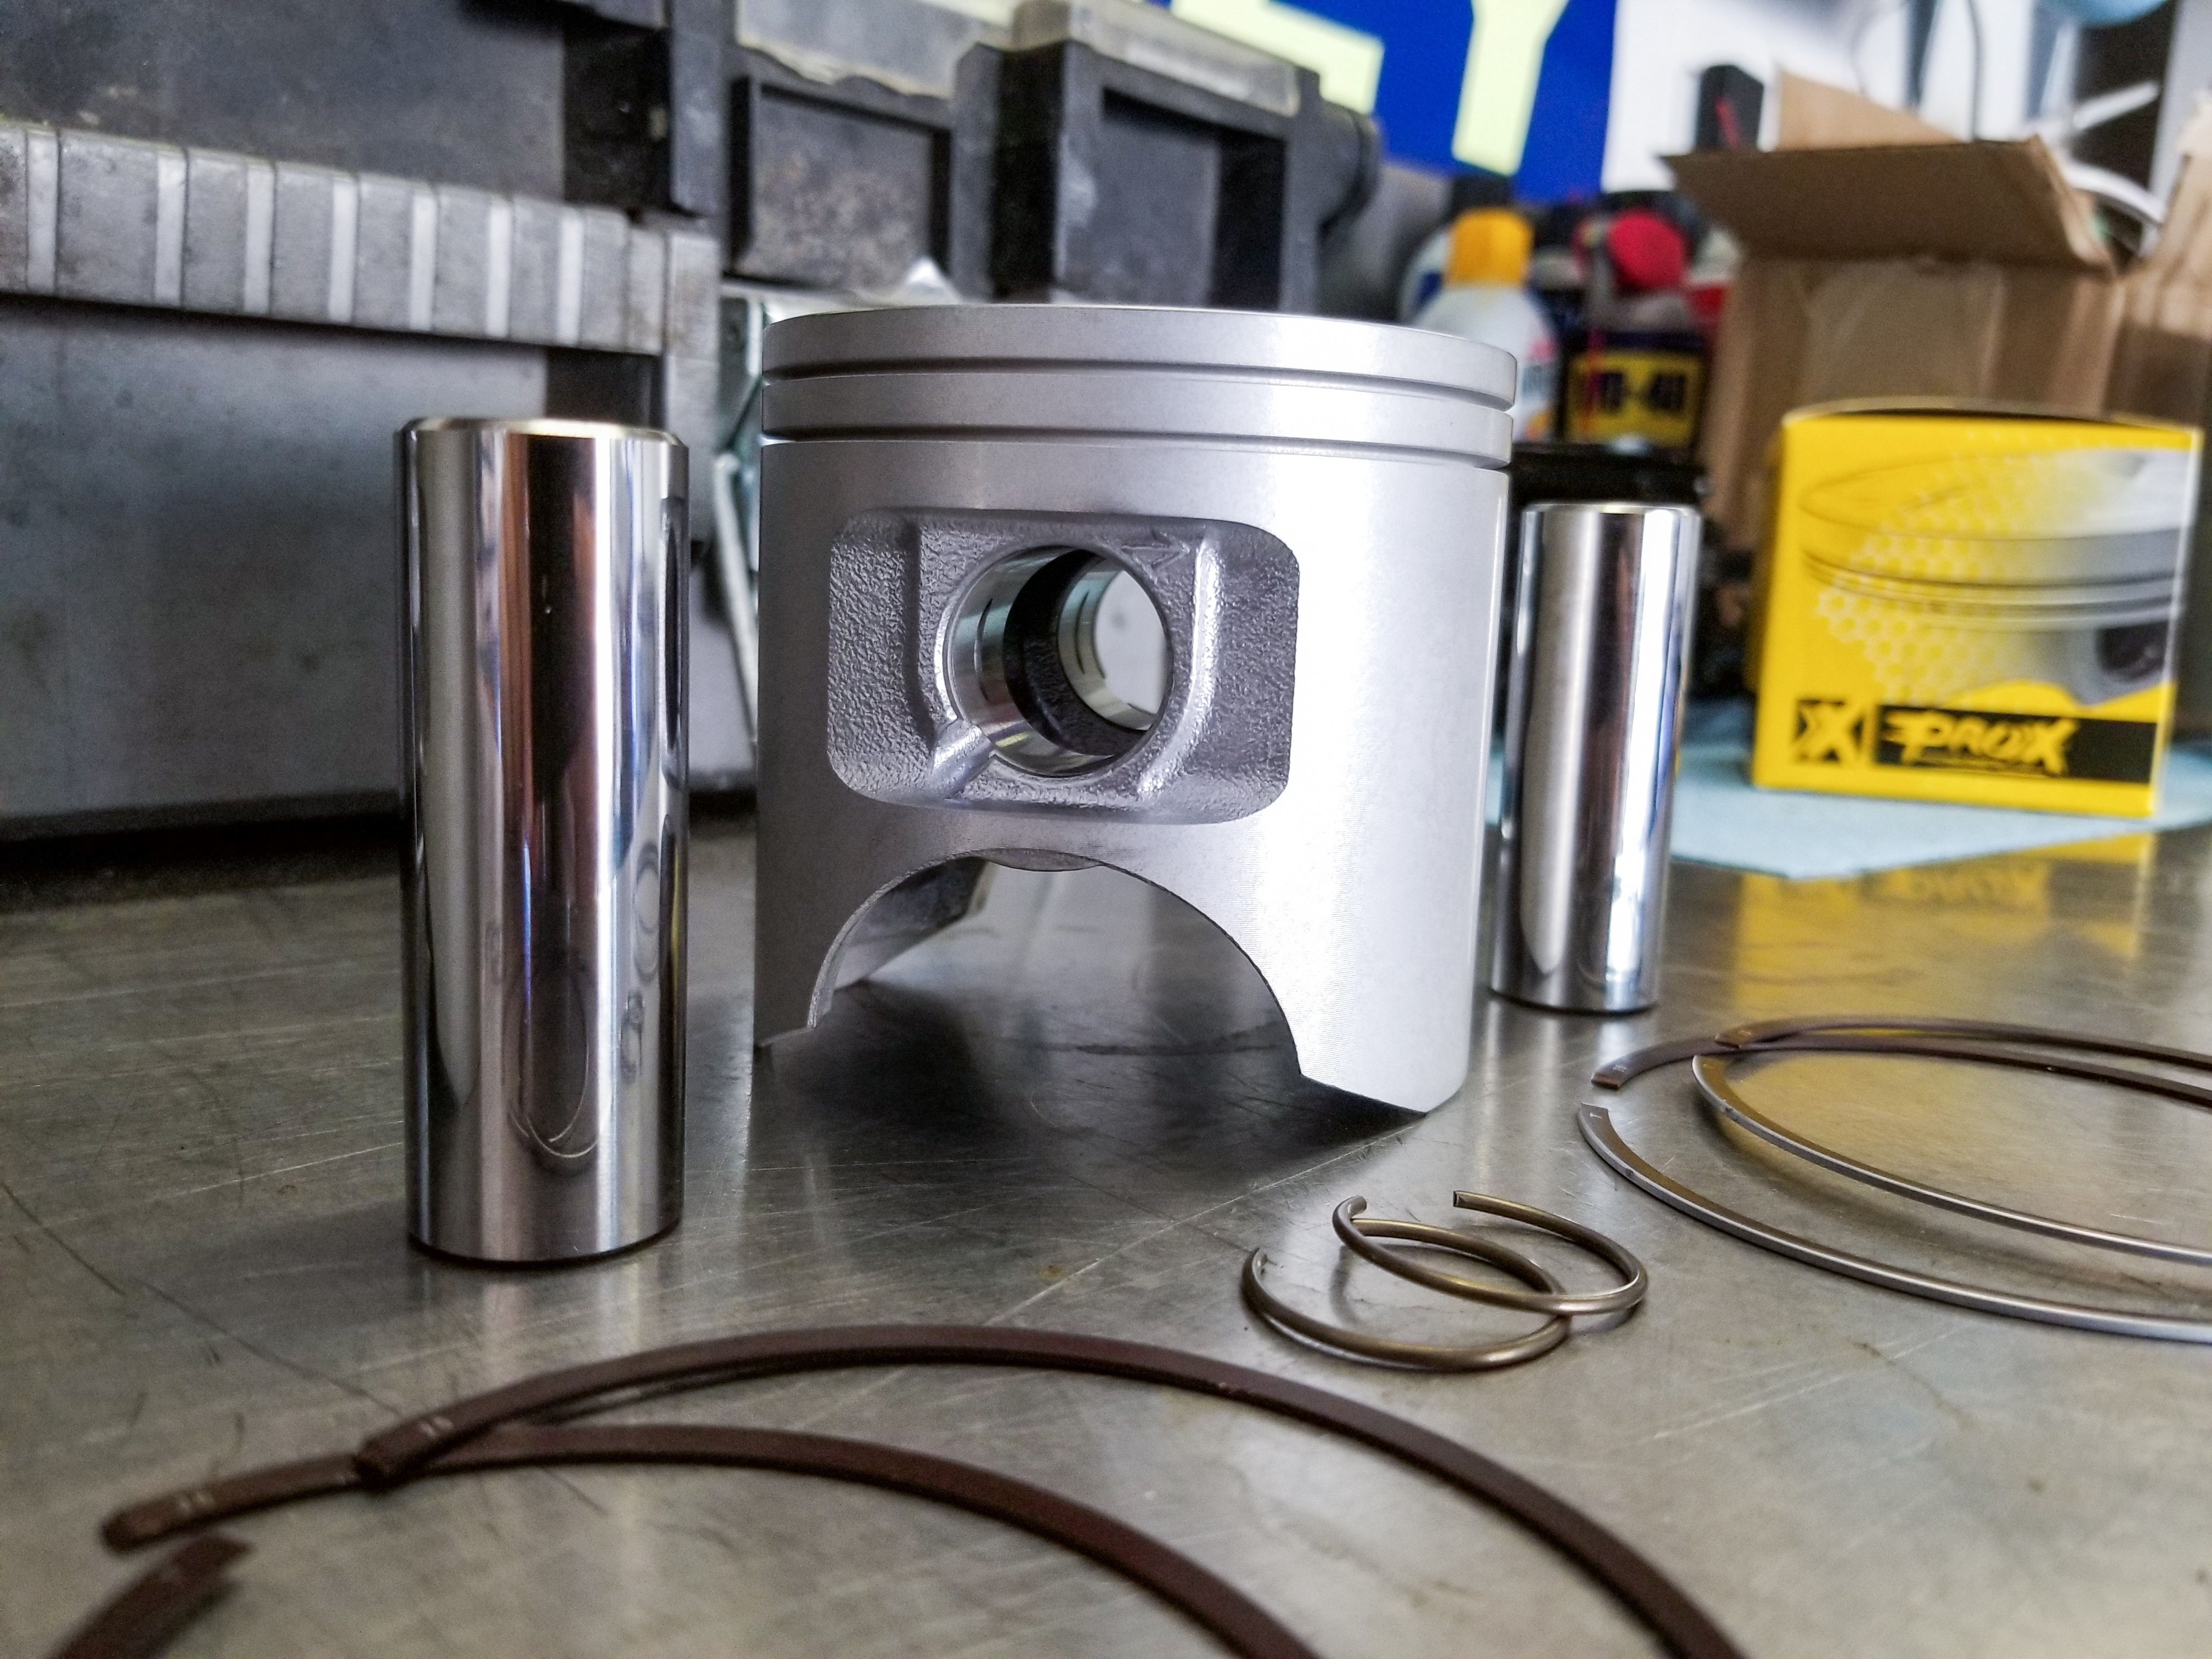
Luckily, ProX offers OEM replacement pistons for many PWC applications. The weekend warrior PWC rider doesn’t always want to spend a lot of money to rebuild their toy, but they still want to know they have OEM reliability. ProX pistons are manufactured by the same manufacturers as the OEM companies, so you know you’re getting a part you can count on.
Click here to find ProX parts for your PWC.
The ProX pistons for this 800 2-stroke are cast, just like the OEMs. This is beneficial in 2-stroke applications because the silicon content is higher, lessening the amount of expansion under heat. A great example of this benefit is that in our 800, the internal temperatures were high enough to melt the crowns, but neither of the pistons expanded enough to seize.
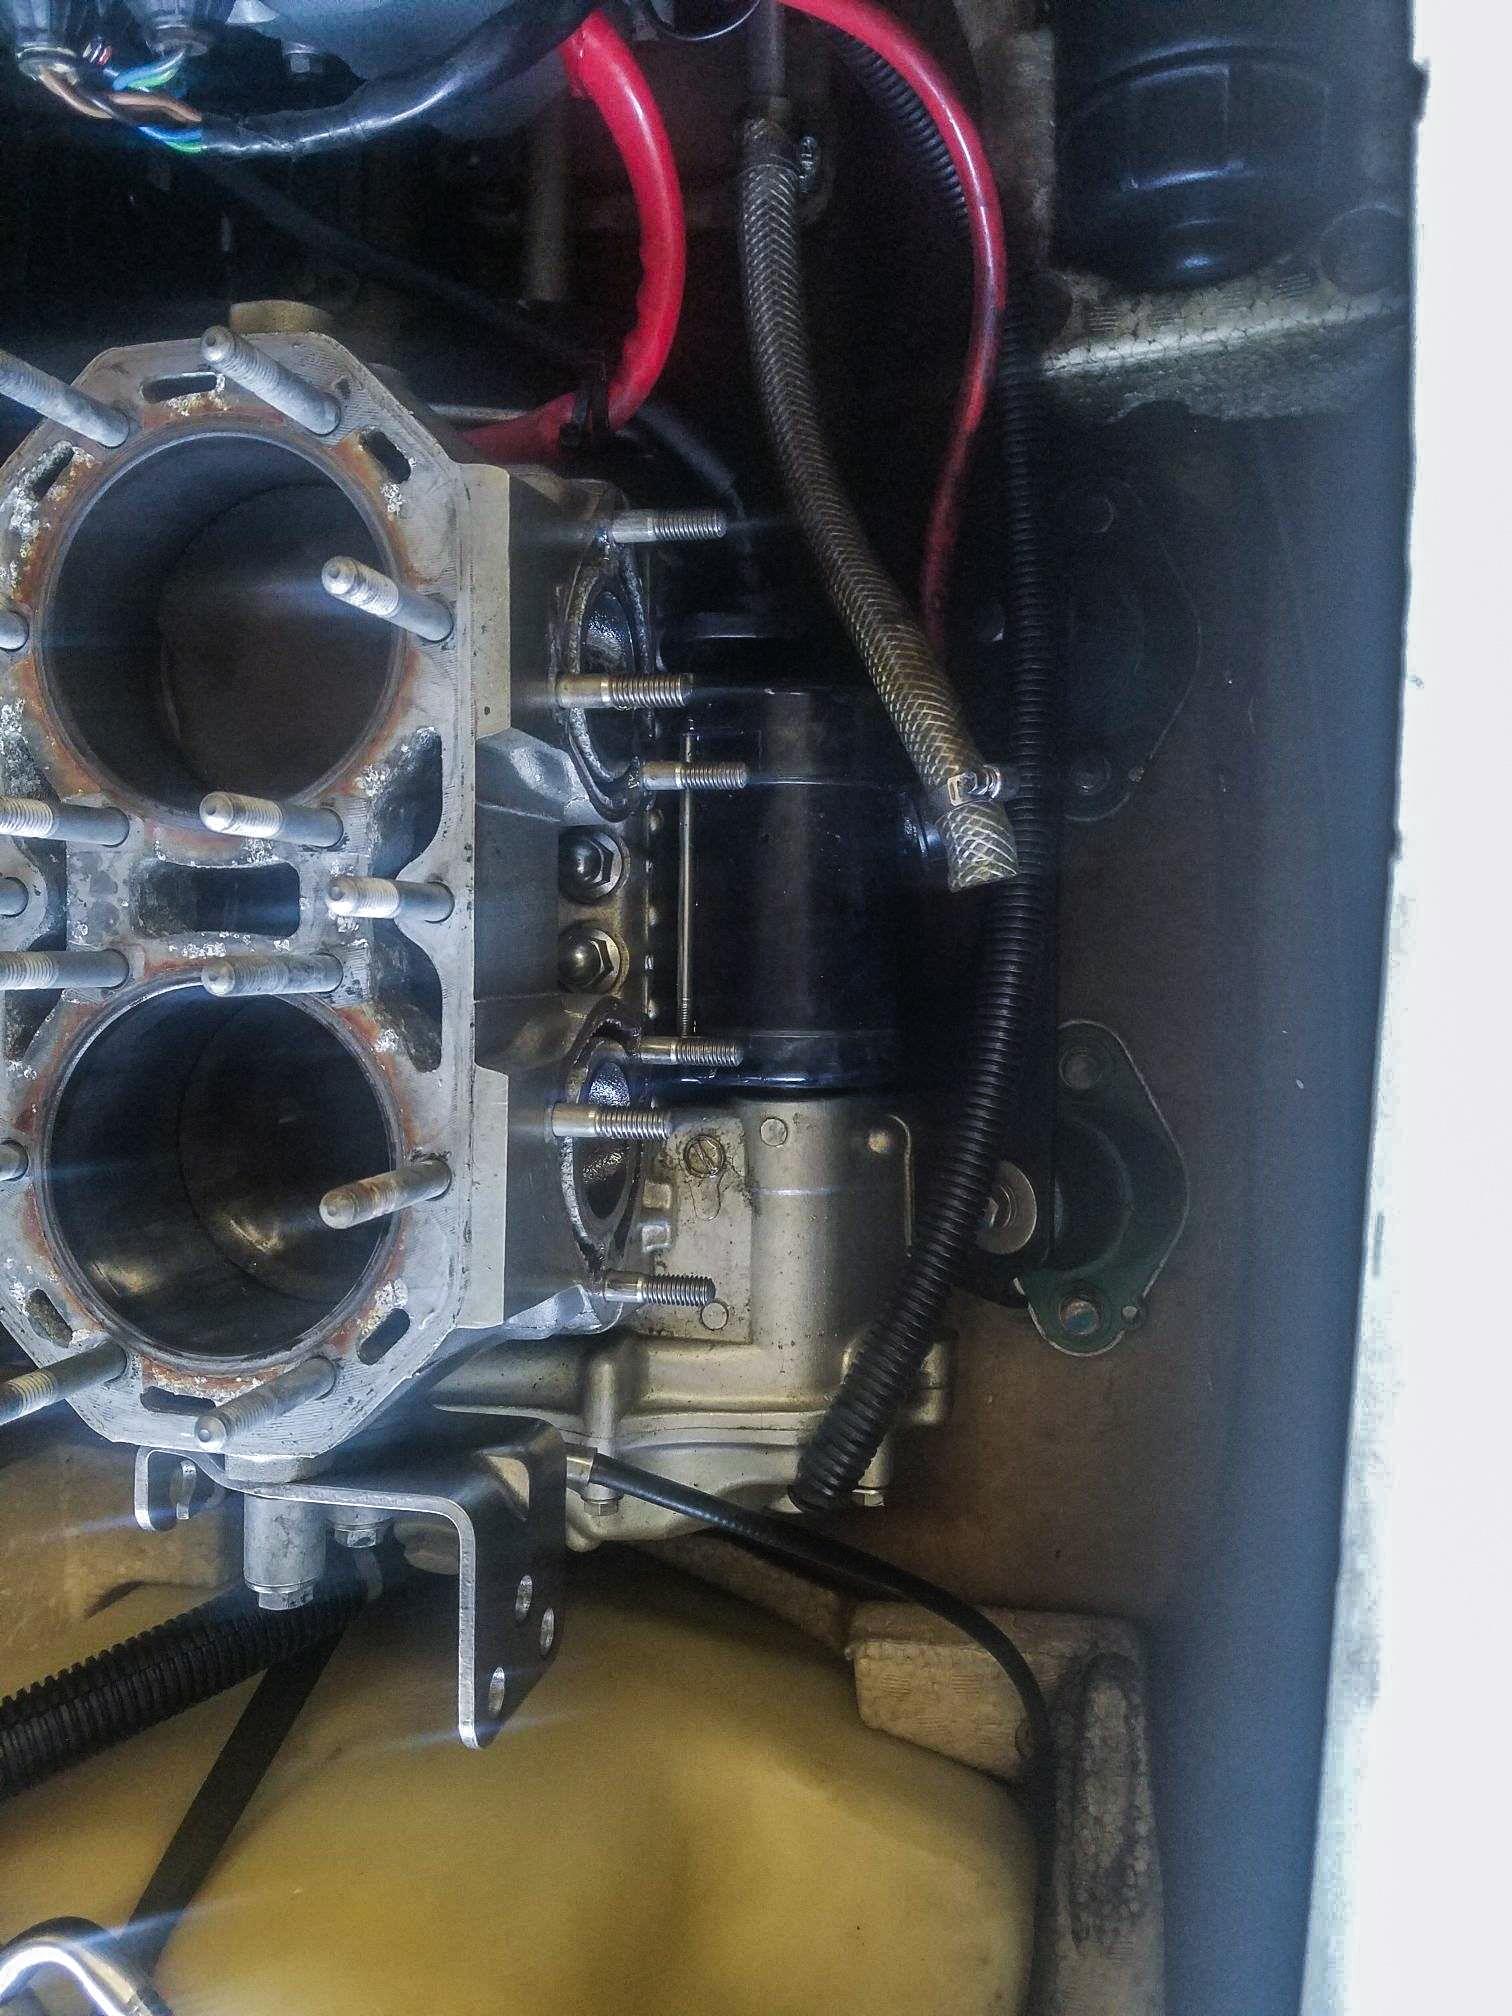
The first step in this top end rebuild process is disassembly. If you are not confident in your ability to disassemble and re-assemble the following parts, we recommend taking your PWC to a certified mechanic. To remove the head and cylinder, you’ll need to remove the exhaust (including the manifold) as well as the carburetors. Once those are removed, you can remove the head and any water lines attached. The next step would be to remove the cylinder base nuts, and then carefully slide the cylinder off the pistons.
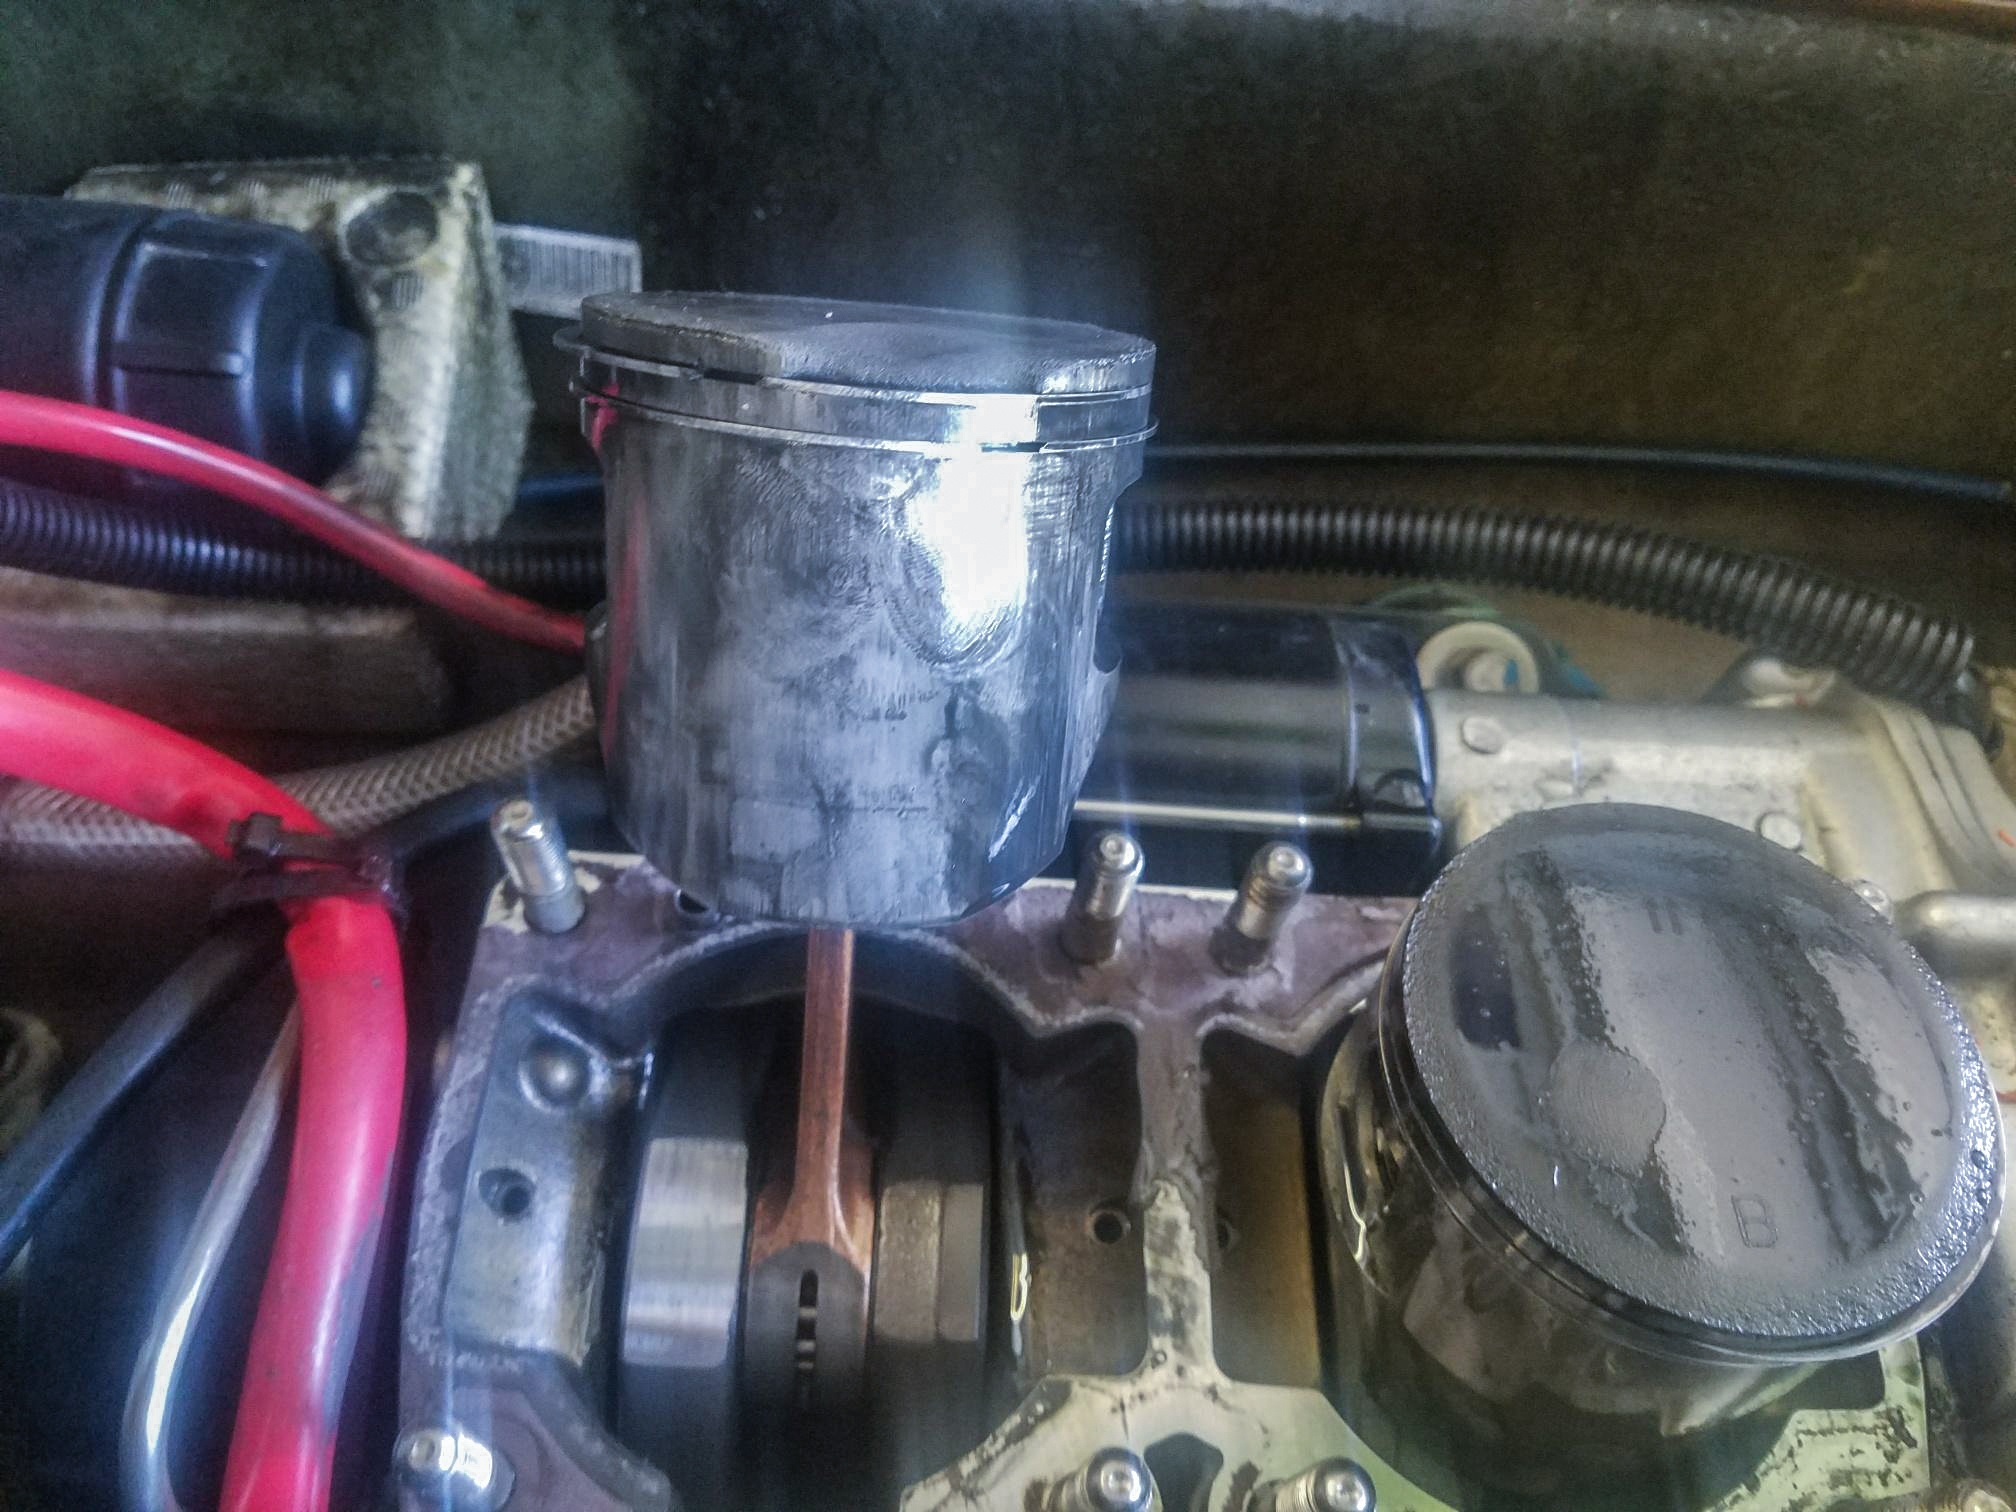
At this point in disassembly, it would be a good time to inspect for the cause of the top end failure, if a failure is the reason for your rebuild, and not just maintenance. 2-stroke top end failures can be caused by many things, but generally you’ll want to inspect the cylinder, pistons (crowns, skirts, rings, ring grooves, wrist pins, circlips).
Check the cylinder walls for areas of excessive contact, and check for any deep grooves that may have been put into the cylinder. Depending on the damage, you’ll most likely either need to bore and hone, or resleeve. If you’re doing the top end just for common maintenance, you should be able to deglaze your cylinder and order the proper sized piston. However, we always recommend using a professional machine shop for all your cylinder work.
Your pistons will usually tell you a lot about what your problem was. This document provides some great tips for diagnosing the cause of a top end failure. Inspect all areas of your pistons and reference this document in comparison. In our case, we knew the engine got too lean because the internal engine temperatures got high enough to begin melting the piston crowns.


However, we needed to figure out why it was so lean so we could prevent it from happening in the future. A lean condition in a 2-stroke engine is commonly caused by an air leak, allowing more oxygen into the cylinder than just the fuel/air mixture coming from the carburetors and intake manifold.
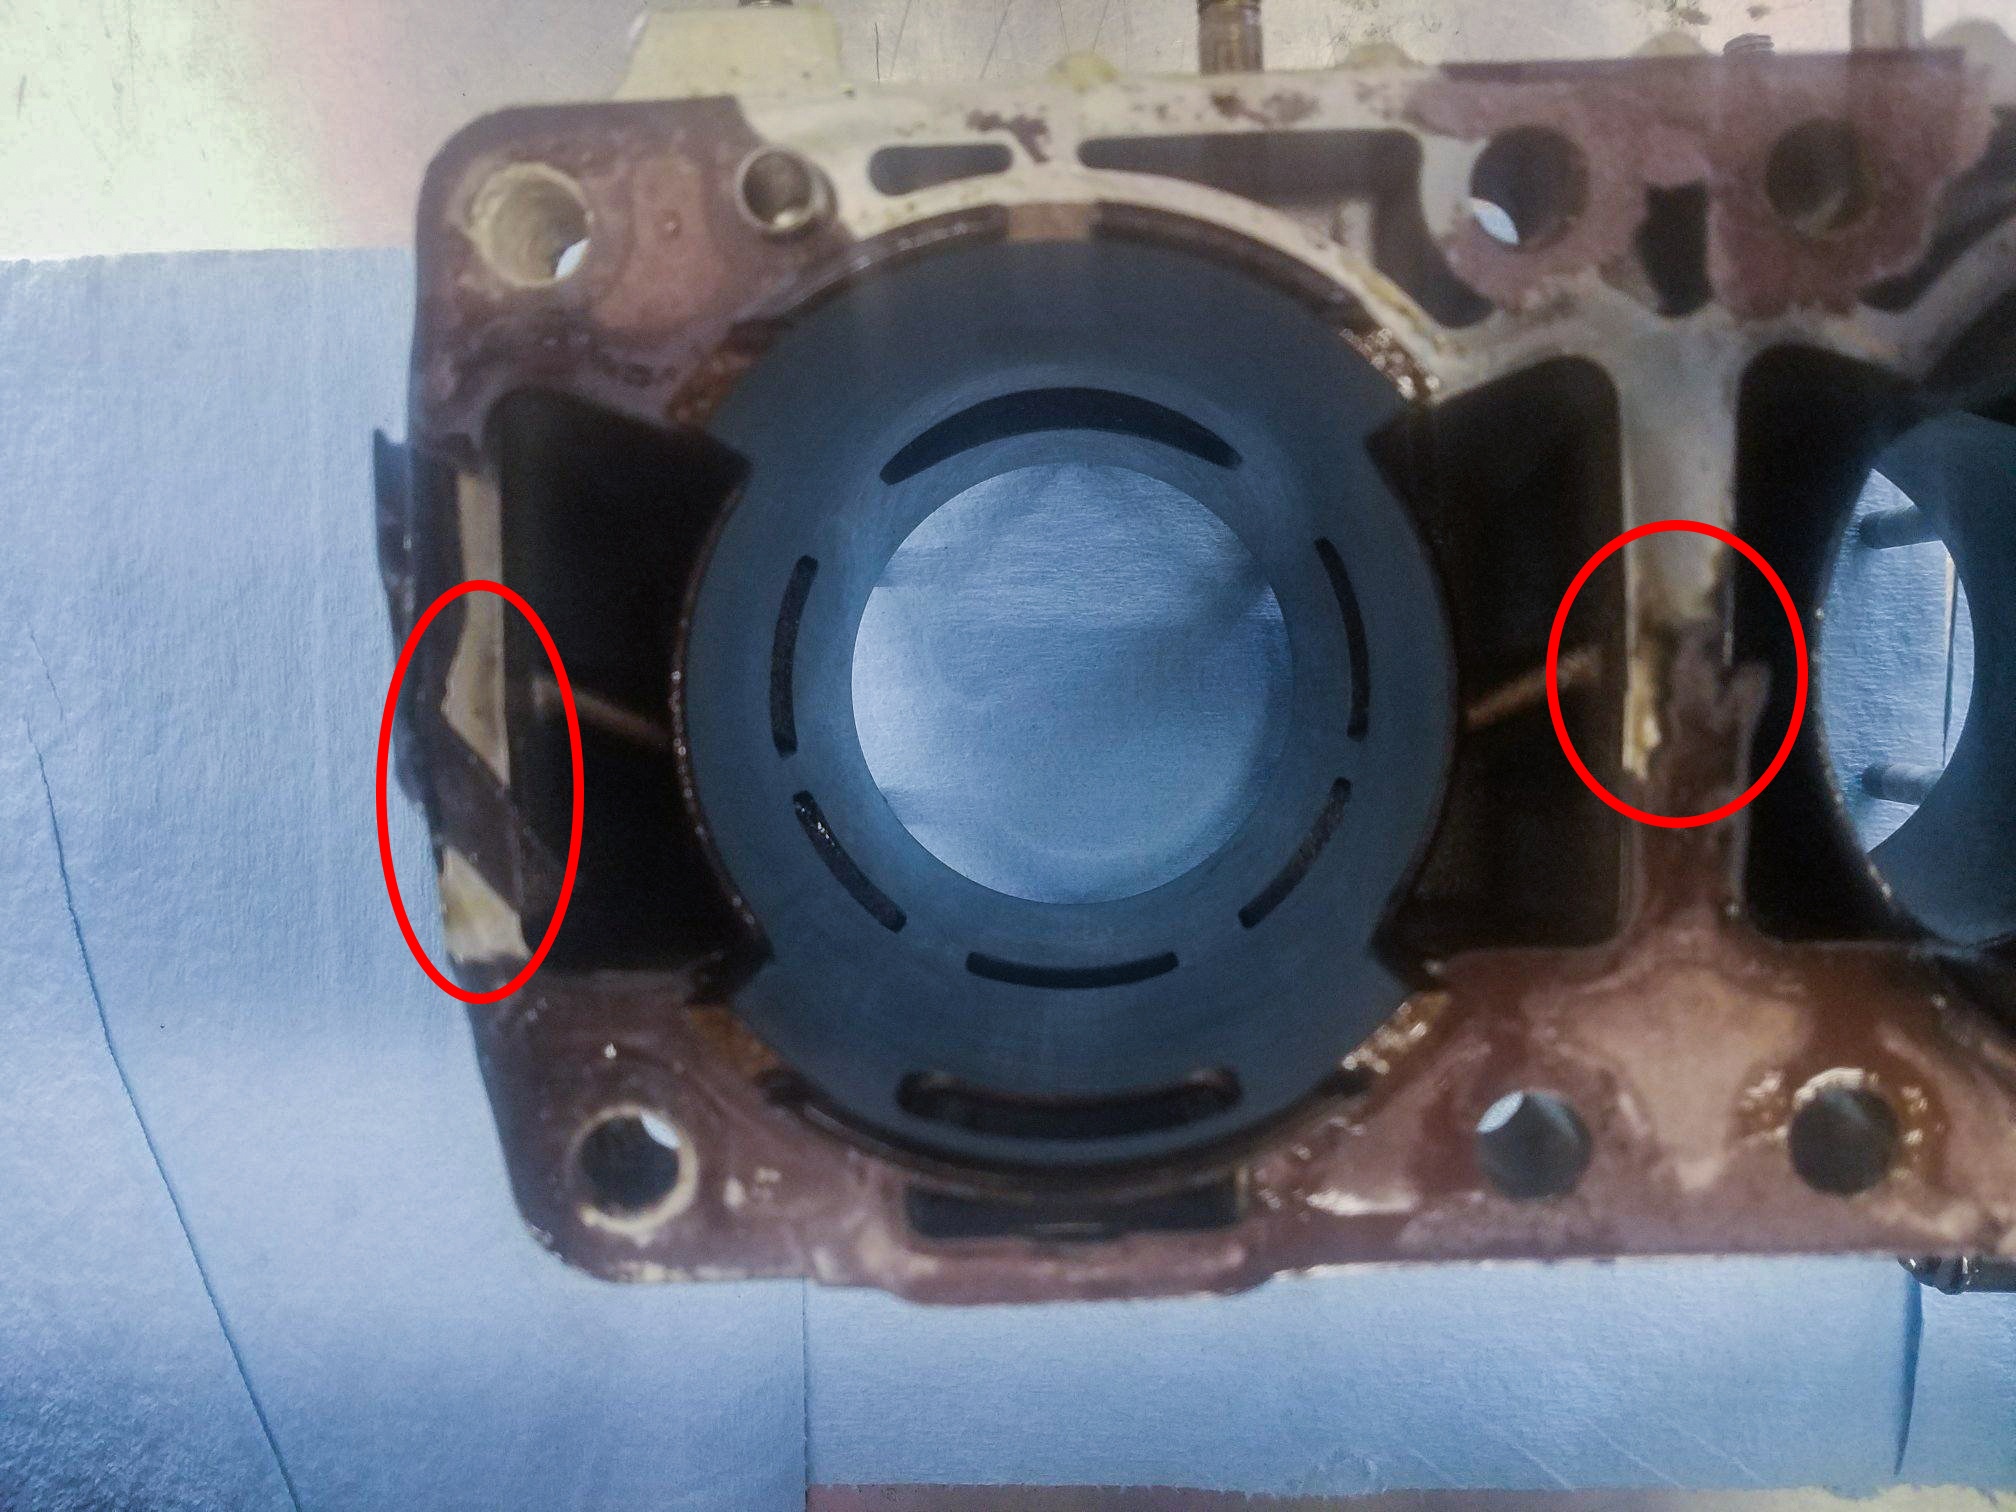
After removing the cylinder, we noticed the base gasket was damaged right in the center of the cylinder, as well as on the outer edge near of the front cylinder. We could tell oil and fuel had been able to escape through these damaged sections, which means air was able to get in and cross between cylinders.
Other important areas to check in the case of a lean condition are the intake manifold gaskets, exhaust gaskets, head gasket, and jetting.
If you had a failure, once you’ve diagnosed and fixed the source of your problem, it’s time to begin reassembly with your new parts.
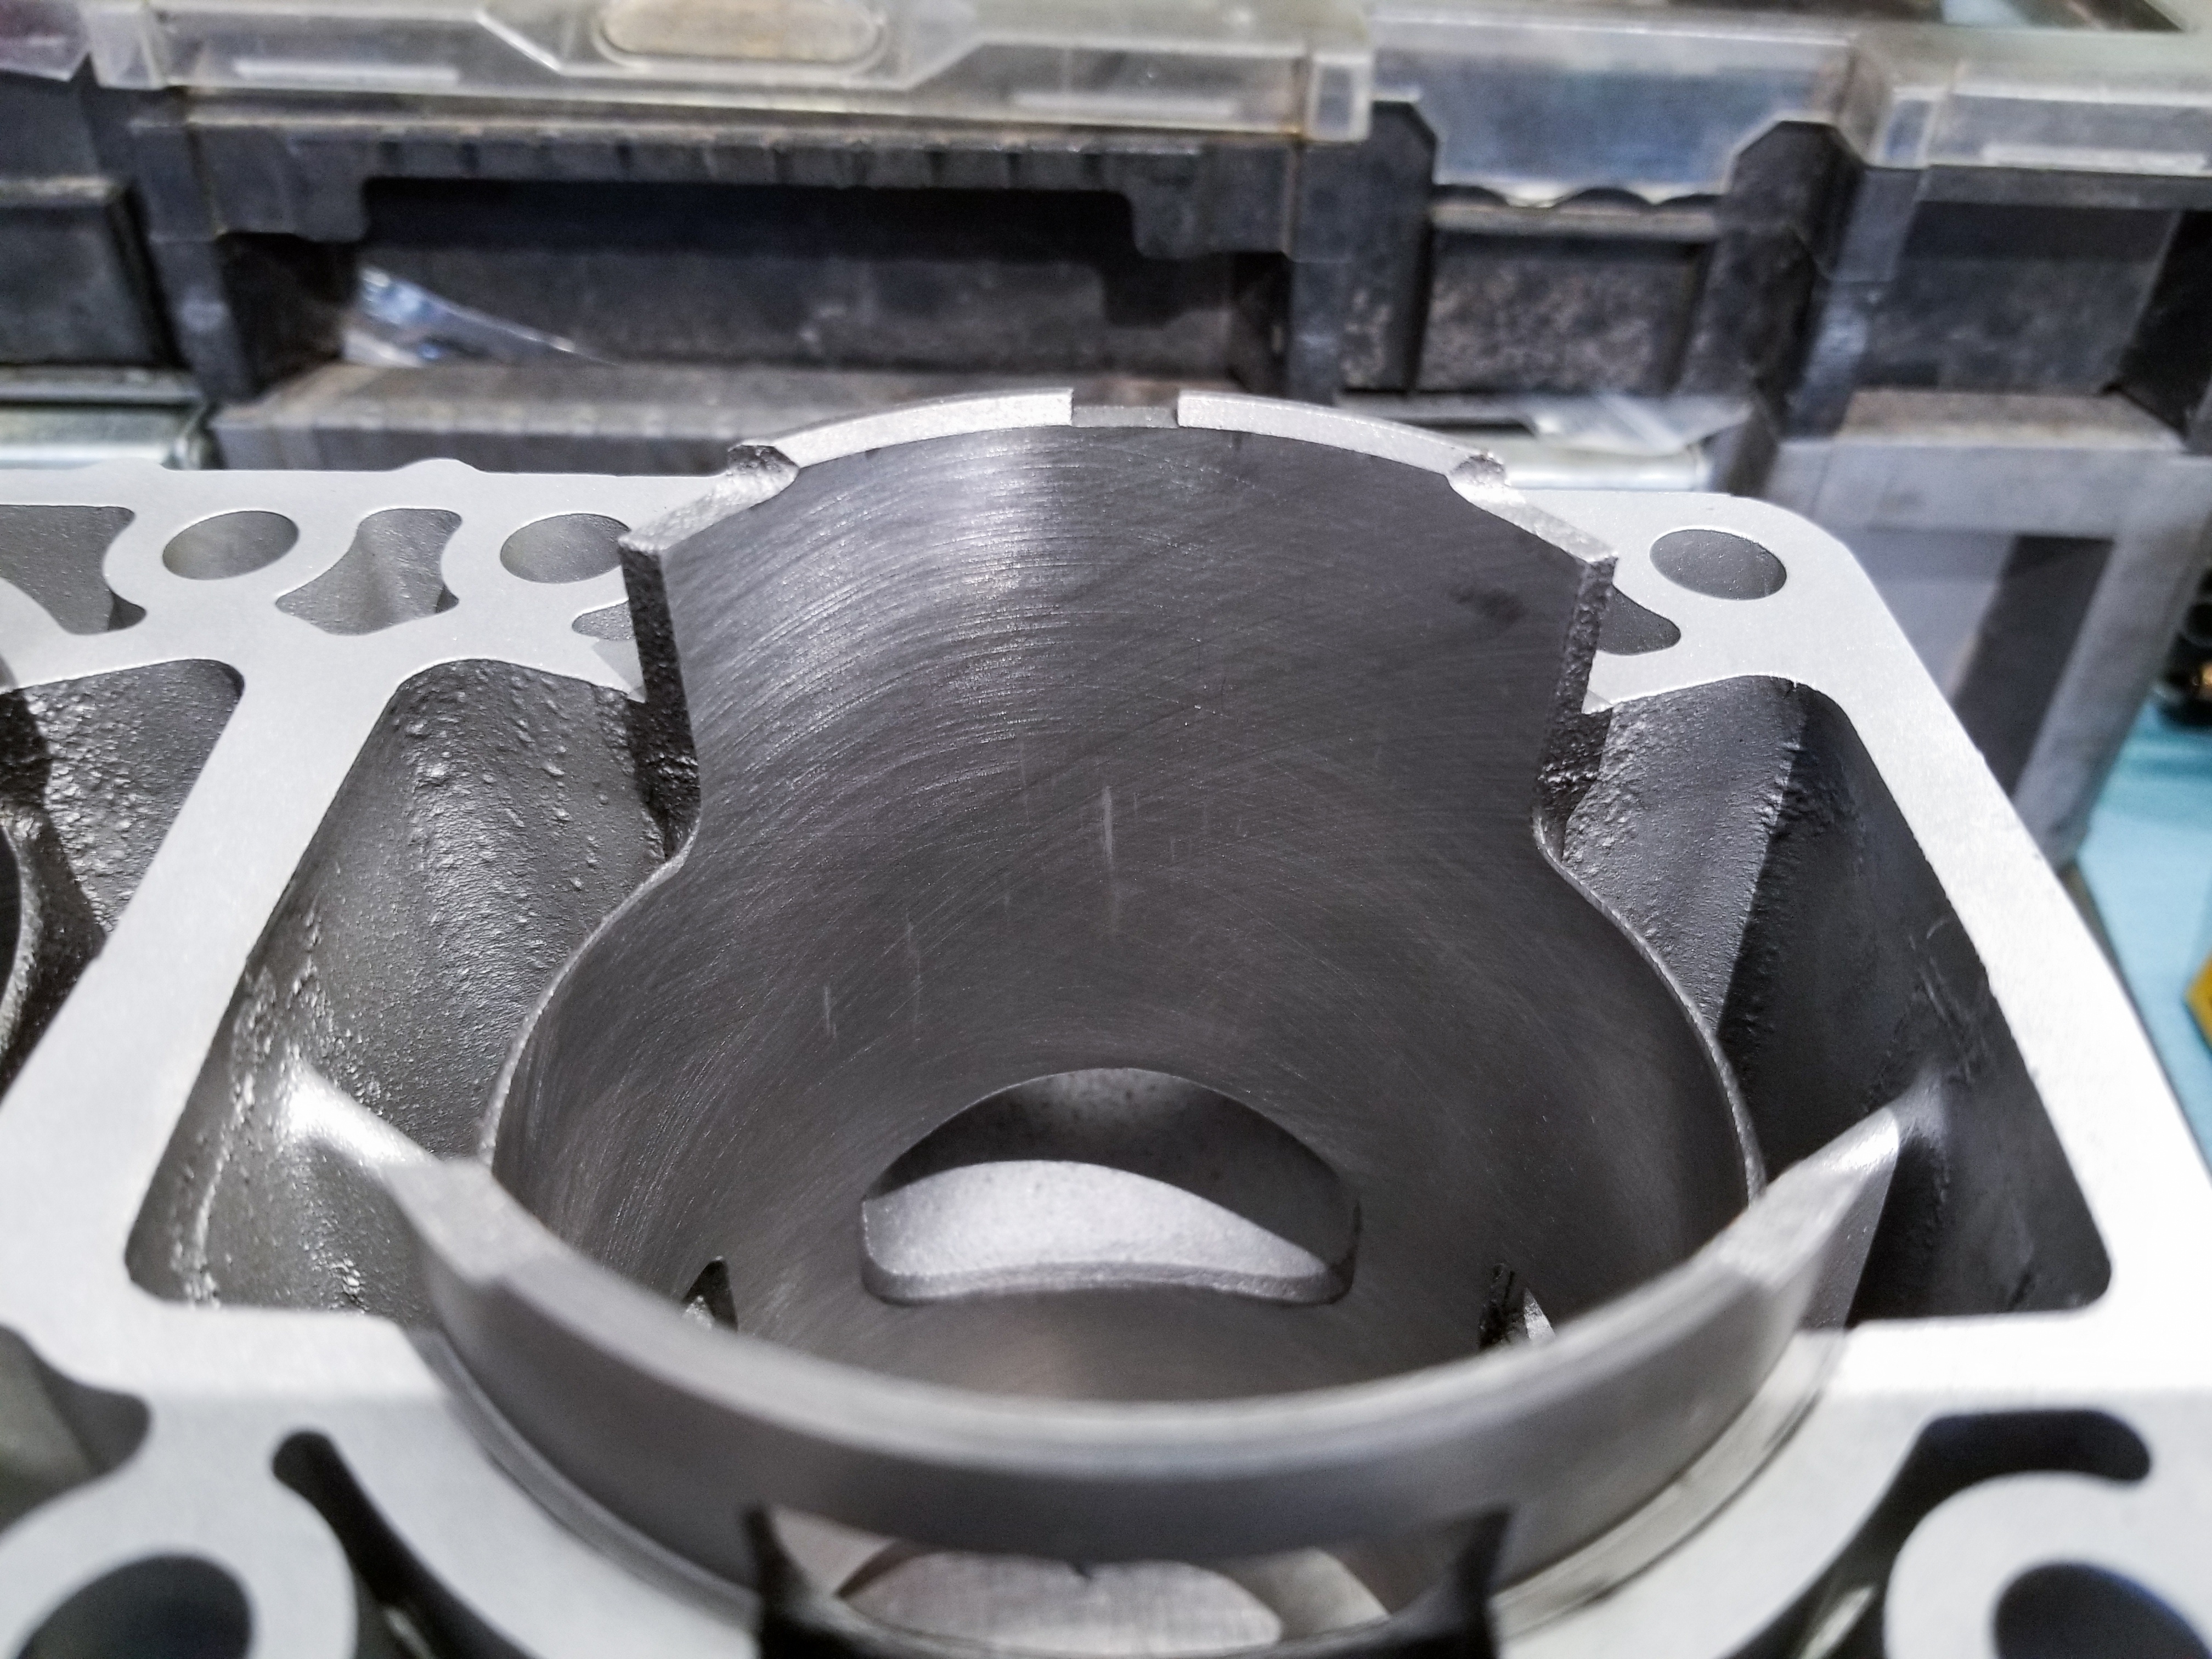
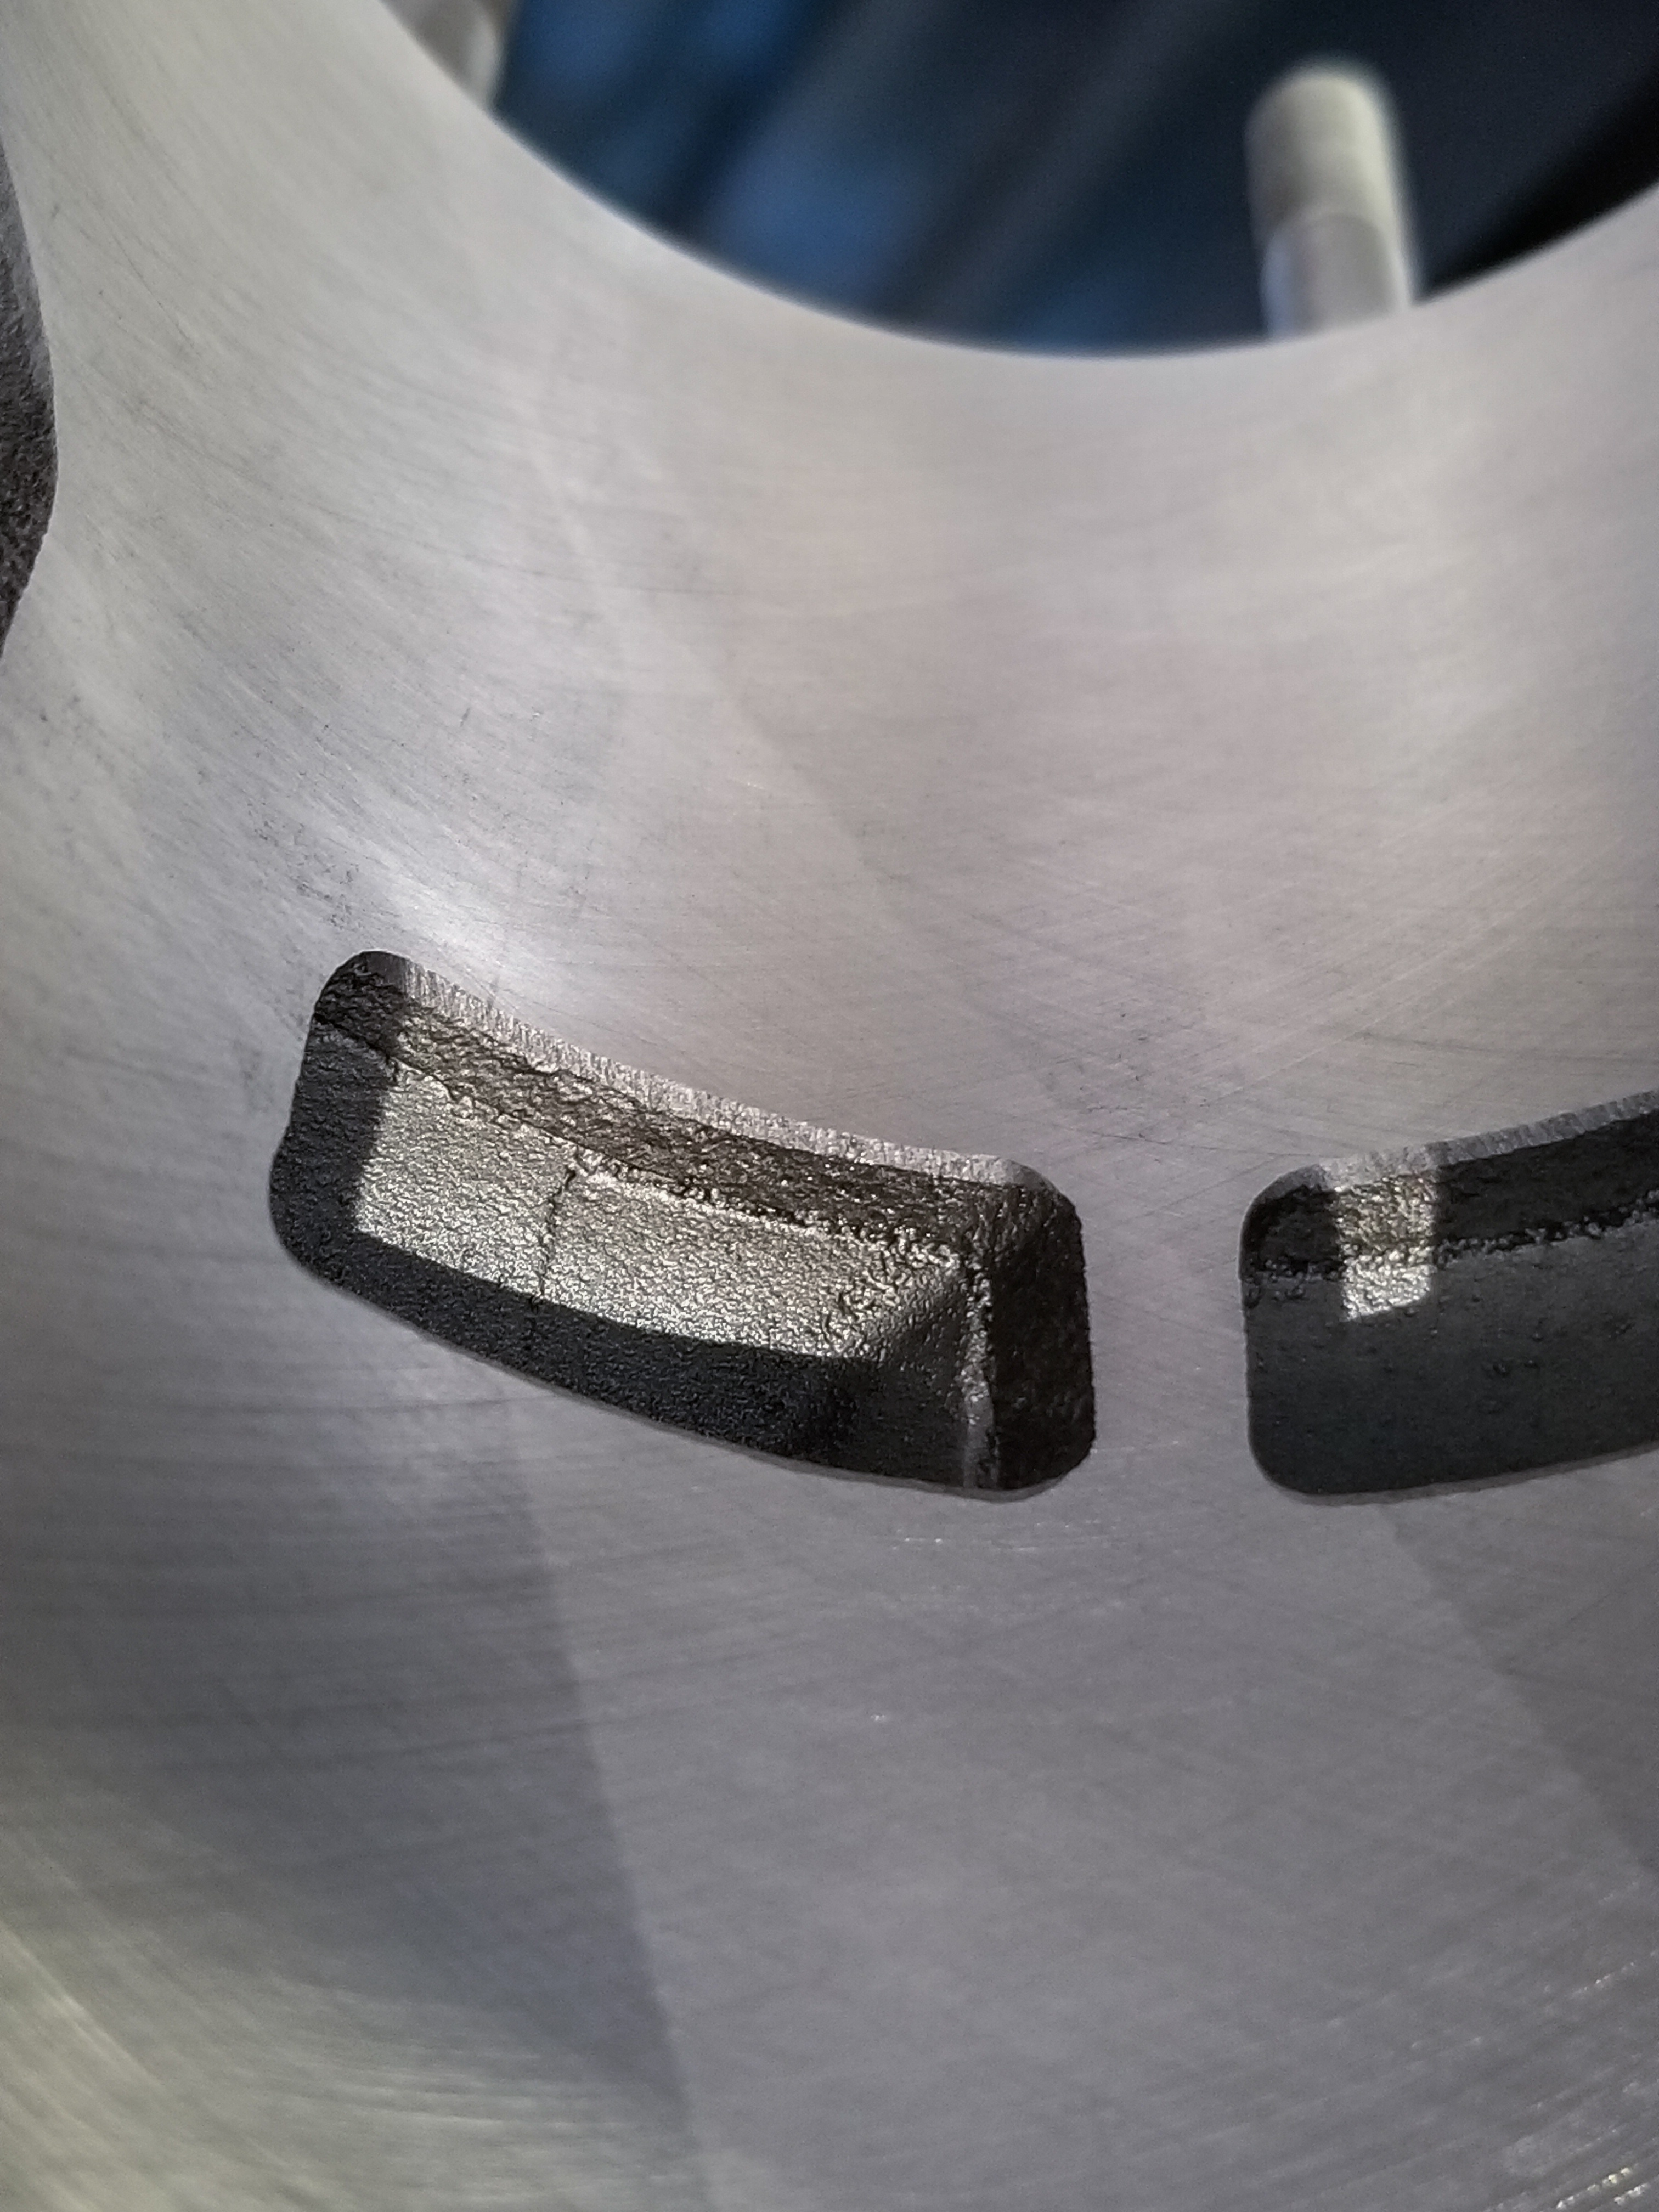
Whatever extent of cylinder work was required for your project, it should come back at the bore size you specified, honed with nice cross hatch marks, and with all sharp edges chamfered. These are very important to a long life of optimal operation for your top end. It’s never a bad idea to double check the bore size, honing, and chamfer work when you get the cylinder back.
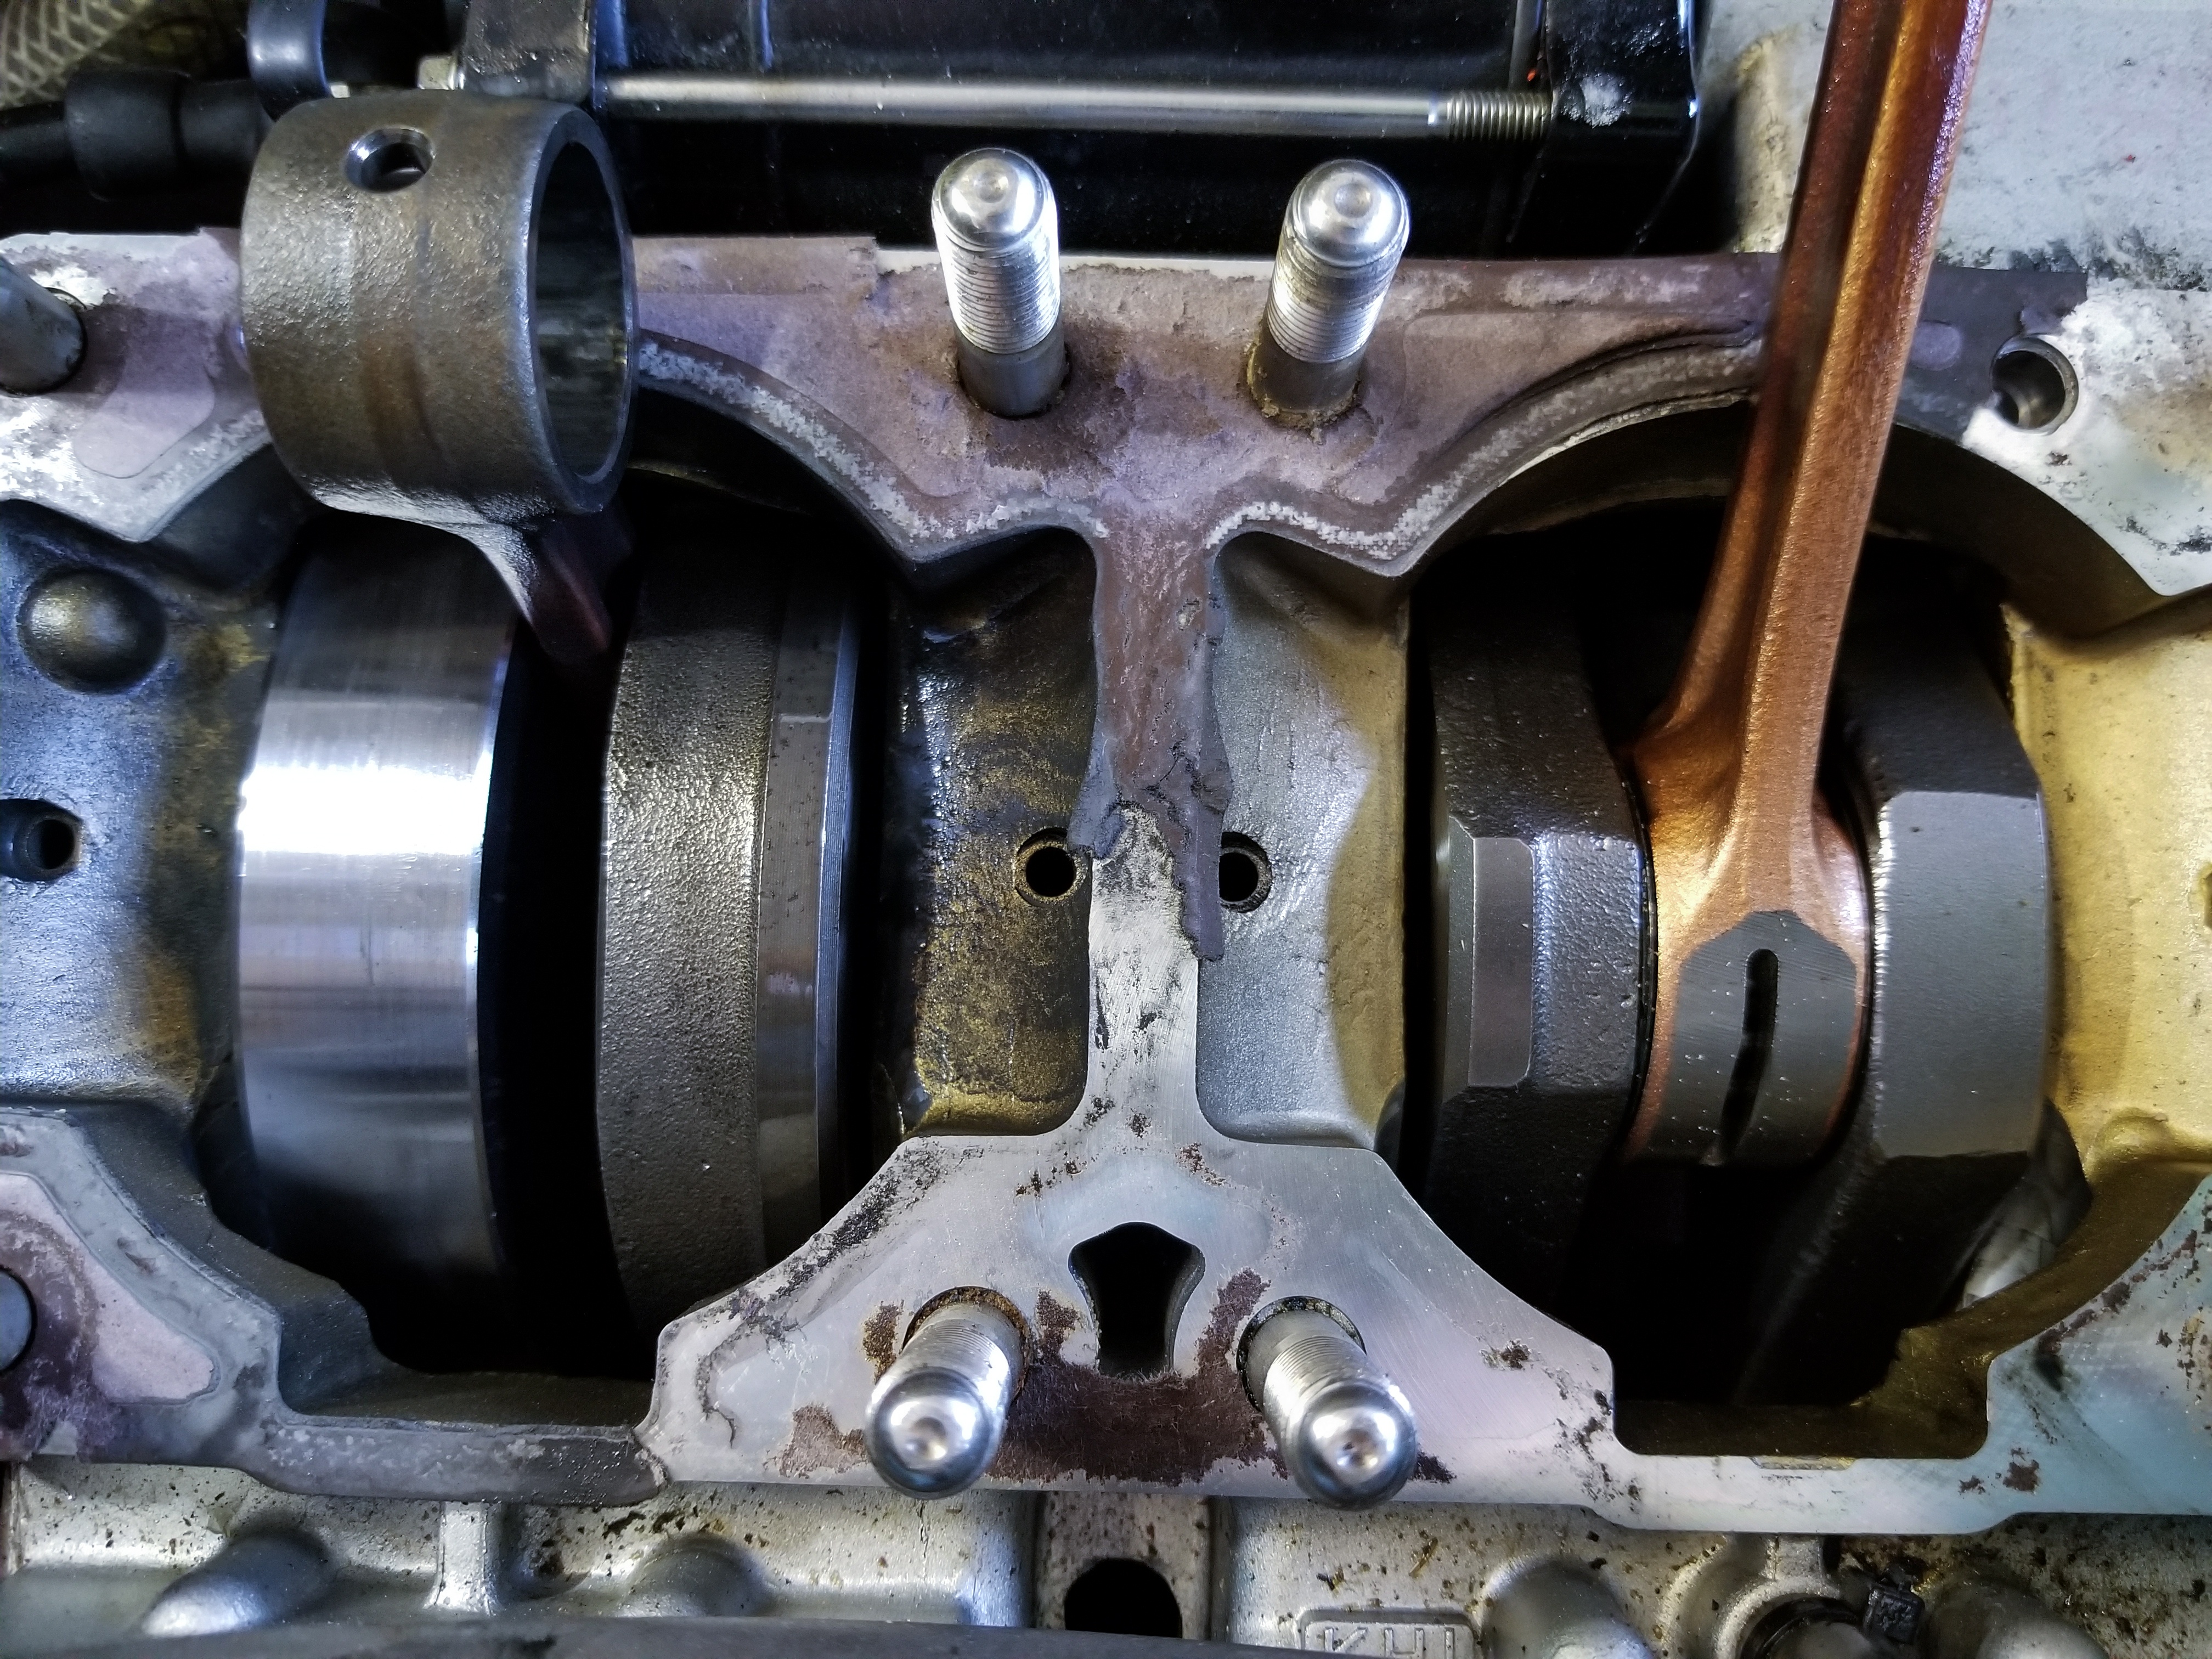
As we begin reassembly, we need to make sure everything is clean. Thoroughly check your crankcase, crankshafts, and bearings for any debris. Any dirt or metal shaving in or around the crankshafts will ultimately lead to a failure. It is also important to clean all old gasket material off the crankcase and cylinder. Once clean, install a new base gasket. Some engine builders recommend using a sealant like Three Bond under the base gasket to make it sure it stays in place when torqueing the cylinder down, but this is ultimately the engine builder’s preference. The critical part is that a new base gasket is laid down in the proper orientation.
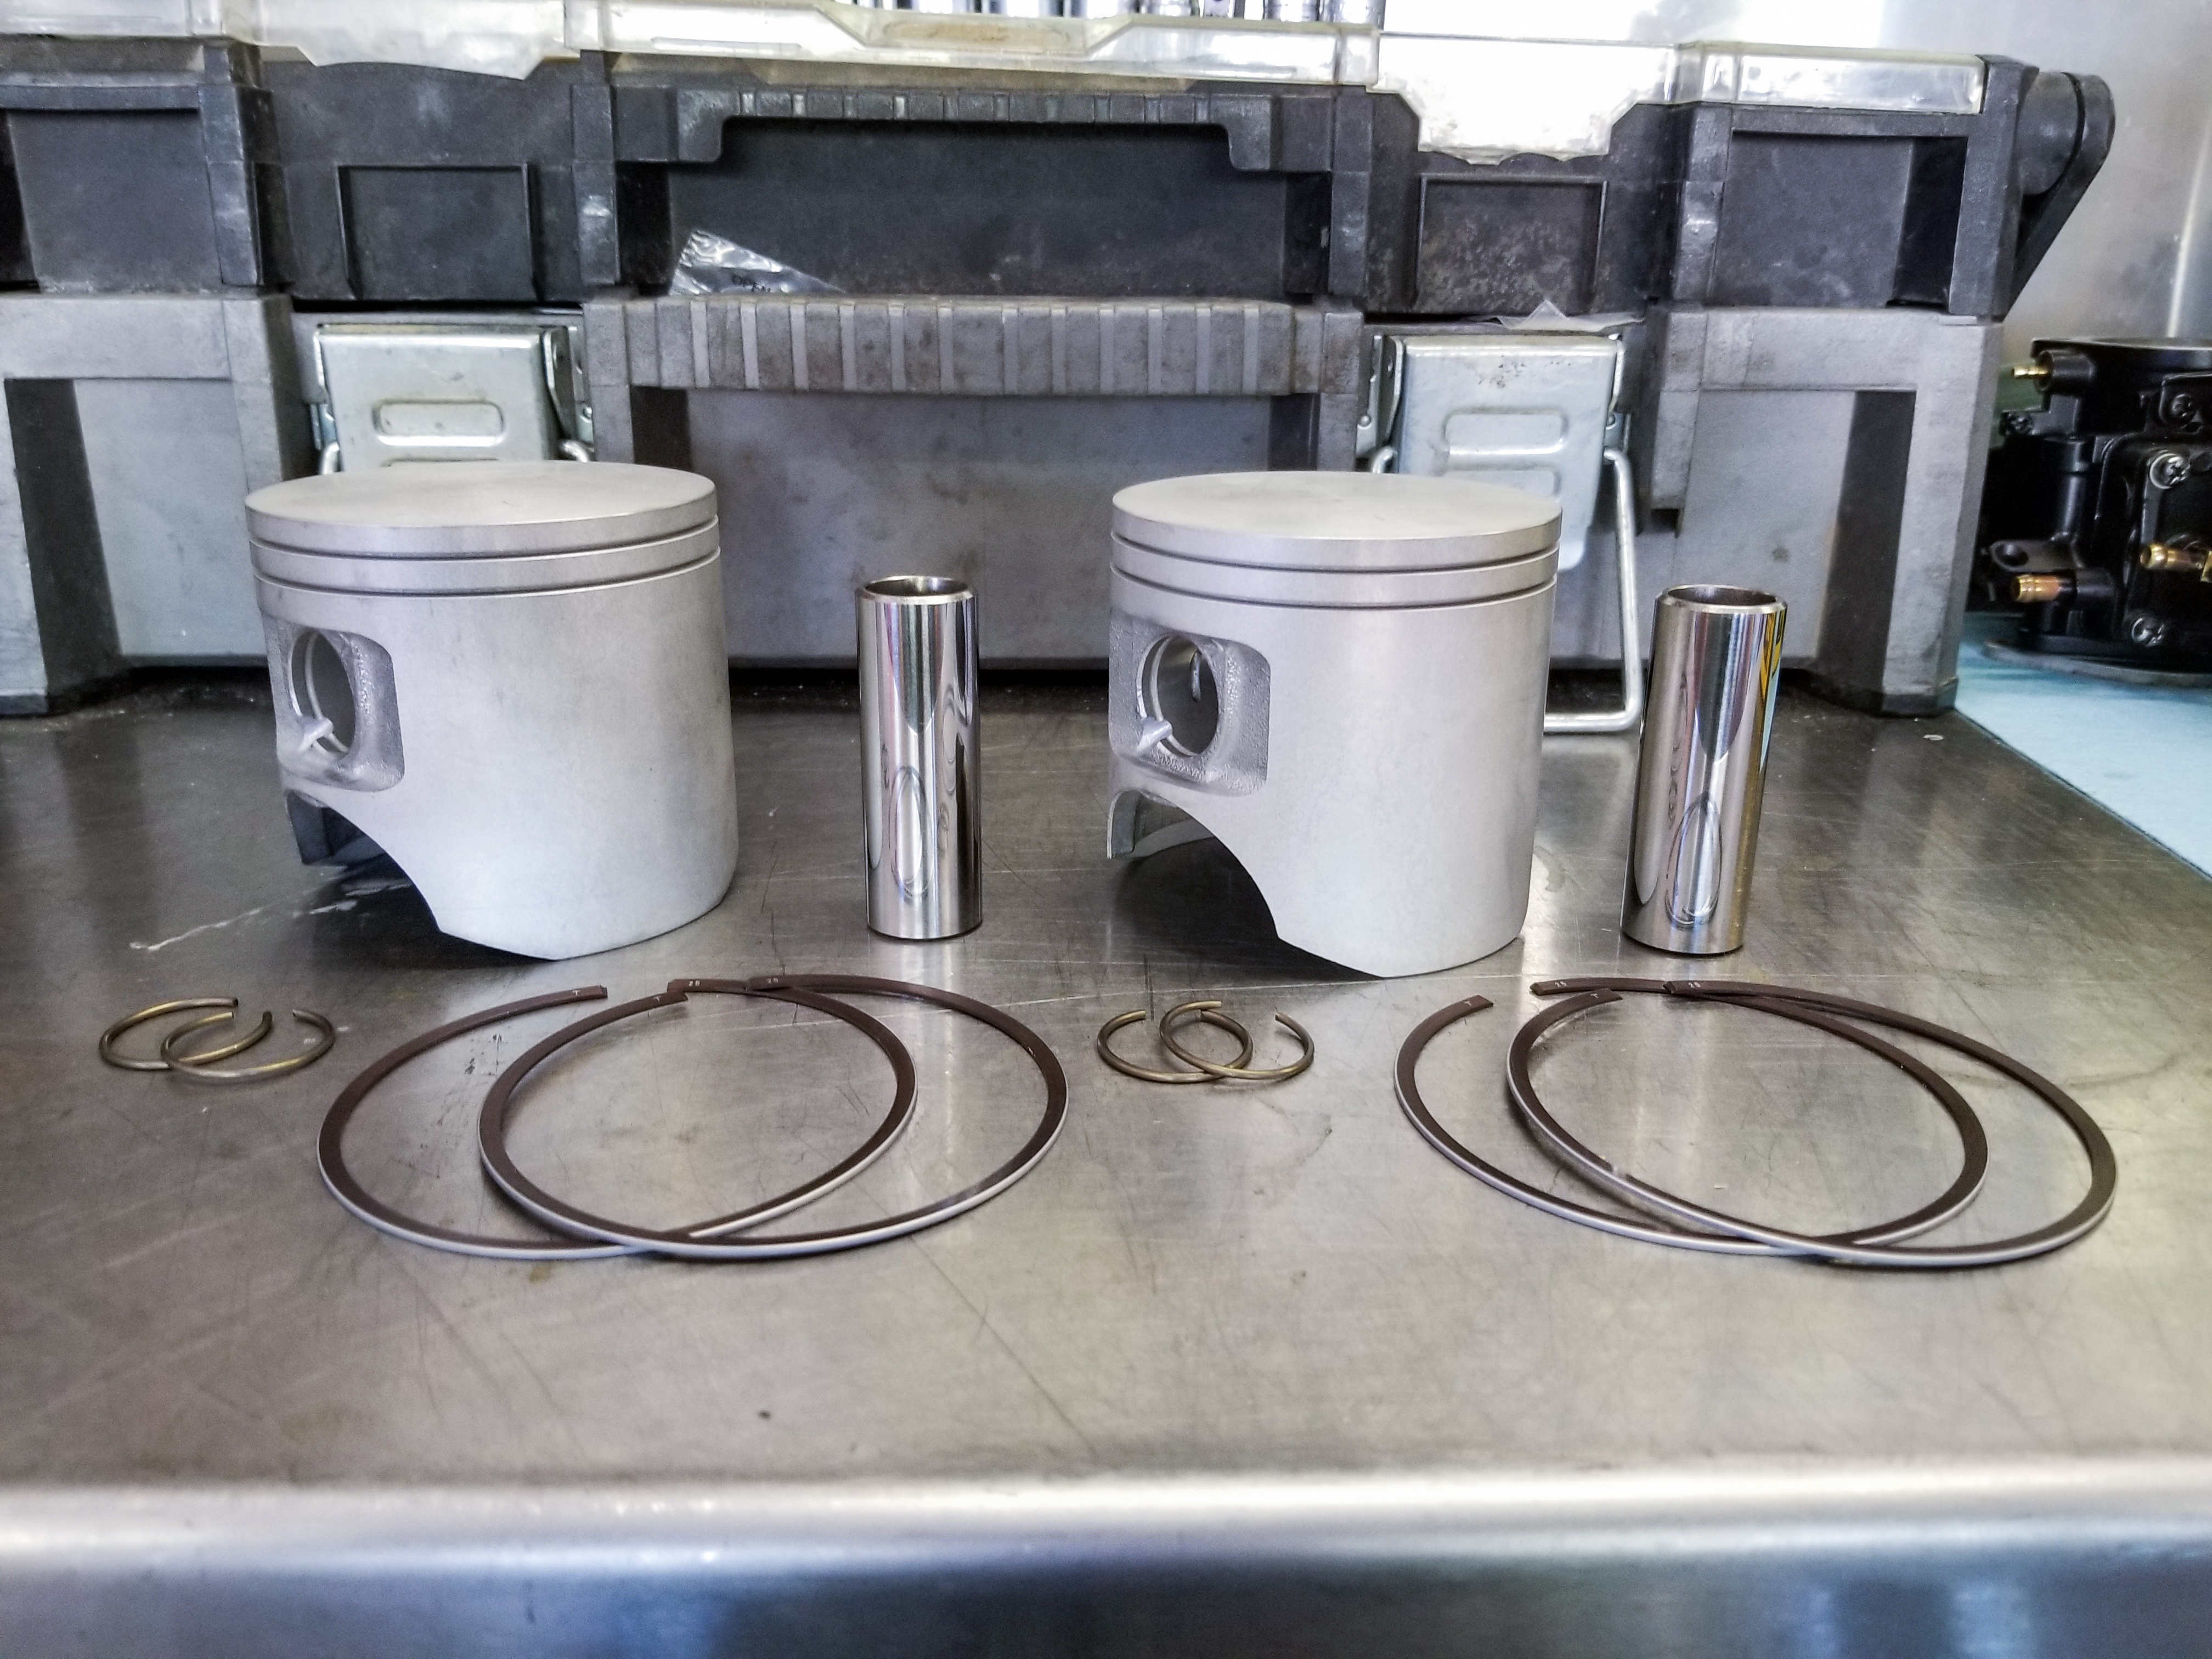
Next, make sure the small ends of the rods are clean, and have a thin layer of fresh oil on them. Insert your new small end bearings into the rods, and add some oil to the bearings as well. Note: whenever you are replacing a 2-stroke top end, use new small end bearings as well. They’re a relatively cheap item, especially from OEM replacement companies like ProX. A small end bearing failure can be catastrophic, so it’s not worth re-using your old ones.
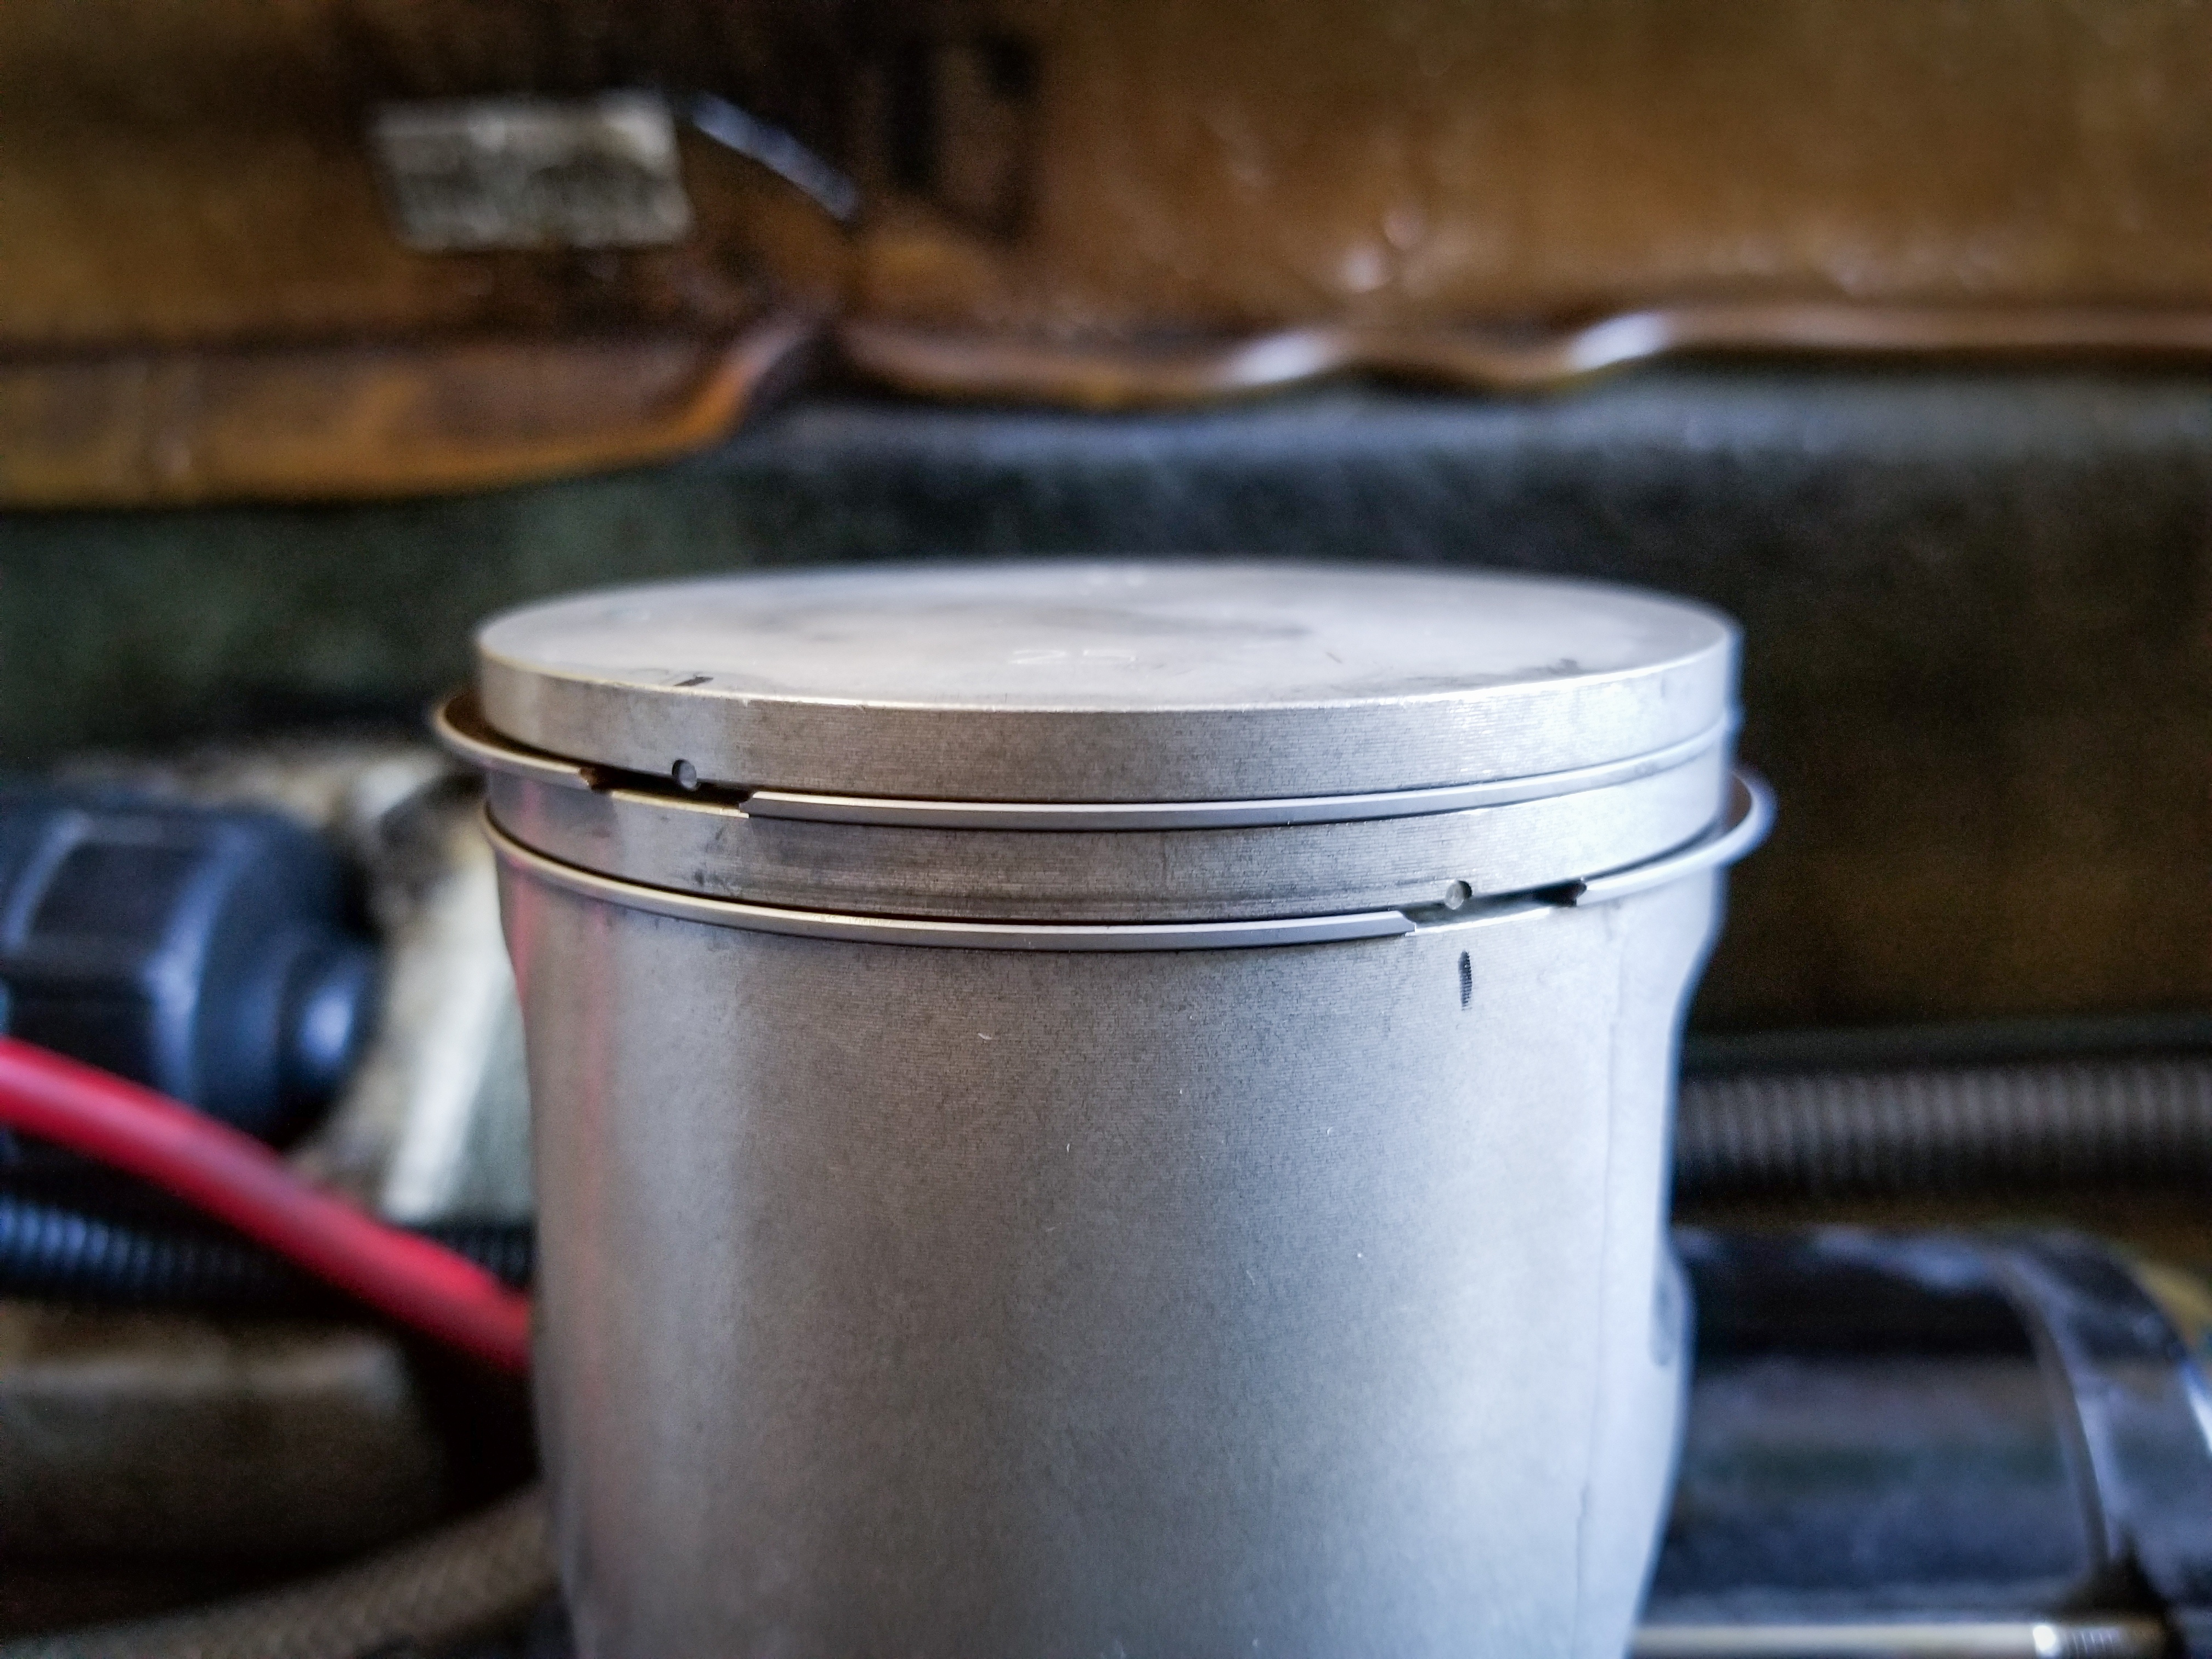
Now, we can install our piston rings onto our pistons. Our ProX piston kit instructions informed us that the markings on the rings should be facing up, so be sure to install them in the correct orientation. Line up the ring end gaps with ring groove pins. You’ll notice there are notches cut in the ends of the rings, which are intended to sit on either end of the ring groove pin to prevent the ring from rotating on the piston.
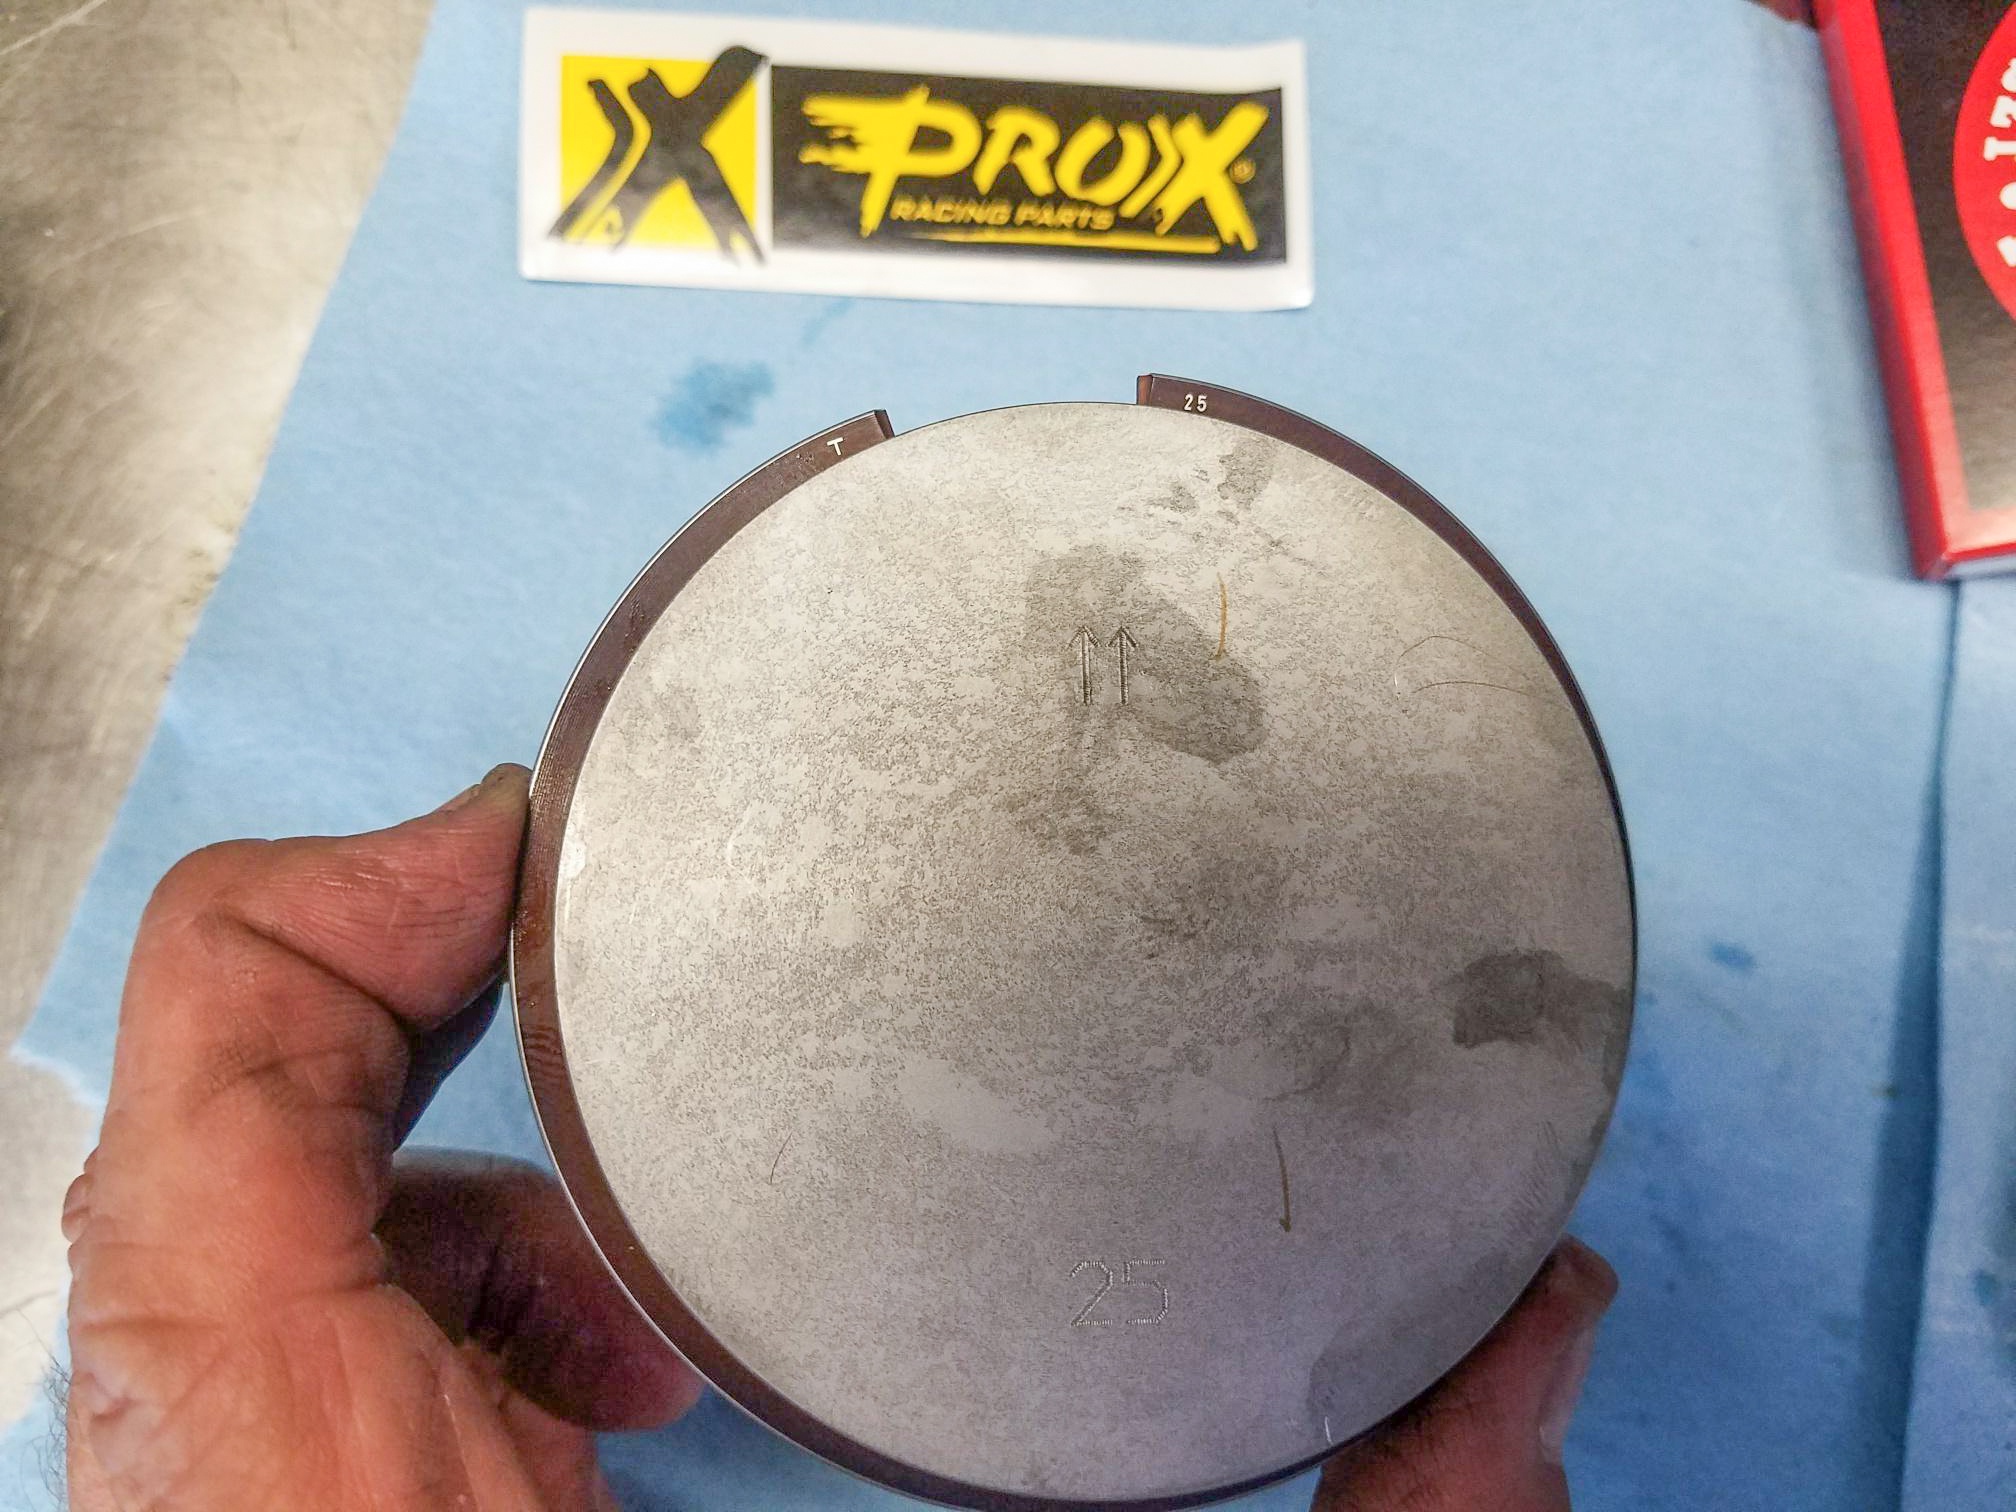
The next step is piston installation. The pistons must be installed with the arrows pointing toward the exhaust side of the cylinder. Install one circlip into one lock groove on the piston. Make sure your new wrist pins are clean and have a coat of fresh oil on them. Hold the piston over the small end of the rod, and slide the pin through piston pin bore on the side without the lock.
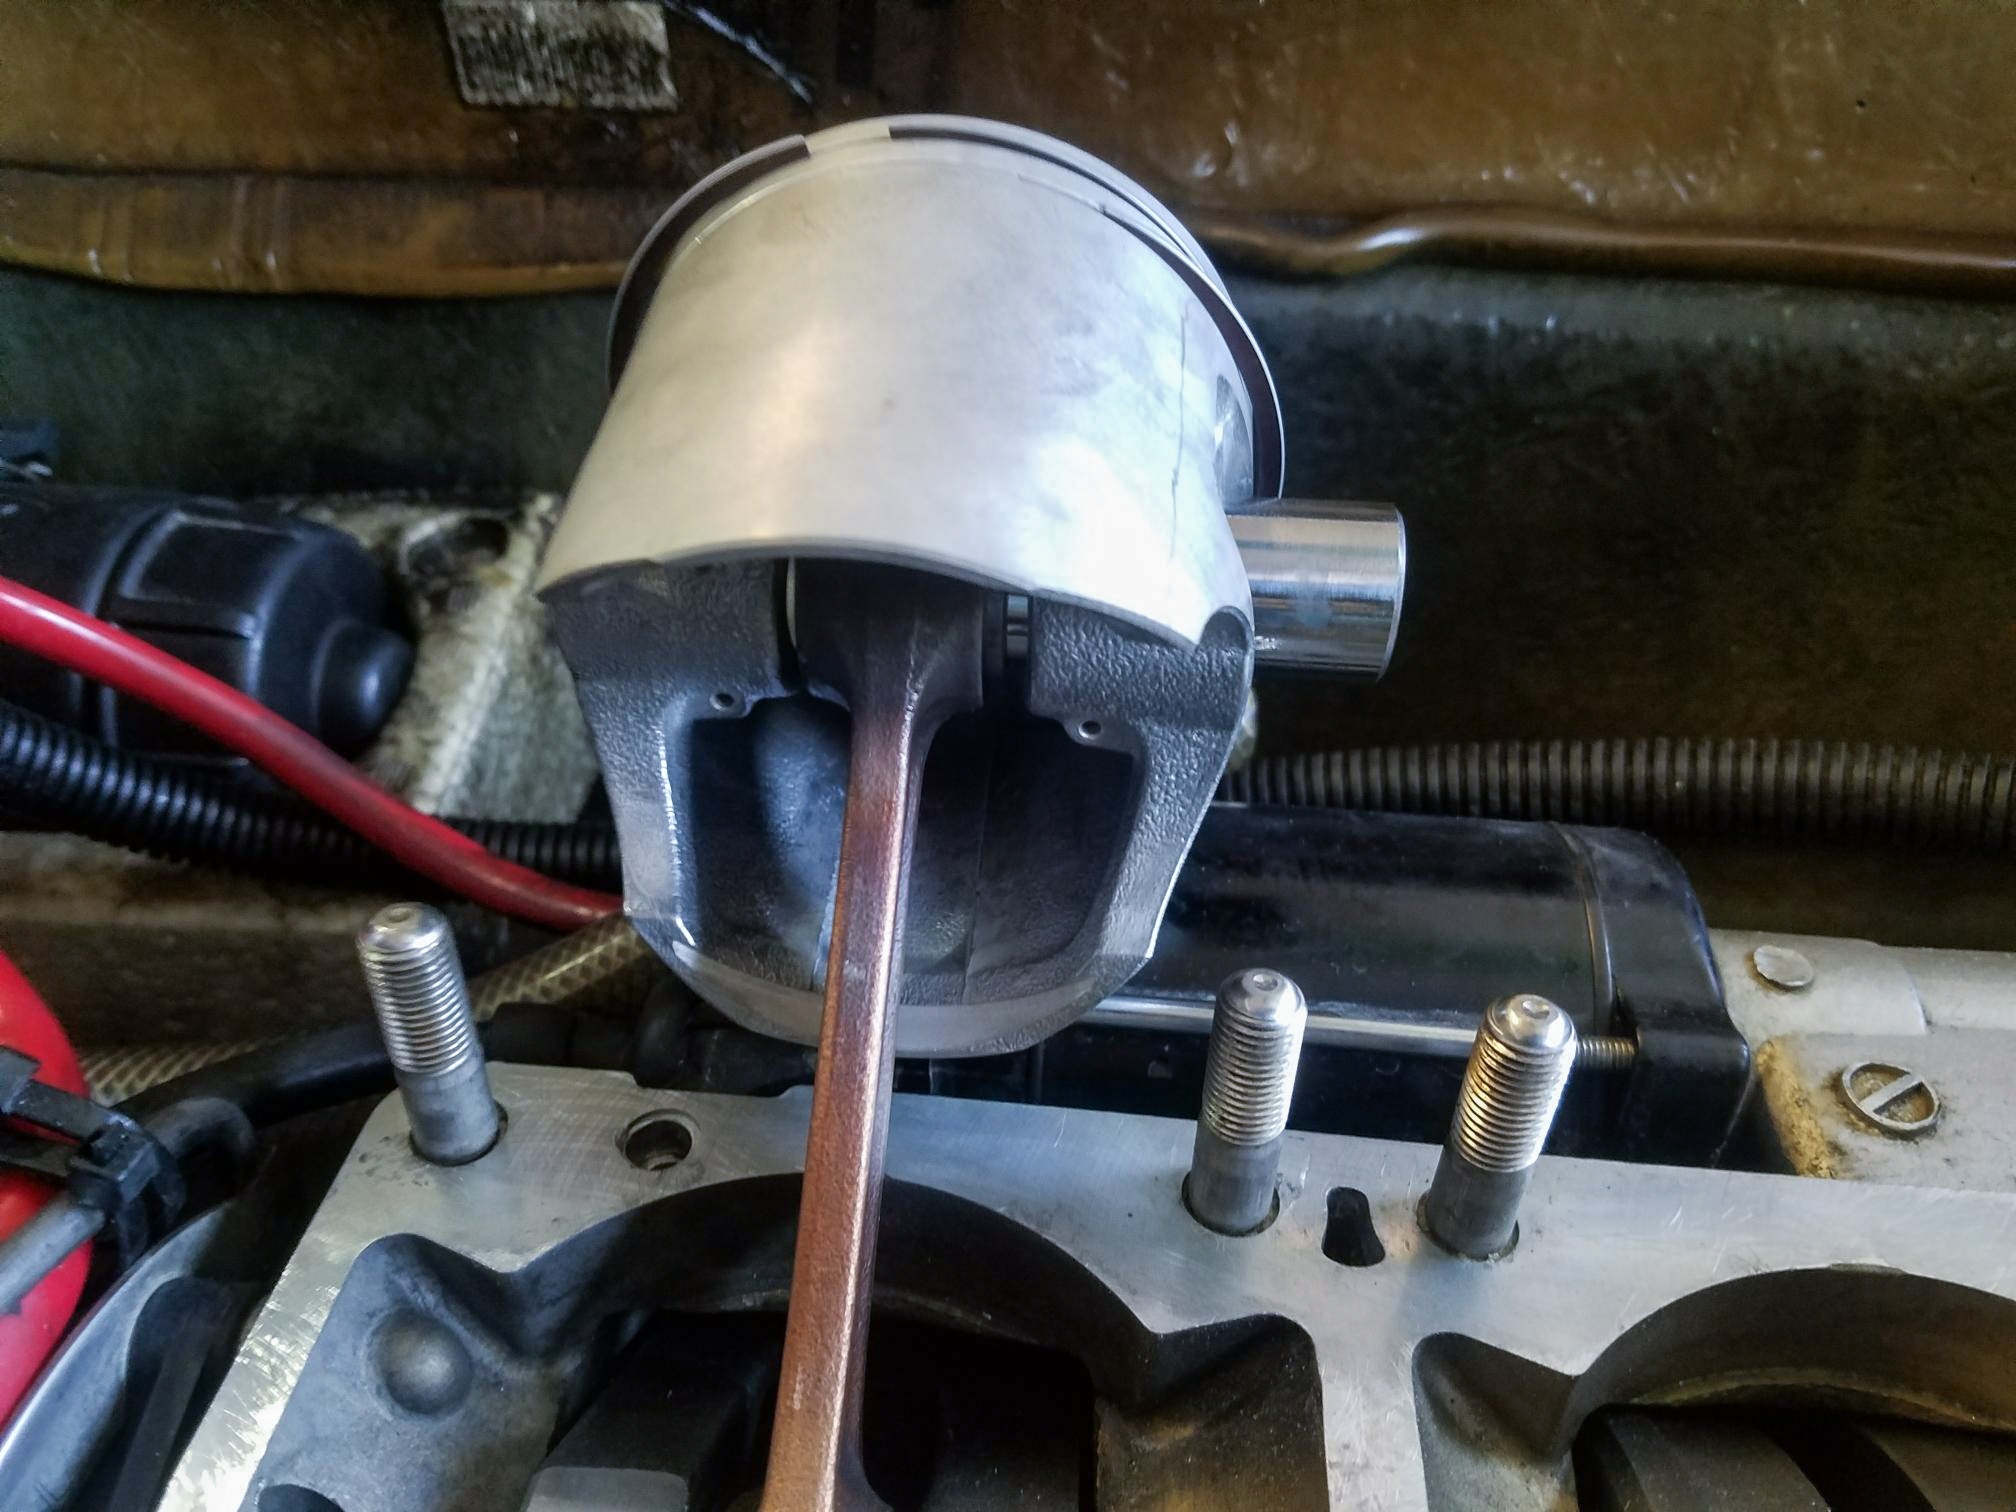
Once both your pistons are fully installed on the rods, slide the cylinder over the pistons. Using ring compressors to keep the rings in the correct spot while initially sliding the cylinder over makes this step the easiest. Before sliding your cylinder all the way down, make sure the rings did not move out of the groove or the end gaps did not move away from the ring groove pin. After you’ve confirmed the rings and pistons are properly in the bores, slide the cylinder all the way down onto the crankcase.
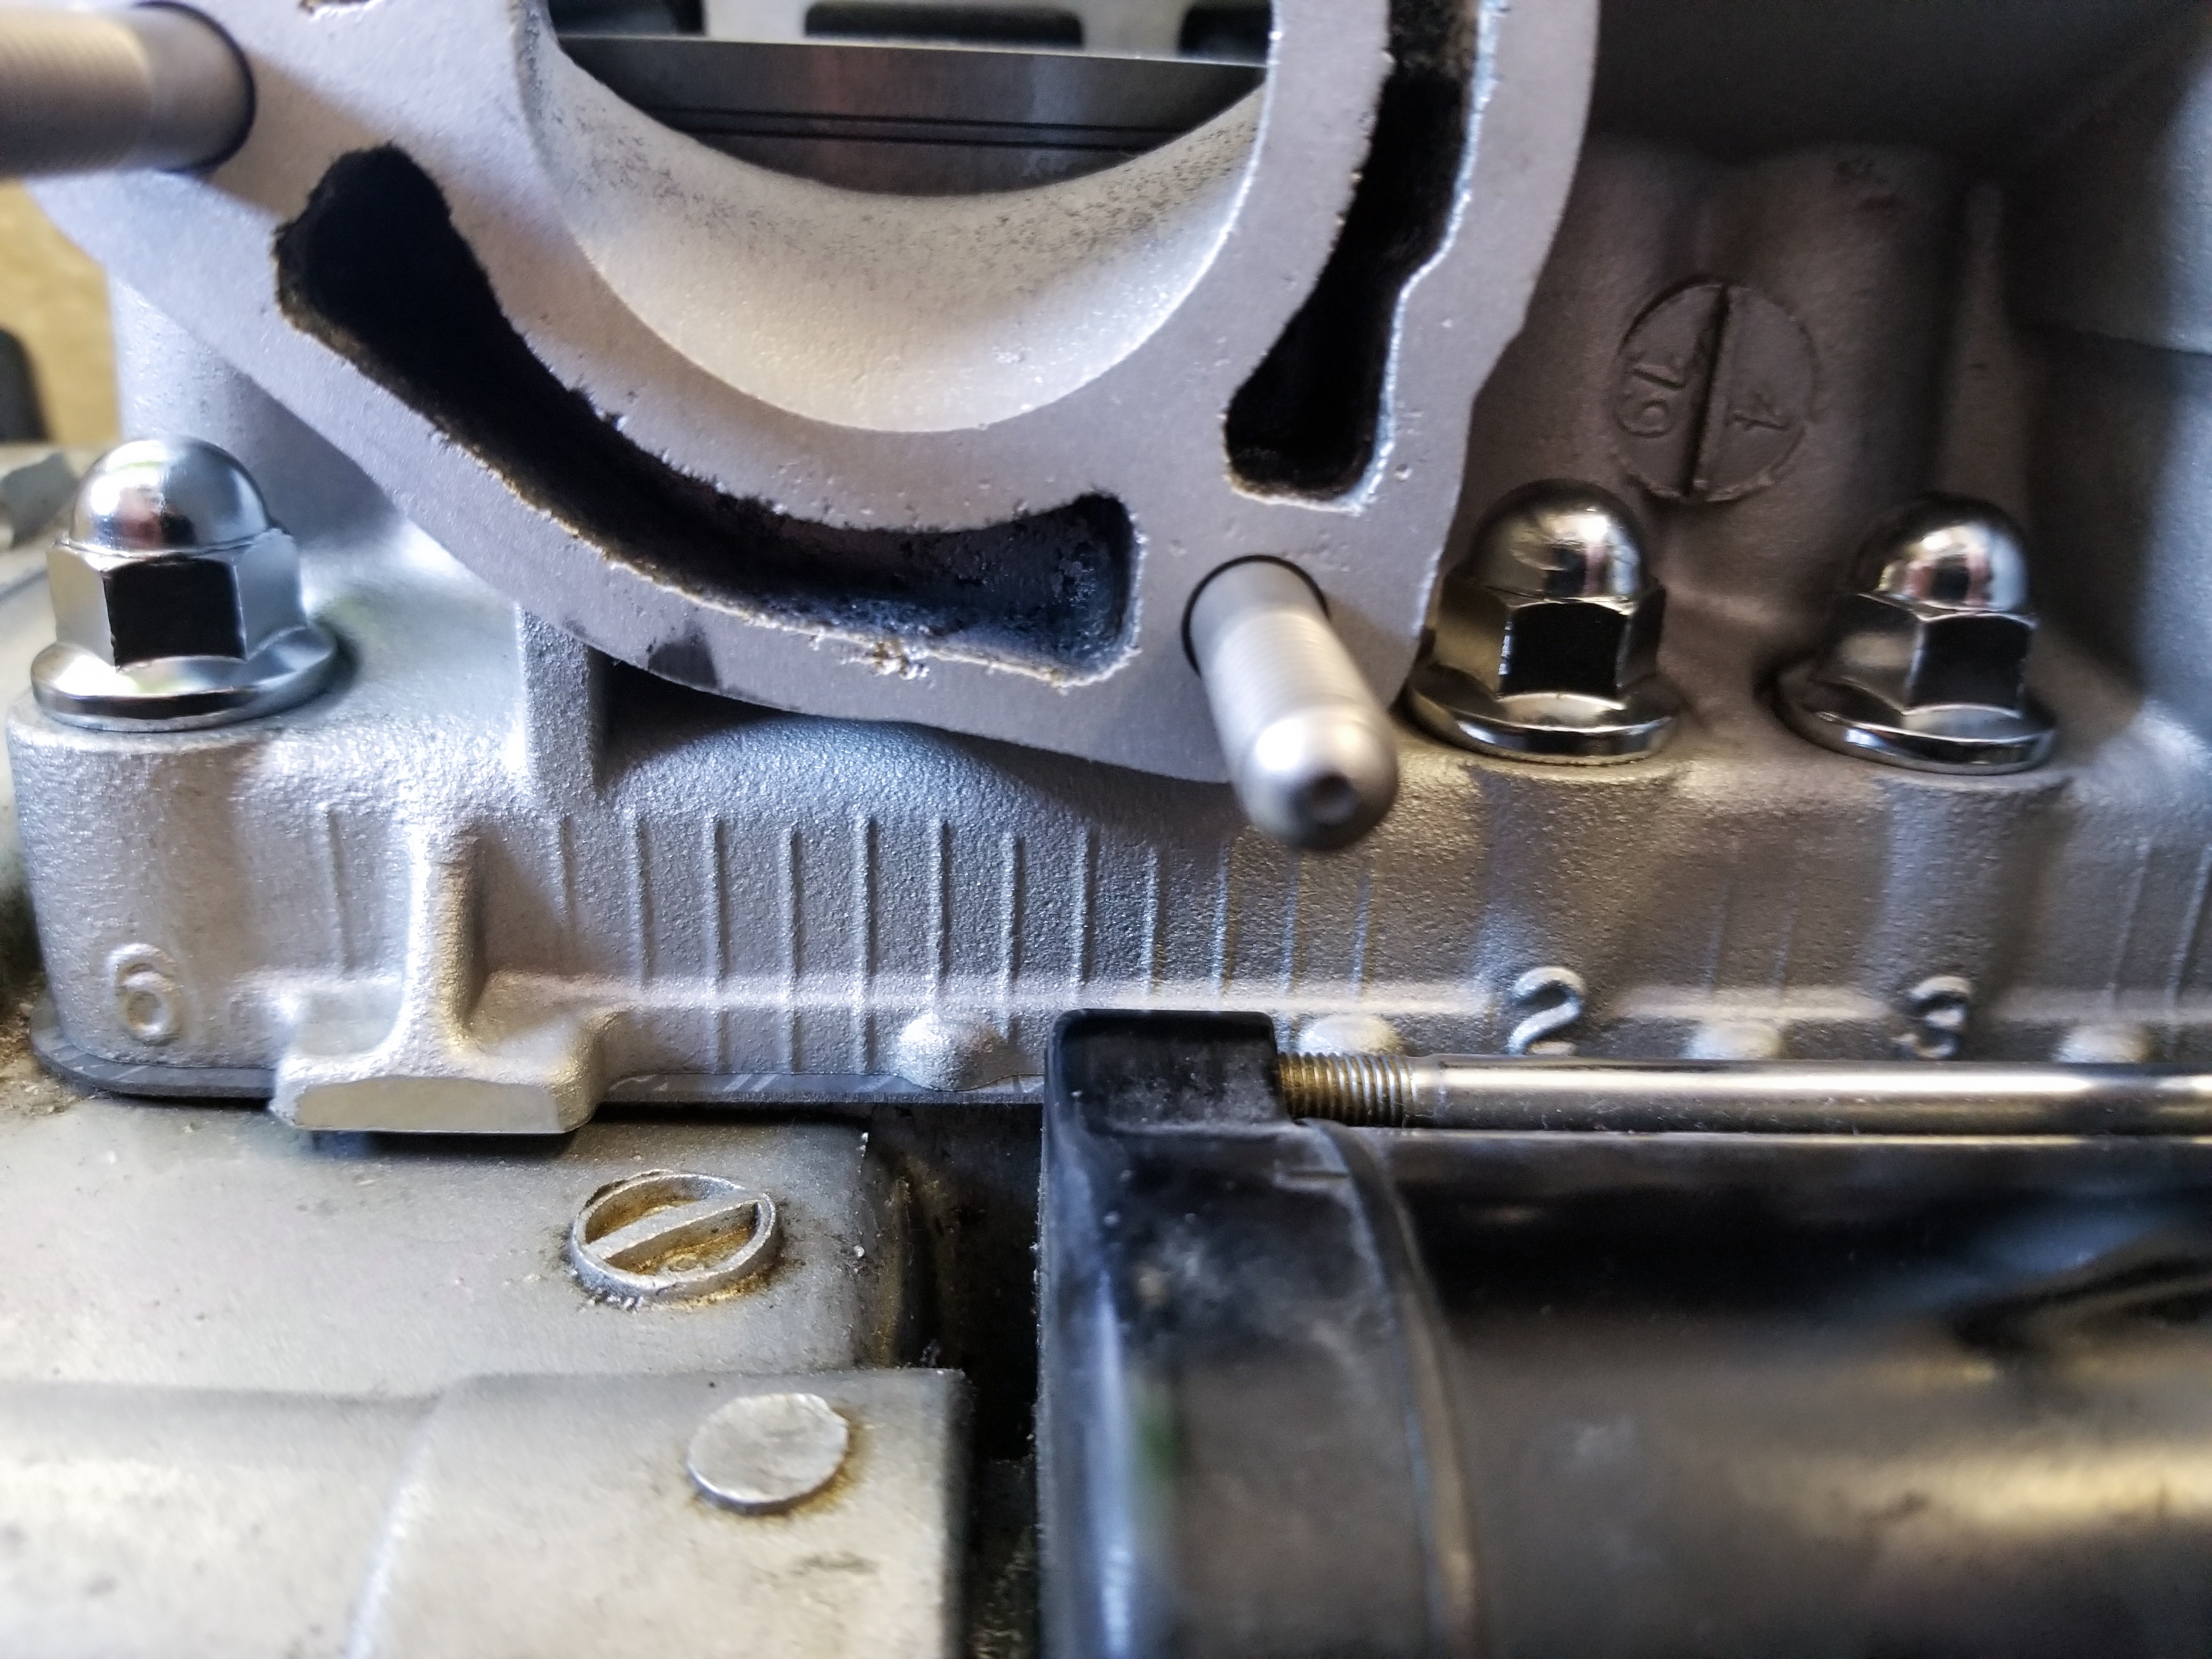
Be sure to torque the cylinder nuts to the manufacturer recommended spec in your owner’s manual. Most PWC 2-stroke cylinder have numbers that indicate the order in which to torque the nuts. Always follow this recommended order.
At this point, we recommend manually rotating the engine to make sure neither piston will come out of the bore during engine operation. This is just a way to double check your replacement pistons were made at the proper height.
The final steps will be to lay down a new head gasket, and re-install the head. Many OEM heads also have numbers indicating the torque pattern. Again, reference your owner’s manual for OEM torque specifications.
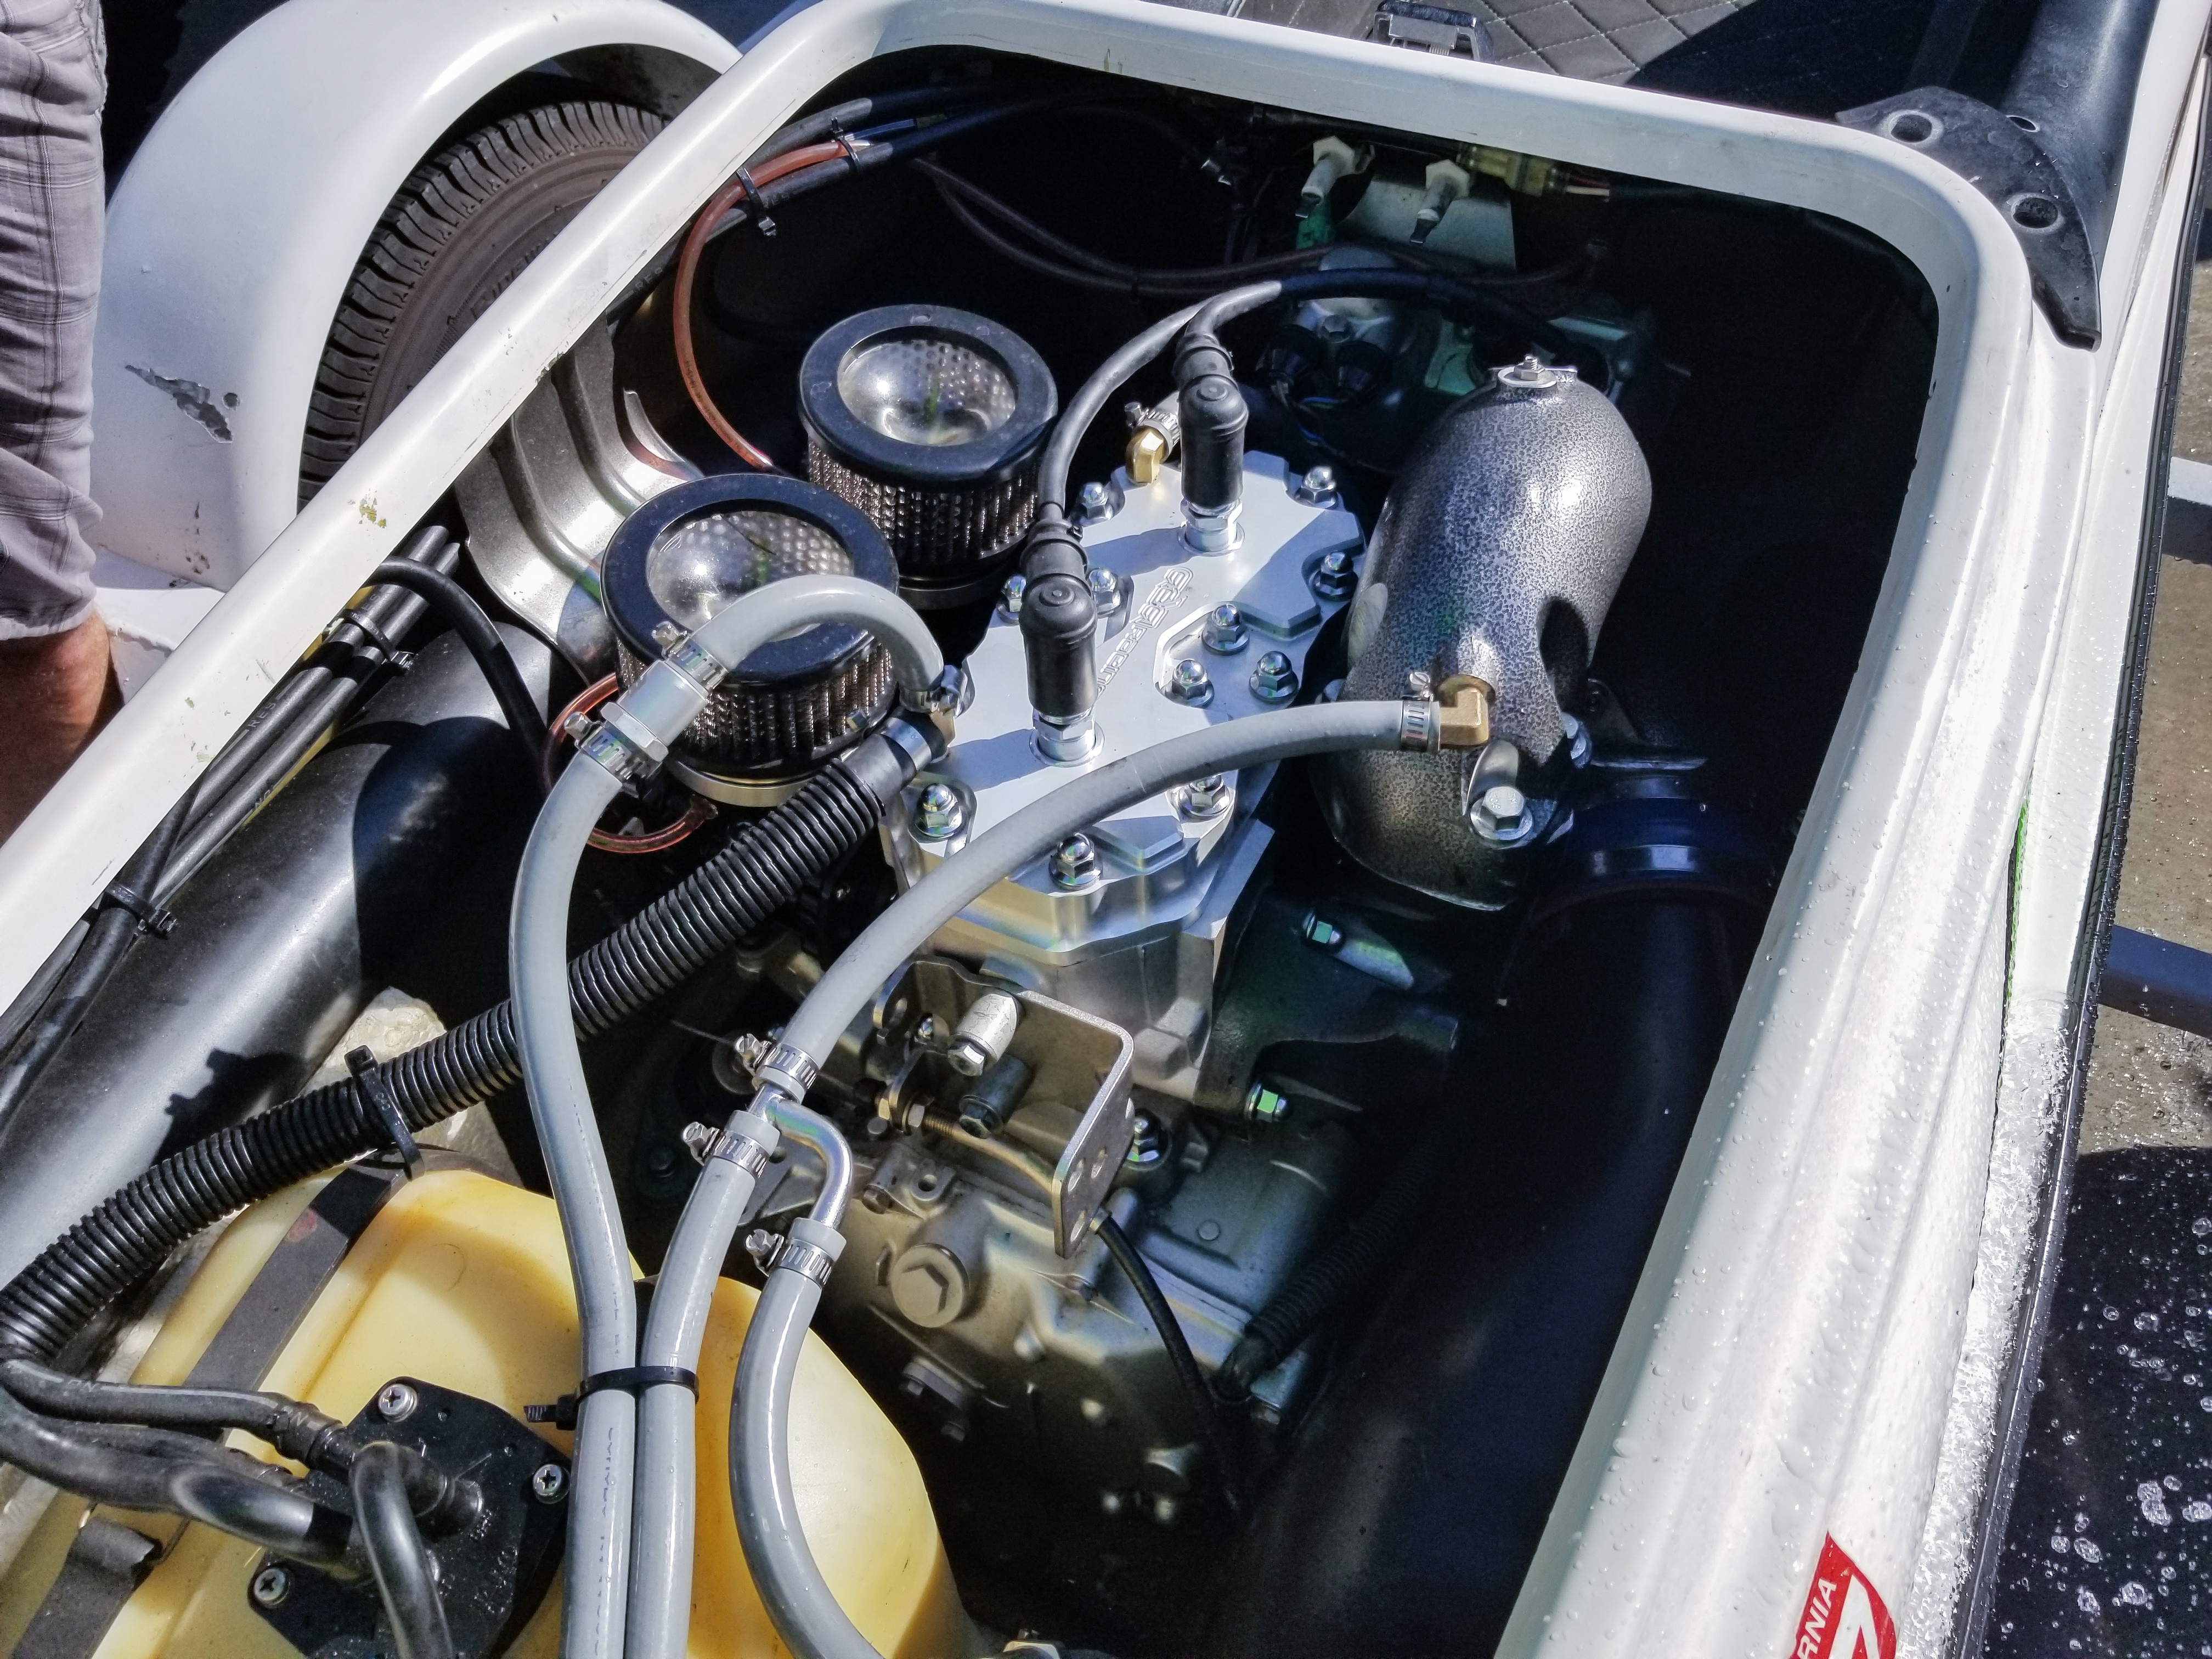
Finally, re-install everything that was removed before engine disassembly, including carburetors, intake manifold, exhaust system, spark plugs, water lines, etc. Double check that everything is properly installed and nothing has been missed before starting the engine.
If you’re starting the ski in your garage, we recommend hooking water up to the flush line to keep the engine cool during break in. When you start the ski, keep it at idle or very low rpms for a minute or two, and slowly work into higher rpms and gradual revs. Avoid holding the engine at high rpms or revving excessively on break in, you don’t want the engine to cold seize and have to do this all over again.
After break in, let it cool down, and check the spark plugs to make sure your jetting isn’t too rich or too lean. If everything looks and sounds good, take it out on its first ride and take it easier than normal. After it cools after that first ride, you should be in the clear to ride it as you normally would.