Chances are if you ride dirt bikes, ATVs, or operate any other wheeled powersports machine, you will eventually have to bleed your brakes. Brake bleeding in itself is not a difficult job, but there are a handful of tips and tricks that can make the process go more smoothly and result in better performing brakes.
Servicing brake systems by replacing worn components as needed and refreshing the brake fluid periodically is a critical maintenance task that is often overlooked. In this article, we’ll provide an overview of the brake bleeding process and share some tips that can make the job easier. We’ll even provide a few pointers that can make rebuilding your master cylinder go more smoothly.
The necessity to bleed your brakes may crop up for several reasons. The tell-tale signs that your brakes may need to be bled are reduced braking power, inconsistent braking, and sponginess felt in the lever. If any of these symptoms exist, it is always a good idea to check the integrity of the system. Leaks can occur as a result of loose banjo bolts, damaged seals, and cracked lines.
To start, it is always a good idea to consult your make and model’s factory service manual for information specific to the task at hand. Within your service manual, you’ll find torque specs, detailed procedures, and fluid information that can be important to take into consideration when performing the job.
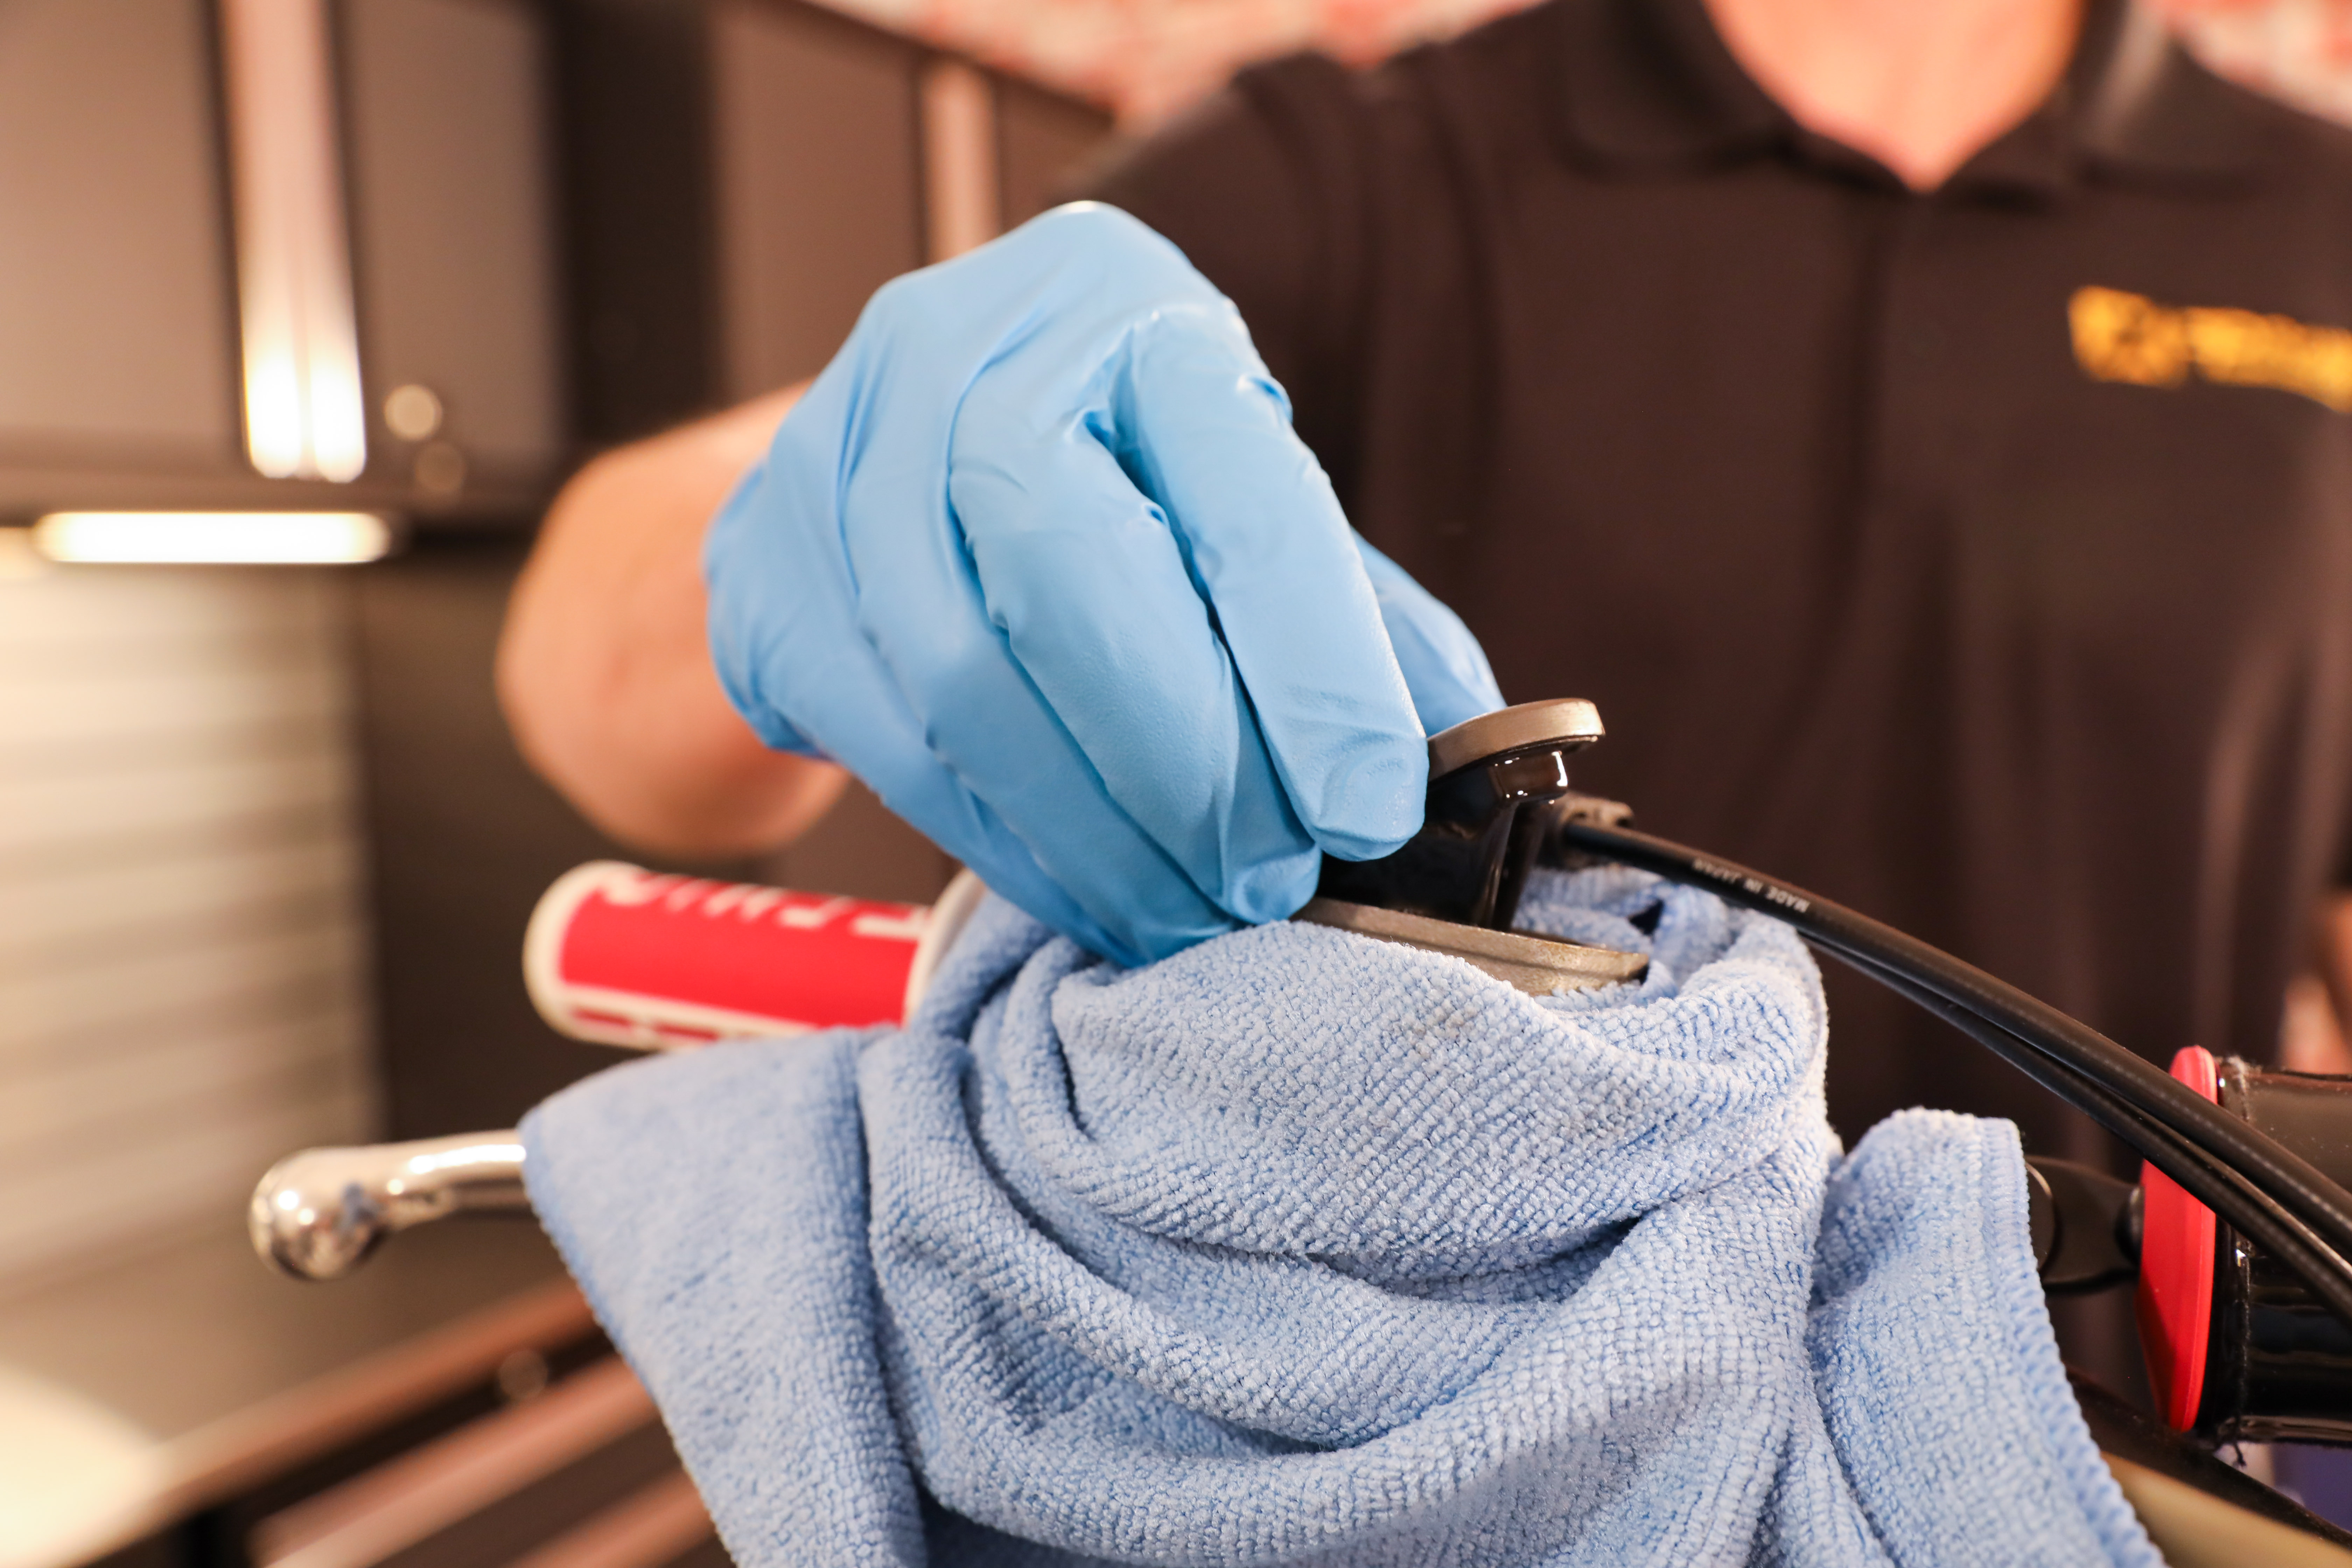
Unfortunately, brake fluid is a harsh chemical and should be treated as such. Both you and your machine can be adversely affected by inadvertent contact with brake fluid. When servicing your brakes and bleeding your lines, be sure to take any necessary precautions and avoid skin and eye contact. Wear rubber gloves and safety glasses when bleeding the brakes. If the brake lever is pump too quickly during the bleeding process fluid can be shot into the air from the reservoir. Brake fluid can strip paint and cloud plastics, so be sure to protect your machine’s surfaces with a towel or rags to limit exposure.
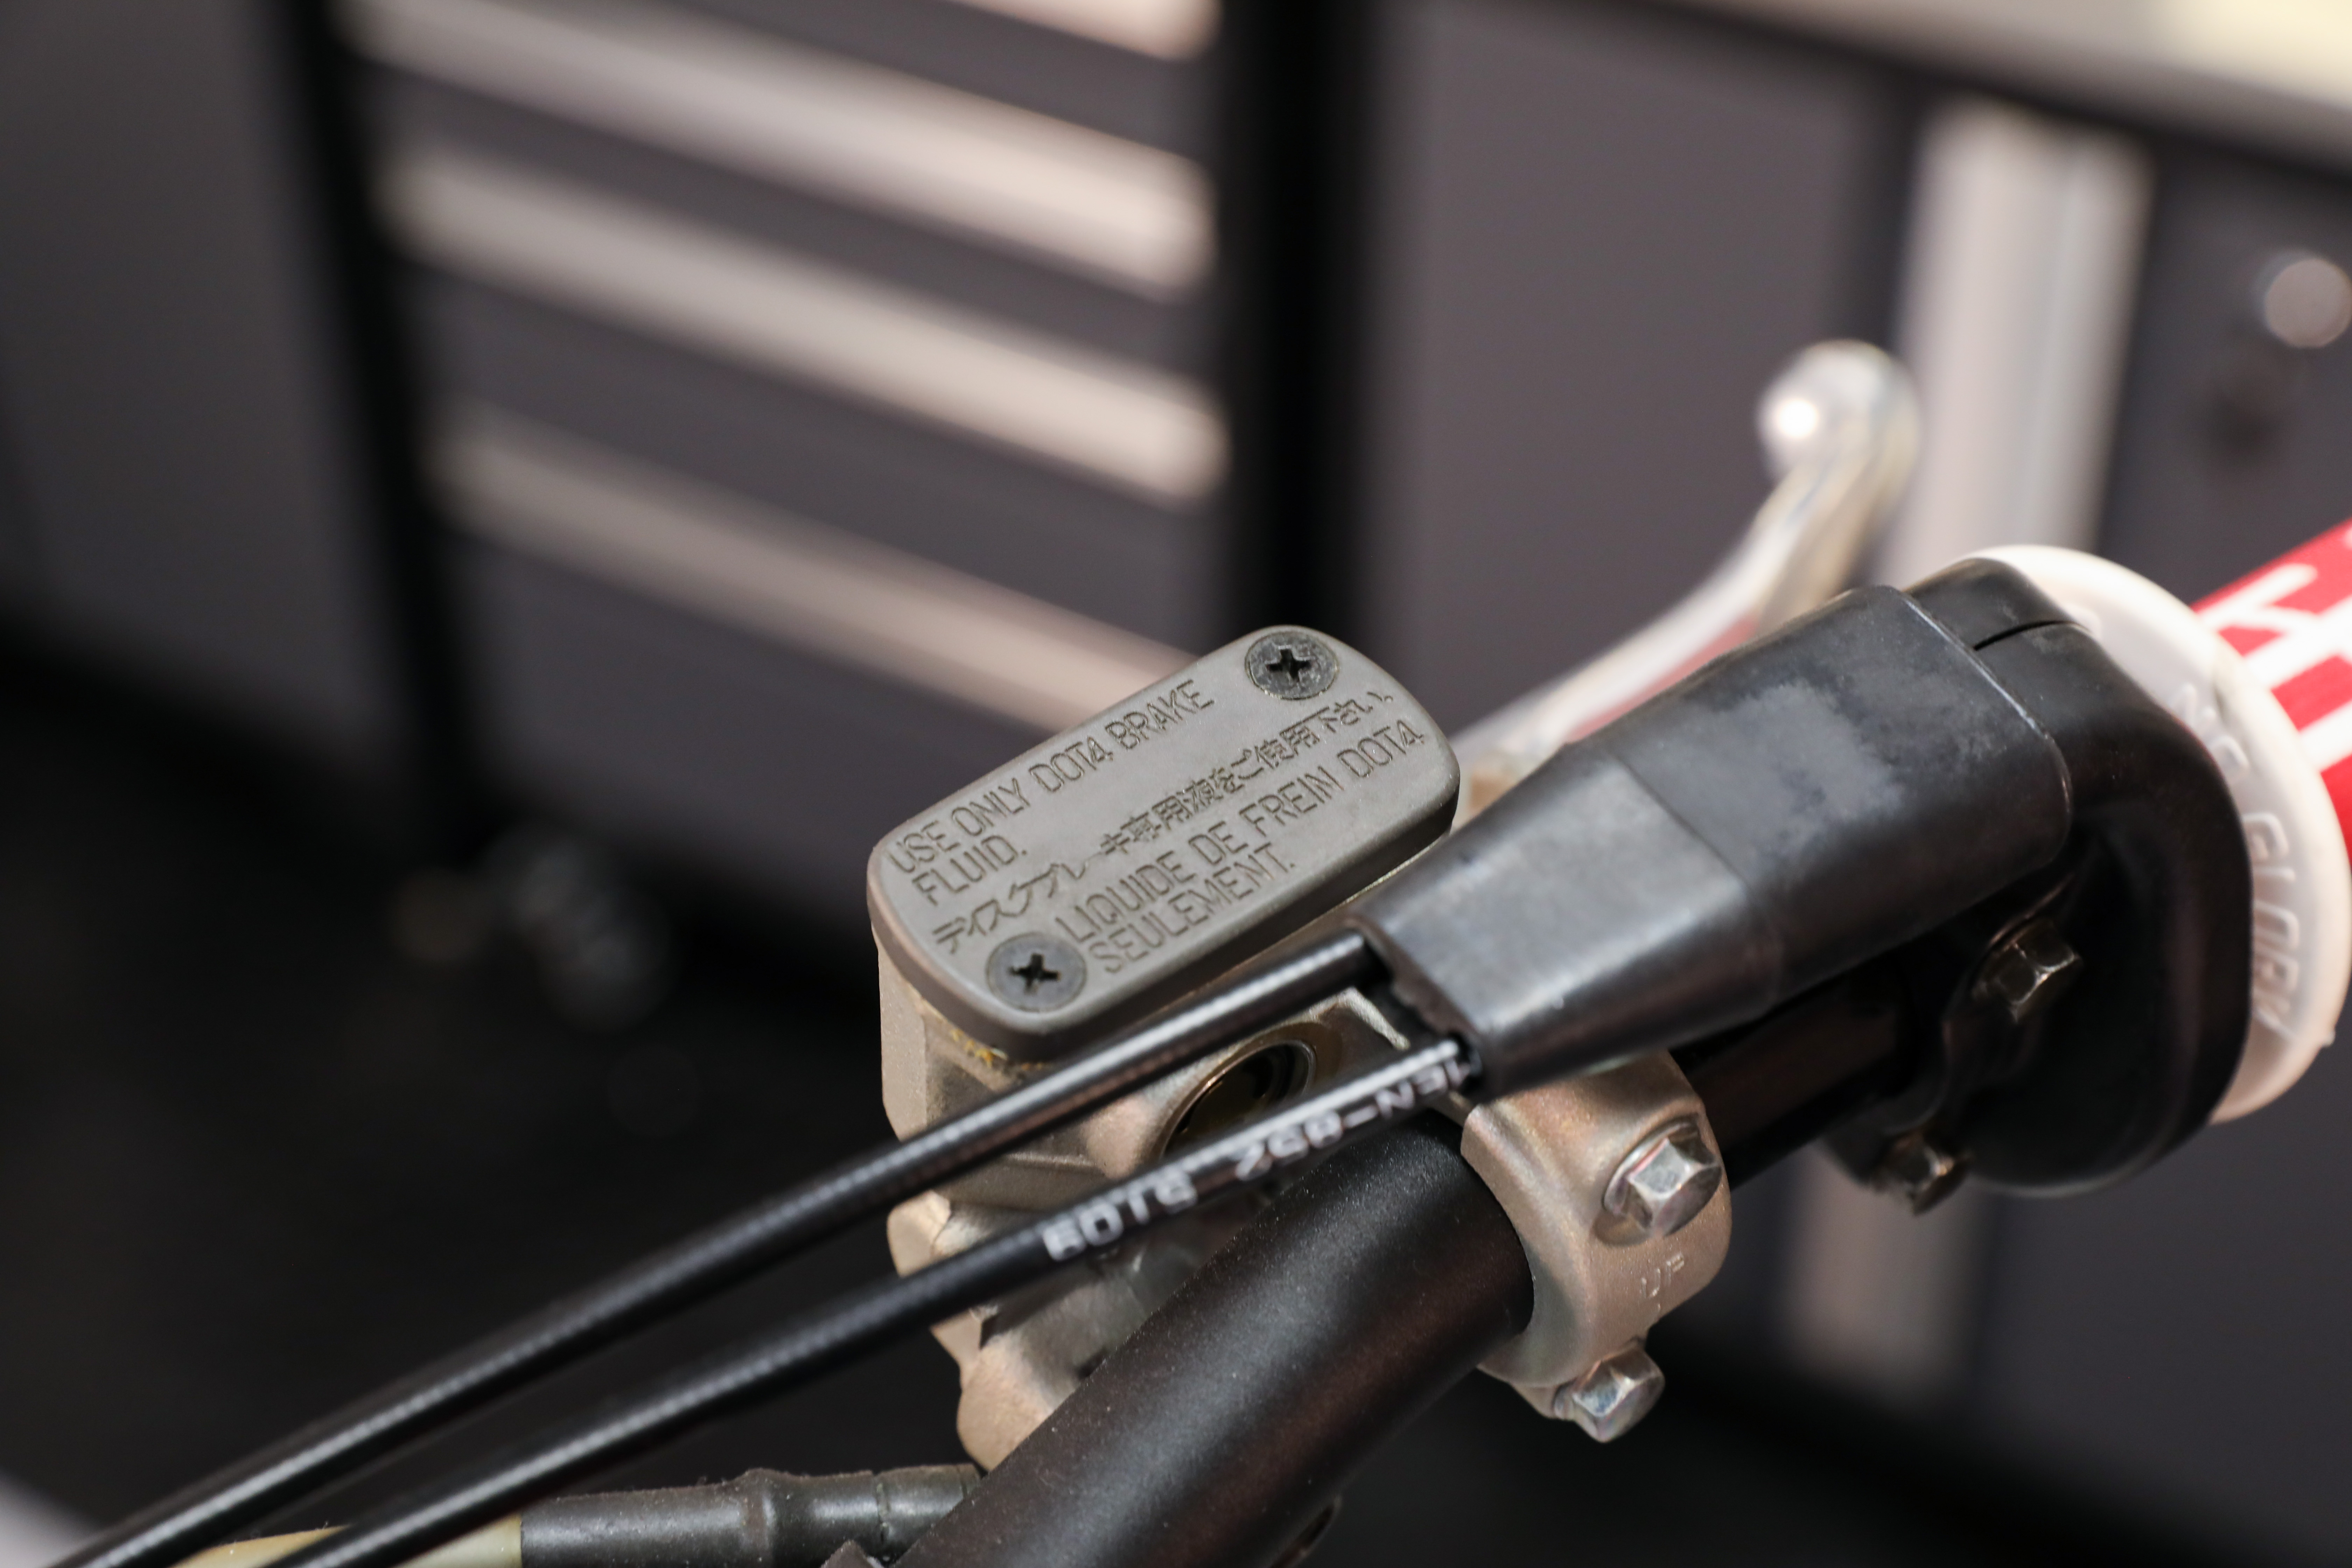
Brake fluids used in automotive/powersports applications within the United States and many other parts of the world are divided into three classes. Specifications for the classes are outlined by the Department of Transportation (DOT). The commonly available fluid class options are DOT 3, DOT 4, and DOT 5.1. The majority of powersports applications utilize DOT 4 brake fluid. Usually, your machine’s brake fluid reservoir cover/cap on the front and rear master cylinder denotes which fluid is used. In general, mixing of brake fluid classes is not recommended because of compatibility reasons and differences in boiling point.
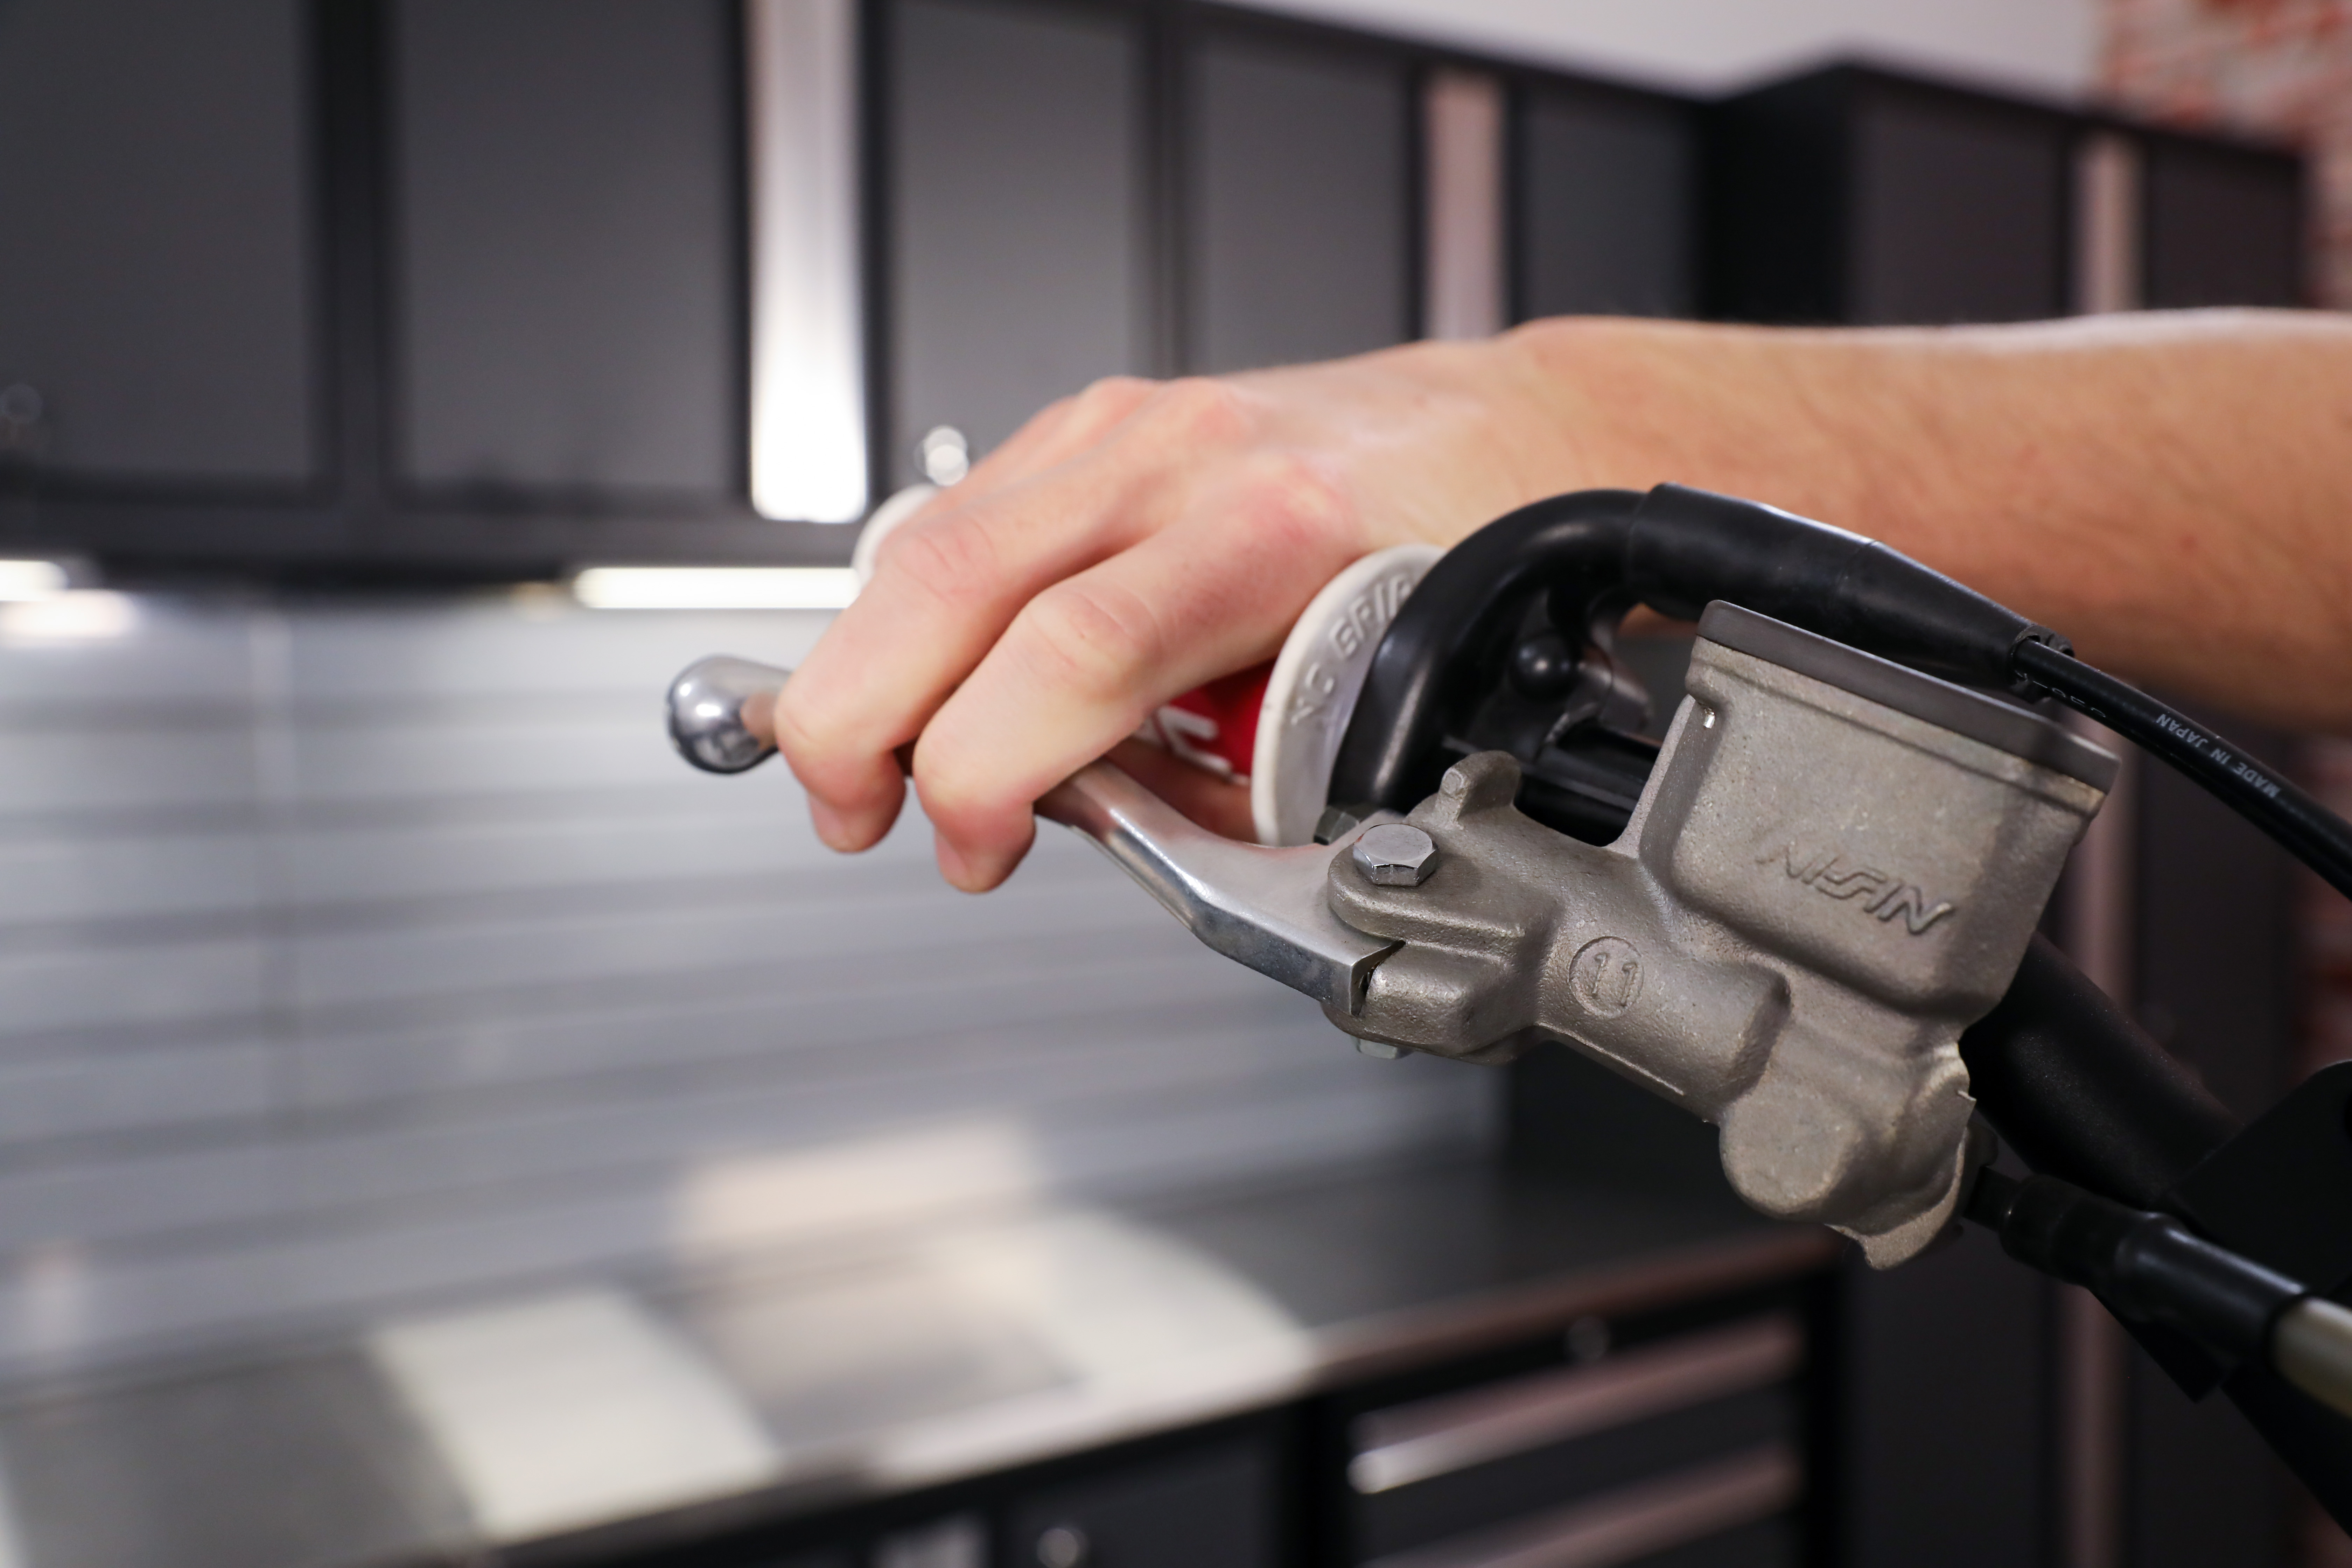
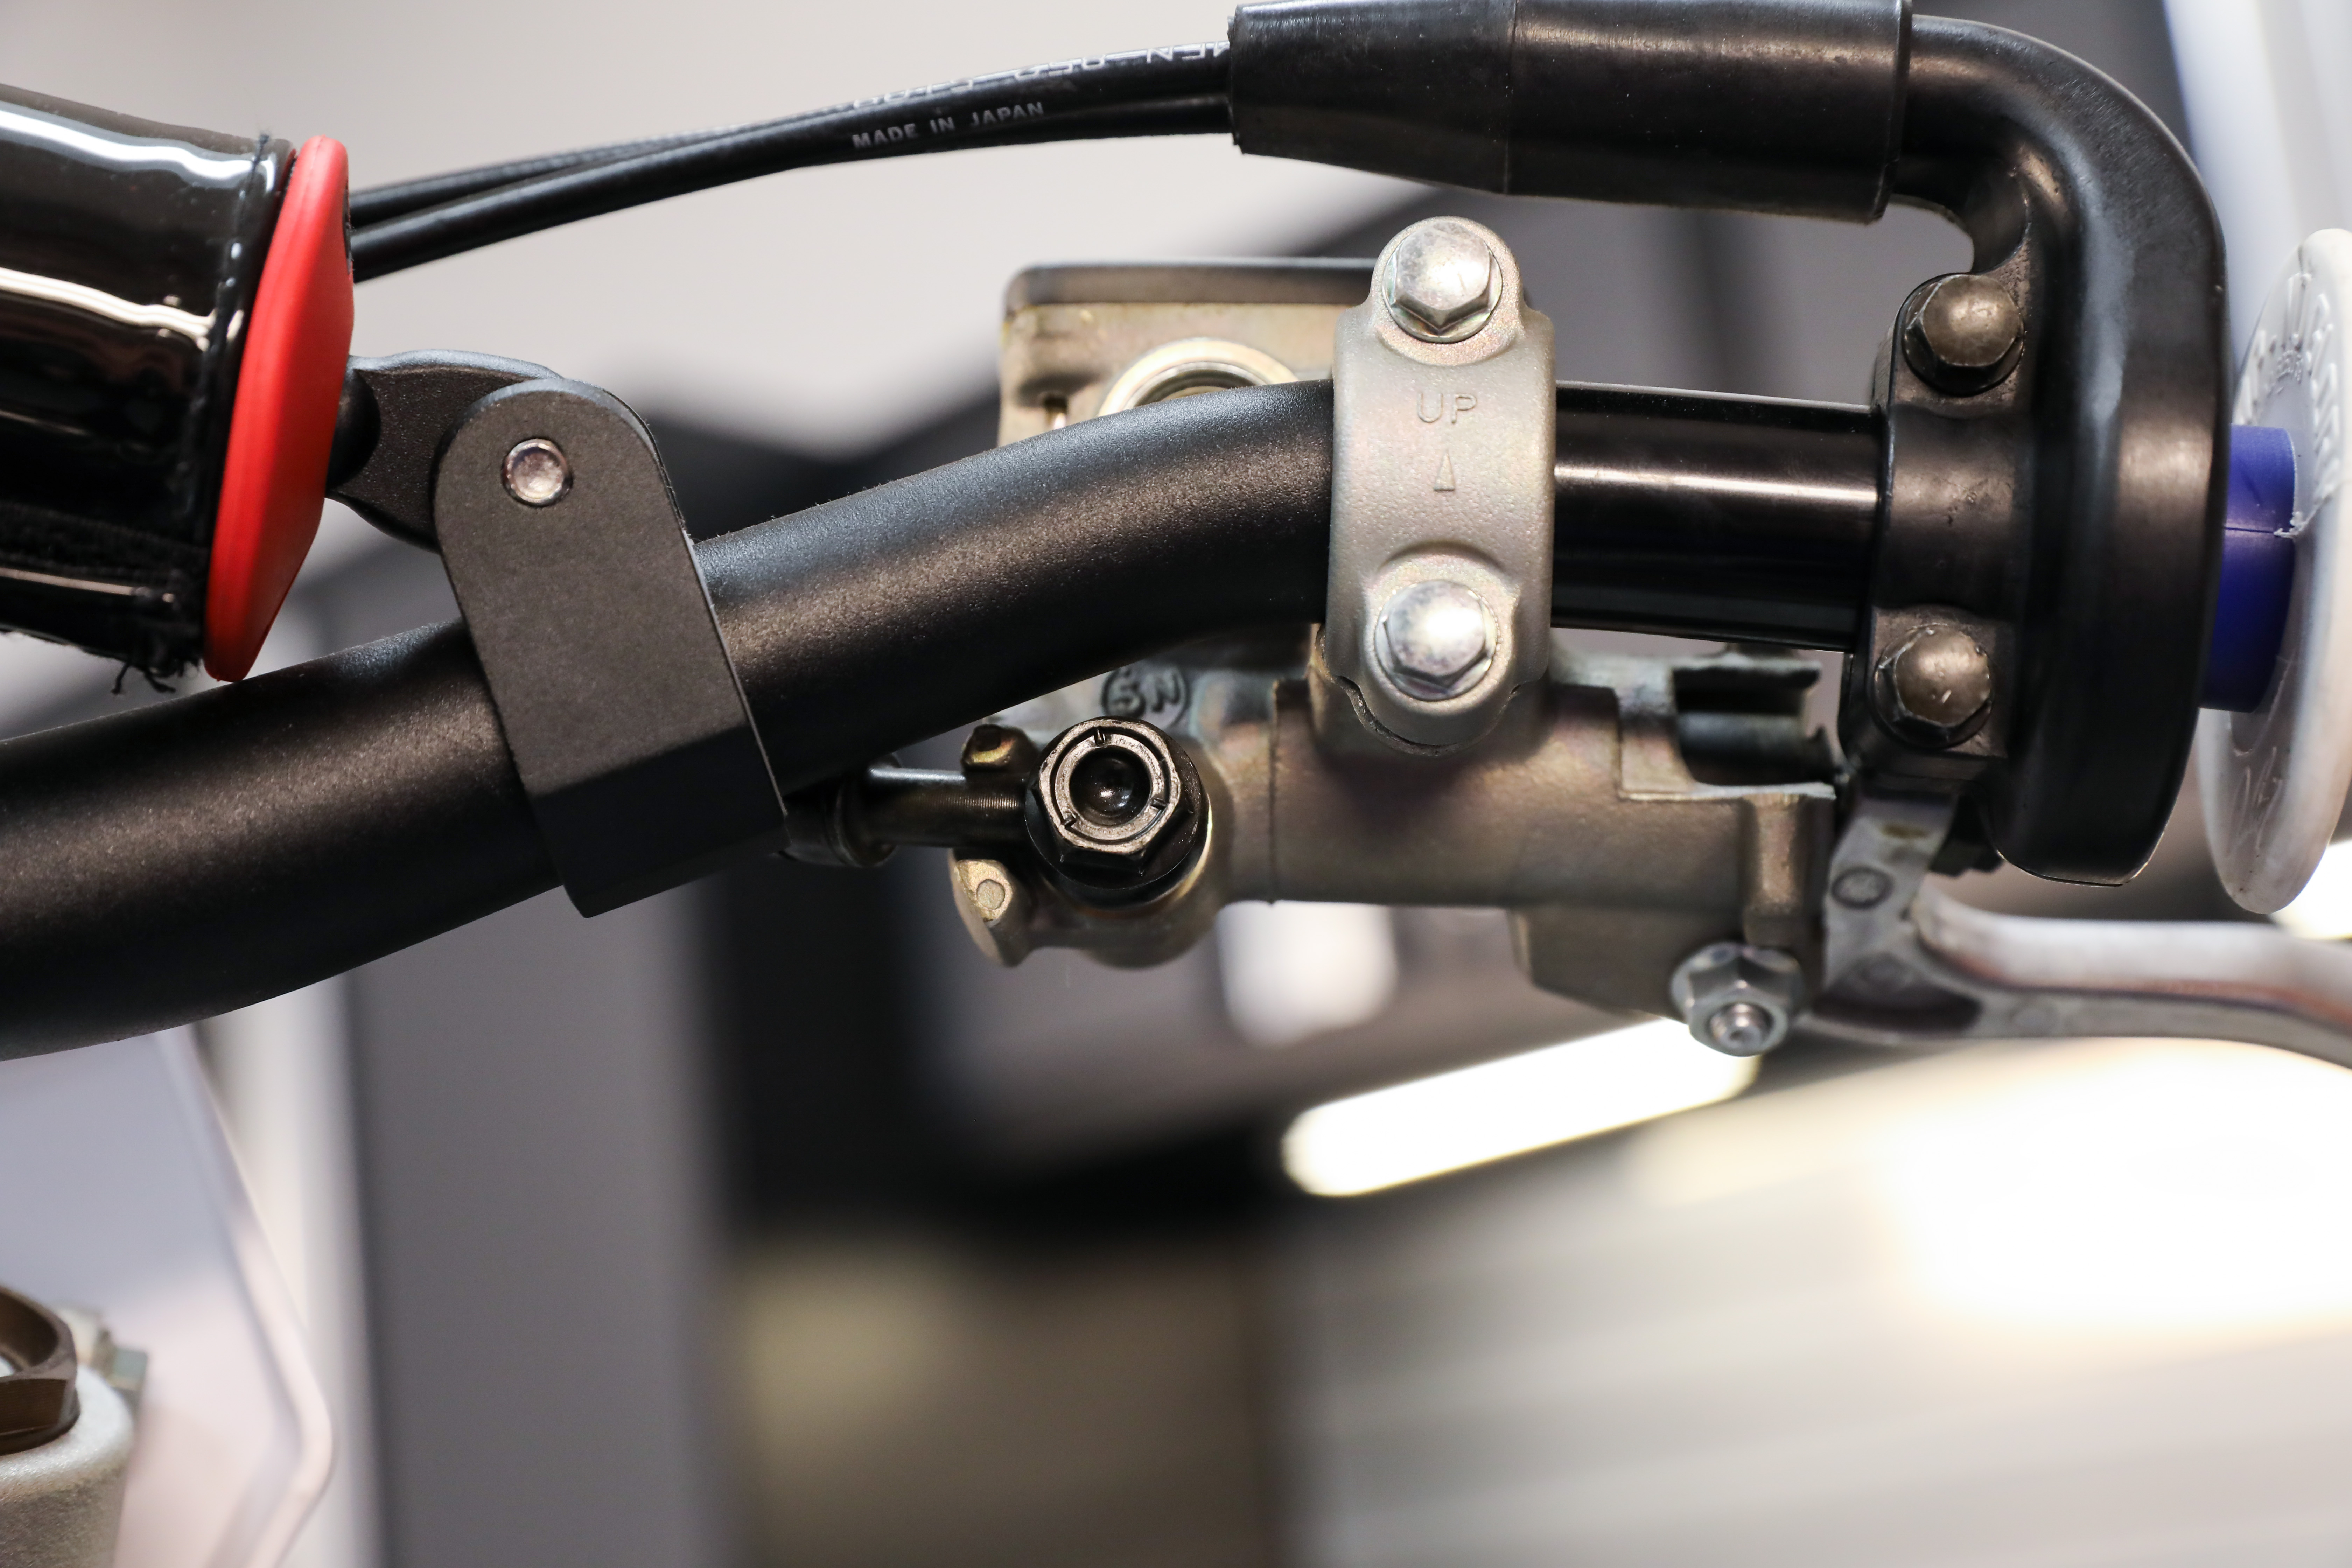
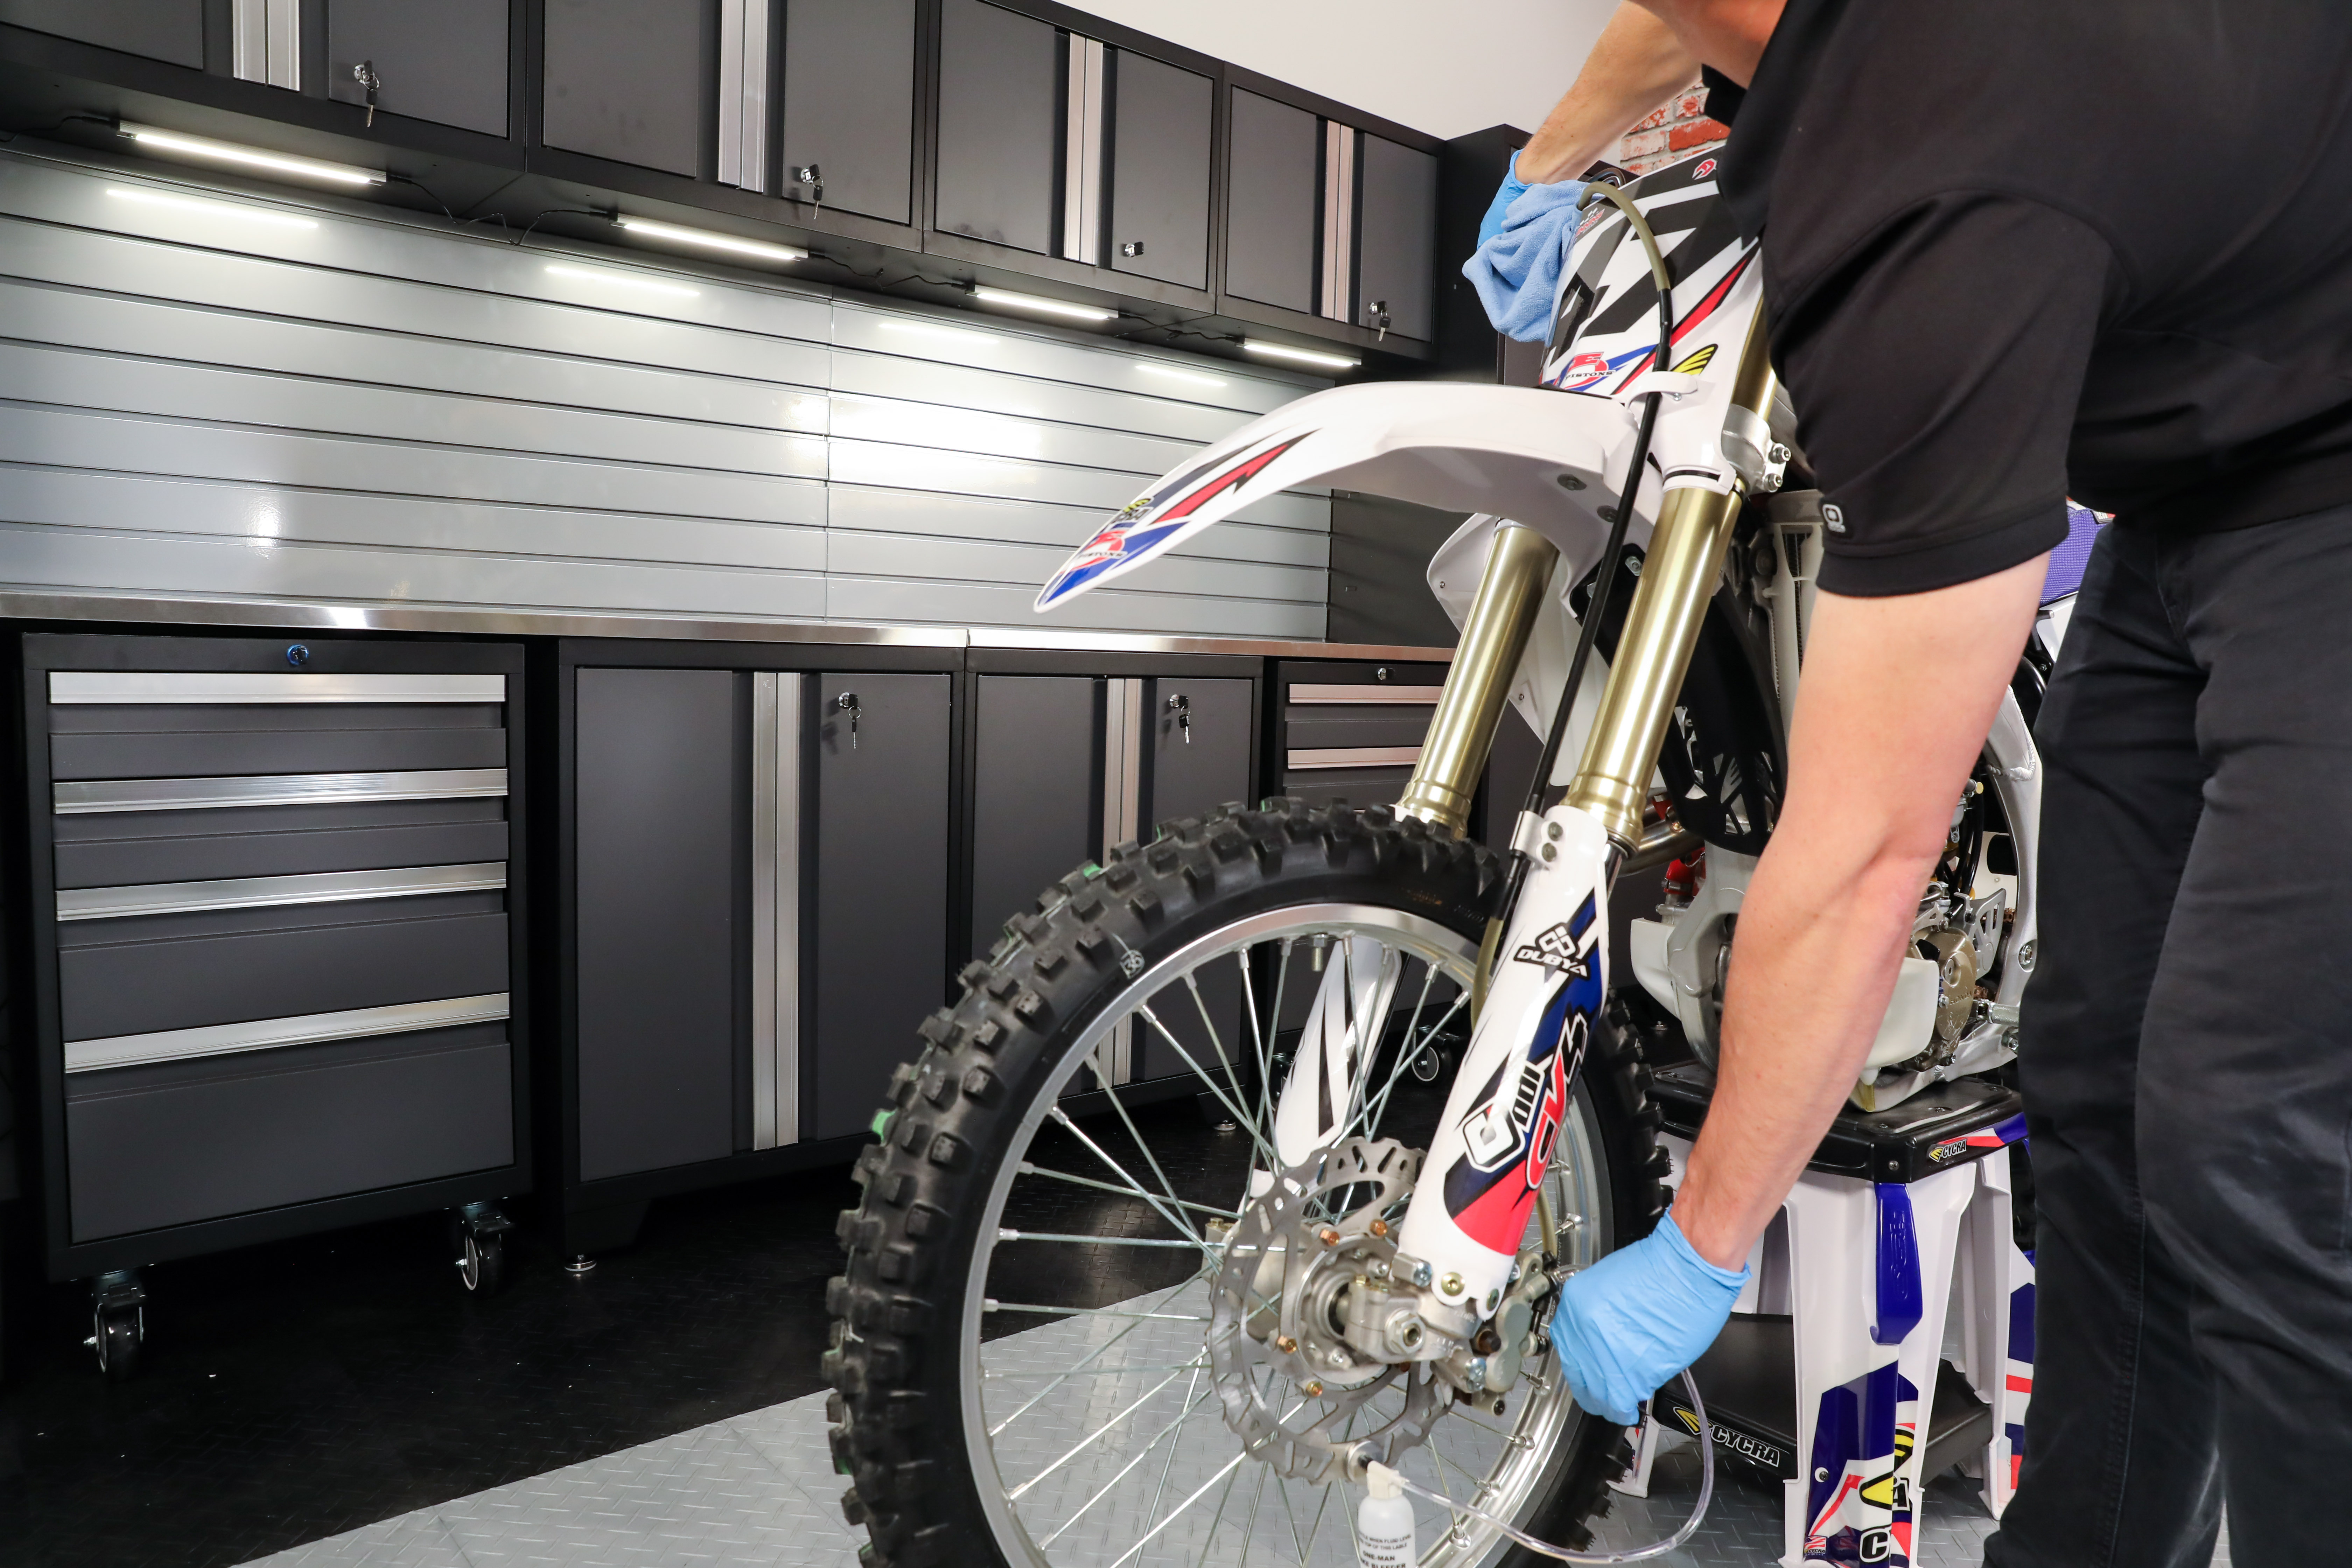
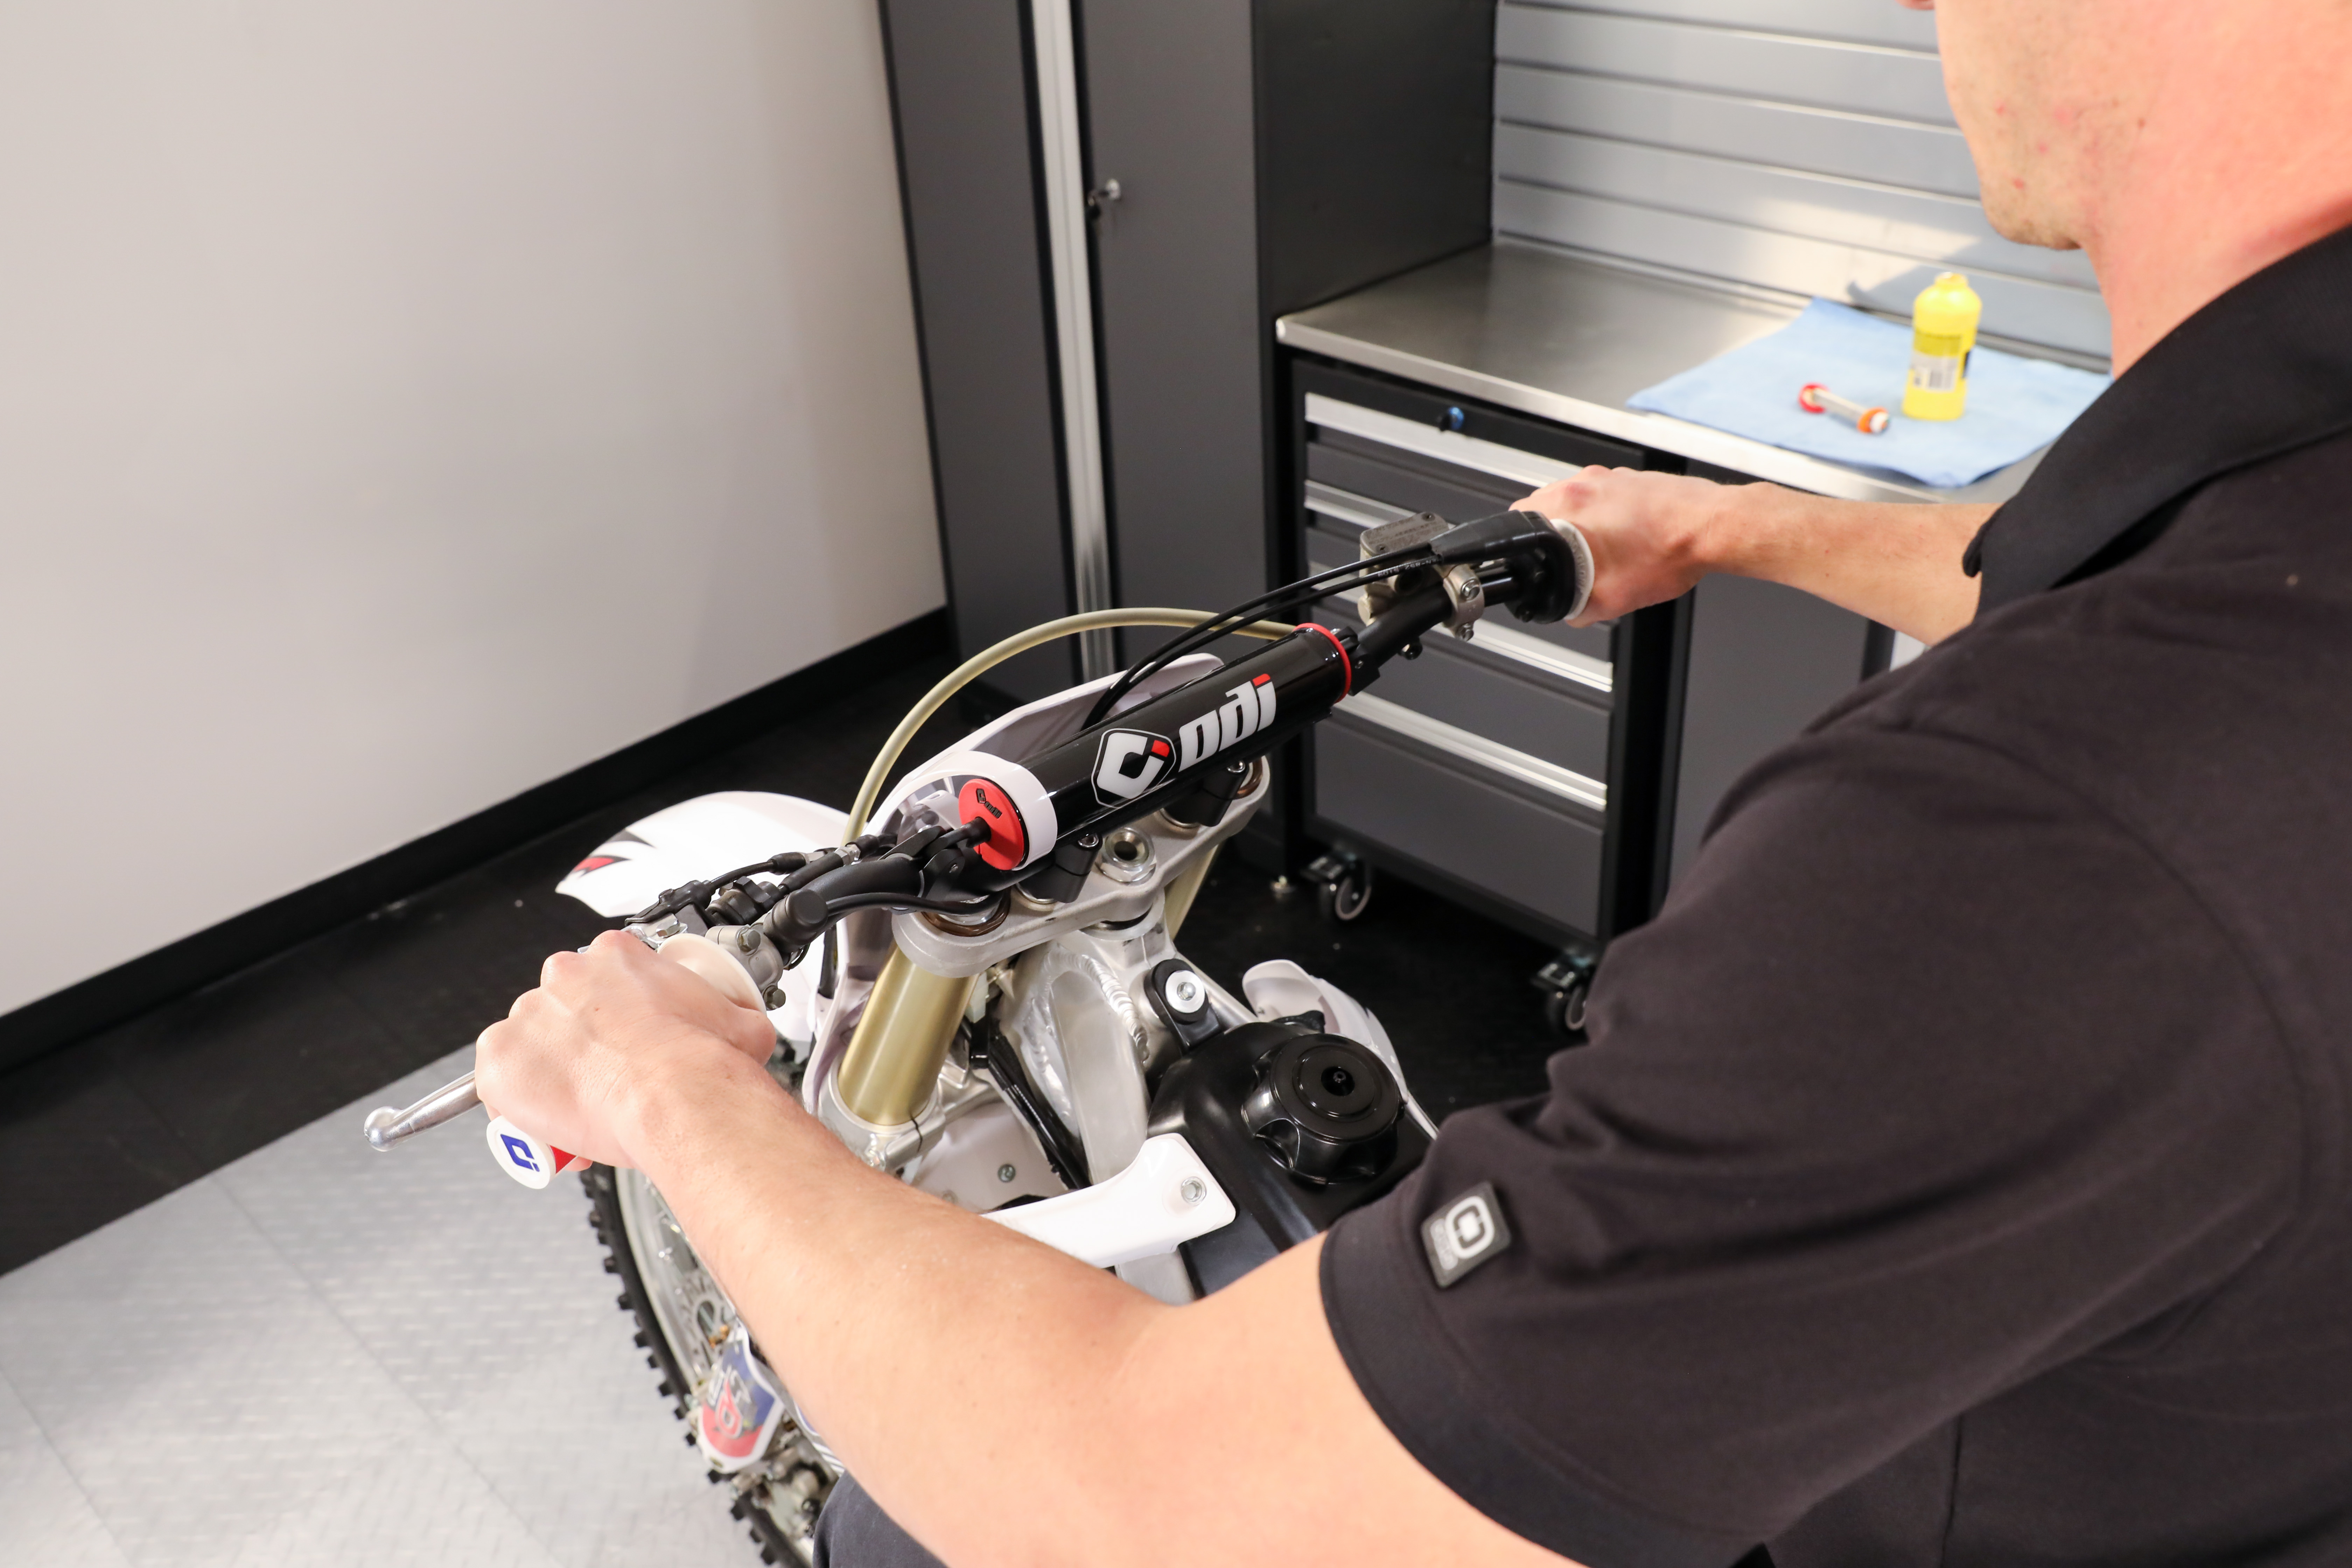
Prepare to bleed your brakes by positioning the front or rear master cylinder and reservoir as close to level as possible. When working on the front brakes, this often means turning the handlebars to one side or the other to achieve a level reservoir. Don’t forget to position towels or rags around the reservoir in case of a spill.
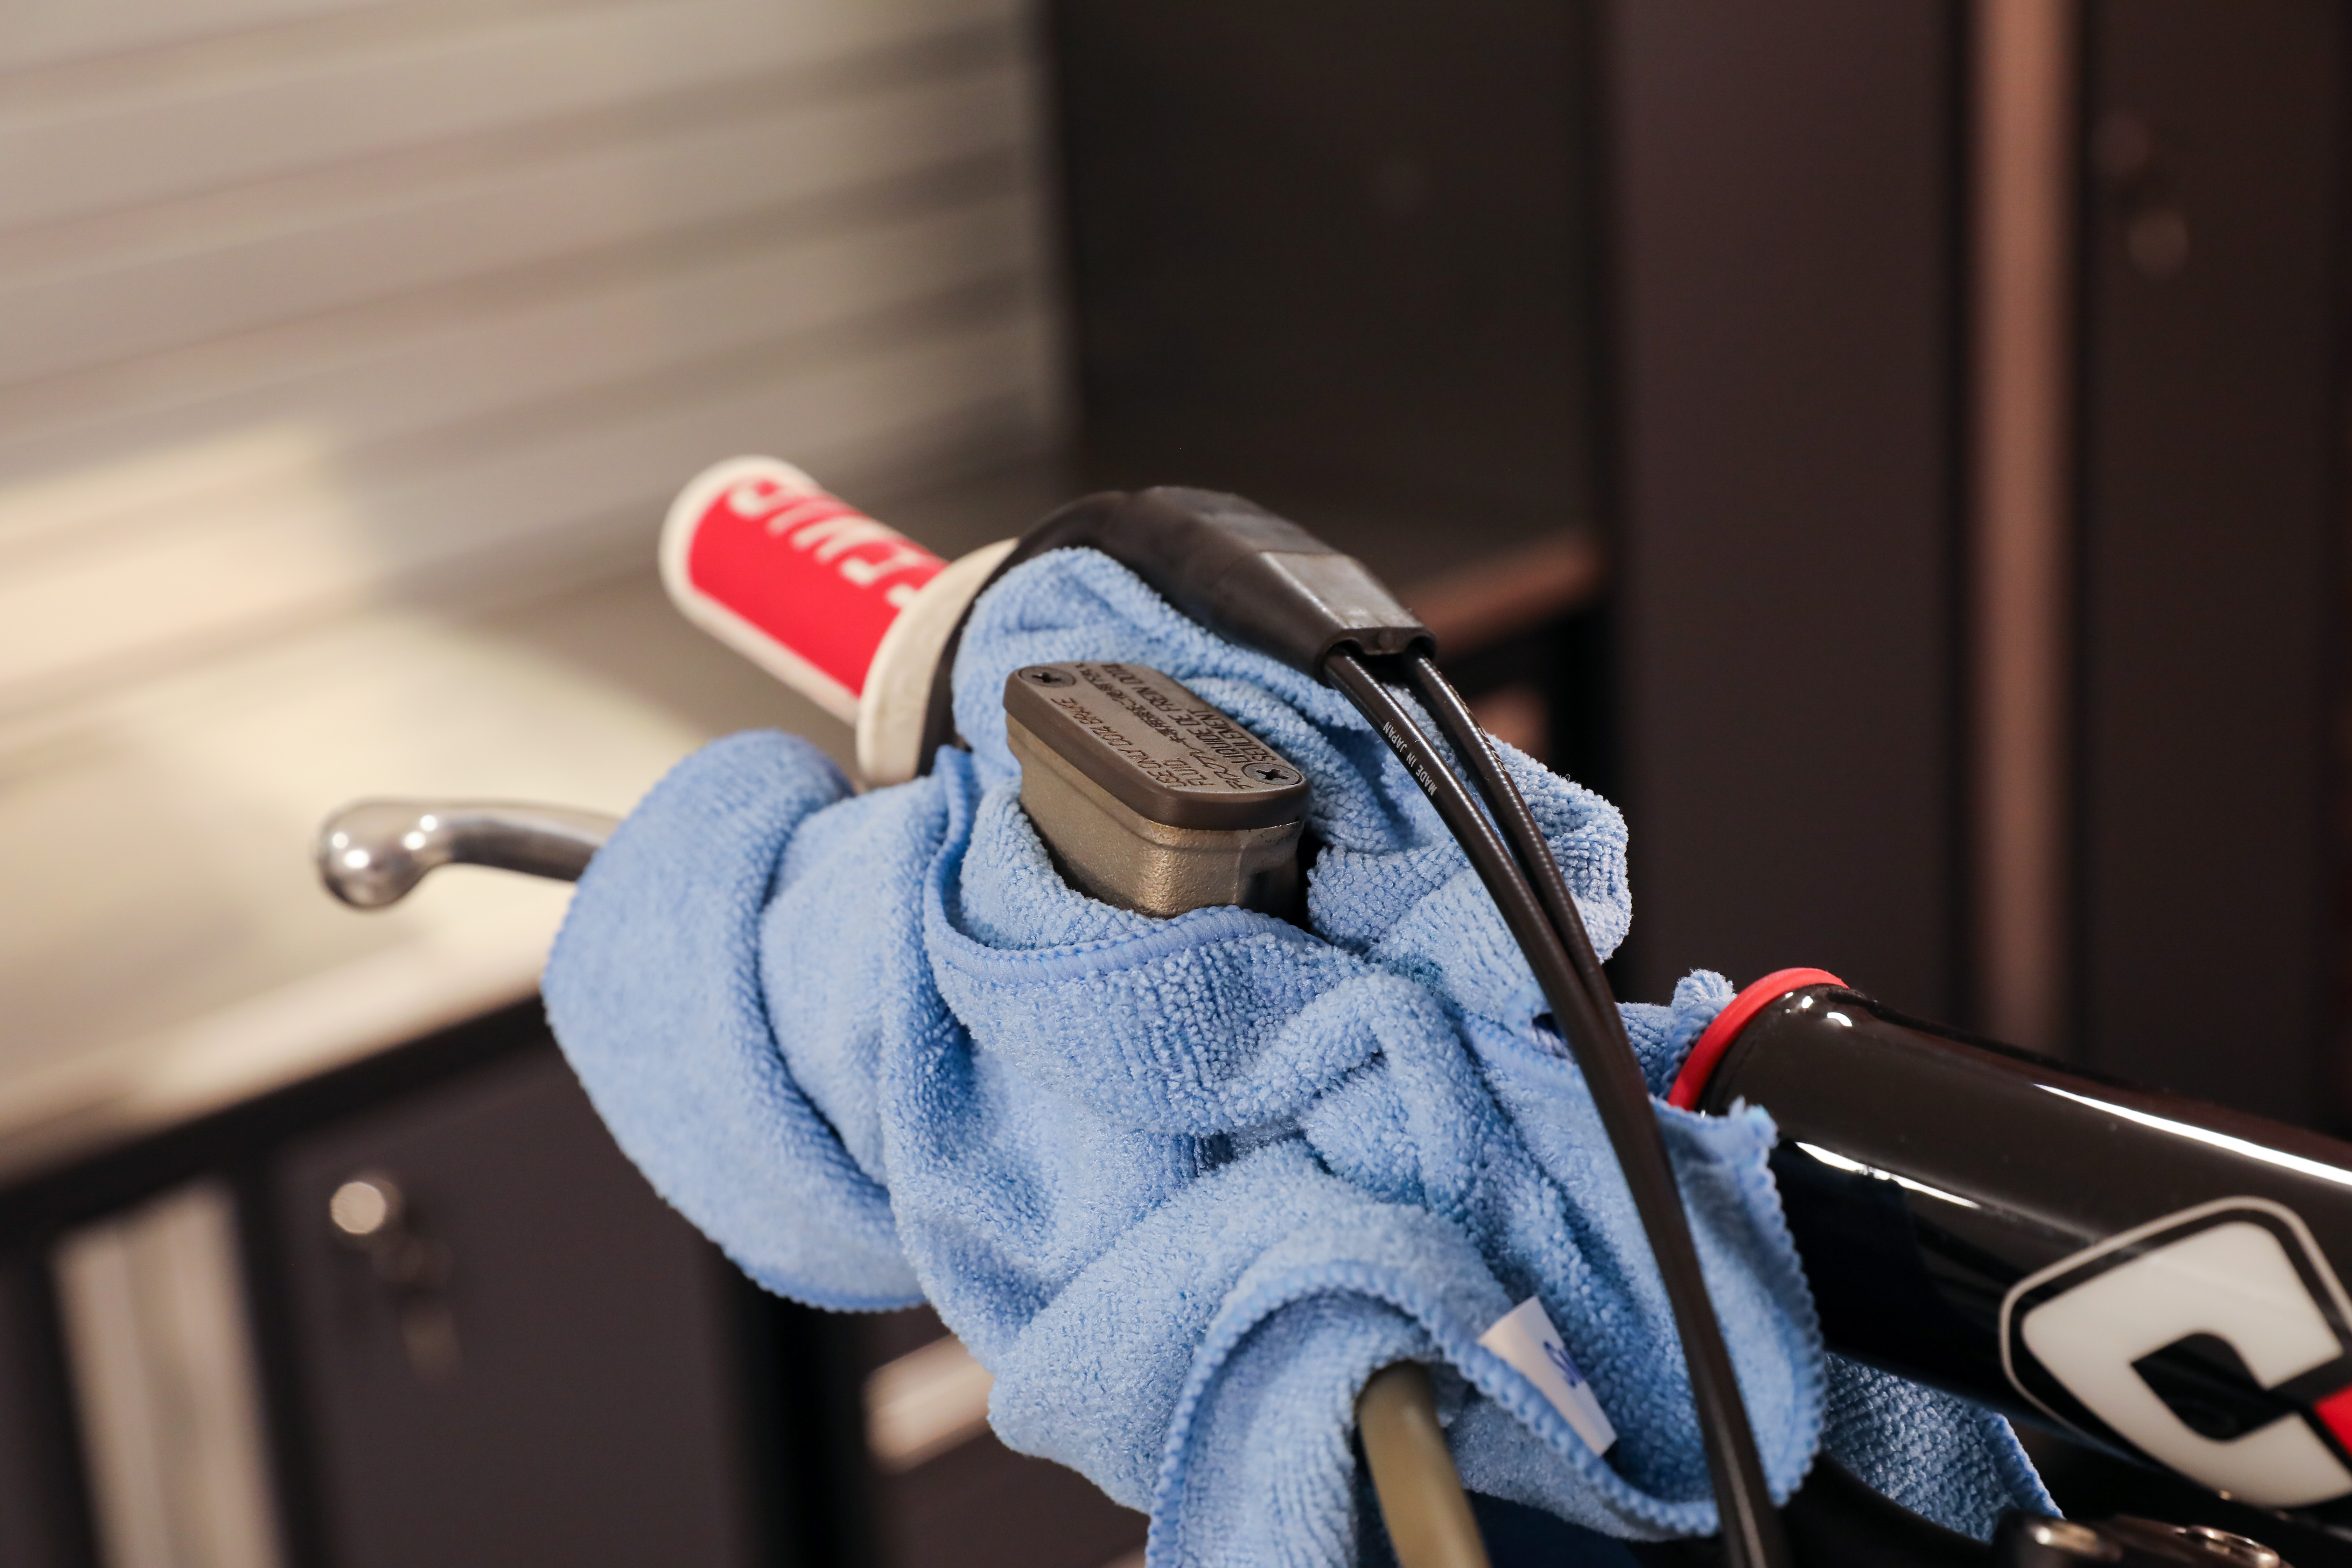
Once situated, remove the reservoir cover or cap, depending on which system you’re working on. Reservoir cover screws can be prone to stripping, so proceed cautiously. Typically, flat head Japanese Industrial Standard (JIS) screws are used on Japanese equipment. While a Phillips bit is close in profile, it is not the right bit for the job and will more easily strip the fastener. Pick up a set of JIS screwdrivers or bits; otherwise, the tip of a Phillips bit can be ground down in a pinch so that the bit fits the JIS profile more closely.

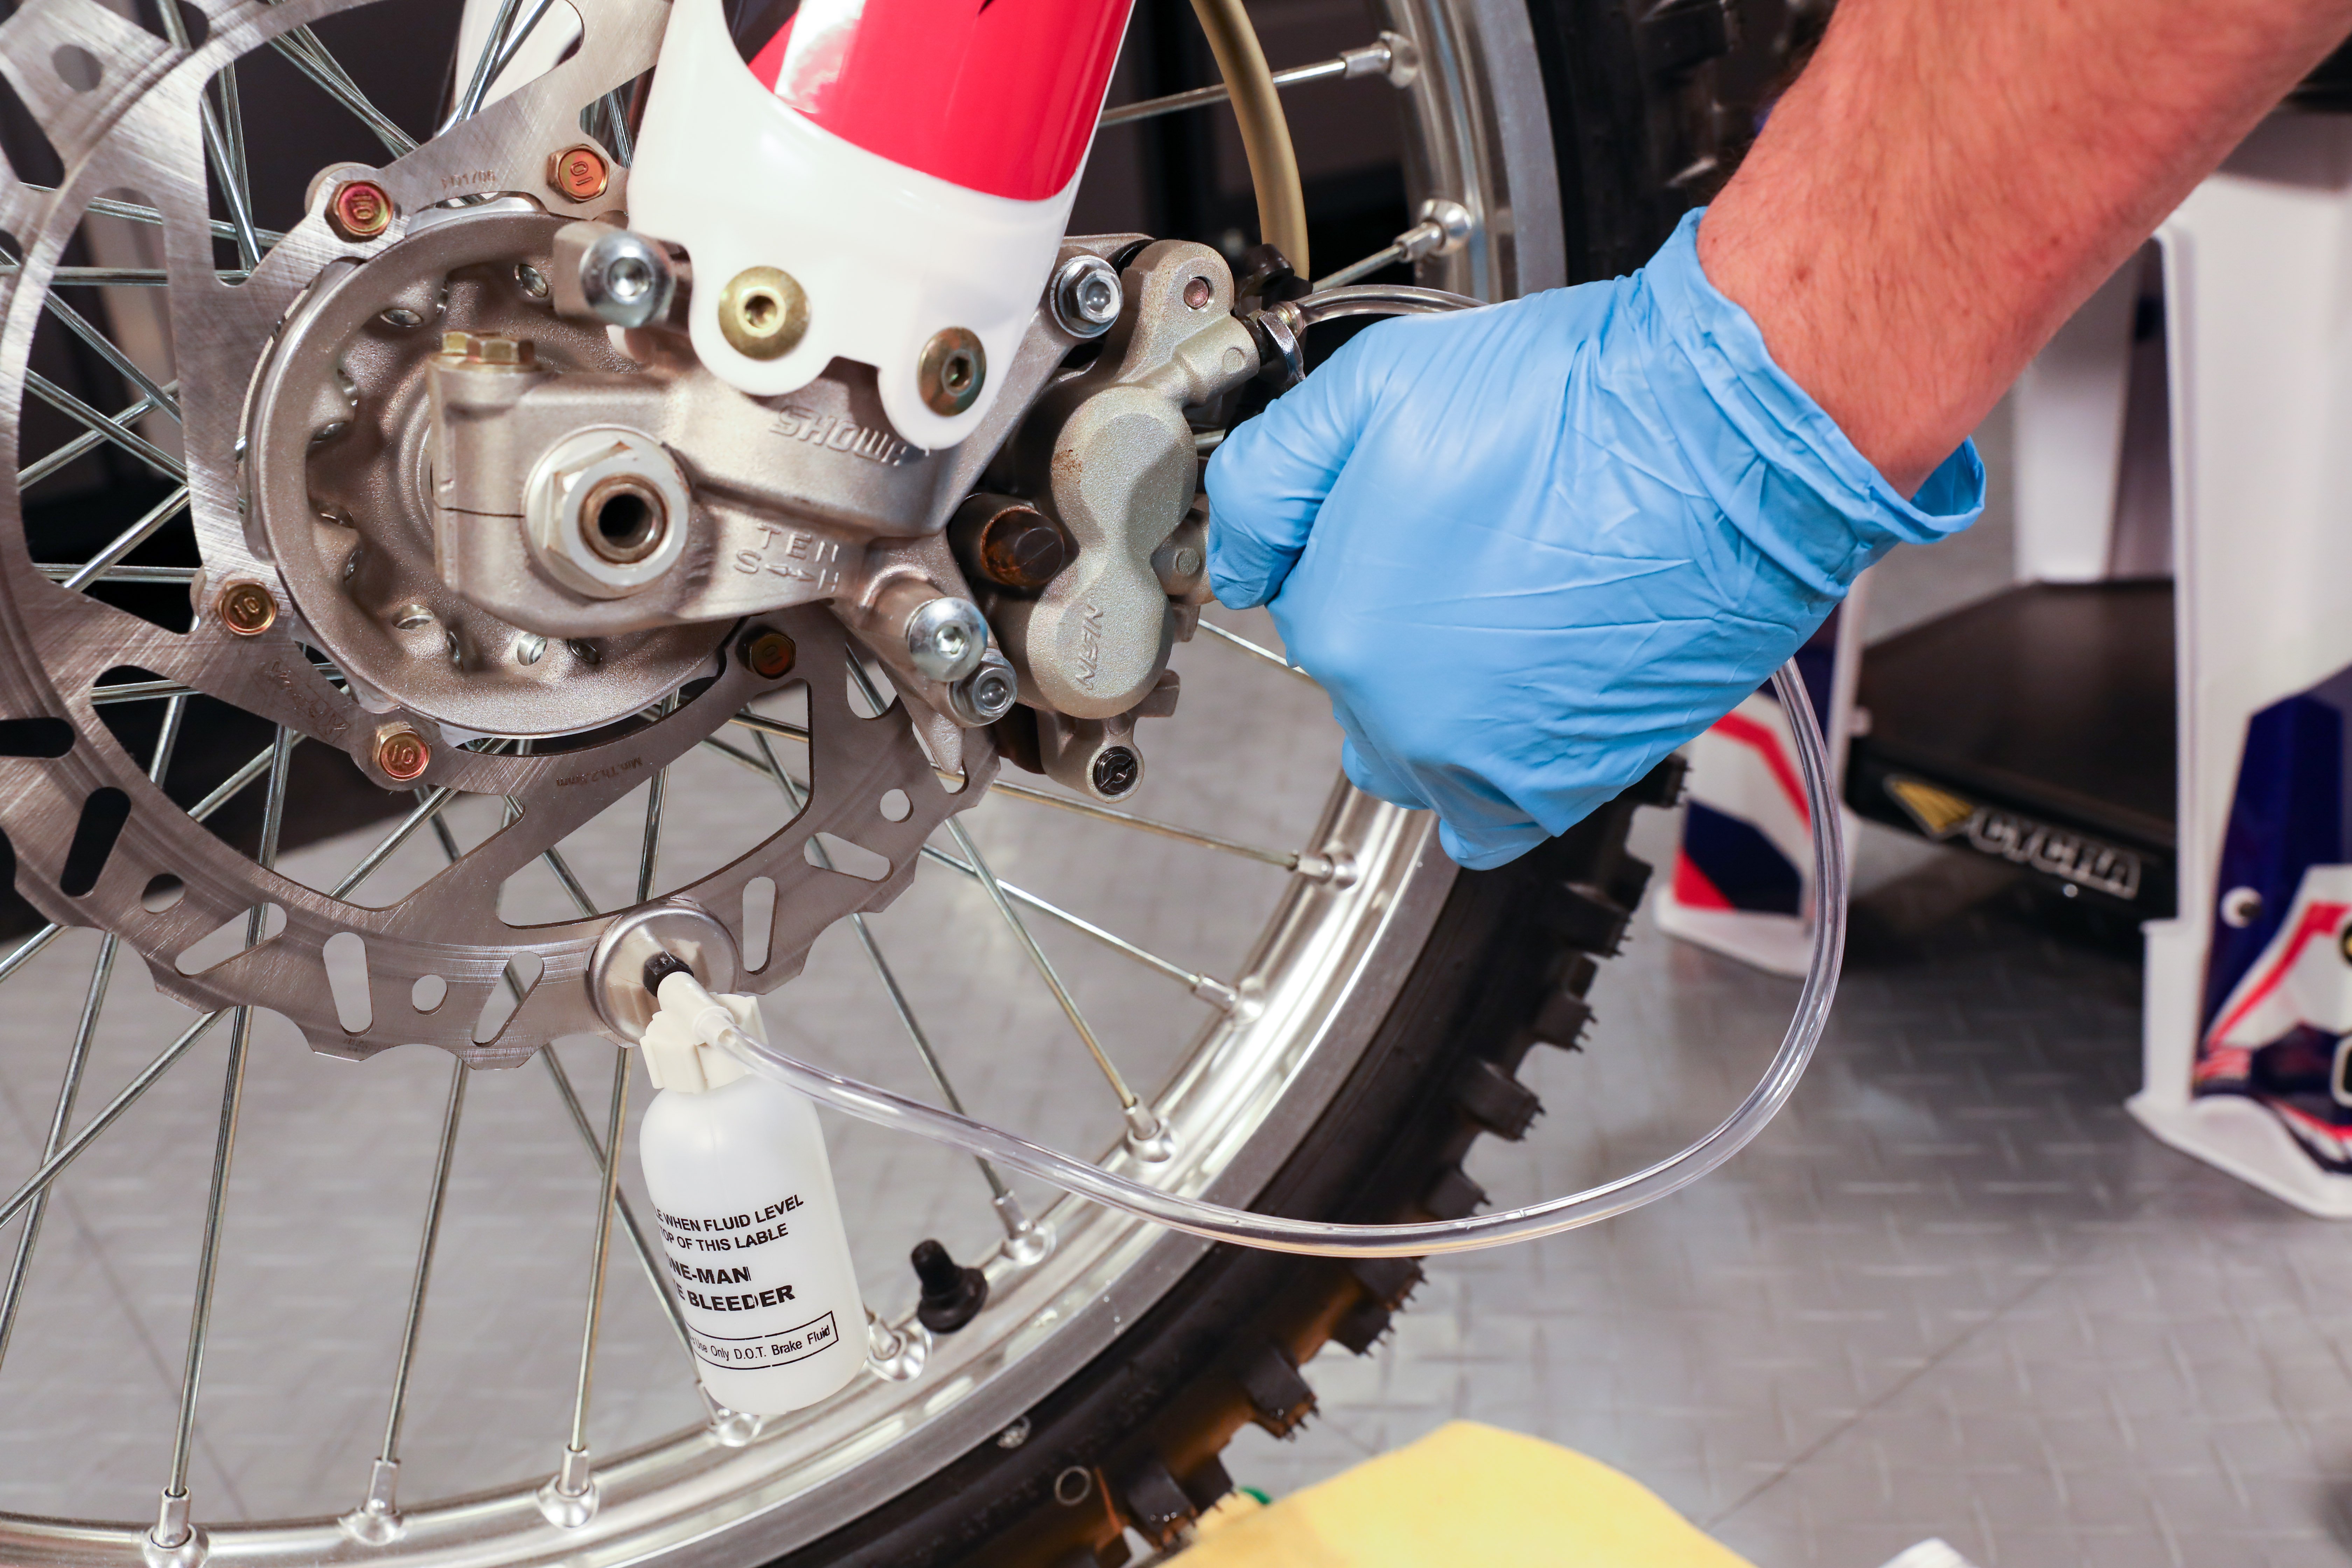
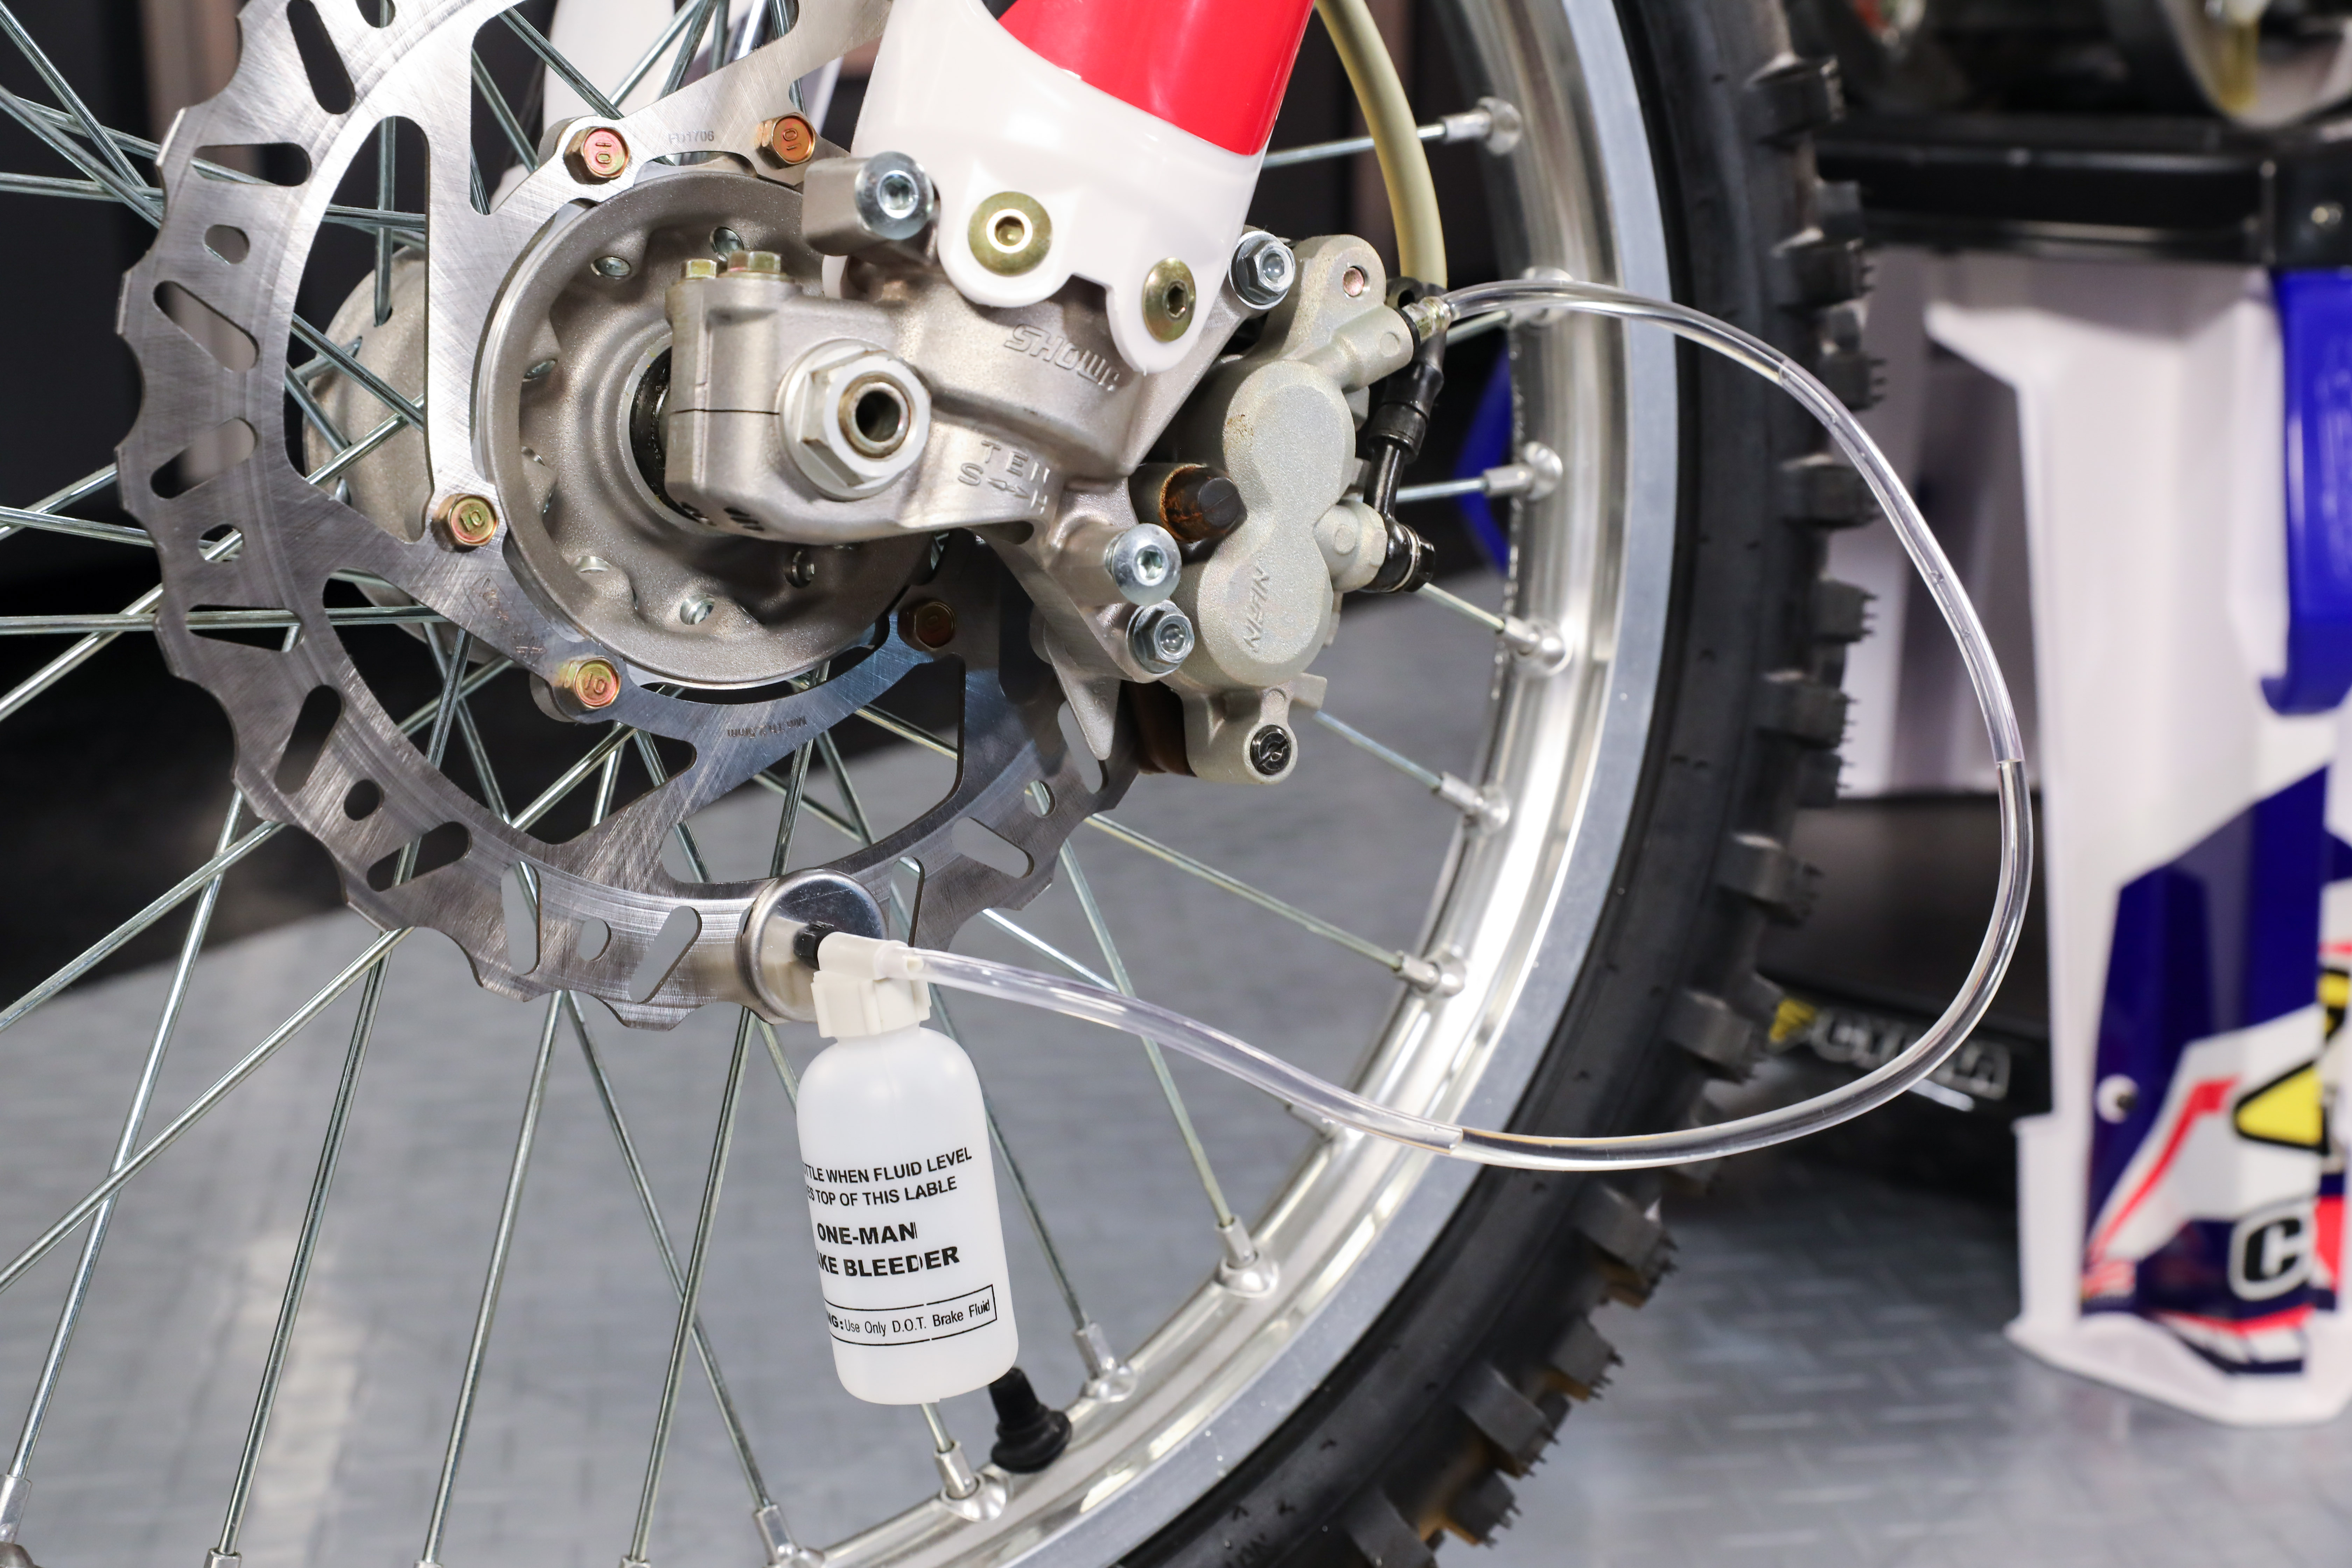
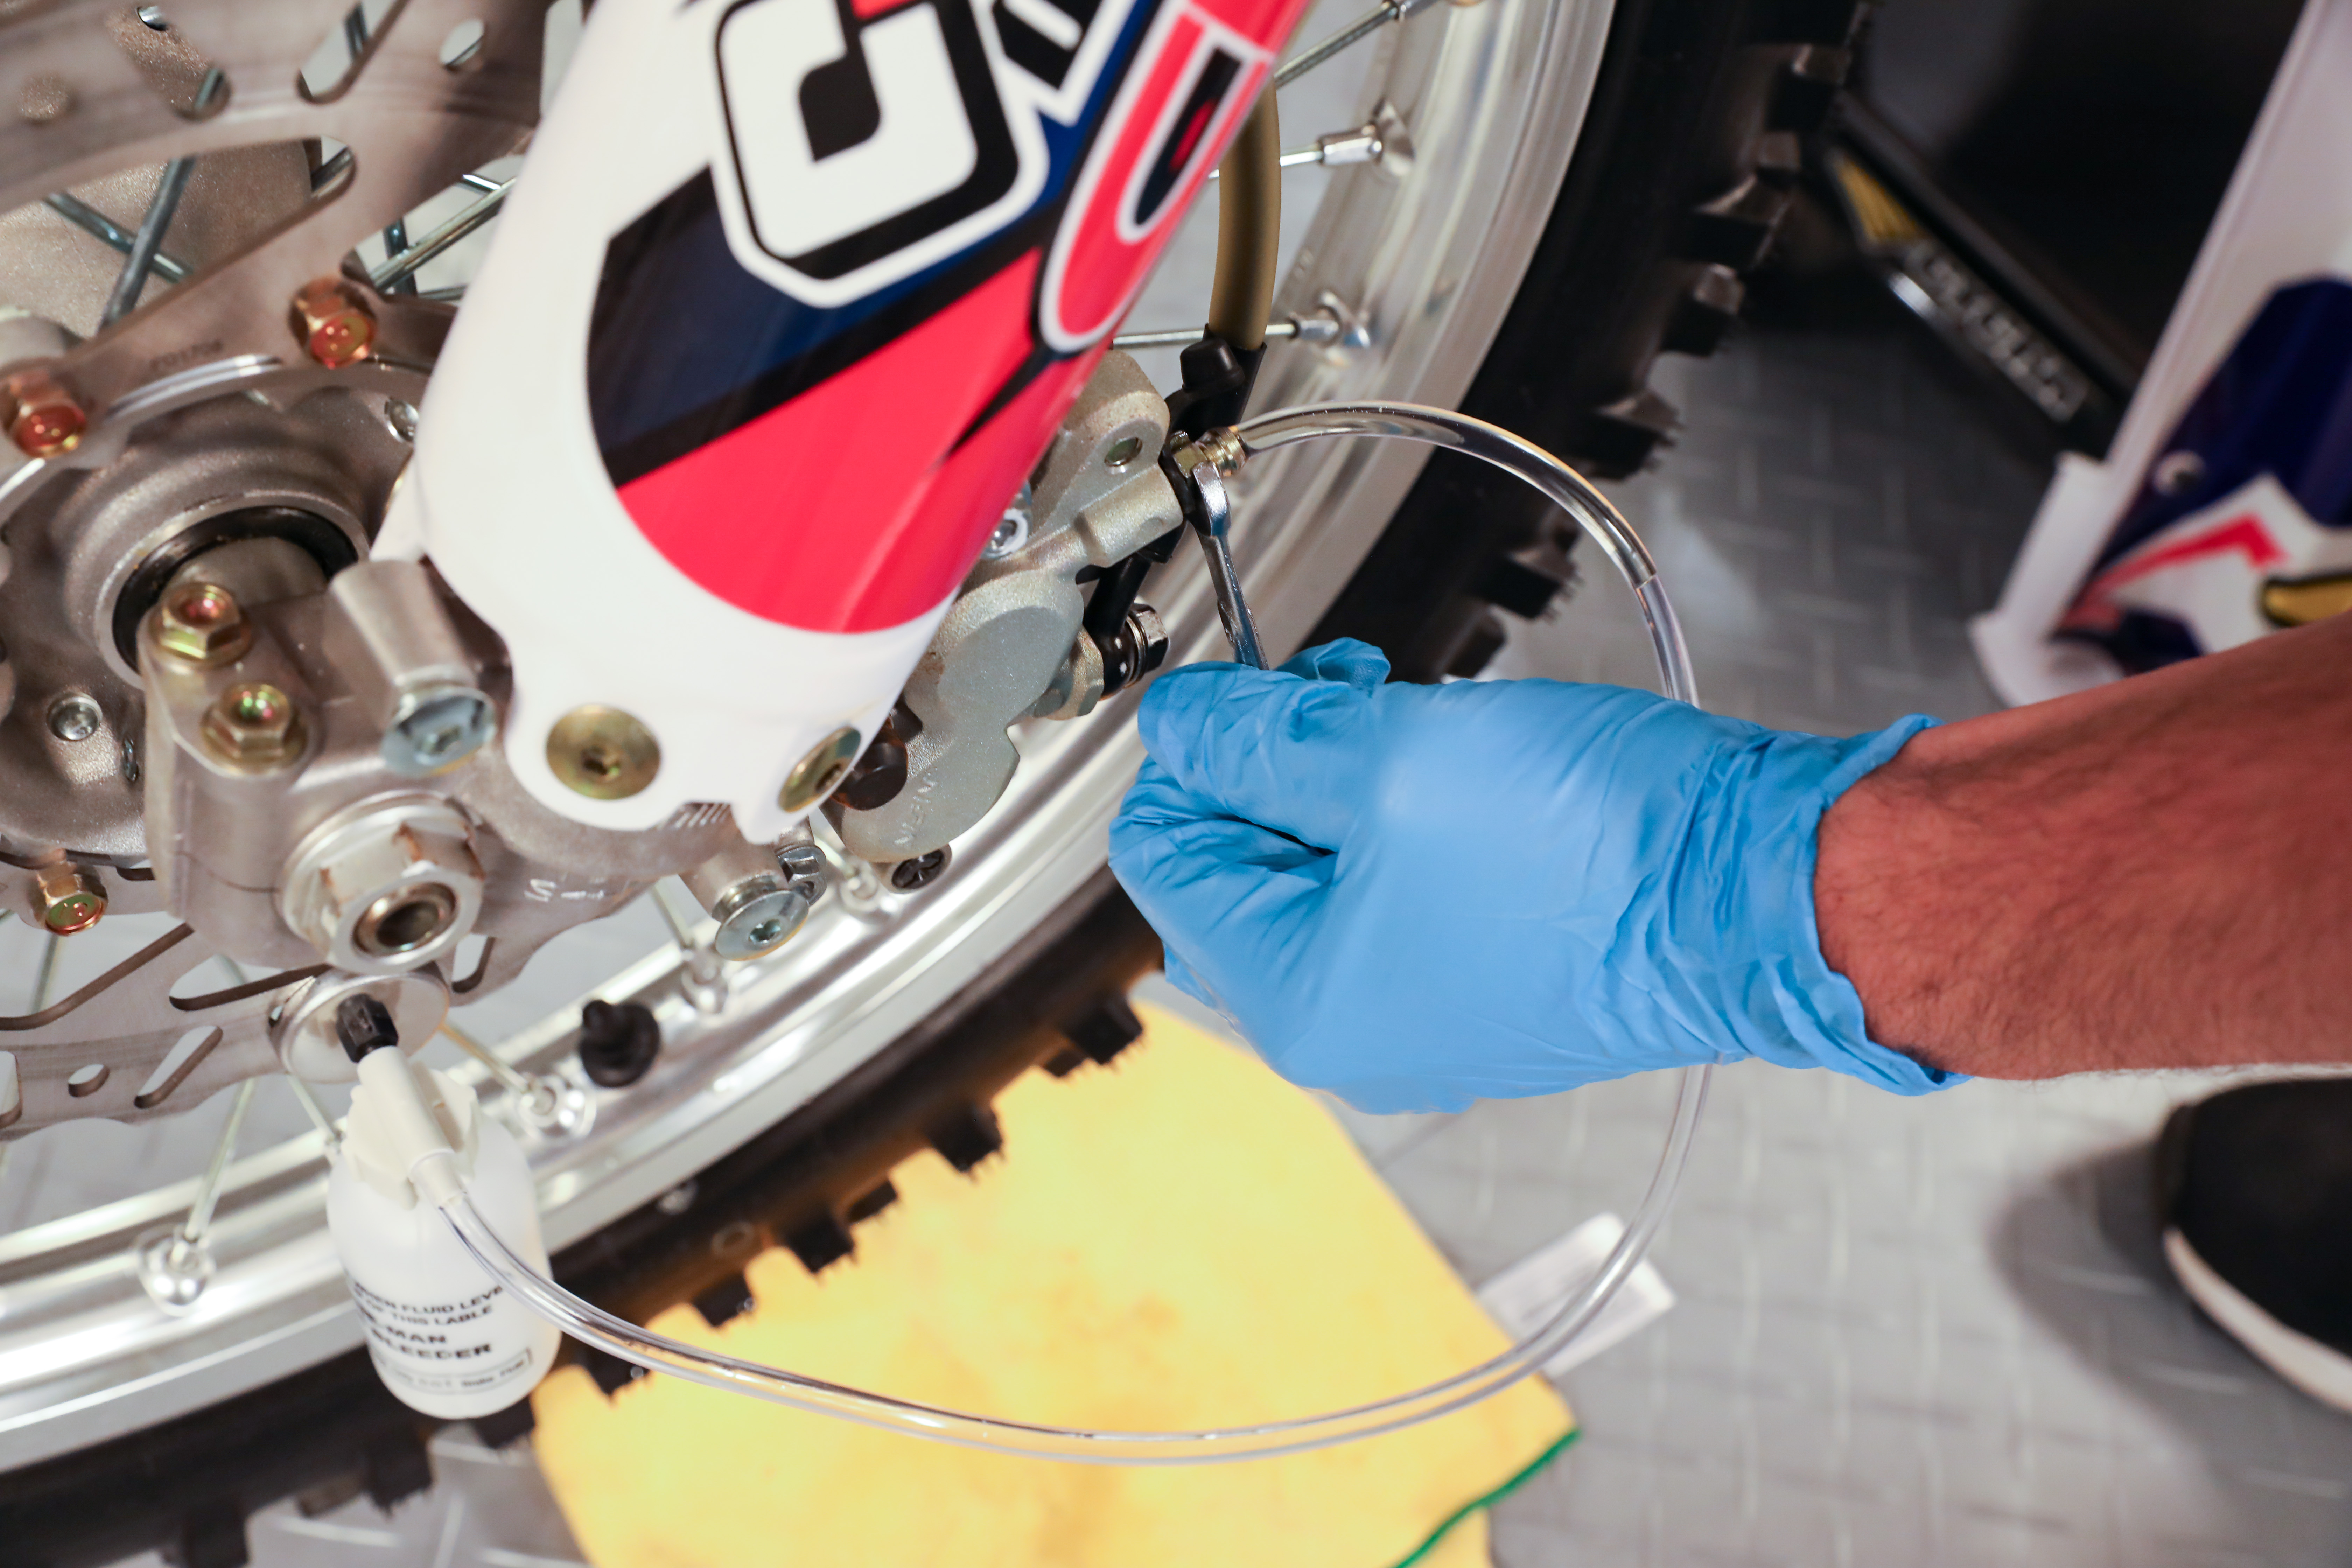
Transition to the caliper and remove any necessary covers or guards so that the bleeder valve is visible. The bleeder valve has a rubber cover that protects its flared nipple and should be easily identifiable. Size a clear piece of tubing so that it fits snuggly over the bleeder valve nipple and has at least six inches of length, or enough length to drain into a catch bottle.
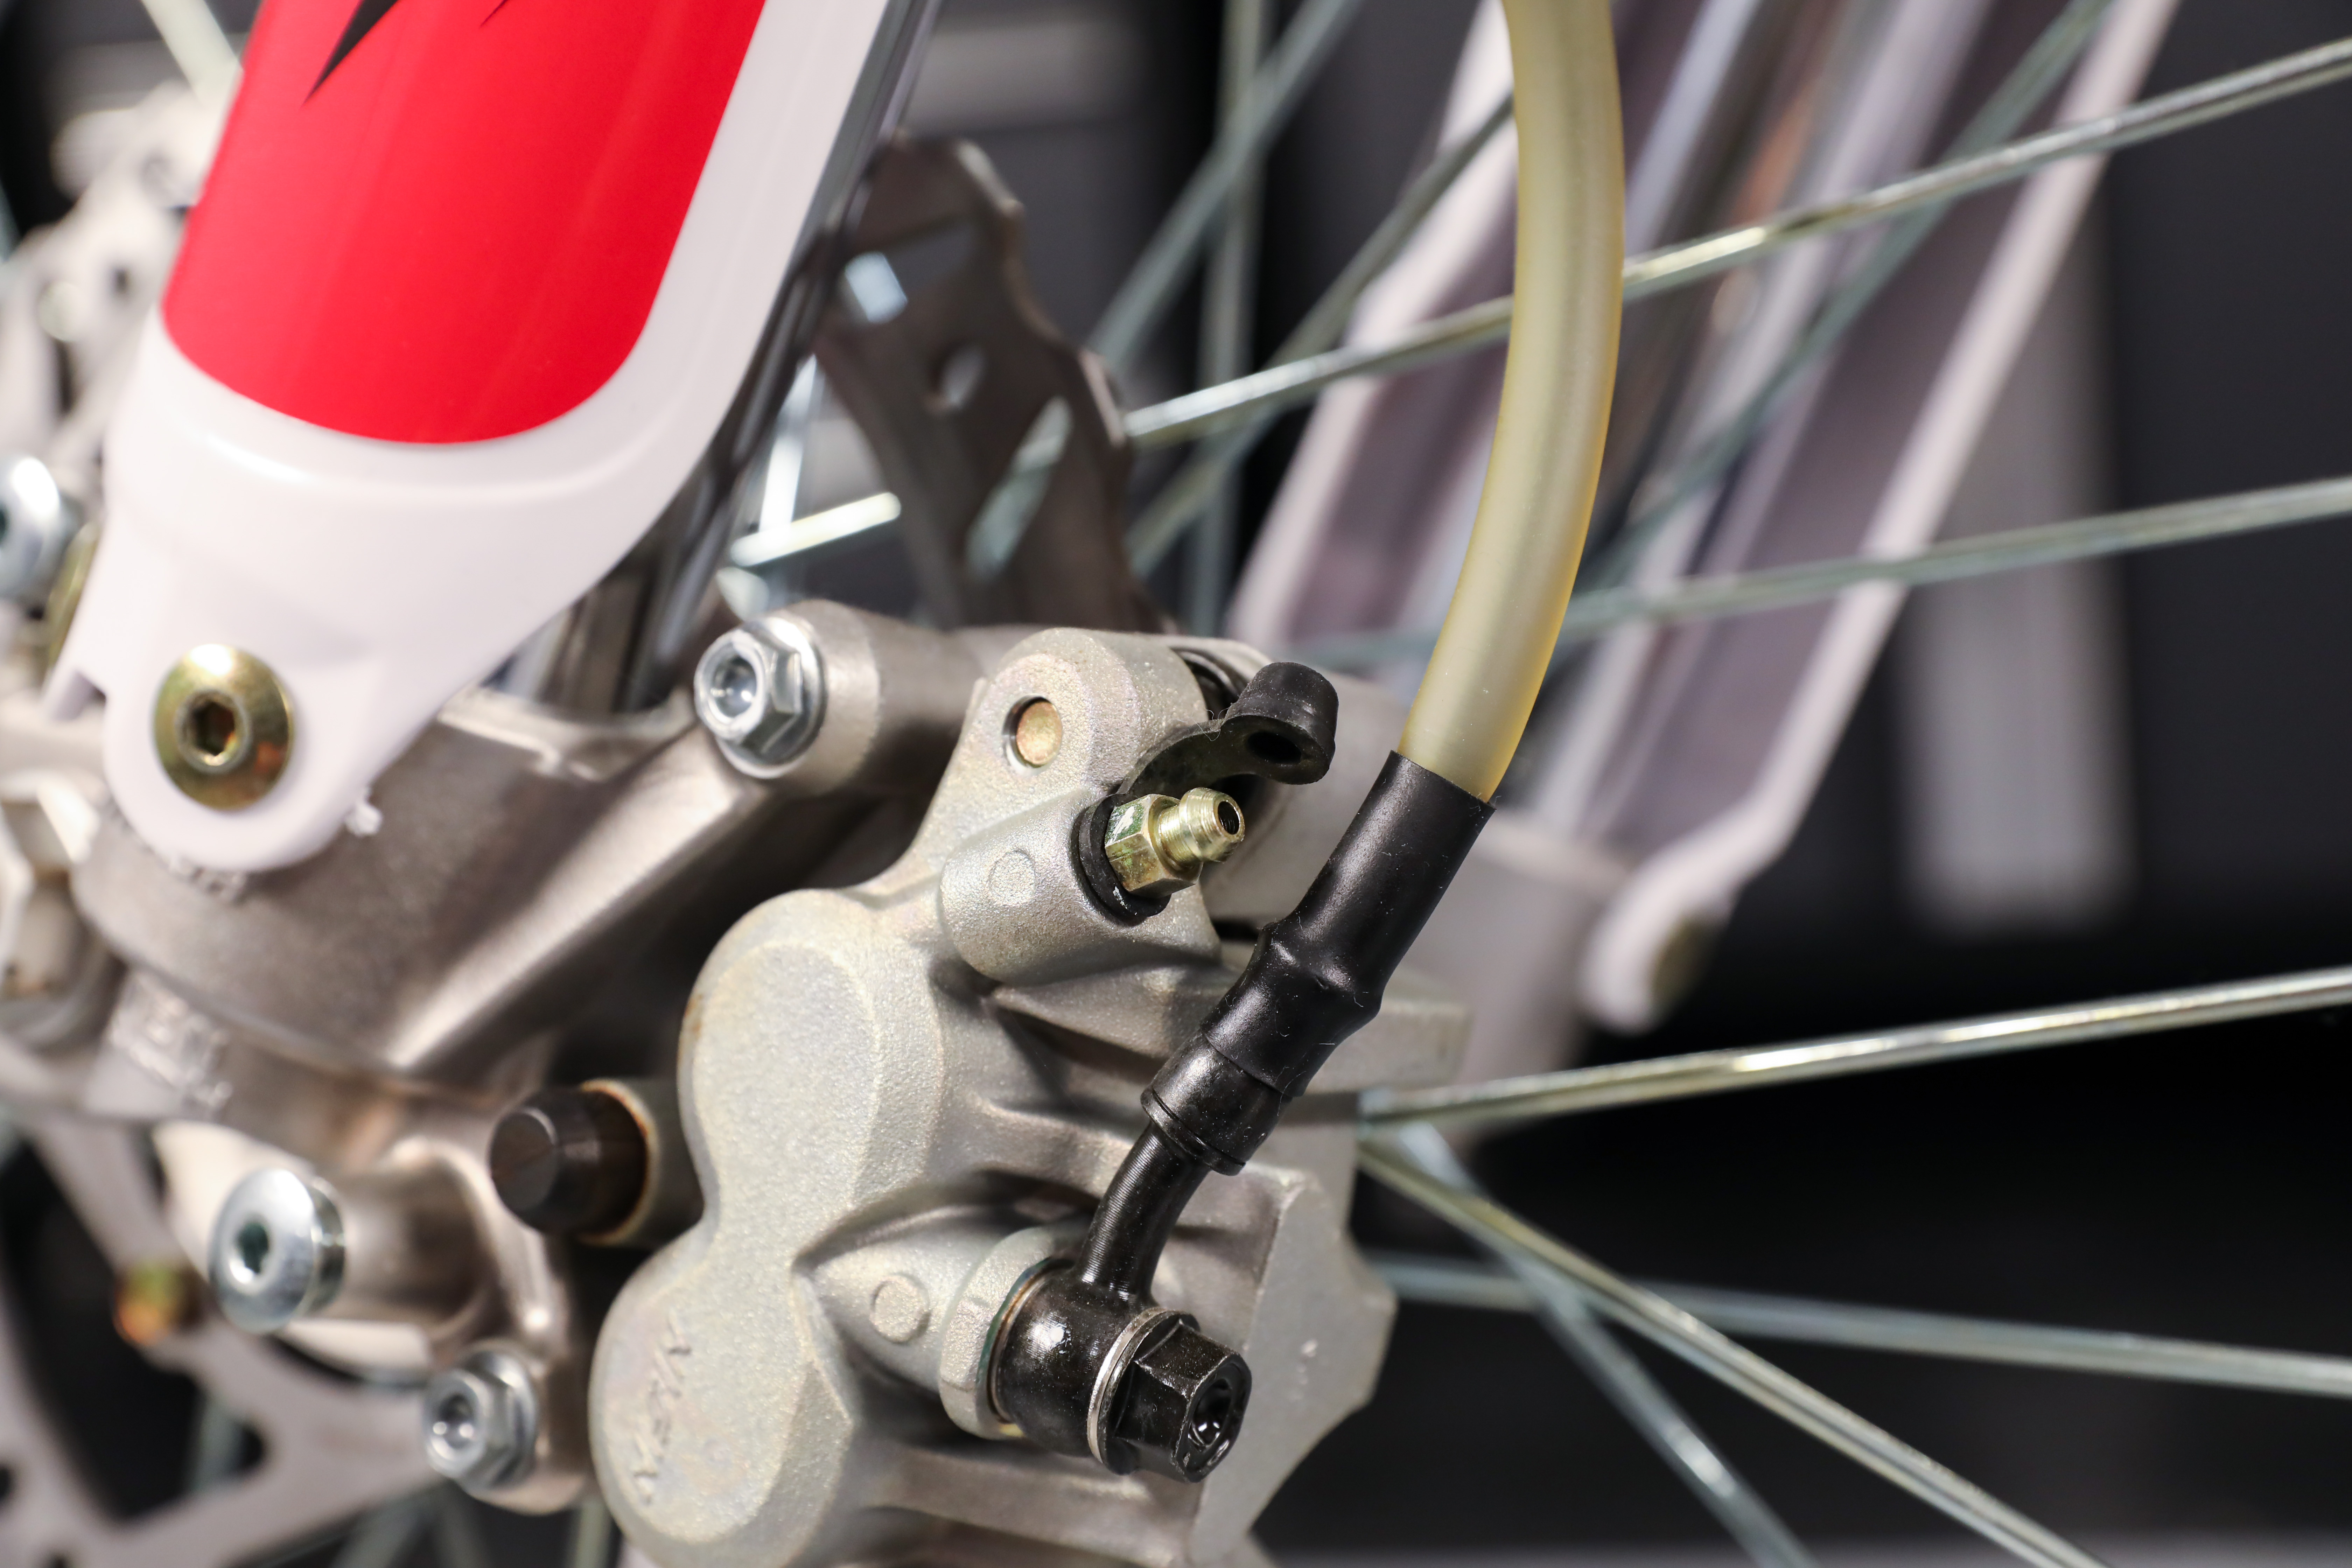
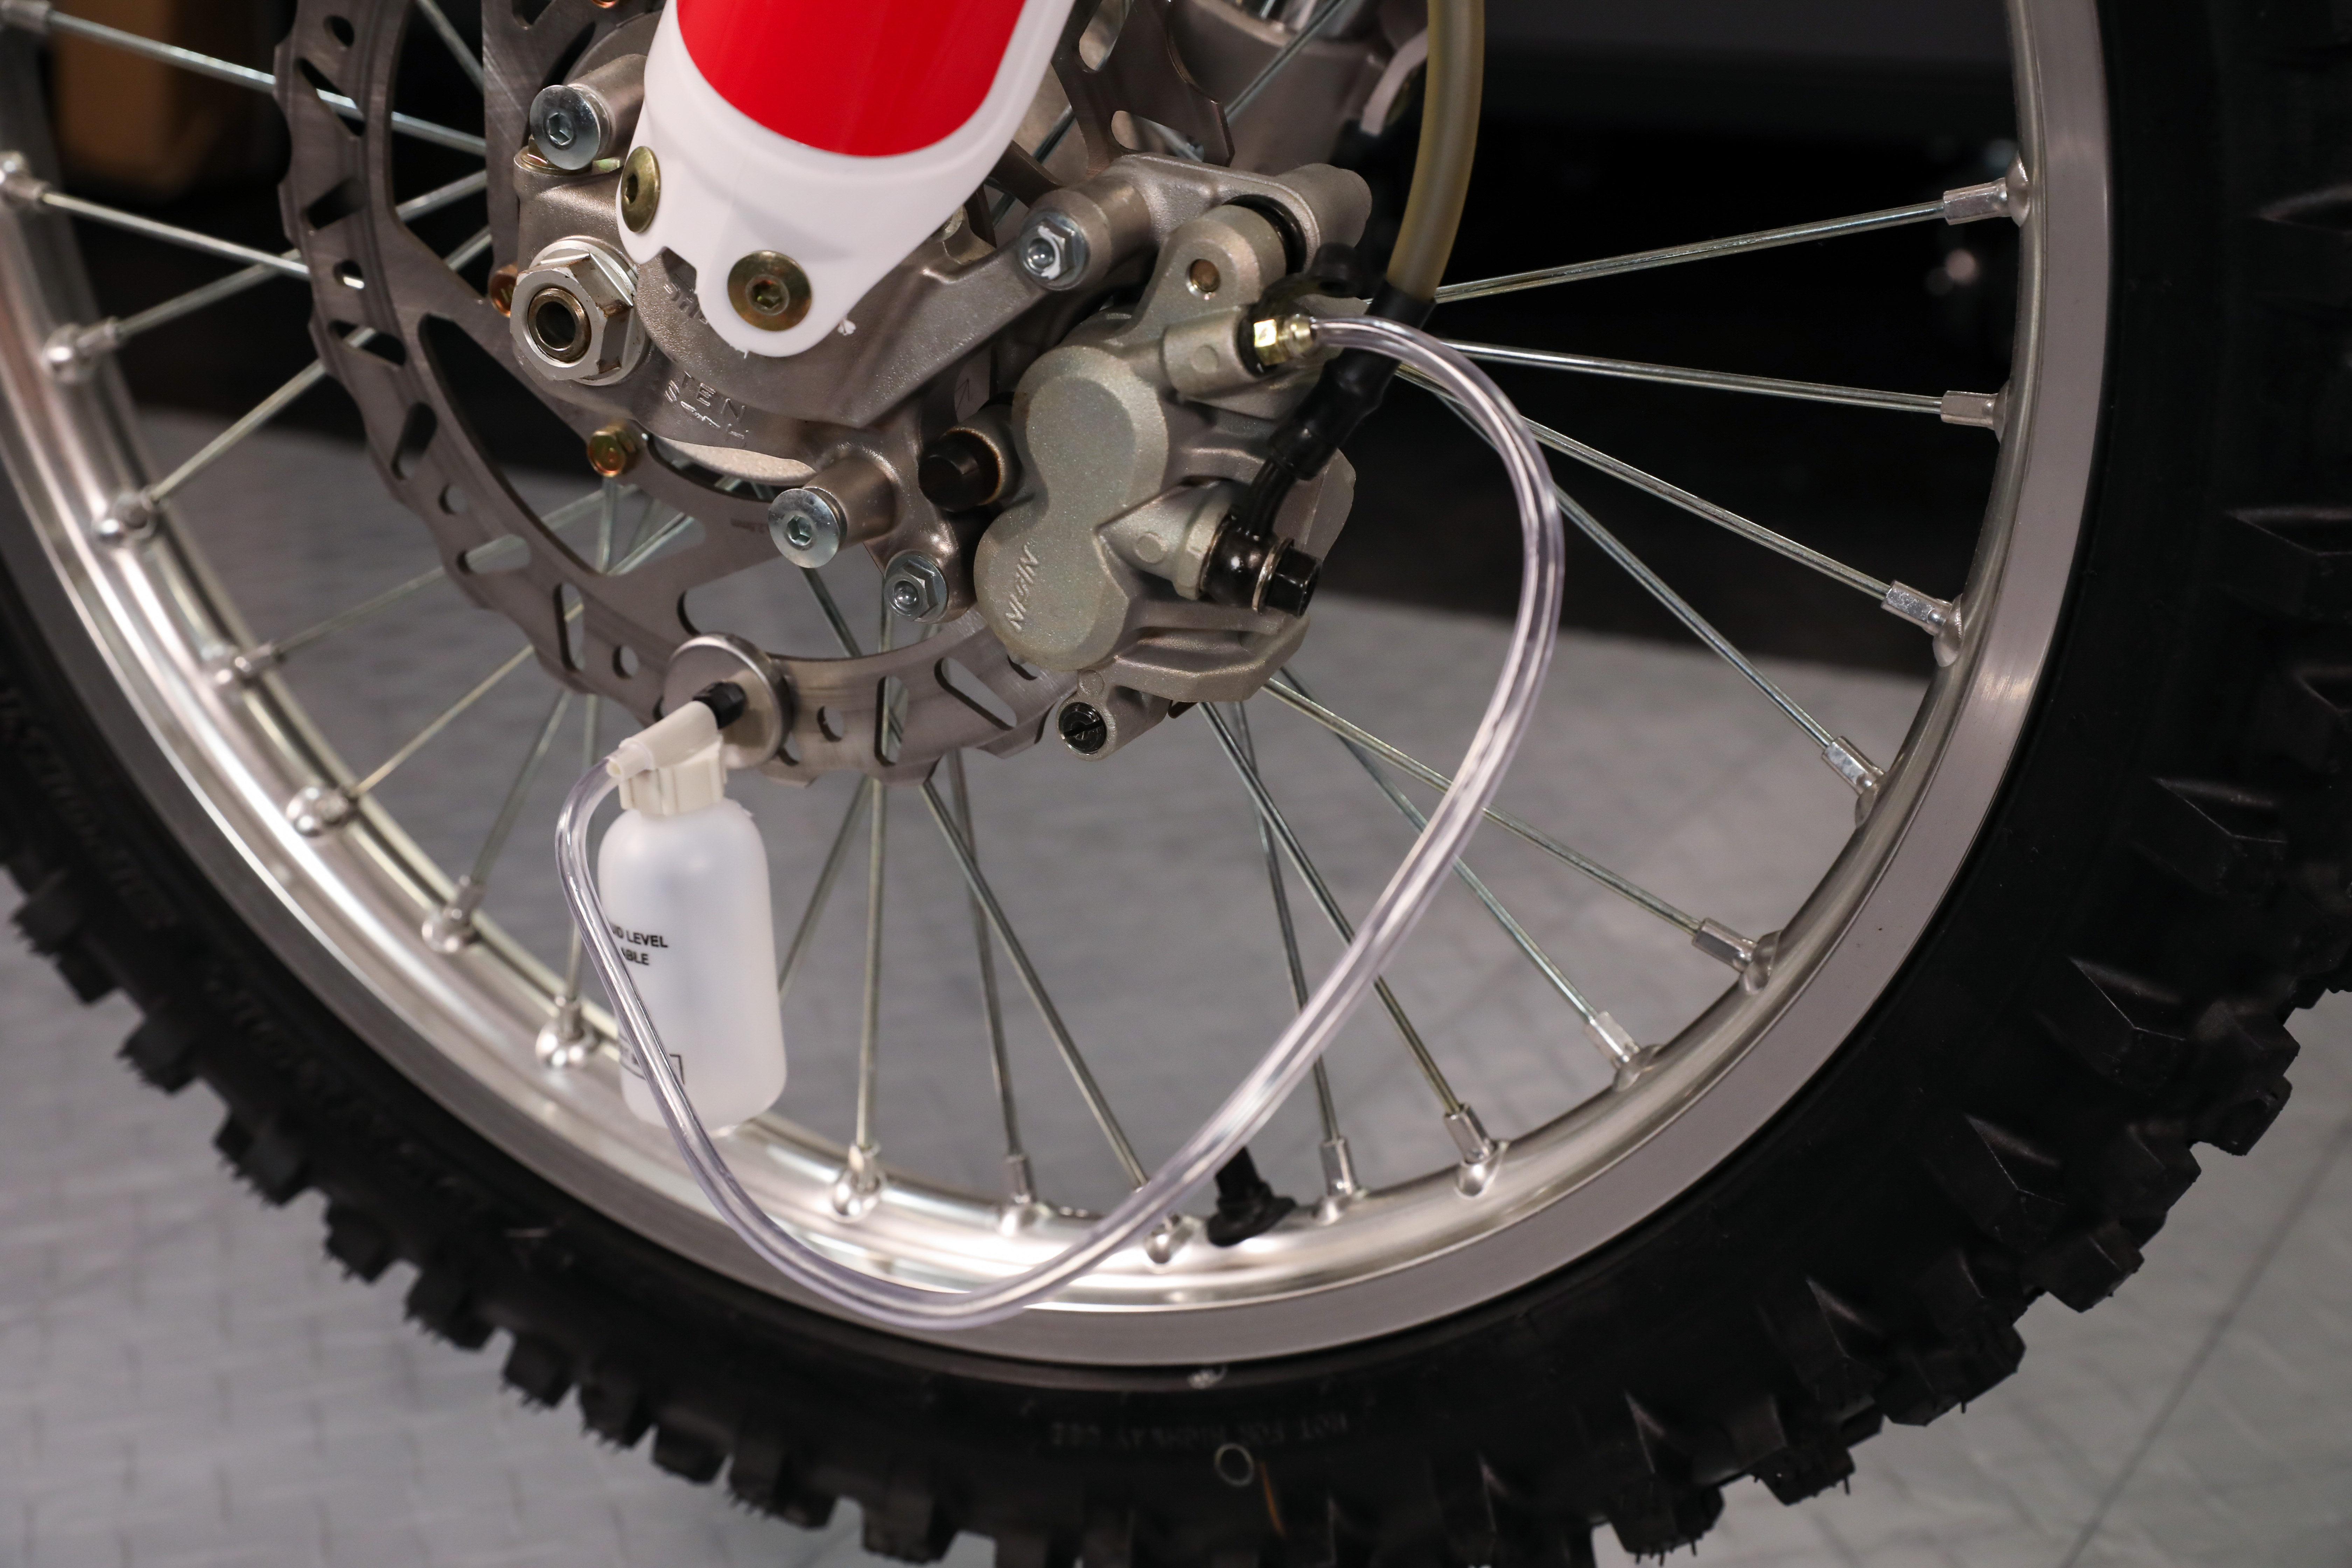
To begin the bleeding process, squeeze the brake lever (front) or push the pedal down (rear), then open the bleed valve ¼ - ½ turn. A mixture of air and brake fluid should exit from the bleeder valve and be visible in the clear tube. Close the bleed valve. Next, slowly release the brake lever or pedal and allow it to remain at its original extended position for a few seconds before repeating the process.
Keep a close eye on fluid levels in the reservoir. If all the fluid in the reservoir is consumed and air is sucked in, the whole process will need to be restarted. Add fresh brake fluid to the reservoir as necessary throughout the bleeding process to ensure no air ever gets sucked into the system. When adding brake fluid, be very careful to ensure no contaminants such as dust or debris enter the reservoir. Any small particles that find their way into the brake system can cause the system to malfunction or prematurely wear.

The bleeding procedure outlined should be repeated until the mixture exiting the bleeder nipple consists entirely of brake fluid. This may take a short or long period of time depending on where and how much air is in the system. Once the brakes have been properly bled, a noticeable improvement in the feel of the brake lever or pedal should be felt when the brakes are actuated.
Upon completion of bleeding the brakes, ensure the fluid level in the reservoir is at the upper level of the fill line. Then, carefully install the diaphragm, cover/cap, and any other remaining hardware. Be sure to double check that the bleeder valve is tight. Once the machine has been reassembled, test the brakes one final time by rolling the machine forward and backward and noting how responsive the brakes are. Assuming everything checks out, the machine should be test ridden.
Perform a test ride by progressively increasing the machines speed and brake load. Do this based on brake performance and as you gain confidence in the brake system. Always pick a suitable test location and be sure to leave yourself ample room in case something goes amiss. Before performing high speed and load braking tests, stop the machine and check over the caliper, line, and master cylinder to ensure there are no leaks.
Master Cylinder Tips
If you continue to encounter problems with your brake system after bleeding or find worn out components in your master cylinder, it’s time to rebuild. Master cylinder rebuild kits make it easy and affordable to get your brakes performing again. The aftermarket is a good source for affordable rebuild kits for a job like this. ProX Racing Parts offers affordable master cylinder rebuild kits that contain OEM-quality parts, complete with all pieces necessary for a standard rebuild. Here’s a few tips to keep in mind during a master cylinder rebuild to ensure your job goes as smoothly as possible.
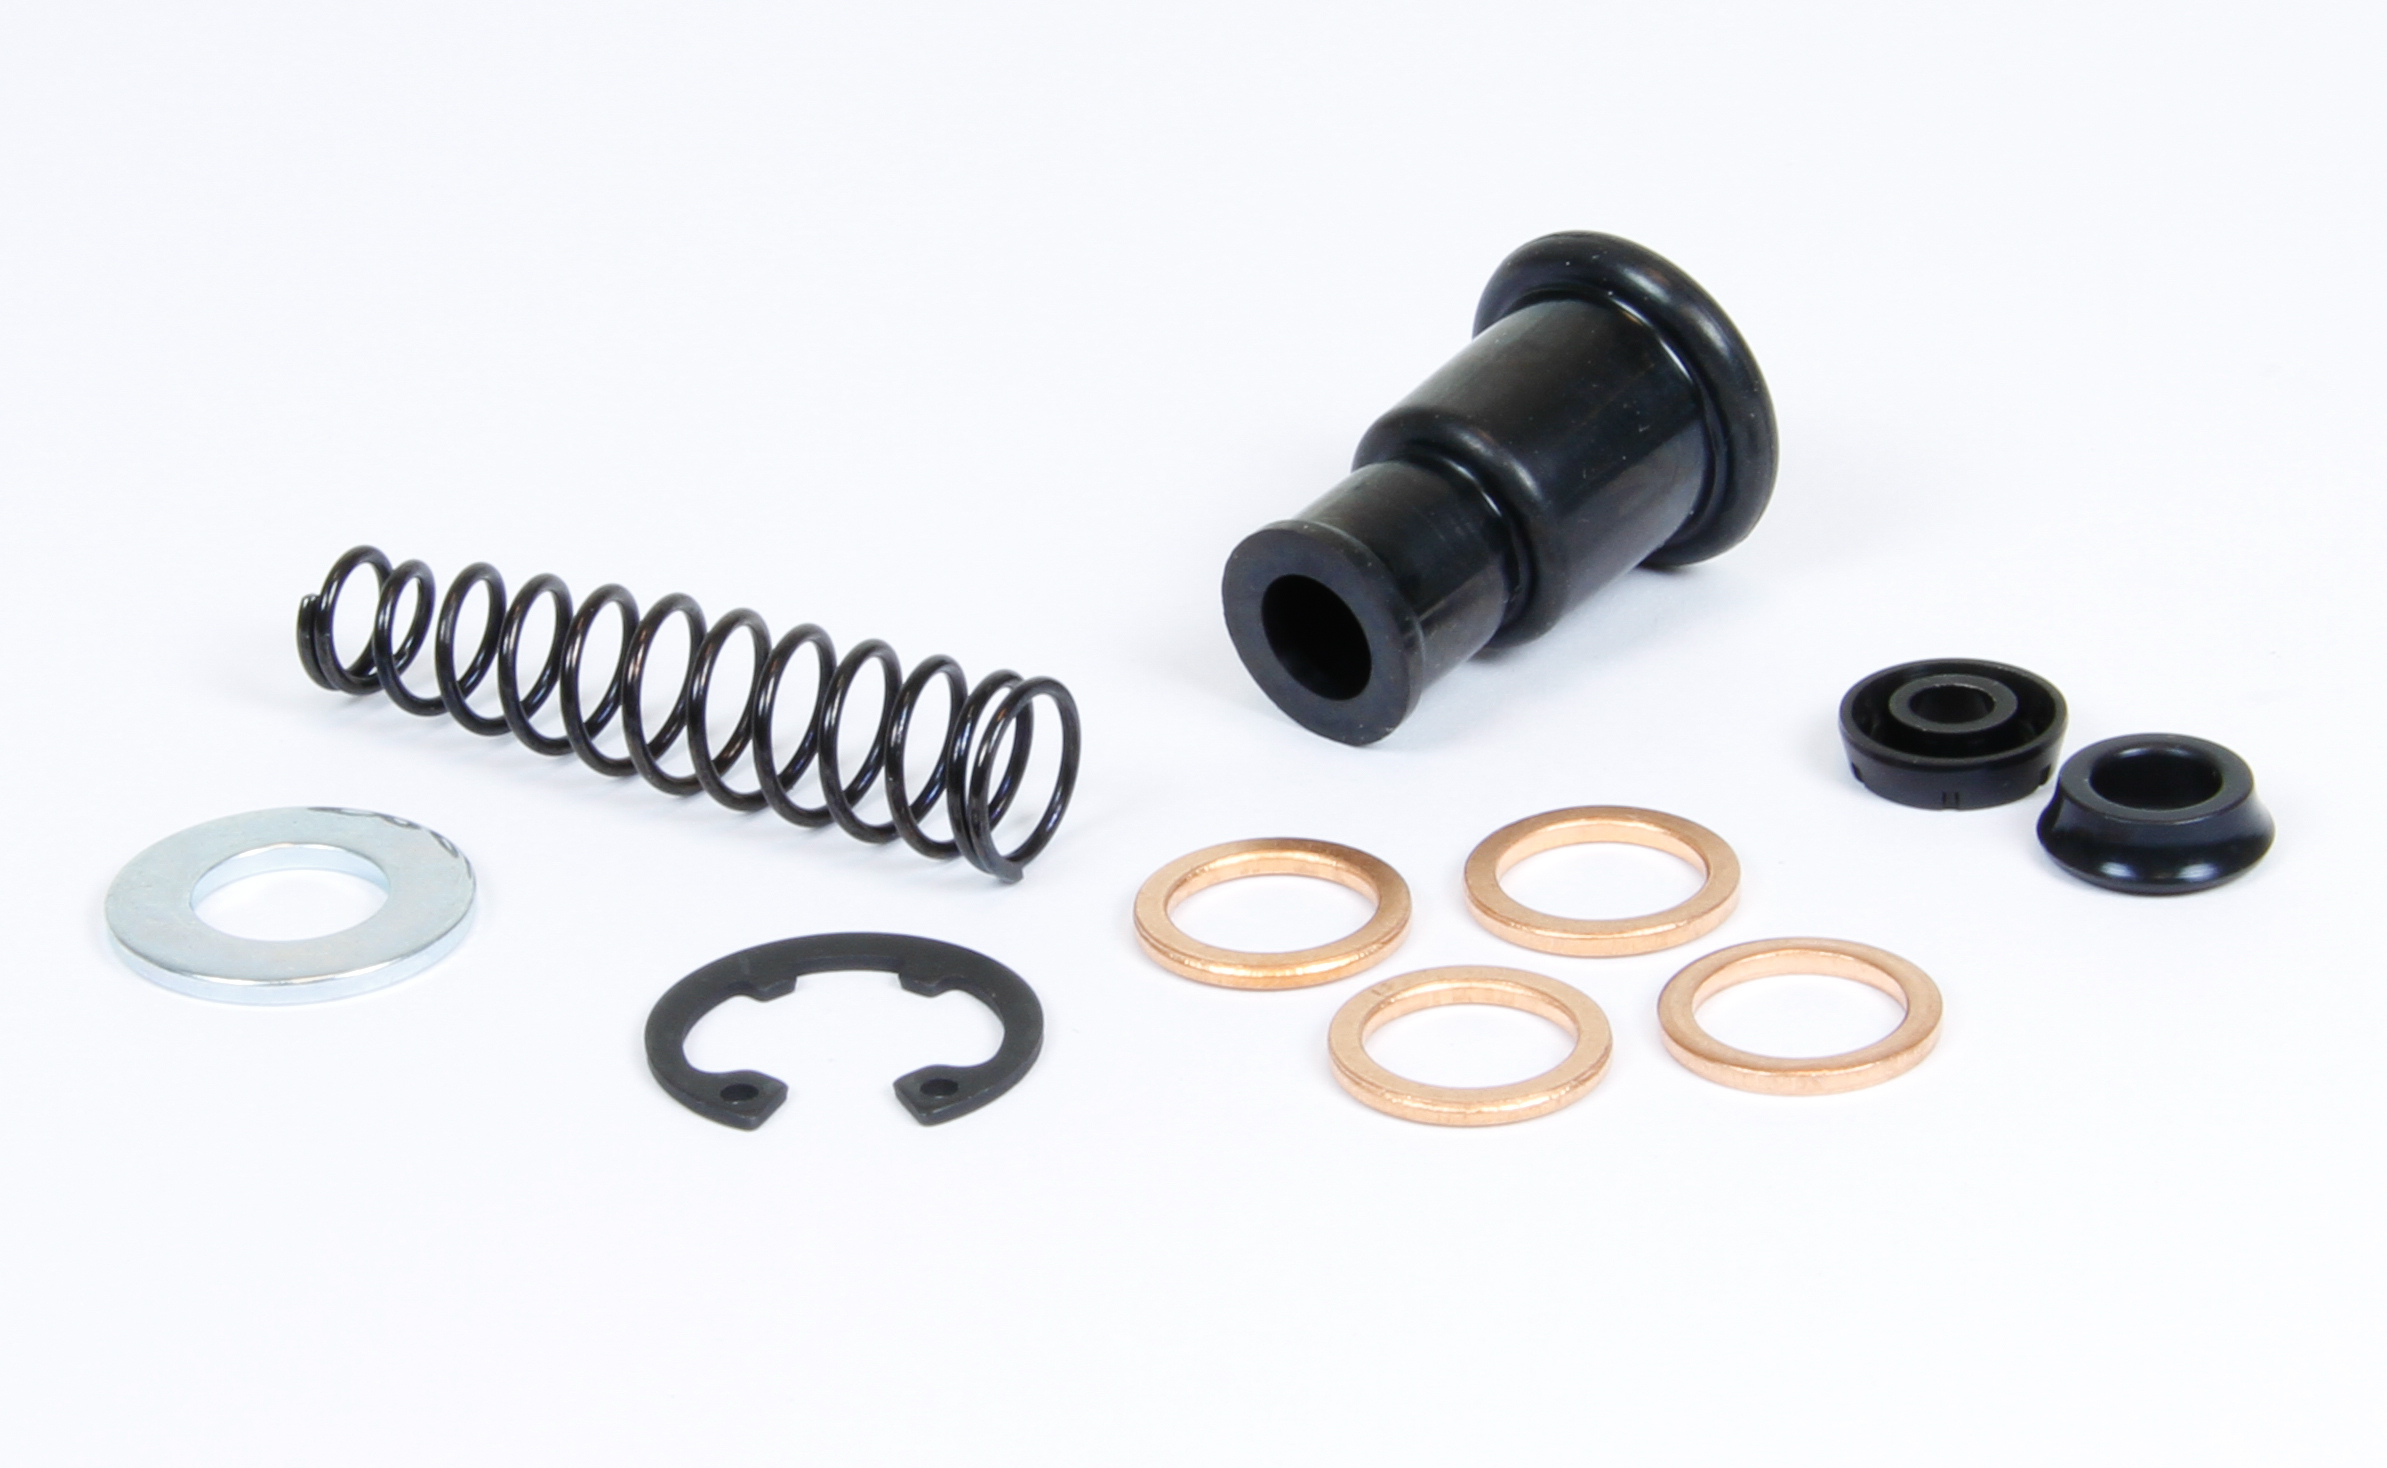
- Be sure to use a snap ring plier when removing the snap ring from the master cylinder. Attempting to extract the snap ring with anything else often leads to damaging the snap ring groove and surrounding geometry.
- Once the master cylinder has been completely disassembled, be sure to clean the entire master cylinder before reassembly. When cleaning the master cylinder, only use brake fluid.
- Check the master piston and cylinder bore for abnormal scratches. If deep scratches are present, the piston and cylinder should be replaced. Also, reference your service manual for any applicable inspection measurements that should be taken.
- Upon reassembly, be sure to apply new brake fluid to the master piston and master cylinder bore.
- When installing the boot, be sure that it fully seats.
Find ProX parts for your machine here.
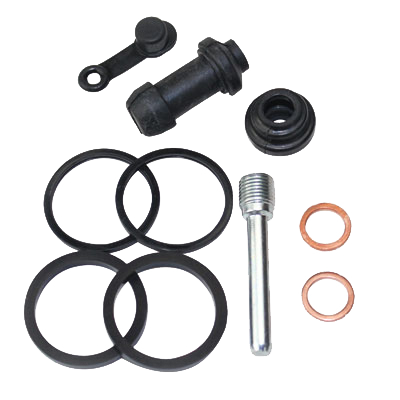
Should you encounter leaks or operational issues with your brake caliper, calipers can also be rebuilt and resealed. ProX offers caliper rebuild kits complete with new rubber boots, seals, bleeder caps, and retaining pins. All ProX components supplied in master cylinder and caliper rebuild kits are designed to OEM specifications to help ensure to the same longevity your machine’s brake system had when it was new.