Routine maintenance and checks on your motorcycle is critical to longevity and consistent performance. Check out this list of 7 things that should be part of your pre-ride routine.
Unlike the T-1000 in “Terminator 2: Judgement Day,” your motorcycle doesn’t have the capability to shapeshift back to its original showroom shine or miraculously repair itself. However, with care and a basic understanding of mechanics, you can enjoy your motorcycle for many seasons. Unfortunately, problems such as a general lack of knowledge or a mild case of disinterest may result in costly repairs.
We have targeted seven essential motorcycle maintenance items in order to help you stay on track and out of the repair shop. Taking the time to run through this checklist prior to riding will help ensure proper operation and lead to a great experience behind the handlebars.
Air Filter
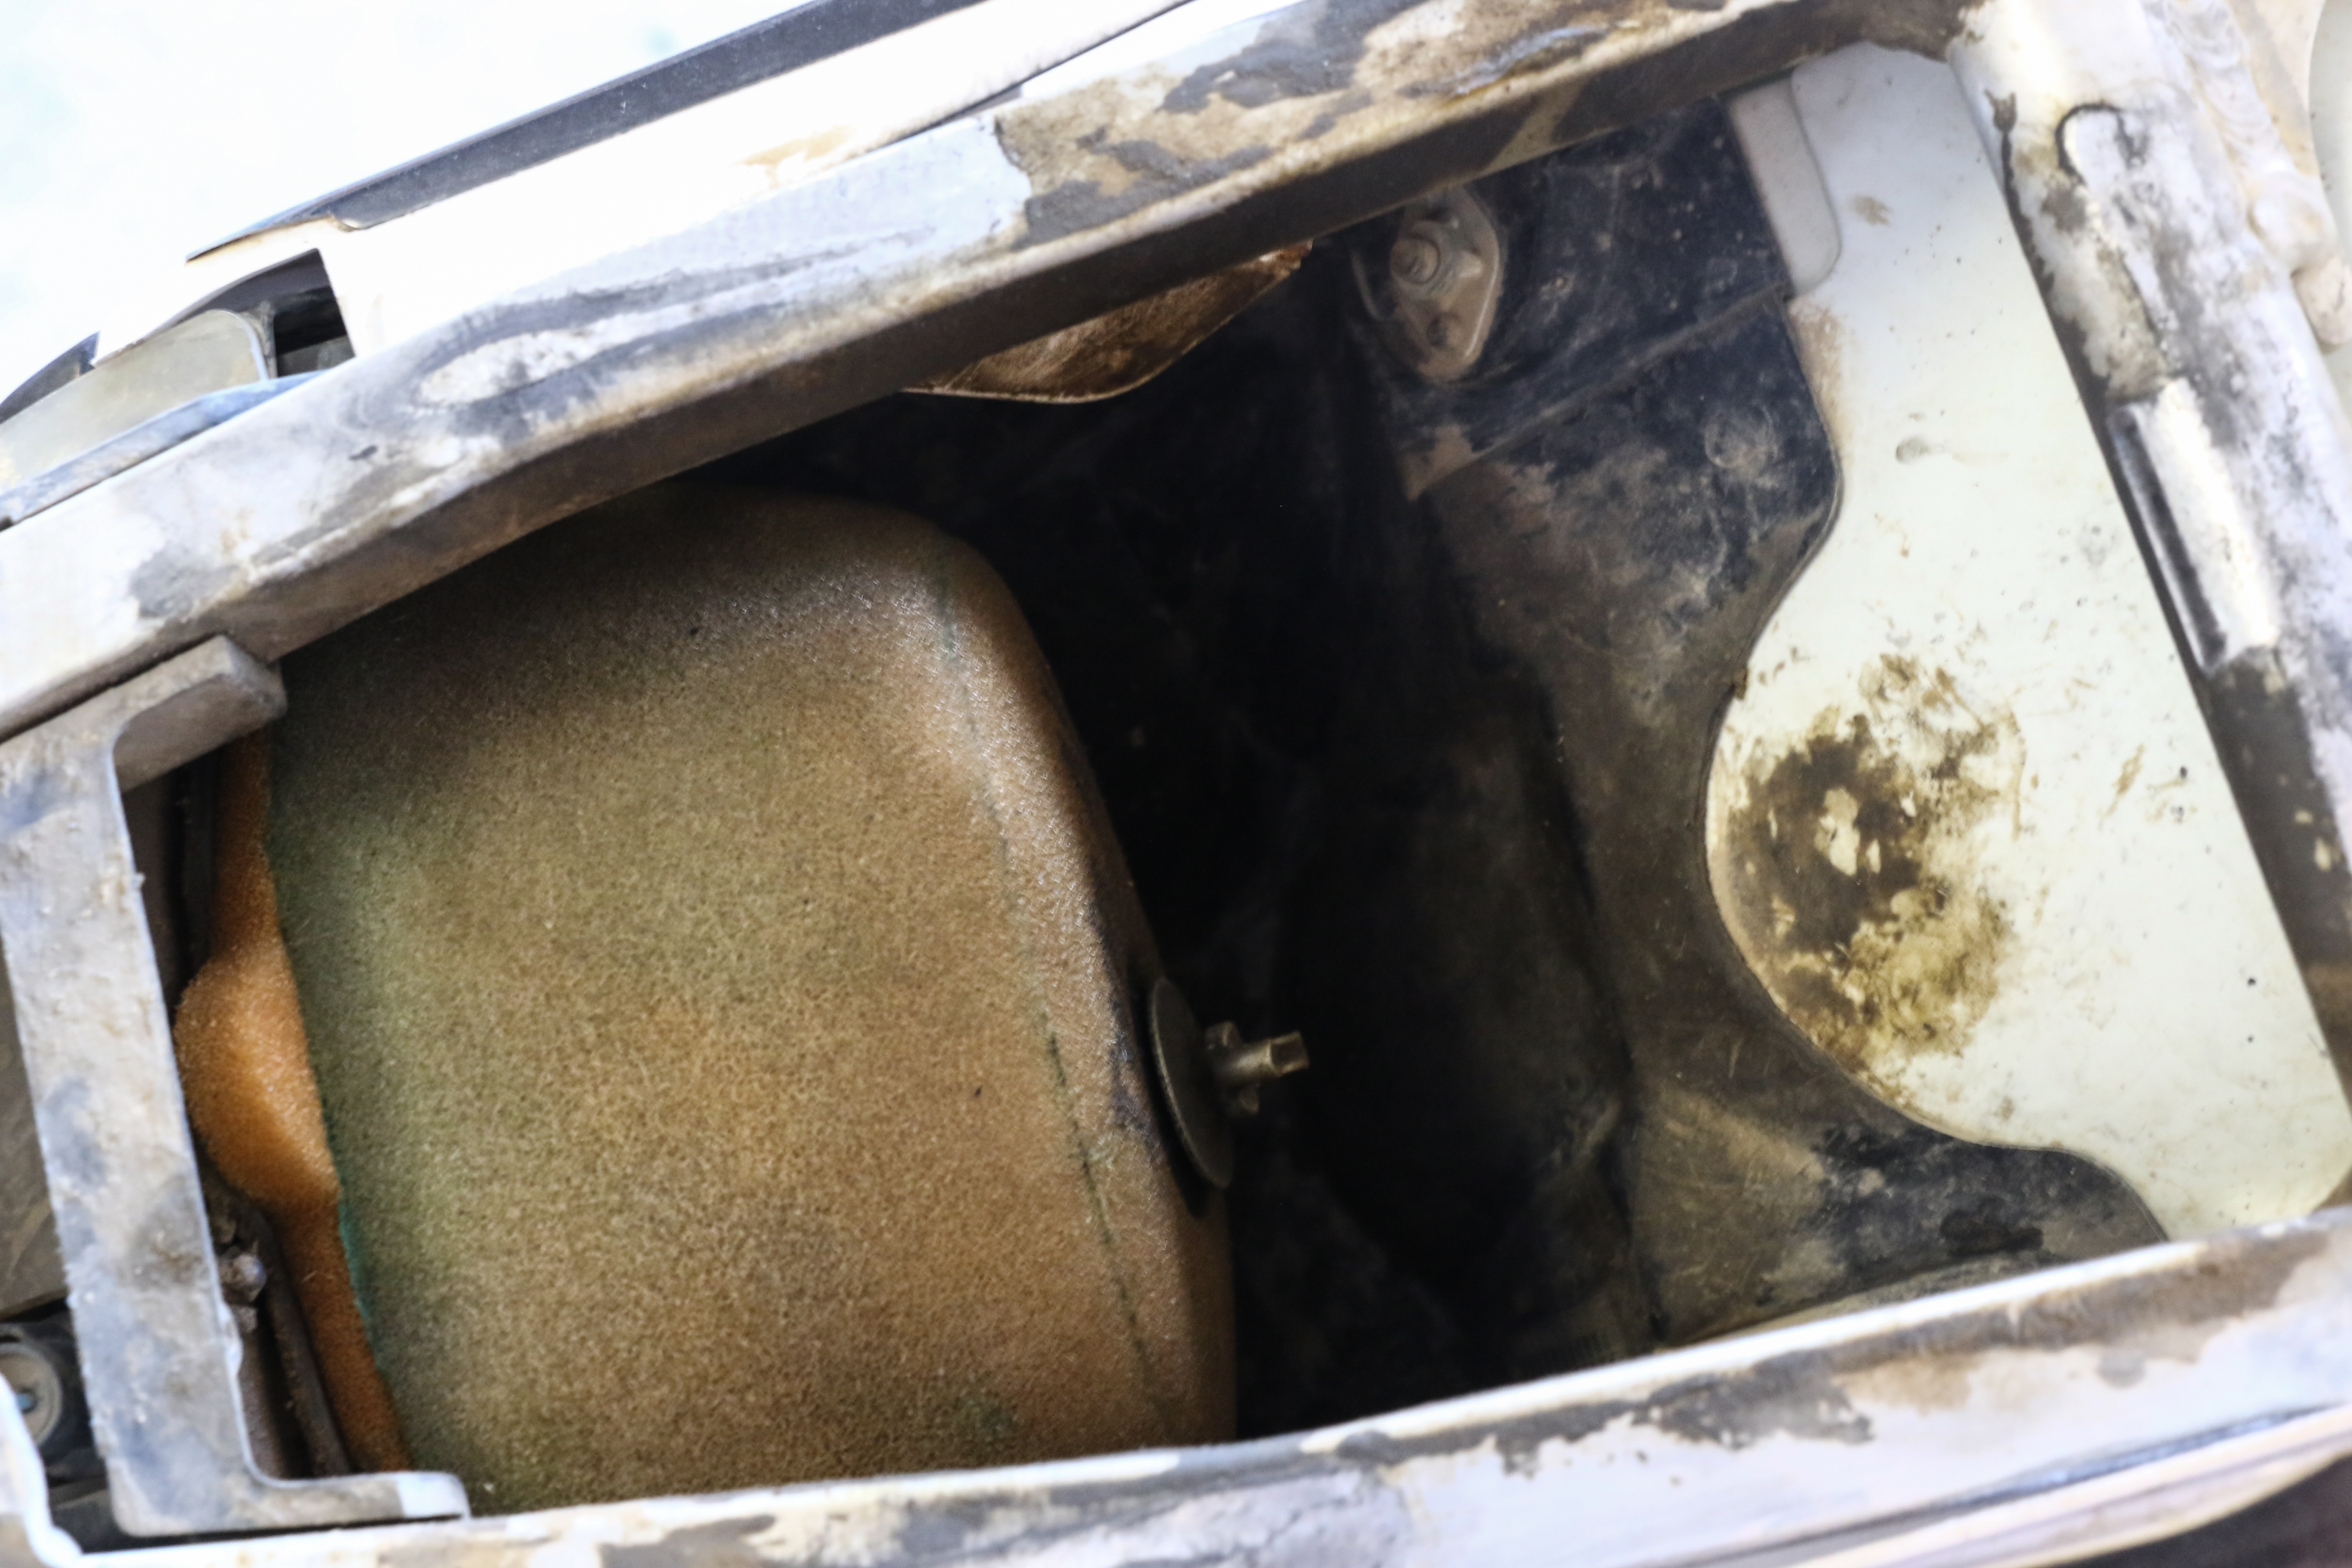
Checking the air filter is a more involved process than most backyard mechanics think. Do not simply give your filter the once-over before starting up your motorcycle and taking off. Harmful particles may be deeply embedded in the air filter and not visible to the naked eye. Not only that, but the air filter might have collected moisture following the previous ride. Water can be the death knell to proper air filtration. For these reasons, you should closely inspect your air filter.
Clean here for step-by-step air filter maintenance.
Unlike an engine, which is monitored by adhering to service intervals, an air filter may need to be replaced after one ride. Sand and silt wreak havoc on air filters. Also, pay attention to the filter oil coverage. Make sure that the filter is completely enveloped in the proper amount of oil. Too much and the oil weeps into the engine; too little and contaminants will easily pass through the intake.
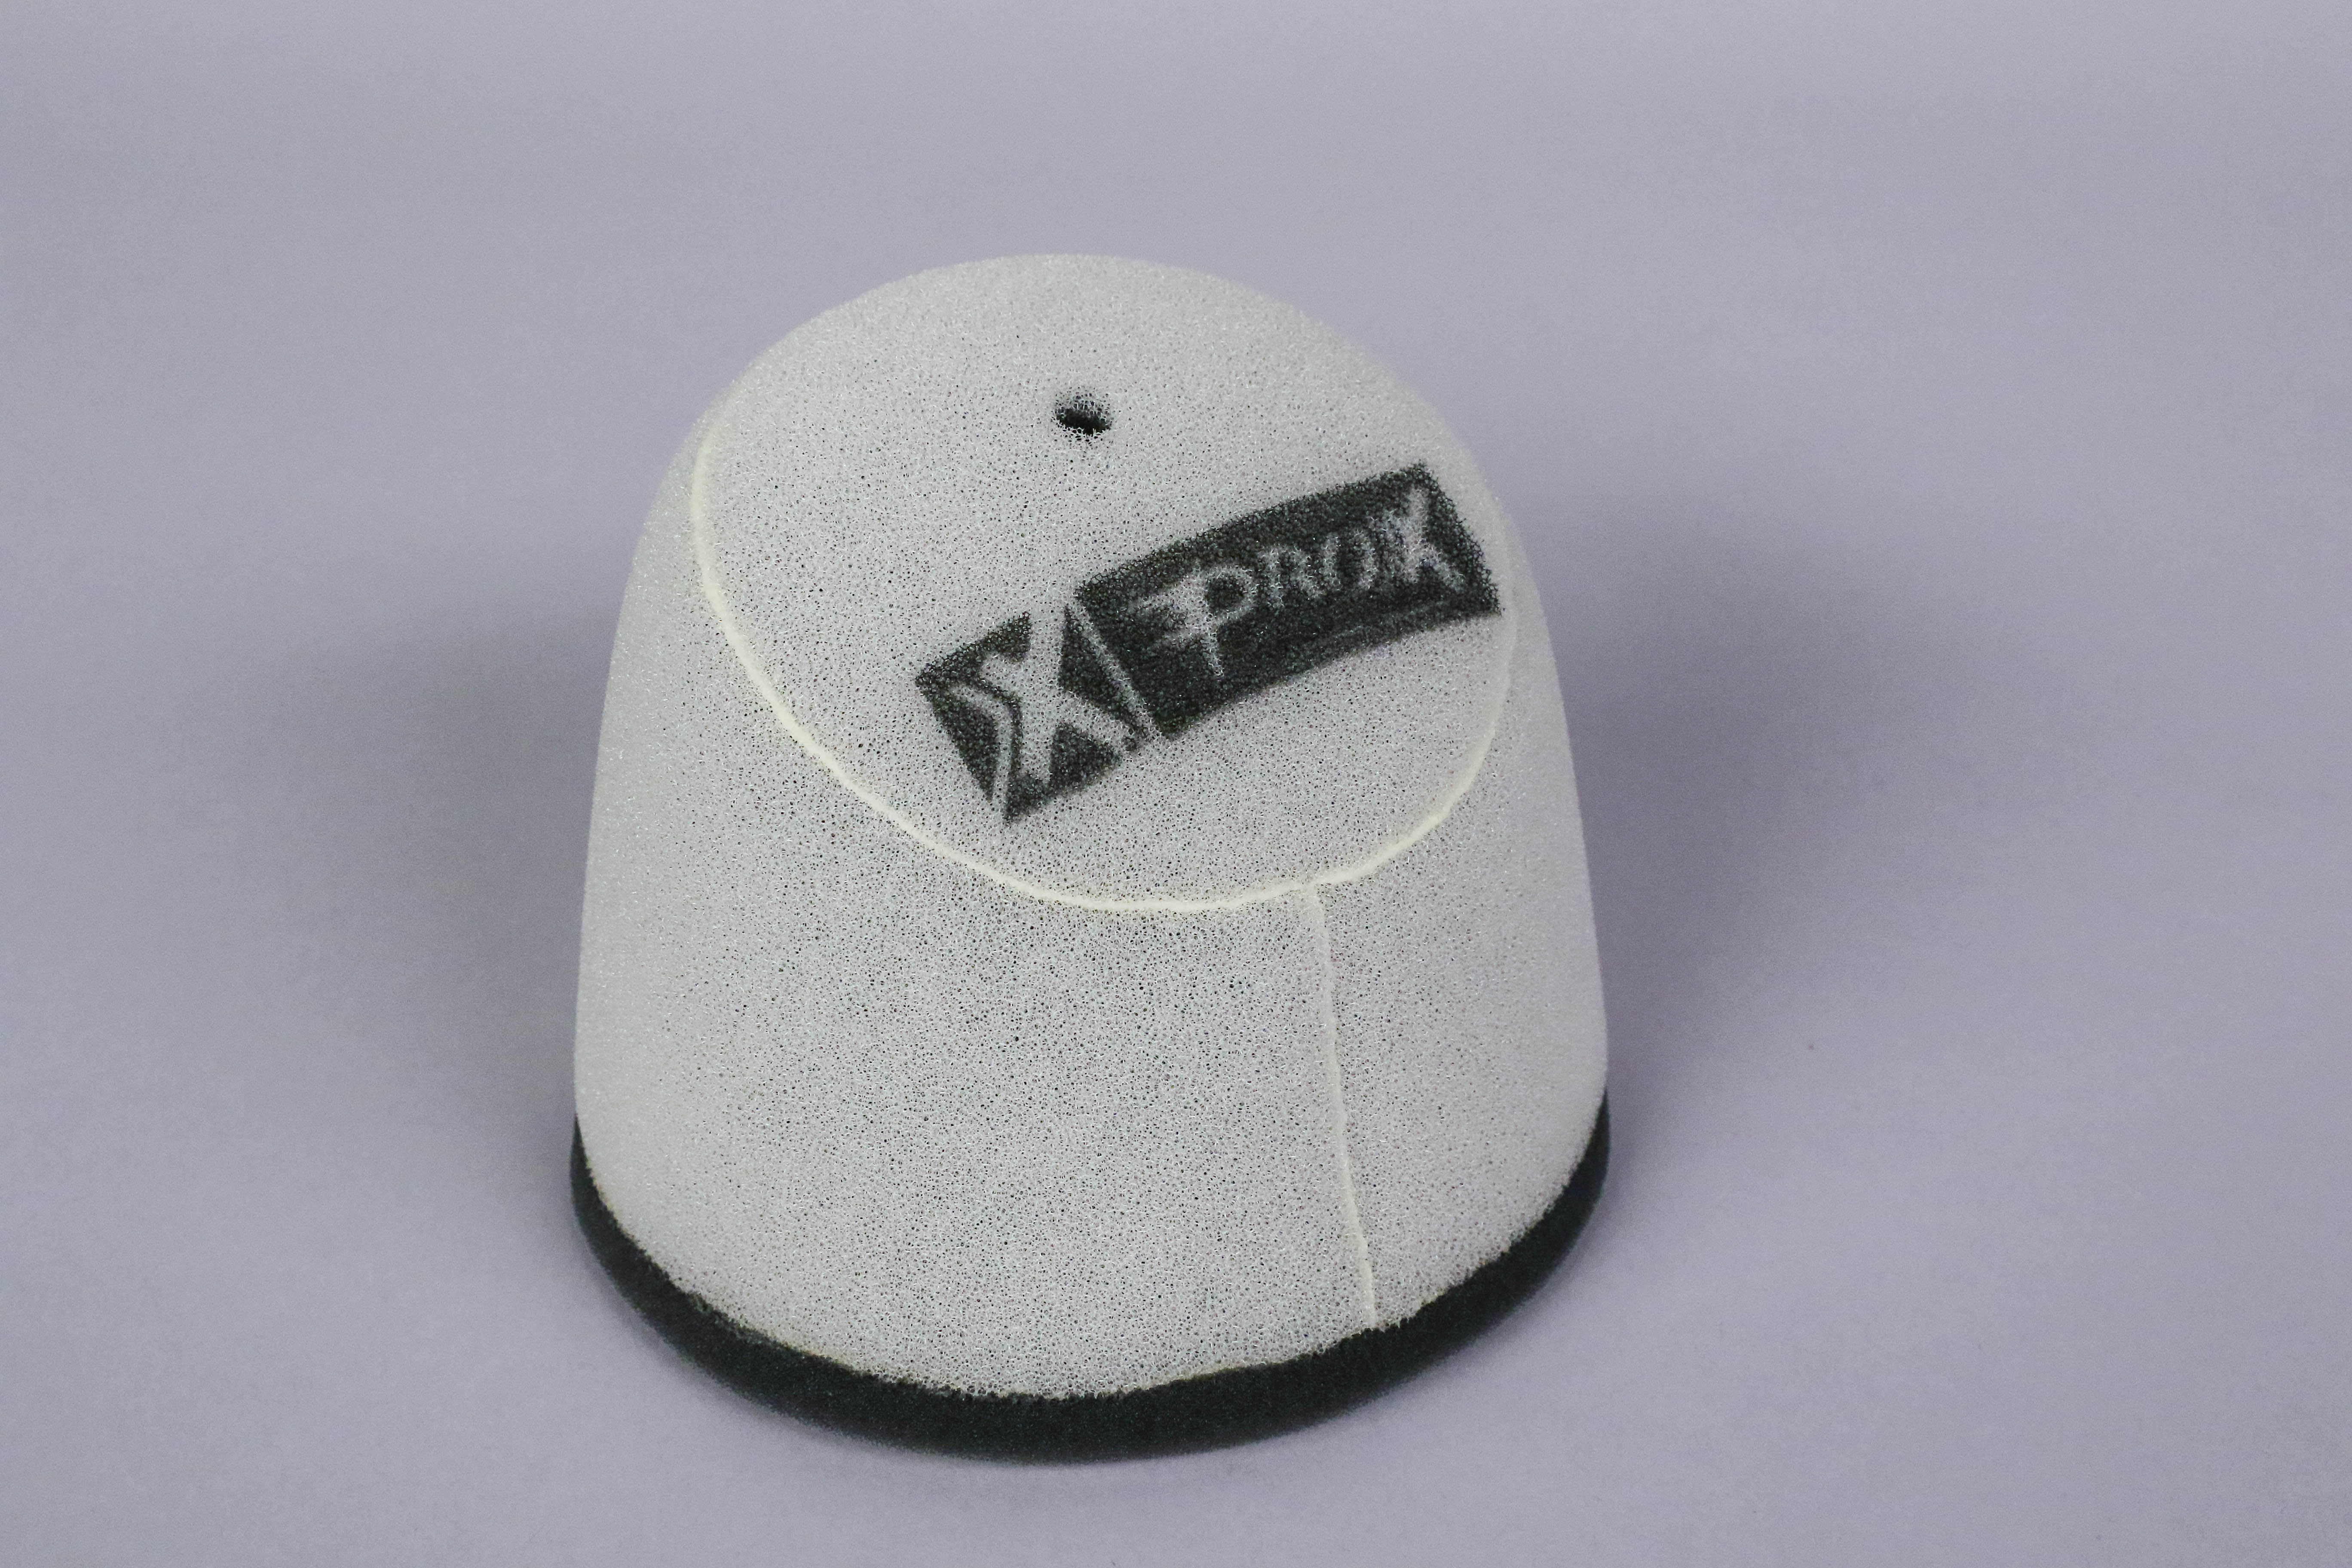
Be sure you are using a quality air filter to combat the elements encountered when riding. Dual-stage, bonded foam filters with thick sealing rings are the standard for modern filters. Filters like these are available at affordable prices from companies like ProX, so there should be no excuse to run a low-quality filter.
Find a ProX air filter for your bike
Brake Pads
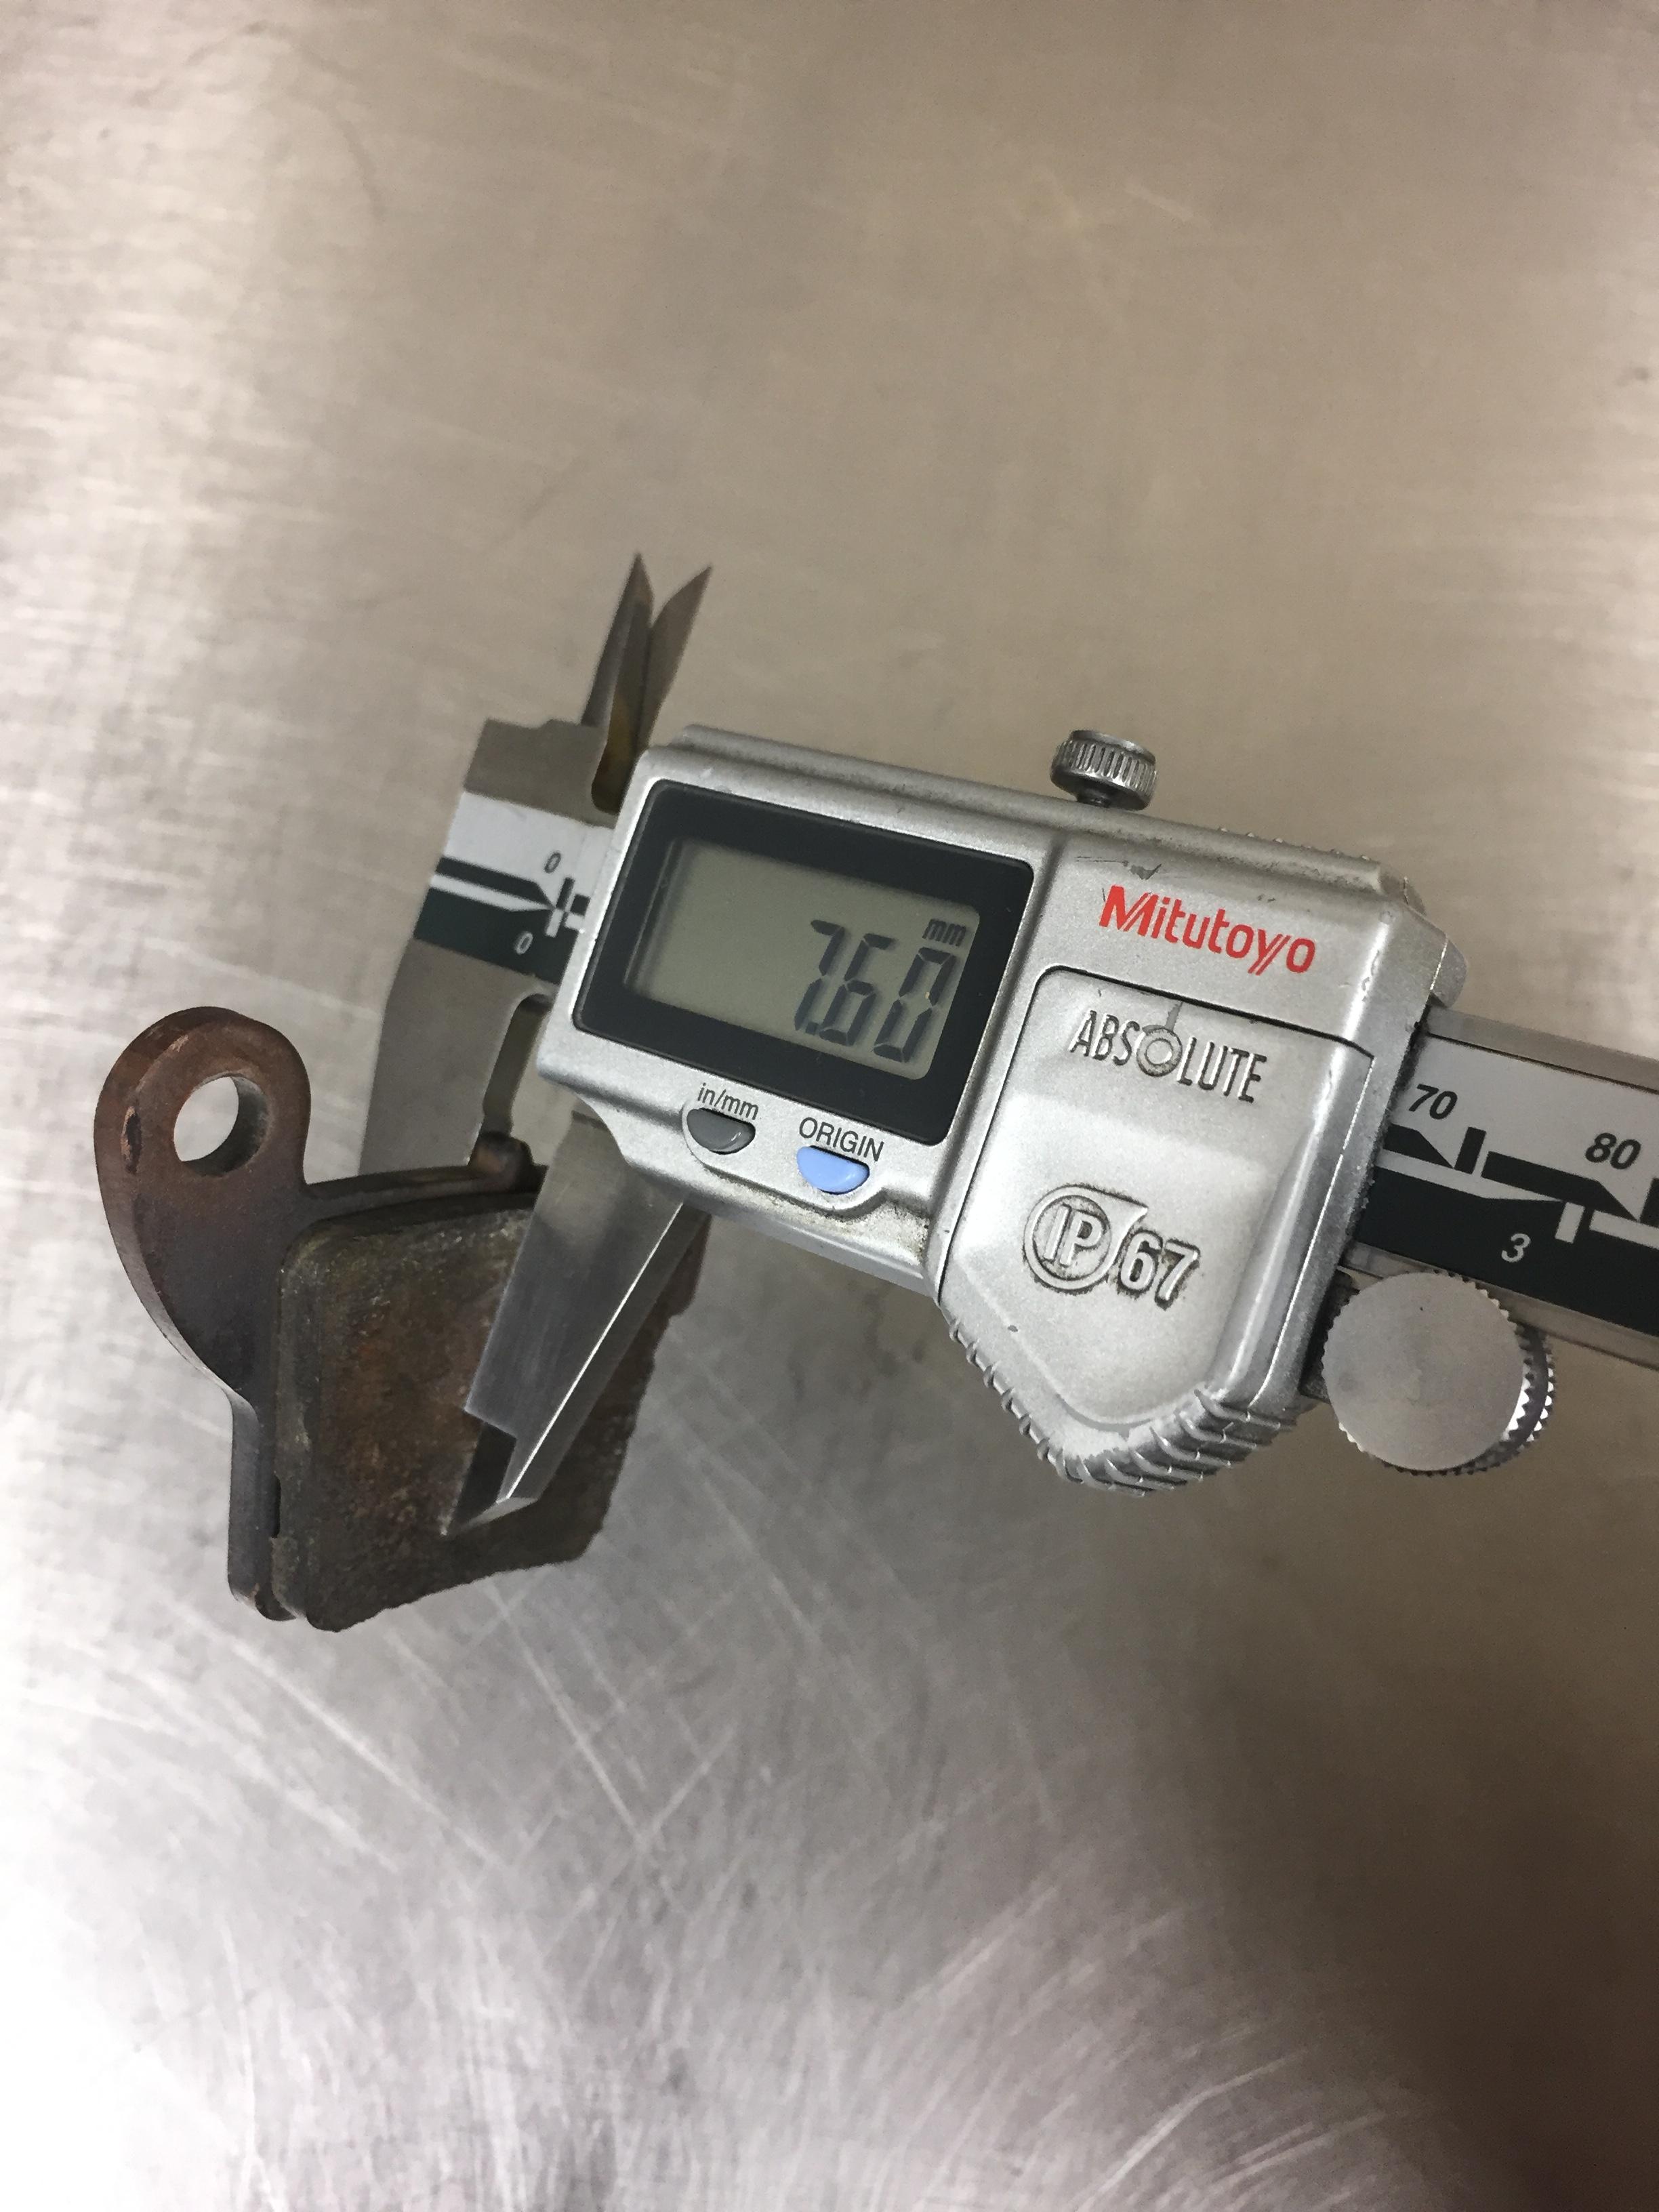
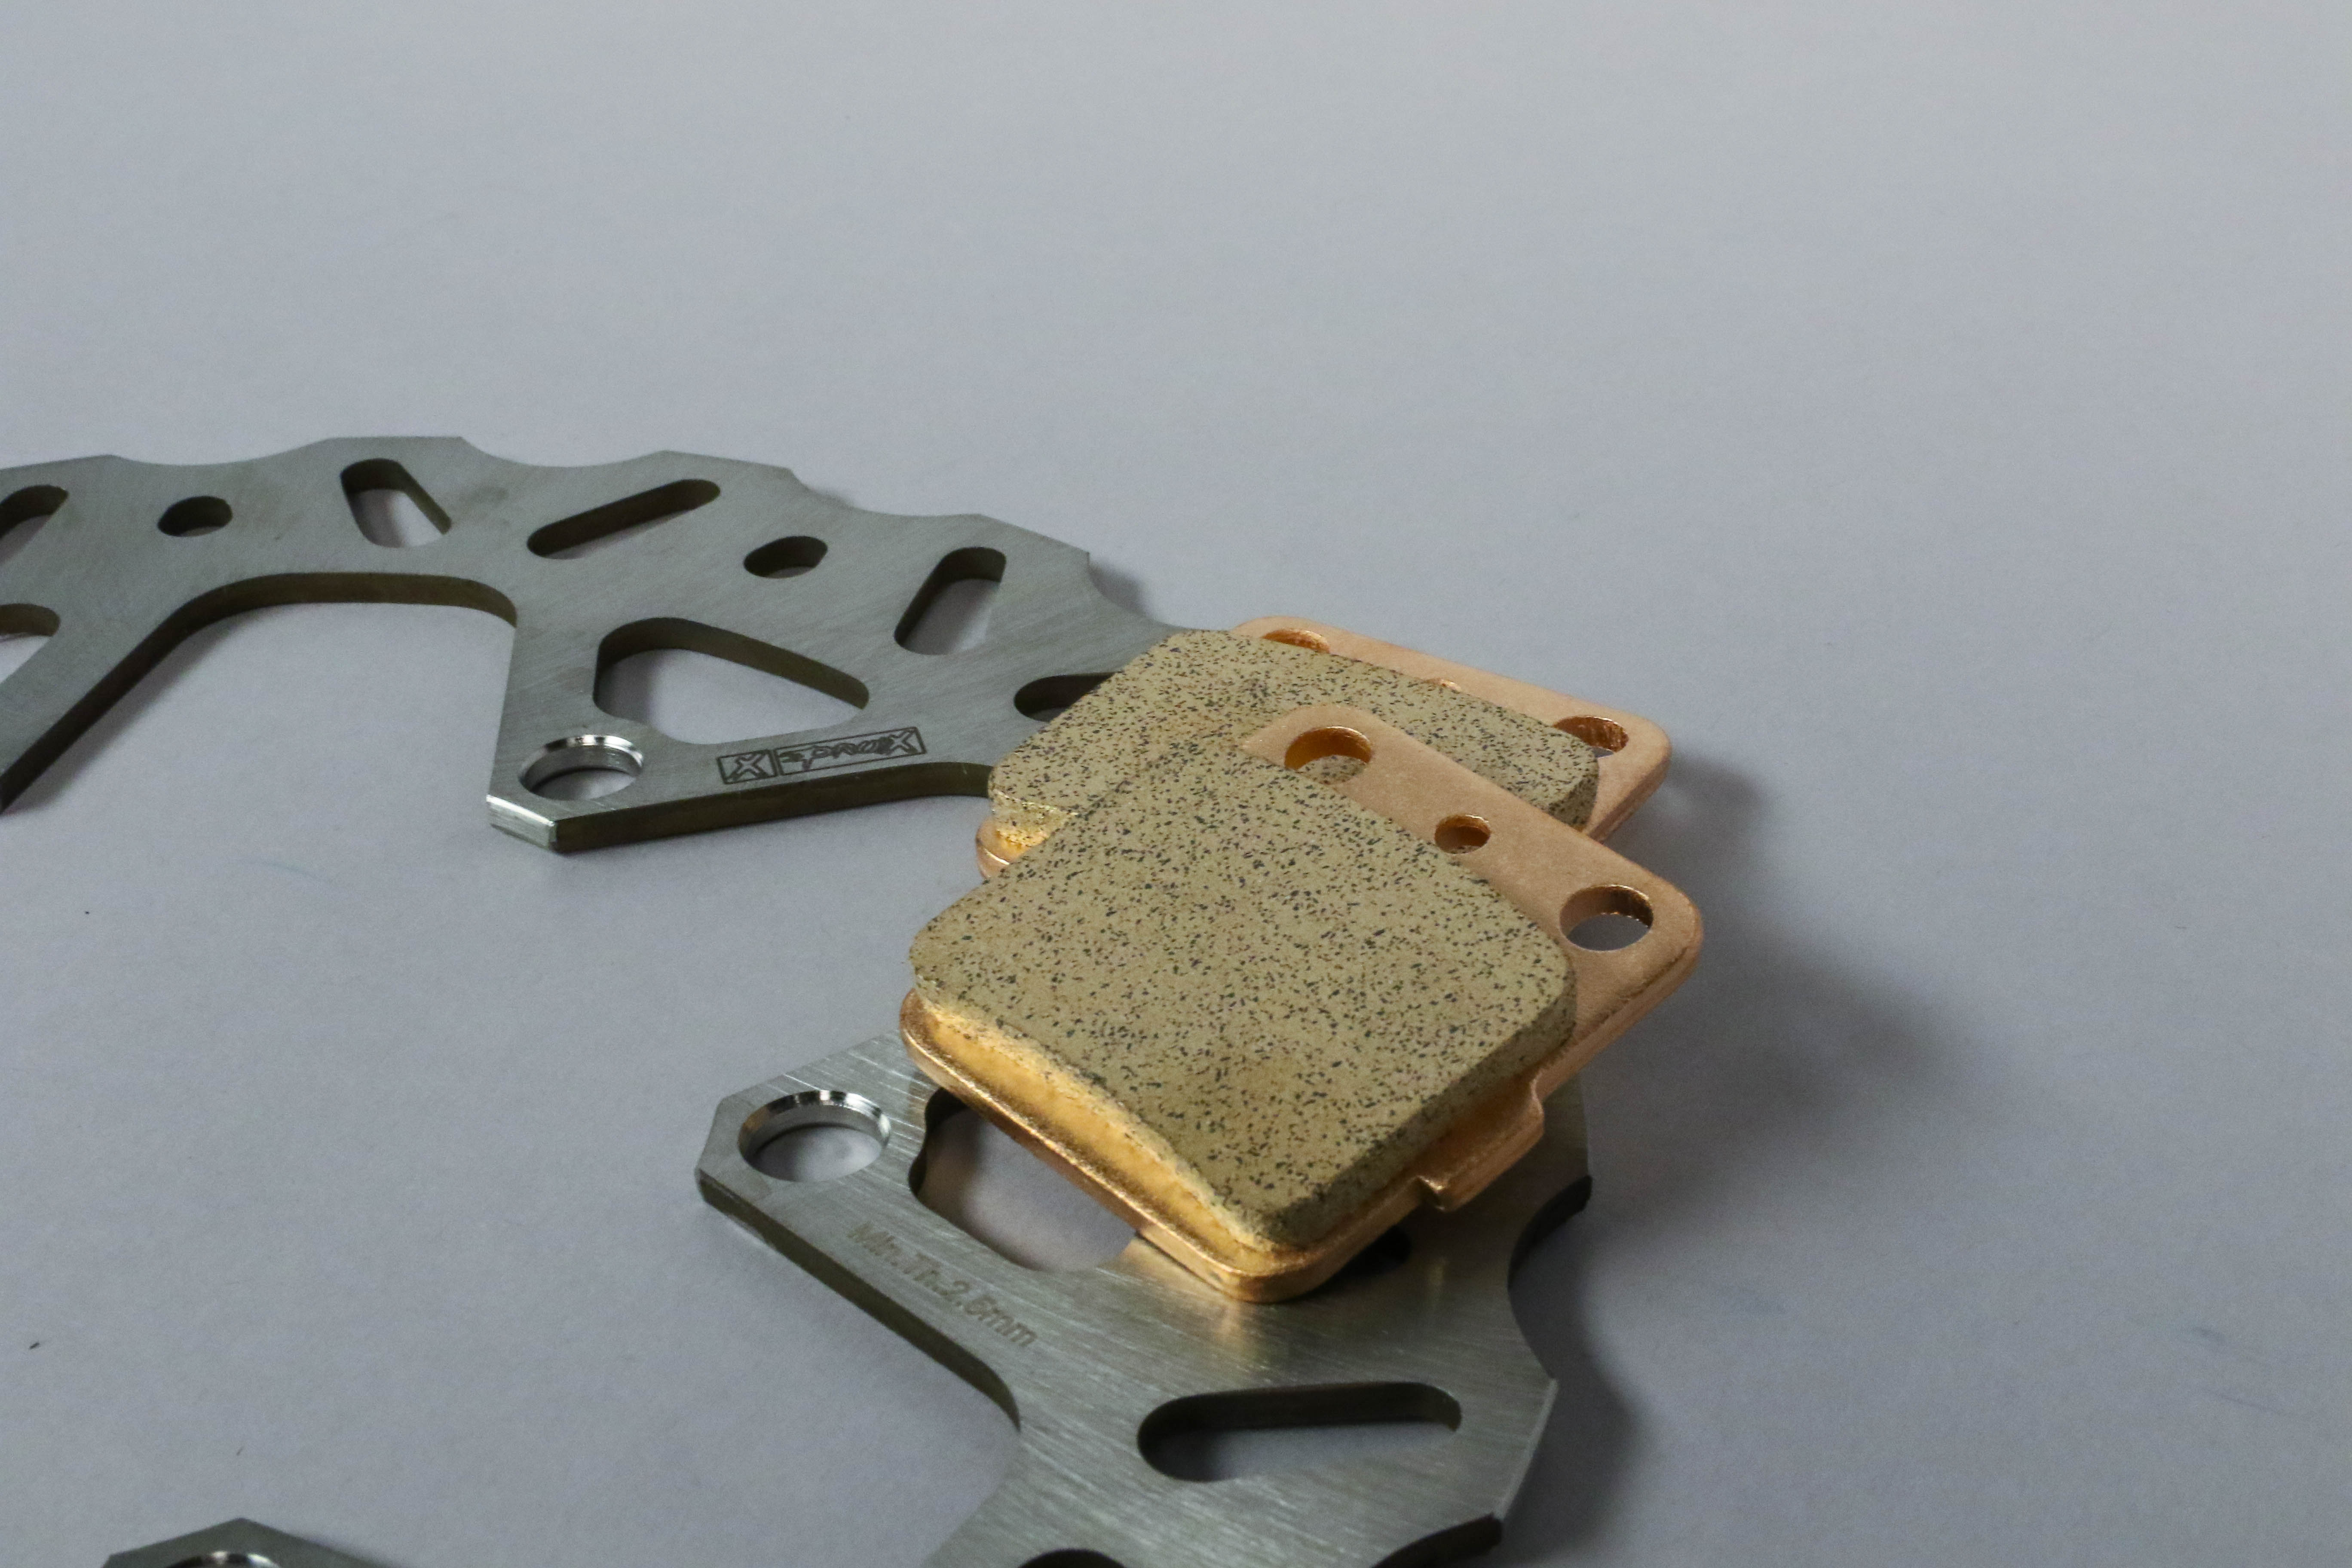
Brake pads do not last forever. Over time, the material wears down until all that remains is the backing plate. When this happens, the hardened steel can destroy the brake rotor. Equally dangerous is that the brake no longer works effectively. Understand that the thickness of the brake pad material can quickly change, especially when facing muddy and/or sandy conditions. Routinely check your motorcycle brake pads. The general rule of thumb is to replace the pads when there is 1.0 mm (0.04 inch) of the pad material remaining. Use a micrometer to measure thickness. Note that some brake pads have indicator marks. It’s advisable to replace the pads once those marks are no longer visible.
Replacing brake components, such as pads and rotors, can be overpriced from the OEMs, or can get you stuck with poor-performing, low-quality products from the aftermarket. ProX brake pads are sintered, which gives them OEM quality, but luckily that comes without the OEM price tag. For those that need to replace worn rotors, or want to upgrade their out-of-date rotors, ProX also offers modern CNC machined rotors made from OEM materials that perform comparably to new rotors on modern bikes.
Engine Oil
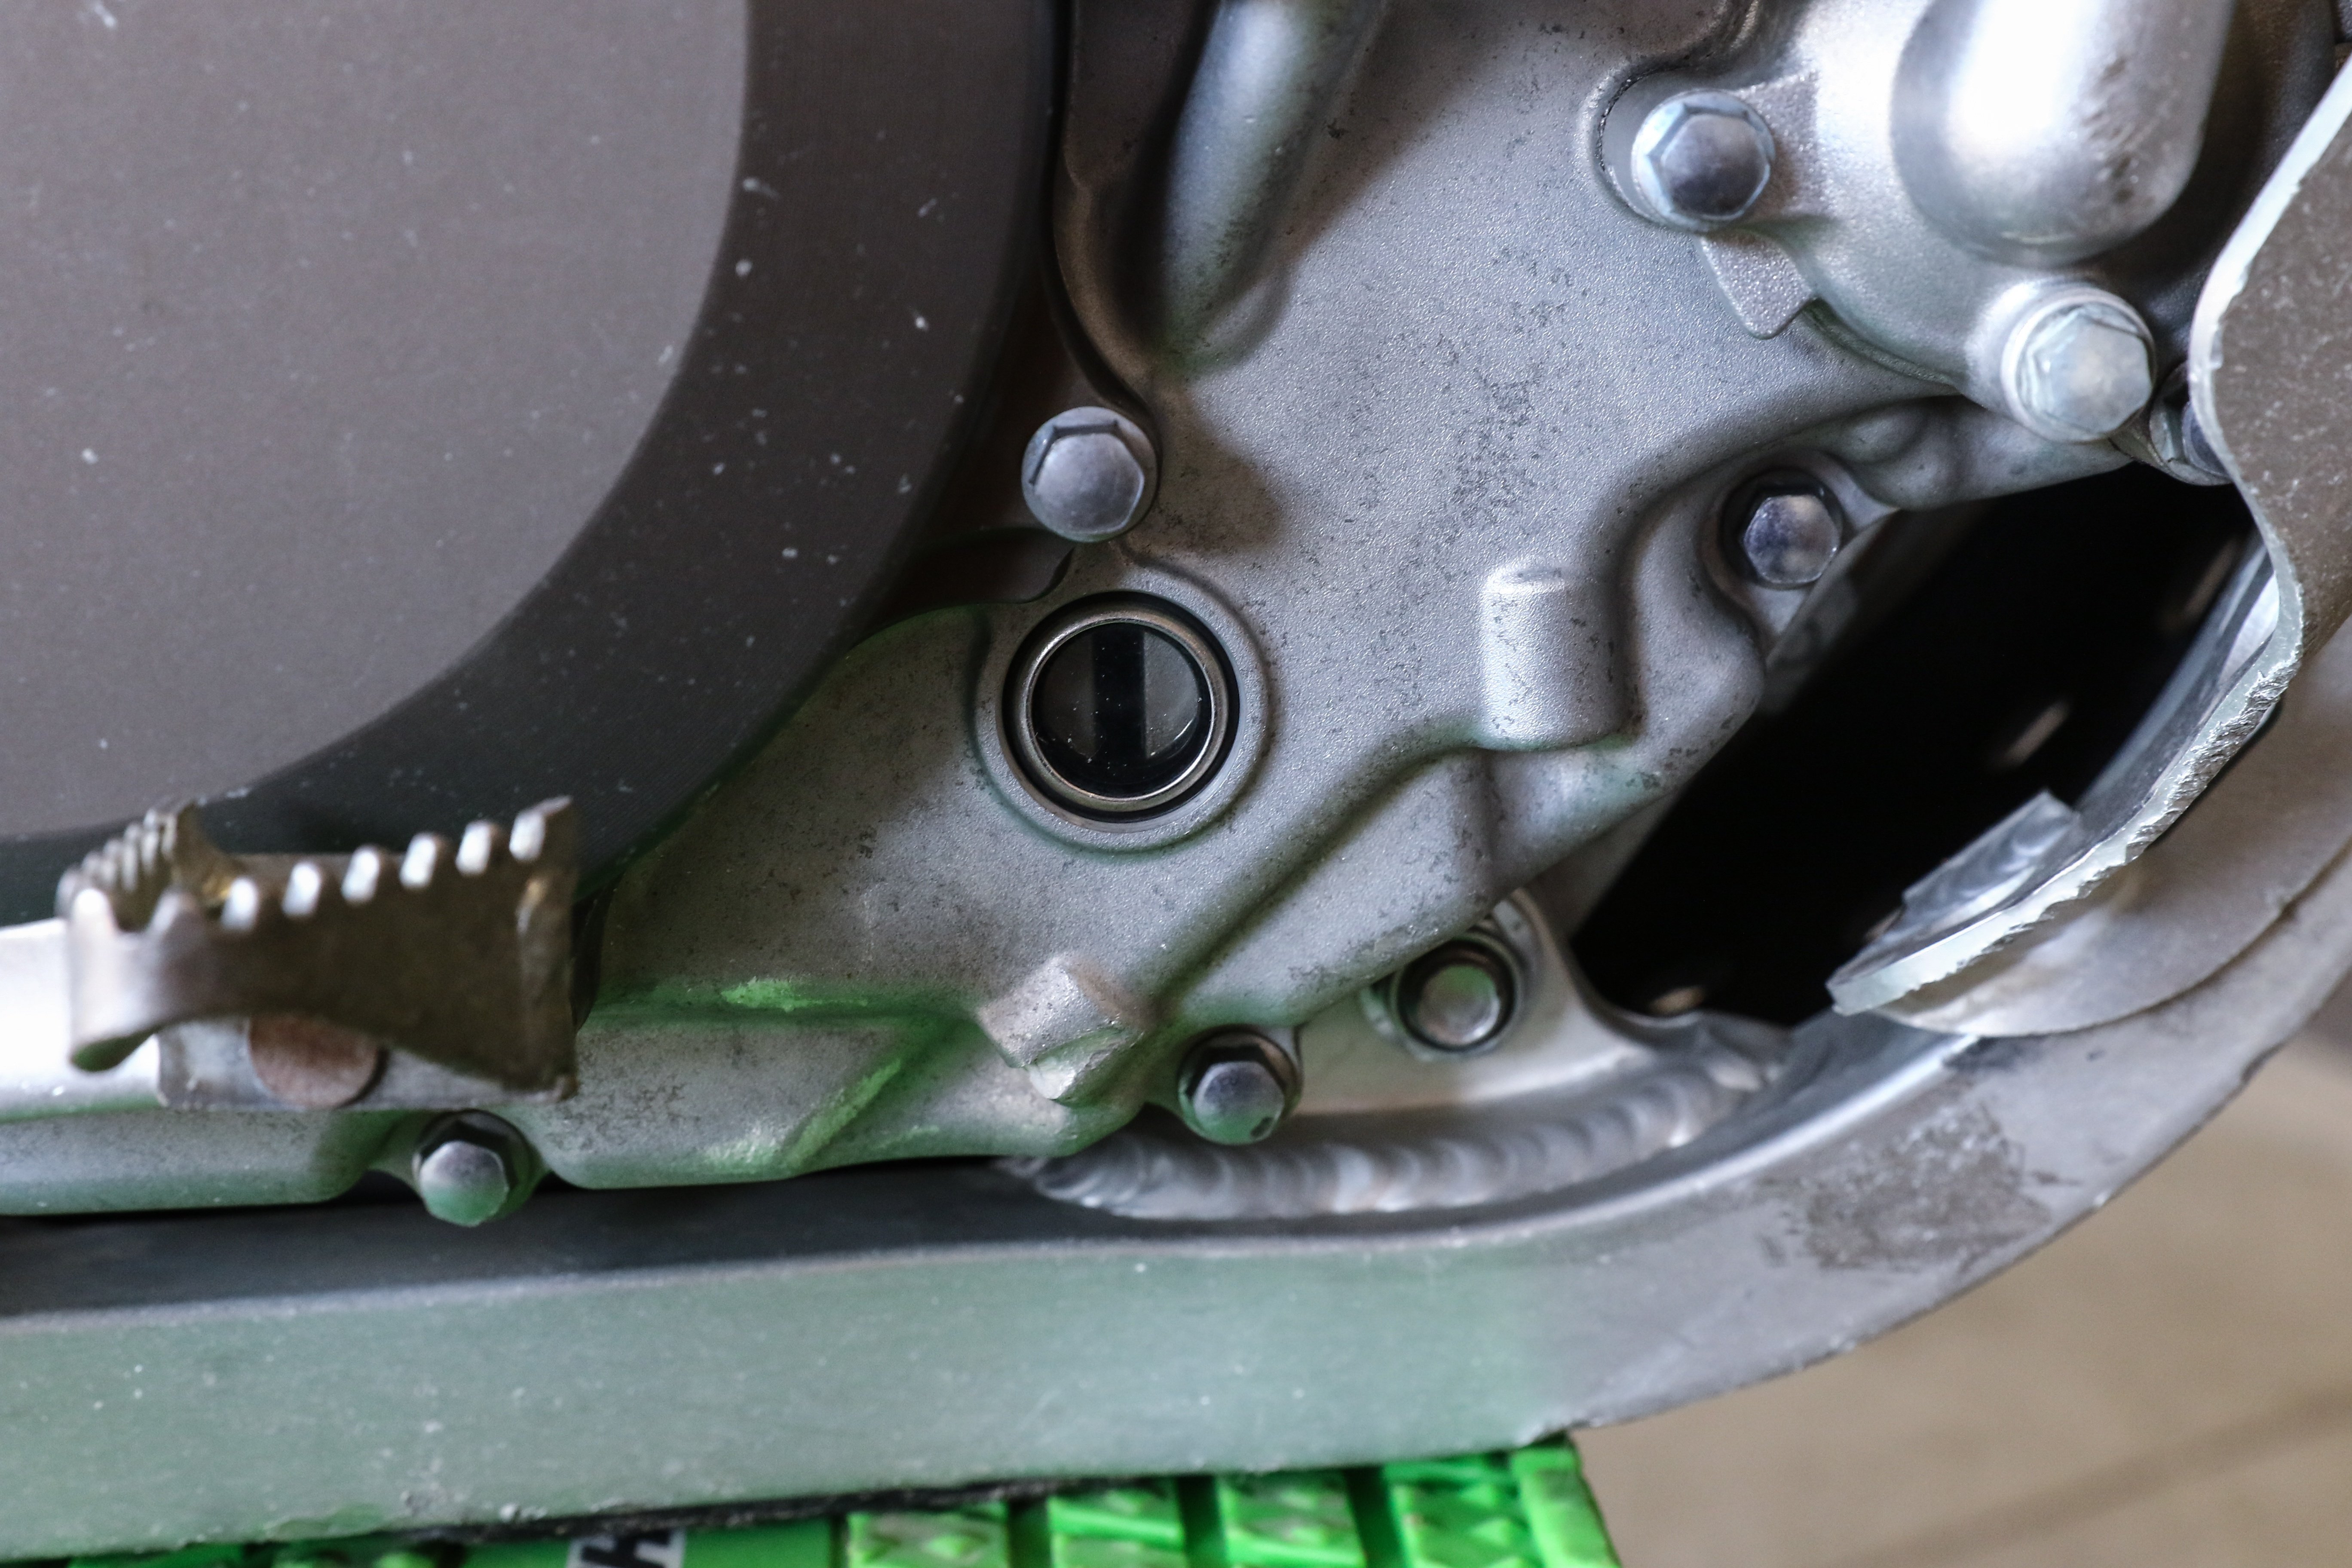
While it’s generally believed that oil comes from the transformed remains of organisms that date back hundreds of millions of years, that doesn’t mean you should go that long between engine oil changes. Oil is essentially the blood that pumps through the heart of the motorcycle–the engine. Its job is to lubricate and cool the internal components. That’s why it’s crucial to check the engine oil level before every ride. Most motorcycles have a sight glass located toward the bottom of the engine case. As a rule of thumb, the engine oil level should be halfway up the sight glass.
It’s also important to regularly change the engine oil. Over time, heat and pressure can break down oil, leaving your engine vulnerable to heat build-up and performance loss. Consult your owner’s manual to determine how often to replace the oil and oil filter. We highly recommend the use of motorcycle-specific oil for the job, which contains additives specifically for two-wheel engines. Premium oil, paired with a high-quality ProX oil filter, will protect your engine from costly damage.
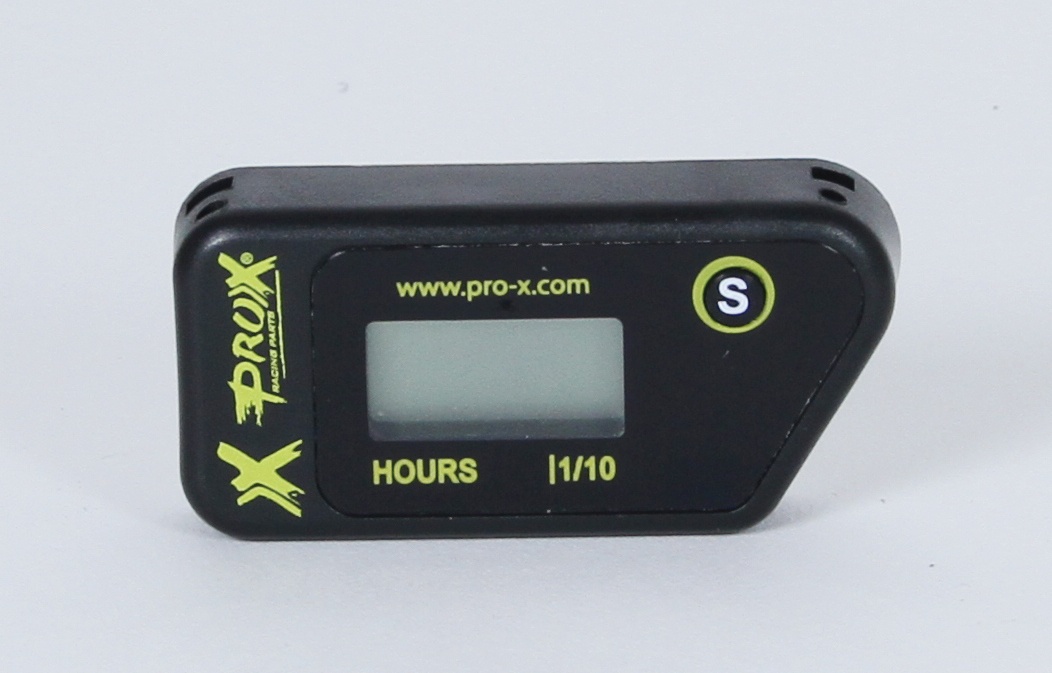
Note that an hour meter is an excellent tool for monitoring engine run time and tracking service intervals. Several viable options are available from ProX, including a wireless version.
Pick up a ProX hour meter here
Chain Tension
Checking chain tension is easily one of the most overlooked maintenance items on your motorcycle, yet it is extremely important. Given that the drive chain’s purpose is to transfer rotational energy from the engine to the rear wheel, it’s dire to routinely measure chain tension. A chain that is too loose may hop off a sprocket, or seriously reduce the lifespan of your countershaft and rear sprocket. If the chain is too tight, then it’s possible the tension will cause the chain to break, resulting in obvious consequences.

Most riders follow the “Three Finger Rule,” which is, at best, a risky technique for measuring chain tension. The proper way to check the drive chain slack is to ensure that the rear wheel is off the ground. Lubricate the chain and rotate the wheel through several rotations in order to find the tightest point in the chain. Locate the end of the chain slider on the top of the swingarm. Lift the chain with one hand and, using a set of calipers, measure the distance between the top of the chain slider and the bottom of the chain. Consult your owner’s manual for recommended drive train slack, as the distance varies based on the manufacturer.
Like any high-wear part, a motorcycle chain has a lifespan, and must be replaced when wear becomes evident. To slow deterioration, we suggest that you regularly clean the chain with a degreaser, followed by rubbing the links with a wire brush. Once complete, apply chain lubricant with a focus on directing the fluid between each link and roller. Professional mechanics check drive chain slack and lubricate the motorcycle chain every time before their rider takes the track. This is a good habit to get into.
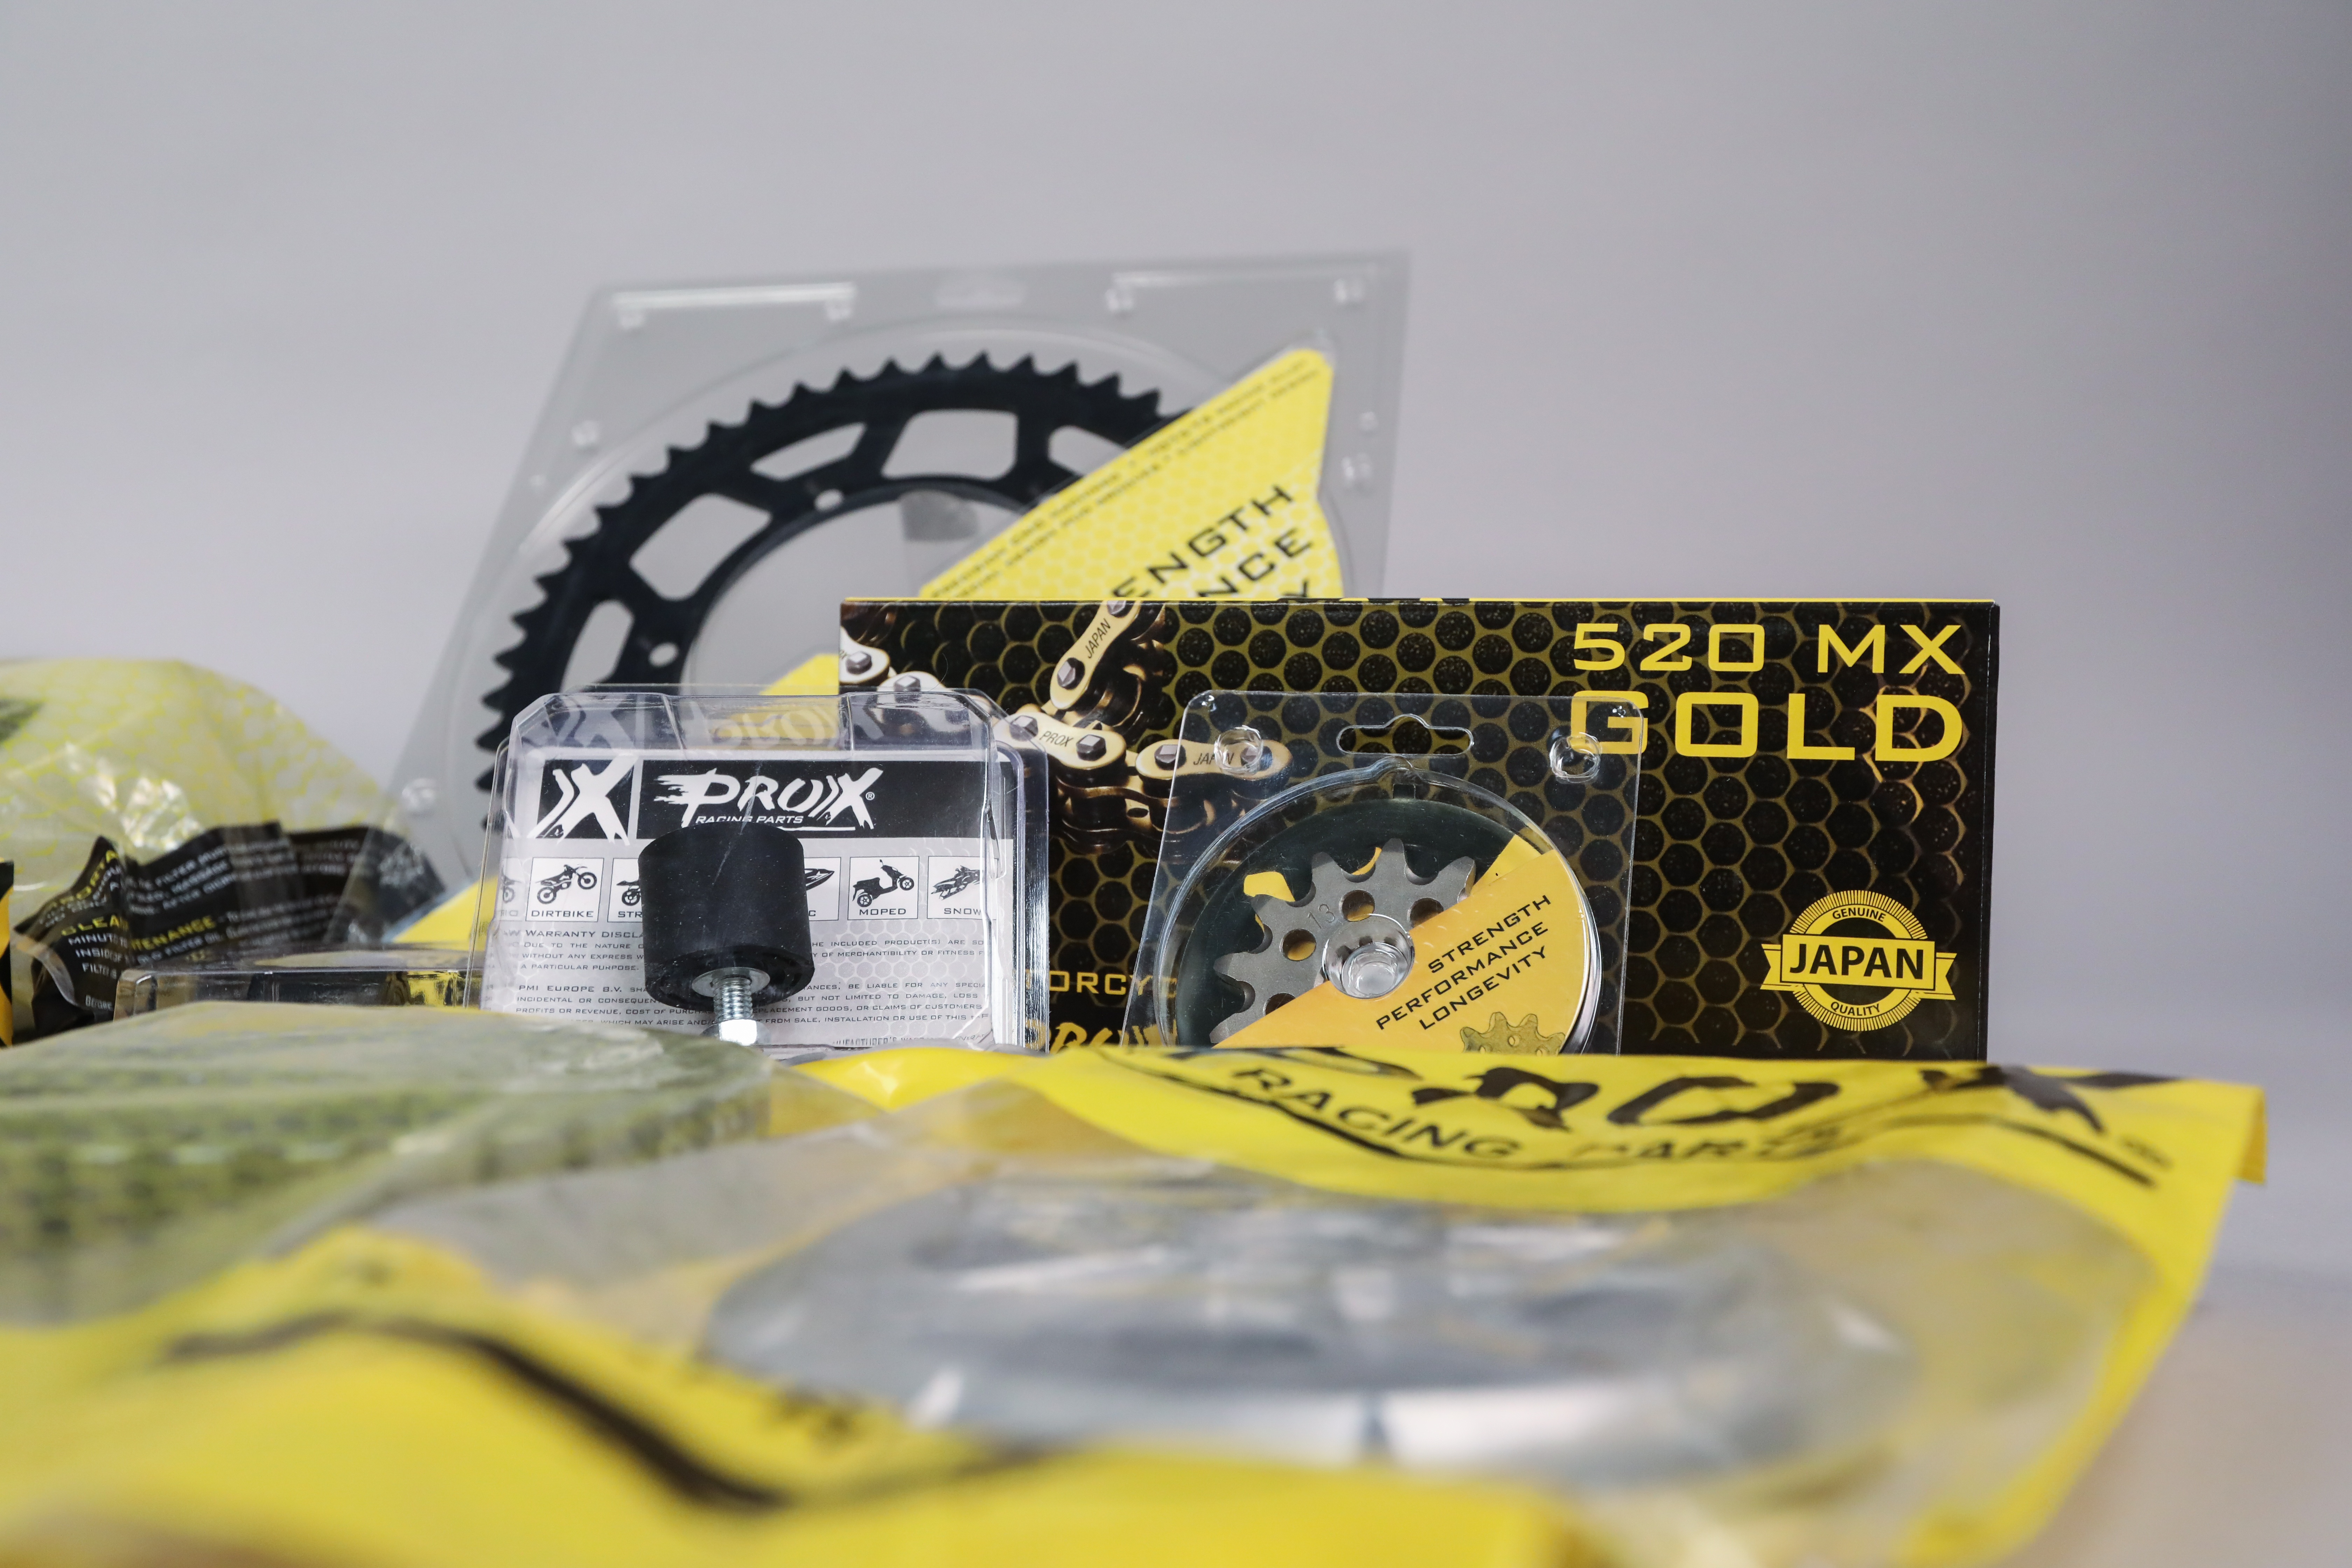
You’ll know your chain needs to be replaced when too much slack remains at the farthest safe point of your rear wheel’s adjustment. Be sure to replace your chain with a brand new one from a reputable company. ProX chain quality is competitive with leading manufacturers, and have lasted race teams longer than expected, even in GNCC racing conditions. Standard and gold MX chains have a long life, and will provide minimal drag. X-ring chains are also available for those that want the longest lasting option available to them.
Sprockets
Motorcycle sprockets have a thankless job. Responsible for transferring power to the rear wheel (with help from the drive chain), sprockets must endure heavy energy loads while maintaining structural integrity. The constant stress is taxing on the countershaft and rear sprockets. These parts will slowly wear out. If the drive chain is too loose, or too tight, the sprocket teeth will become dished out in quick order and the teeth could possibly crack or break.
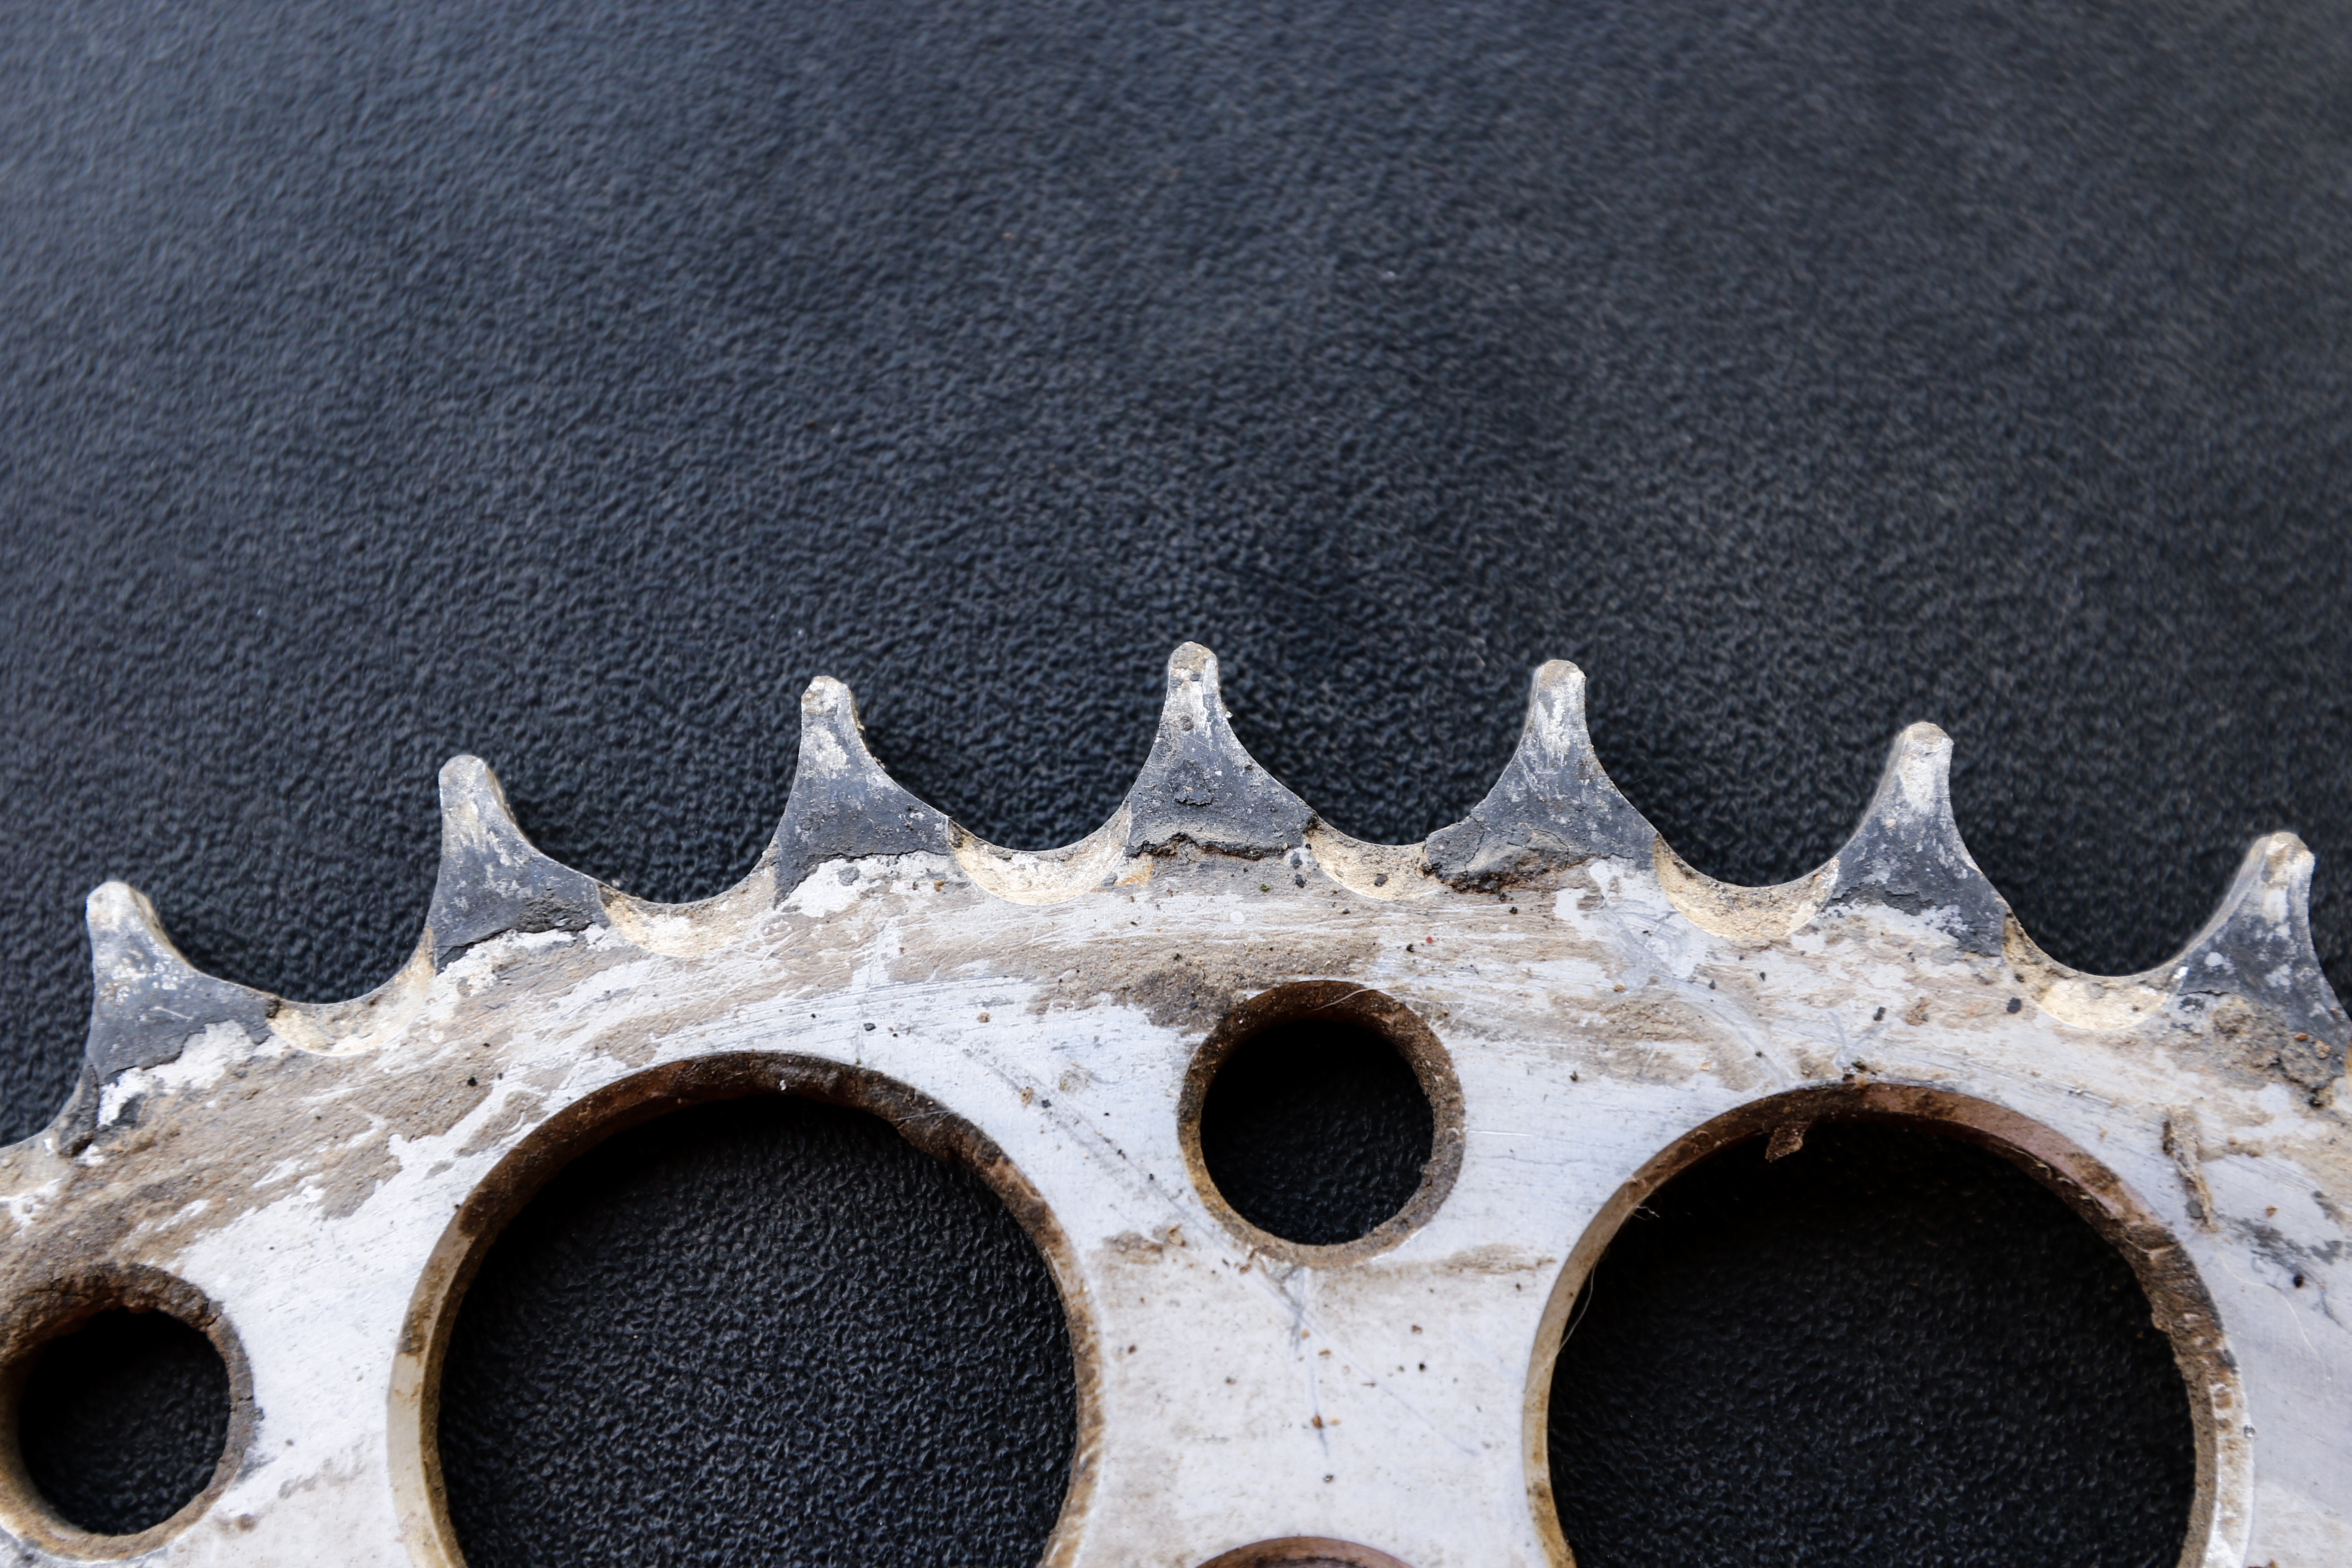
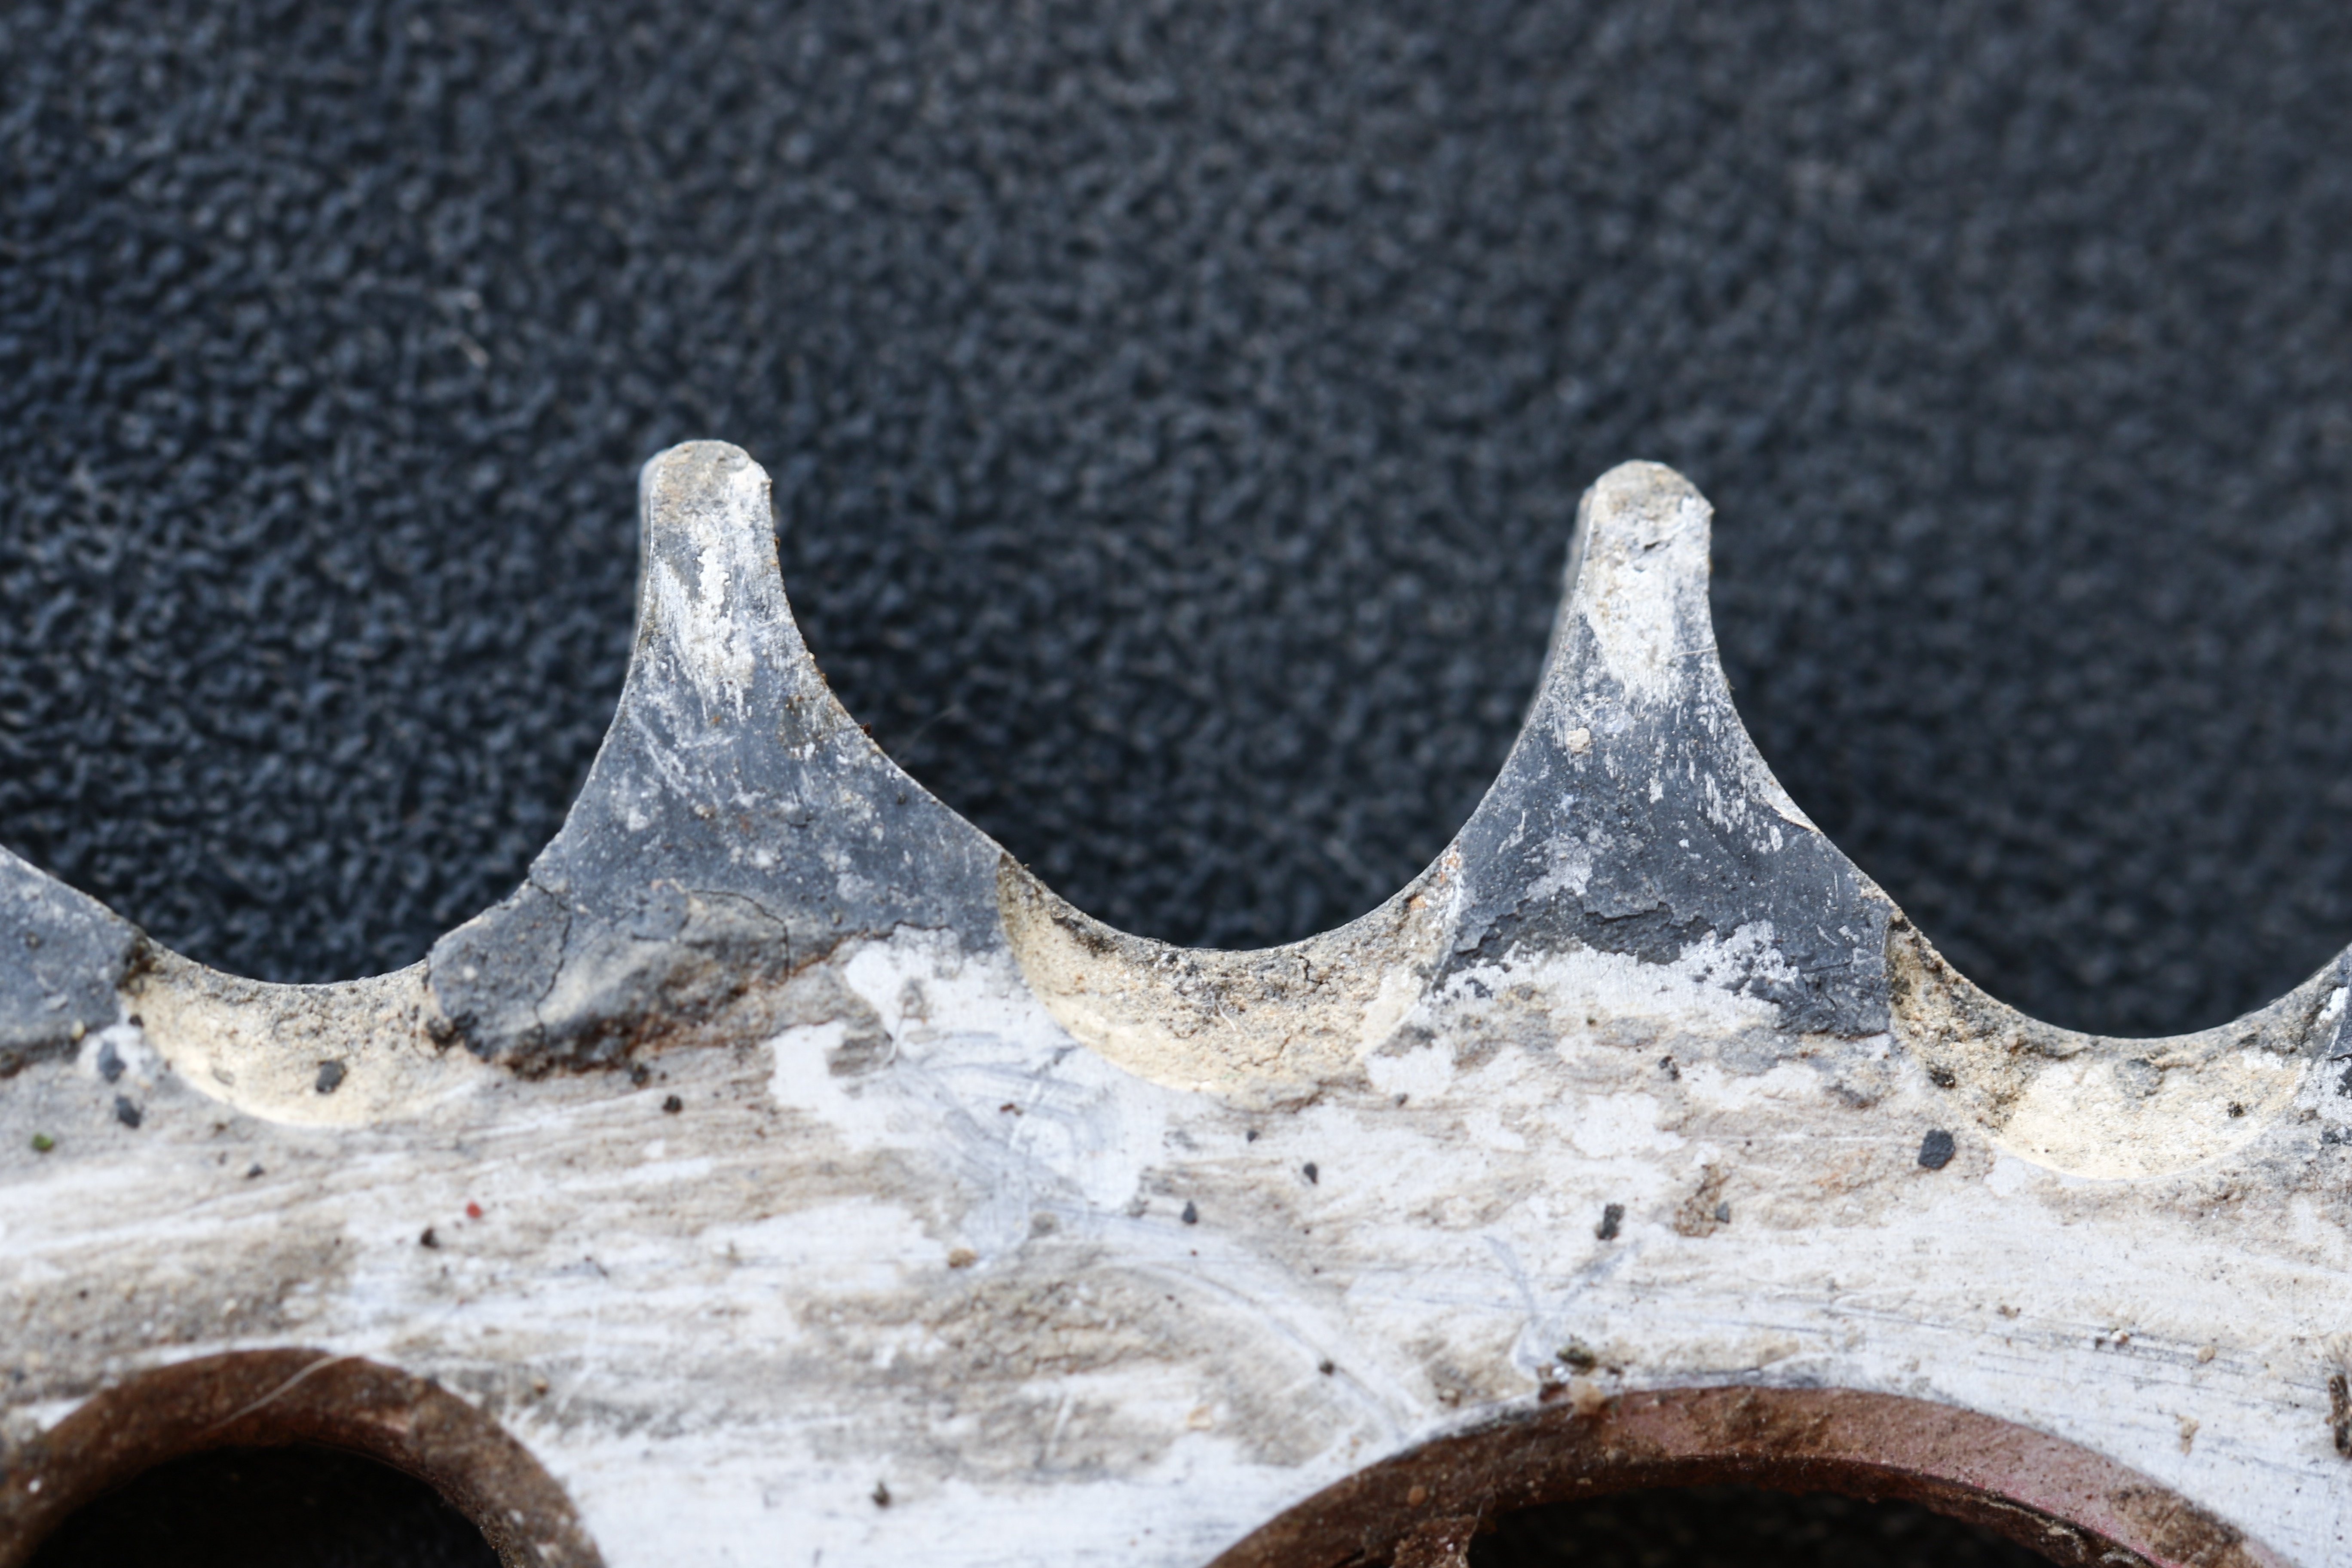
Sprockets are a useful tool for changing a motorcycle’s powerband characteristics. Adding teeth to the rear sprocket (or decreasing countershaft sprocket teeth amount) yields more bottom-end surge. Dropping teeth off the rear sprocket results in greater top-end speed. An alloy sprocket has less rotational mass, meaning that the engine will not labor as much as it would require energy to rotate a steel rear sprocket.
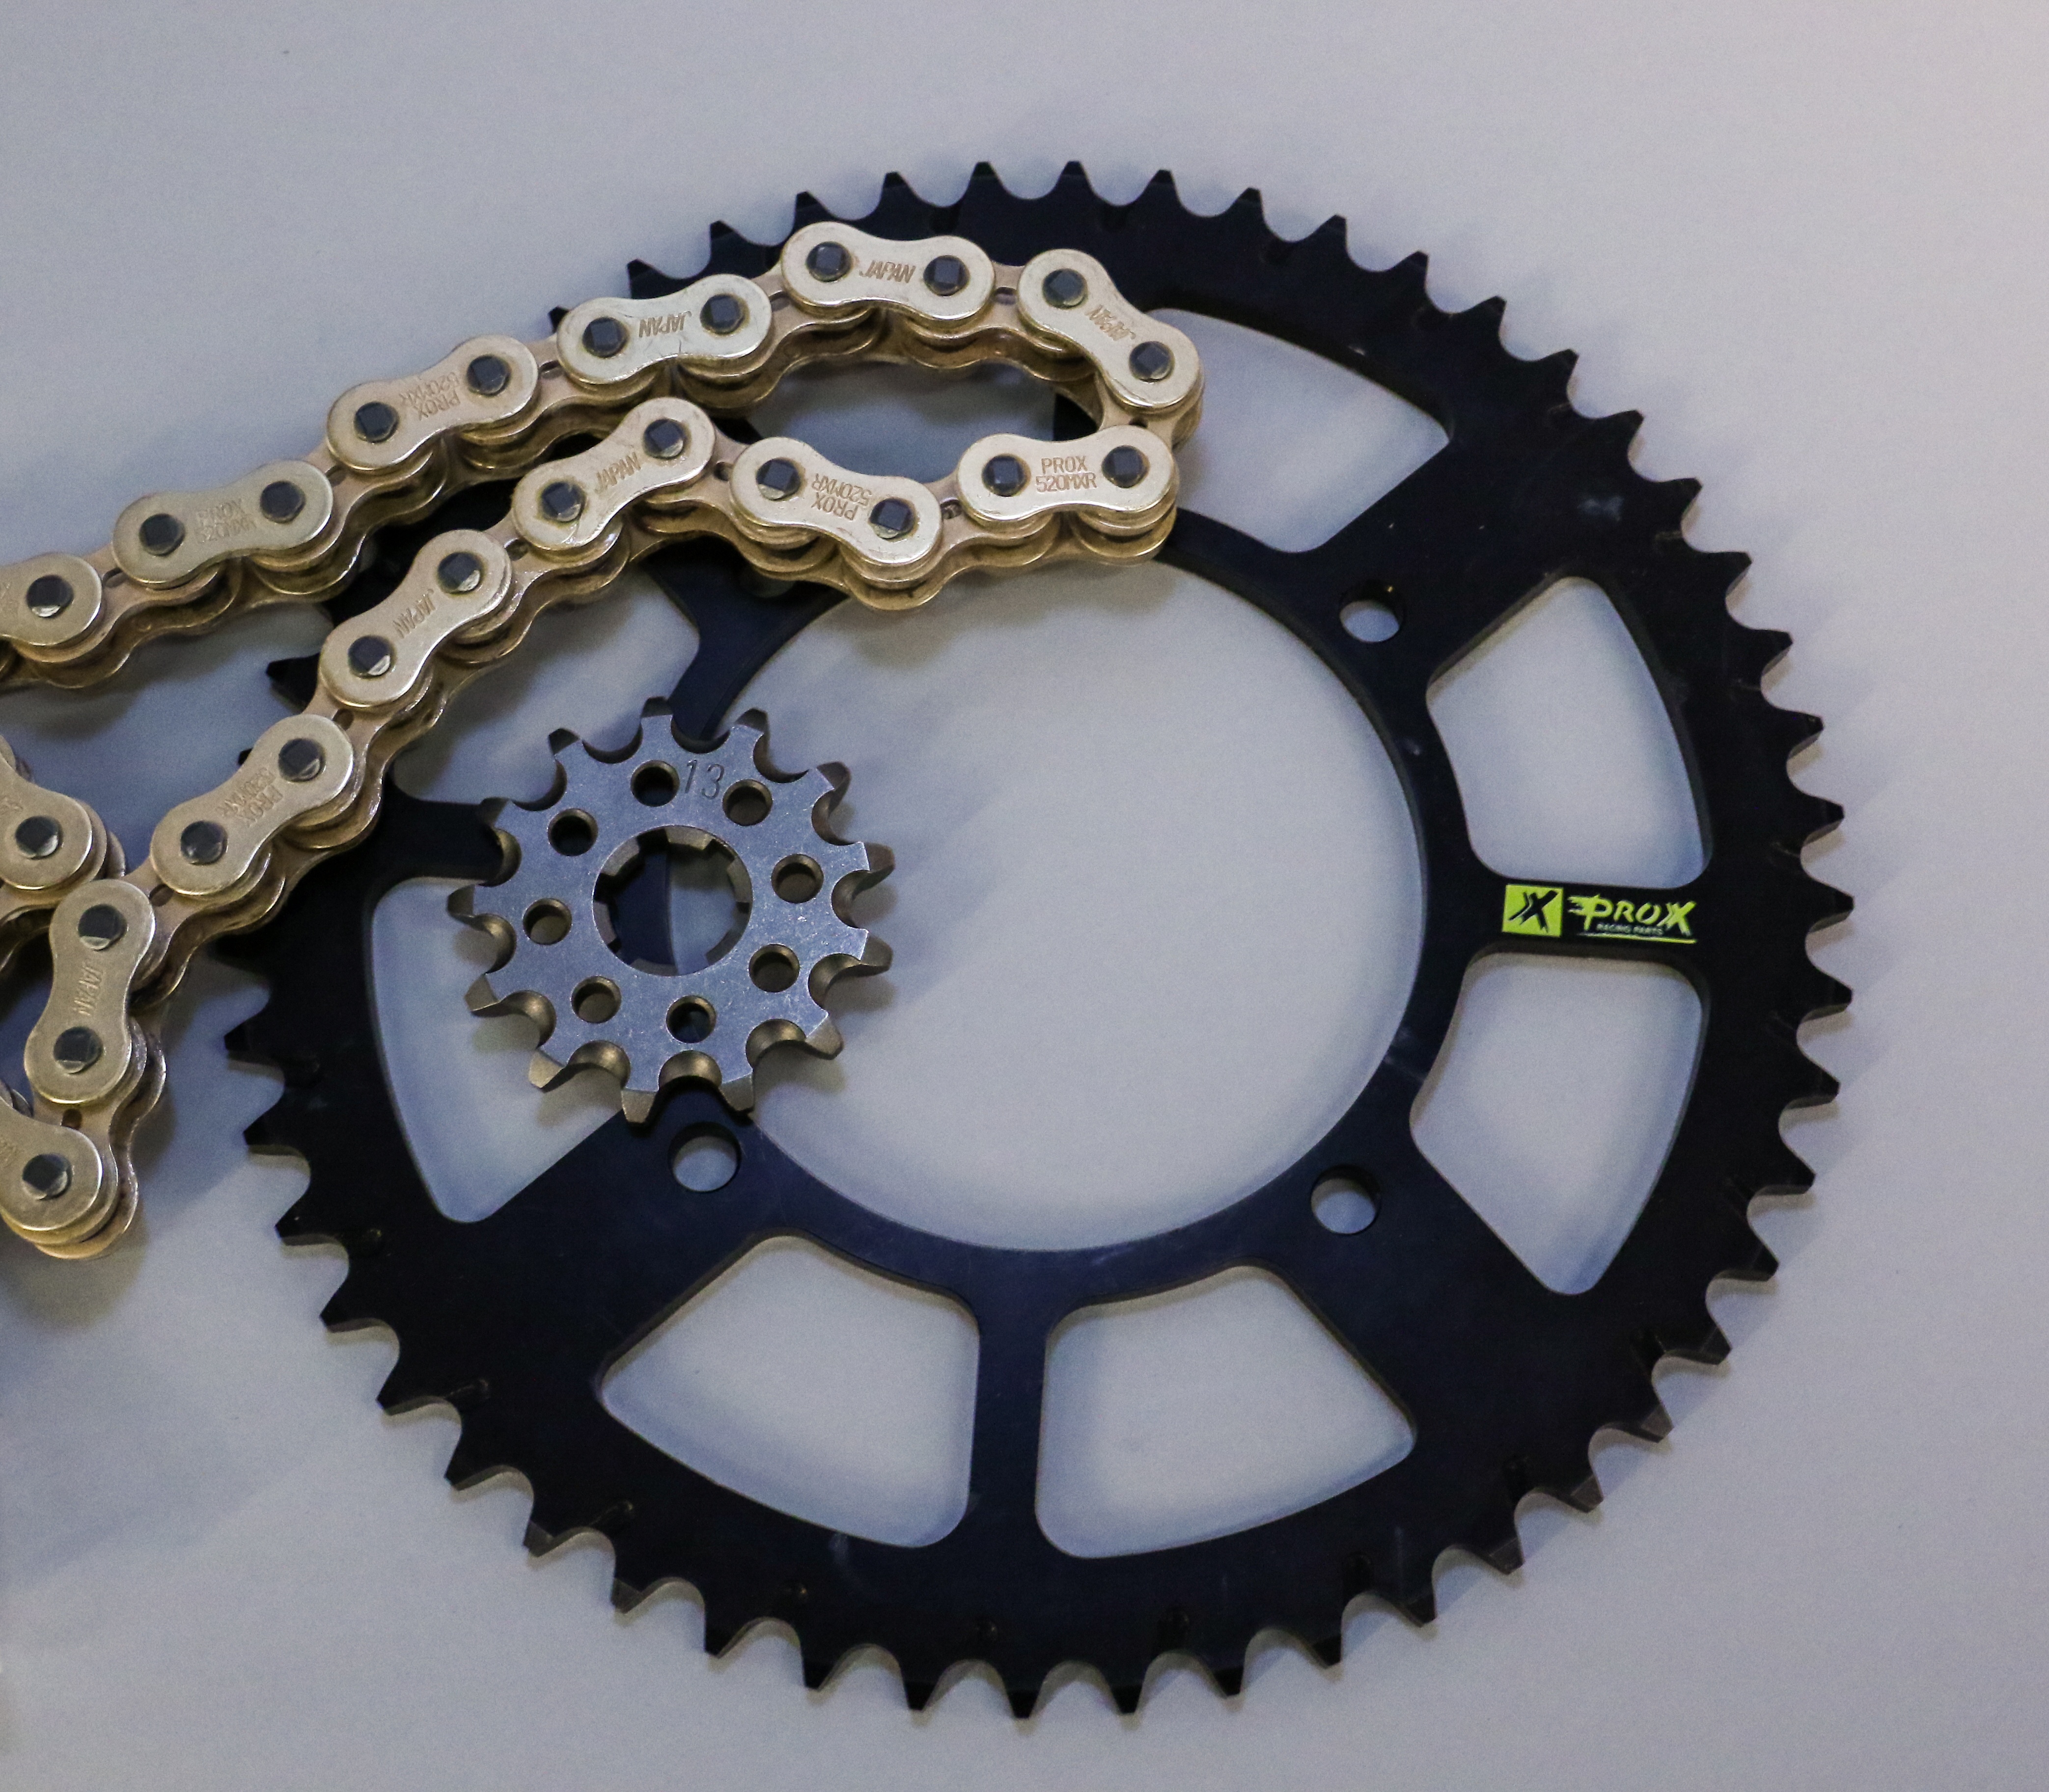
Rear sprockets are available in aluminum and steel. Aluminum saves some weight, while it’s steel counterpart will add extra life to the sprocket. Teflon coatings, such as those used on ProX sprockets, will add life to either style of sprocket.
More info on ProX chains and sprockets
Fluids
A pre-ride fluid check is an afterthought for most riders. This out-of-sight, out-of-mind mentality can be detrimental. Don’t automatically assume that the radiator fluid is topped off, the engine oil level is fine just because you don’t see a puddle on the ground, and the brake fluid is up to snuff. Radiator coolant can expel quickly out of the overflow hose if the engine gets too hot or the radiator cap loses pressure. Always check the coolant fluid level. WARNING: inspect the coolant before the engine reaches normal operating temperature. Use a 50/50 blend of coolant and water when replenishing the system.
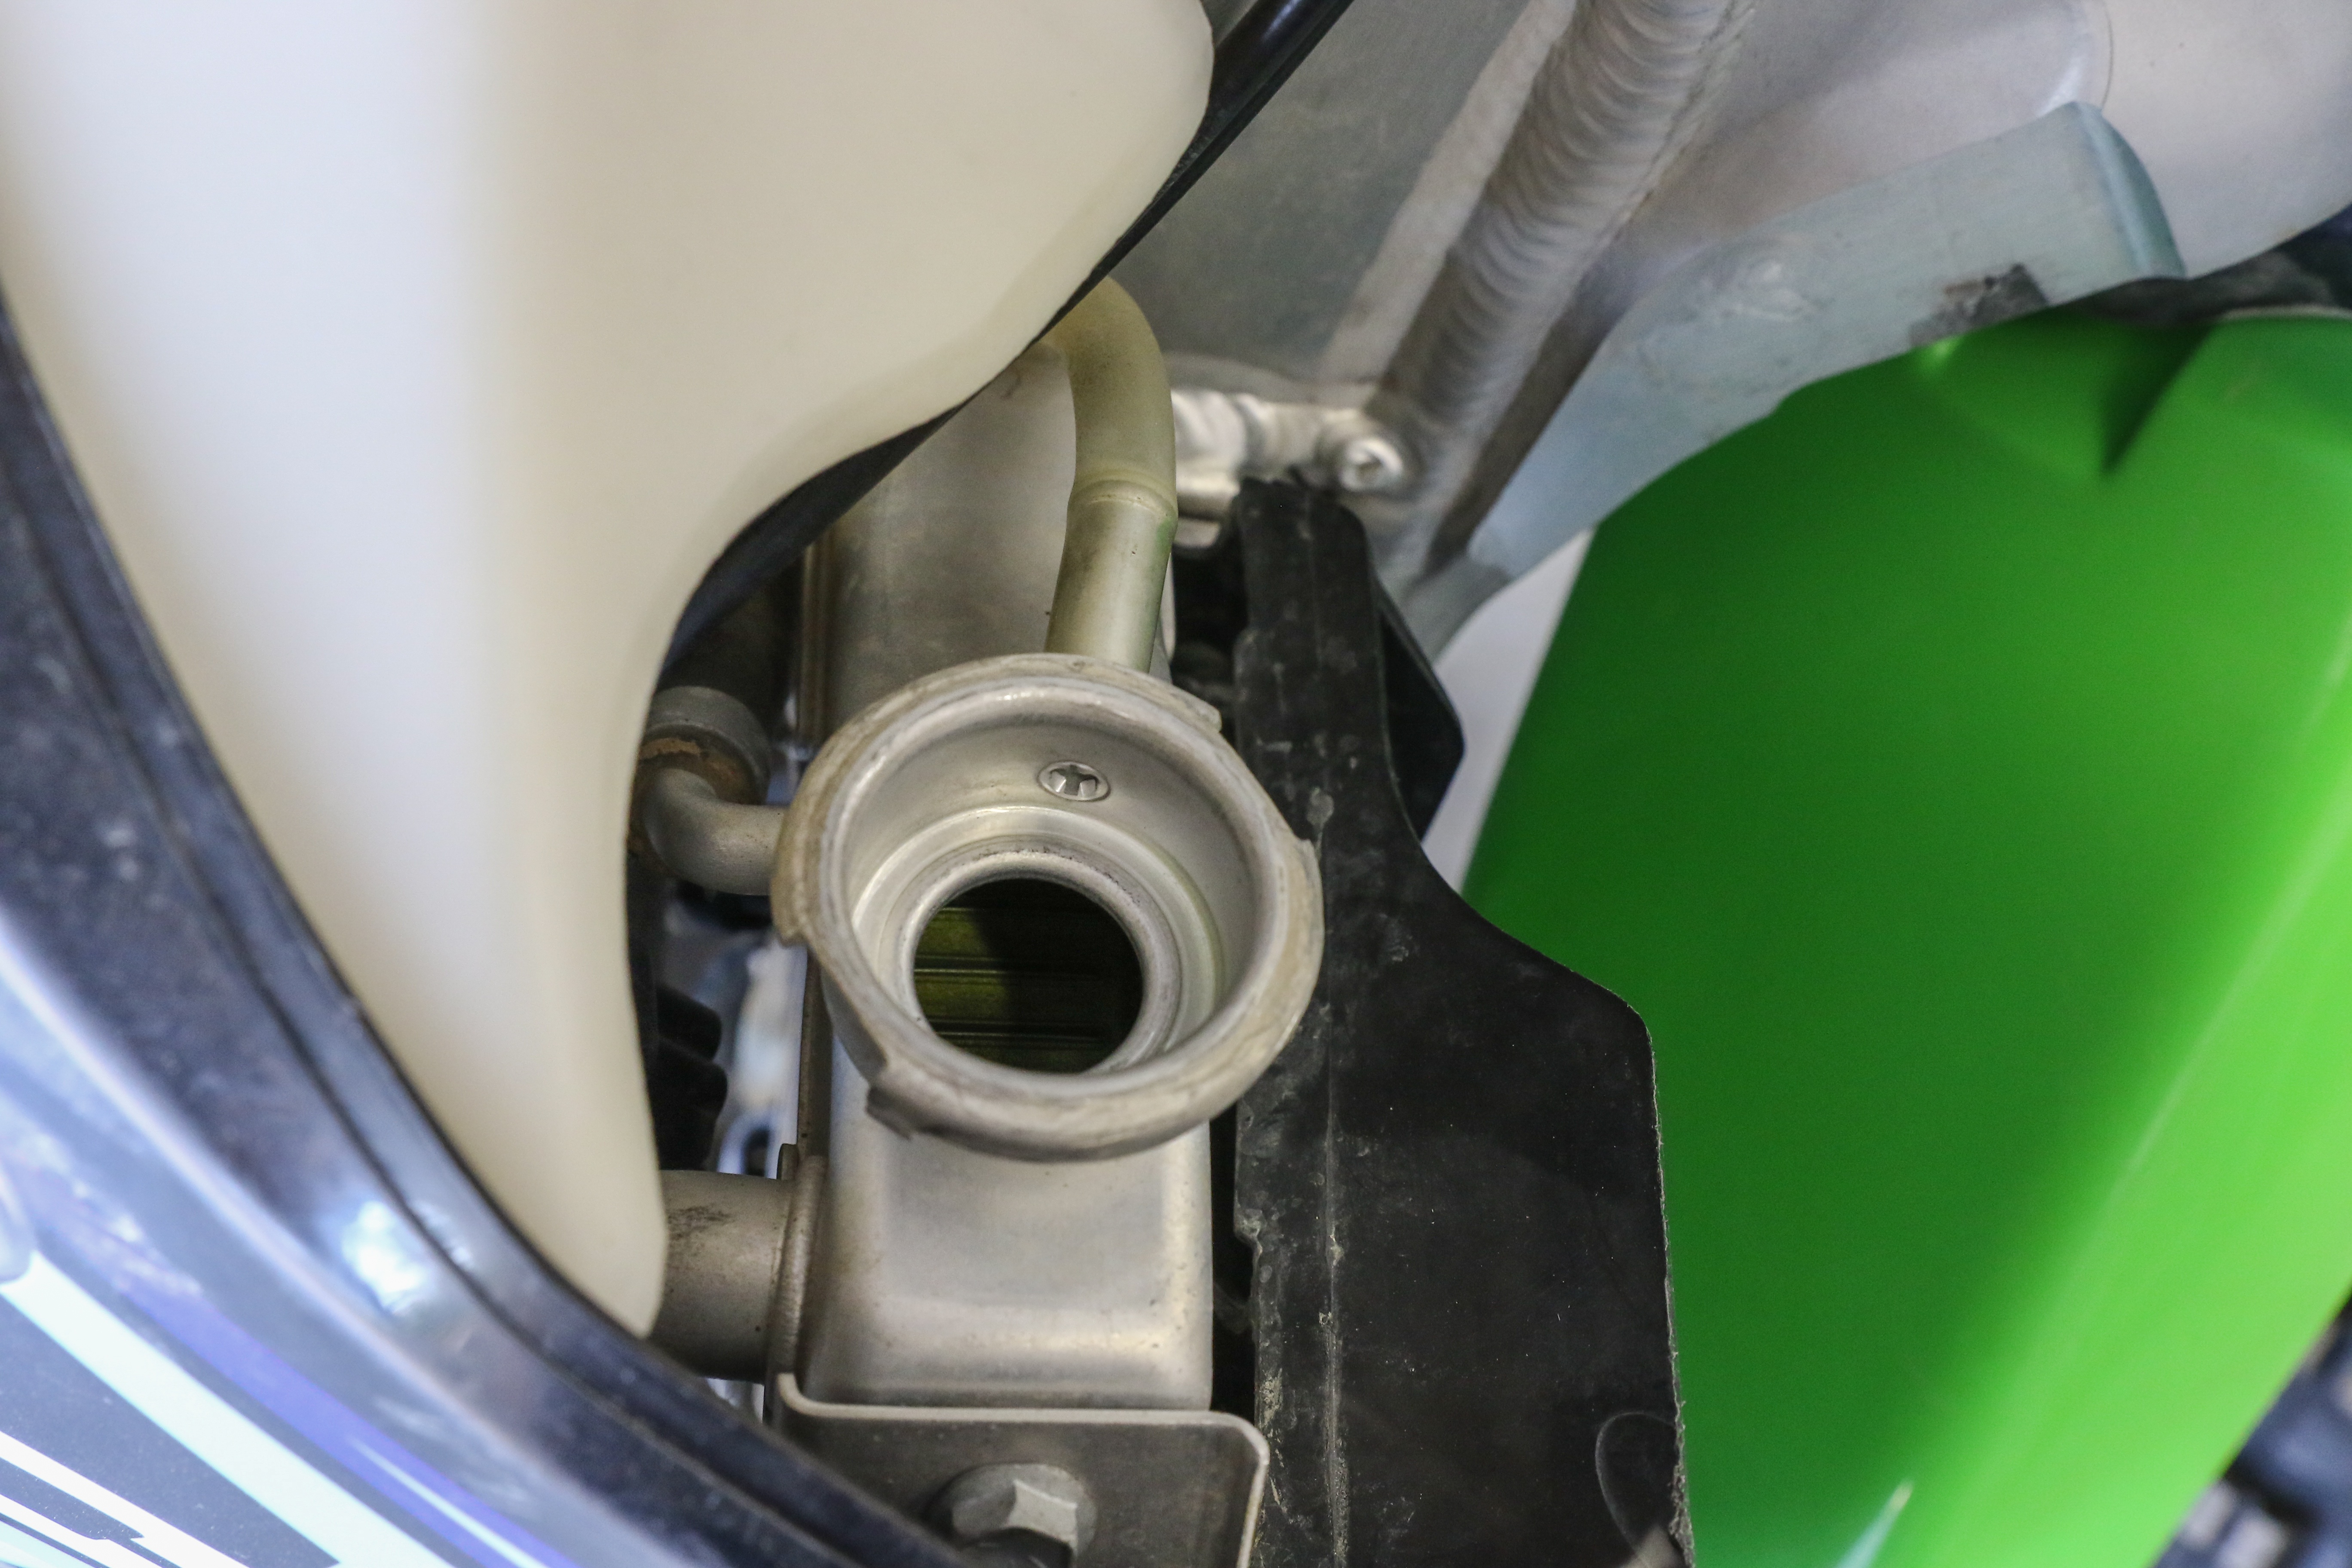
As previously mentioned, be sure to note the level of your engine oil. The same goes for the transmission oil (if your motorcycle houses the oil in separate compartments). Consult your owner’s manual to determine the recommended fluid quantity and oil viscosity.
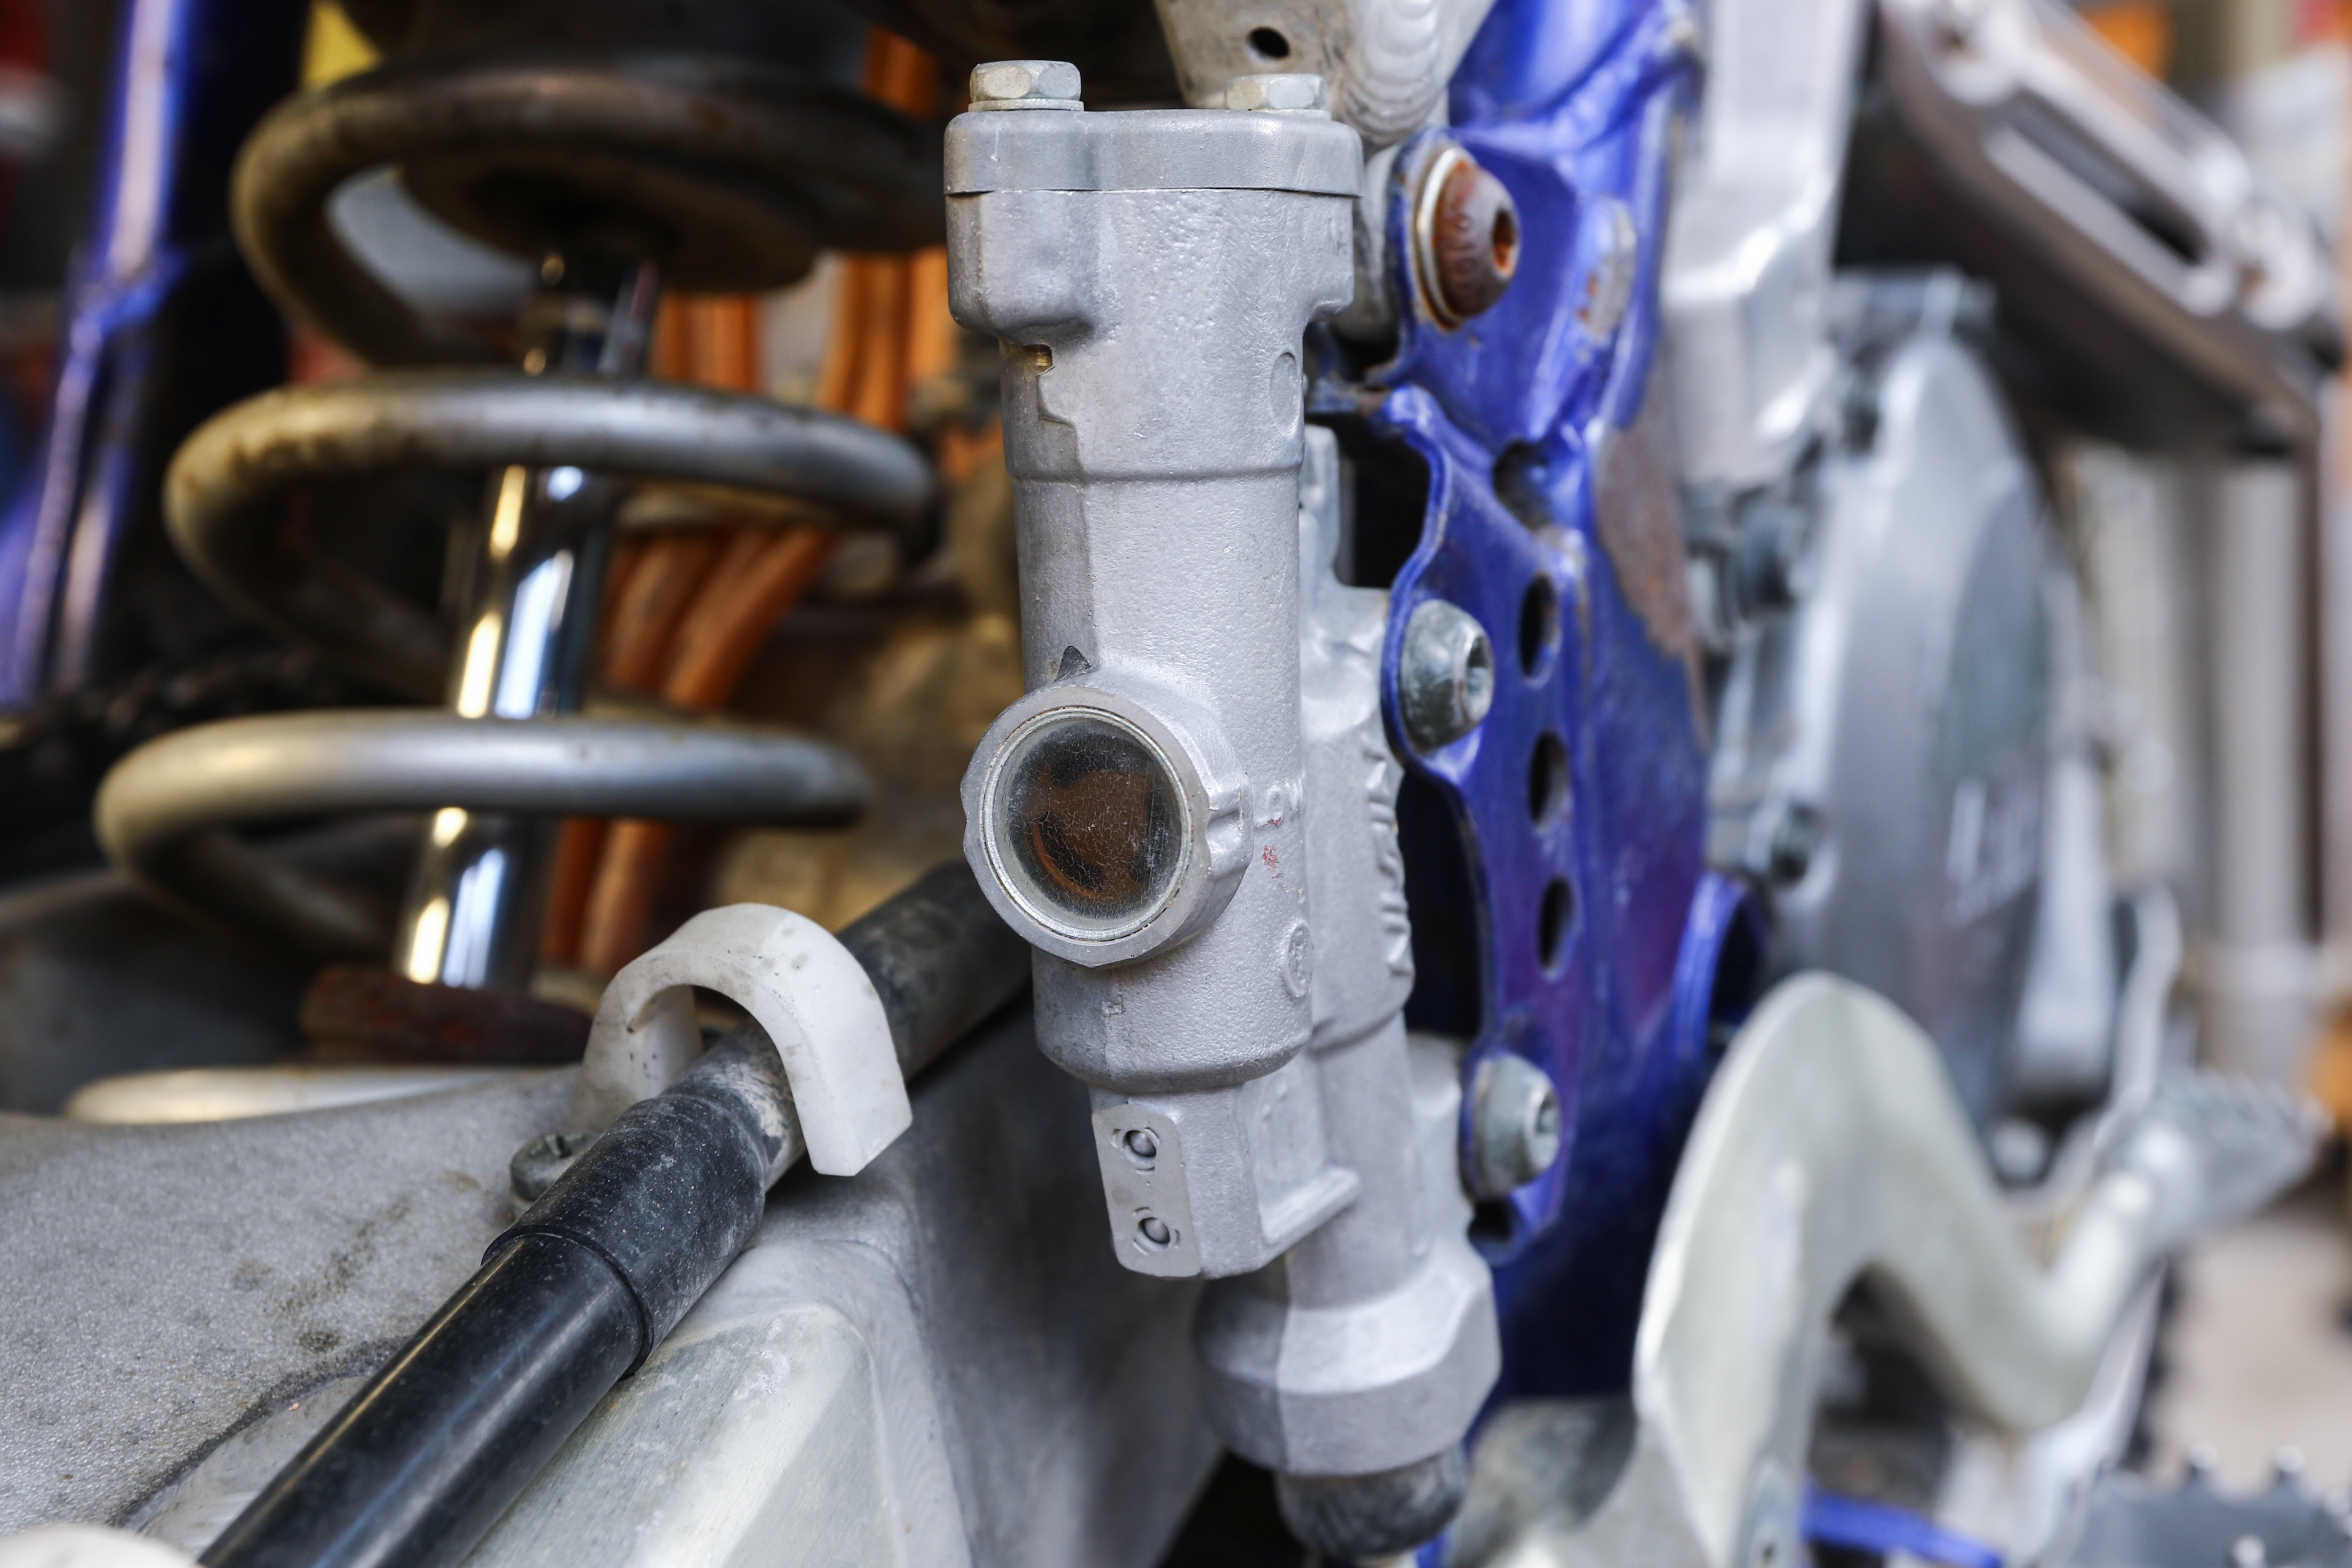
Routinely check the front and rear brake master cylinder oil height. Most motorcycles have sight glasses built into their master cylinders, making it convenient to give your brake systems a speedy inspection. If the oil is depleted, we advise you to give serious thought as to why the master cylinder oil height is low. A bad seal or some larger problem down the line could be the culprit. ProX sells OEM quality master cylinder rebuild kits for most motorcycles. Once diagnosed and repaired, use a high-quality fluid recommended in your owner’s manual.
Oh, and this should go without saying, but don’t forget to check your fuel level before every ride!
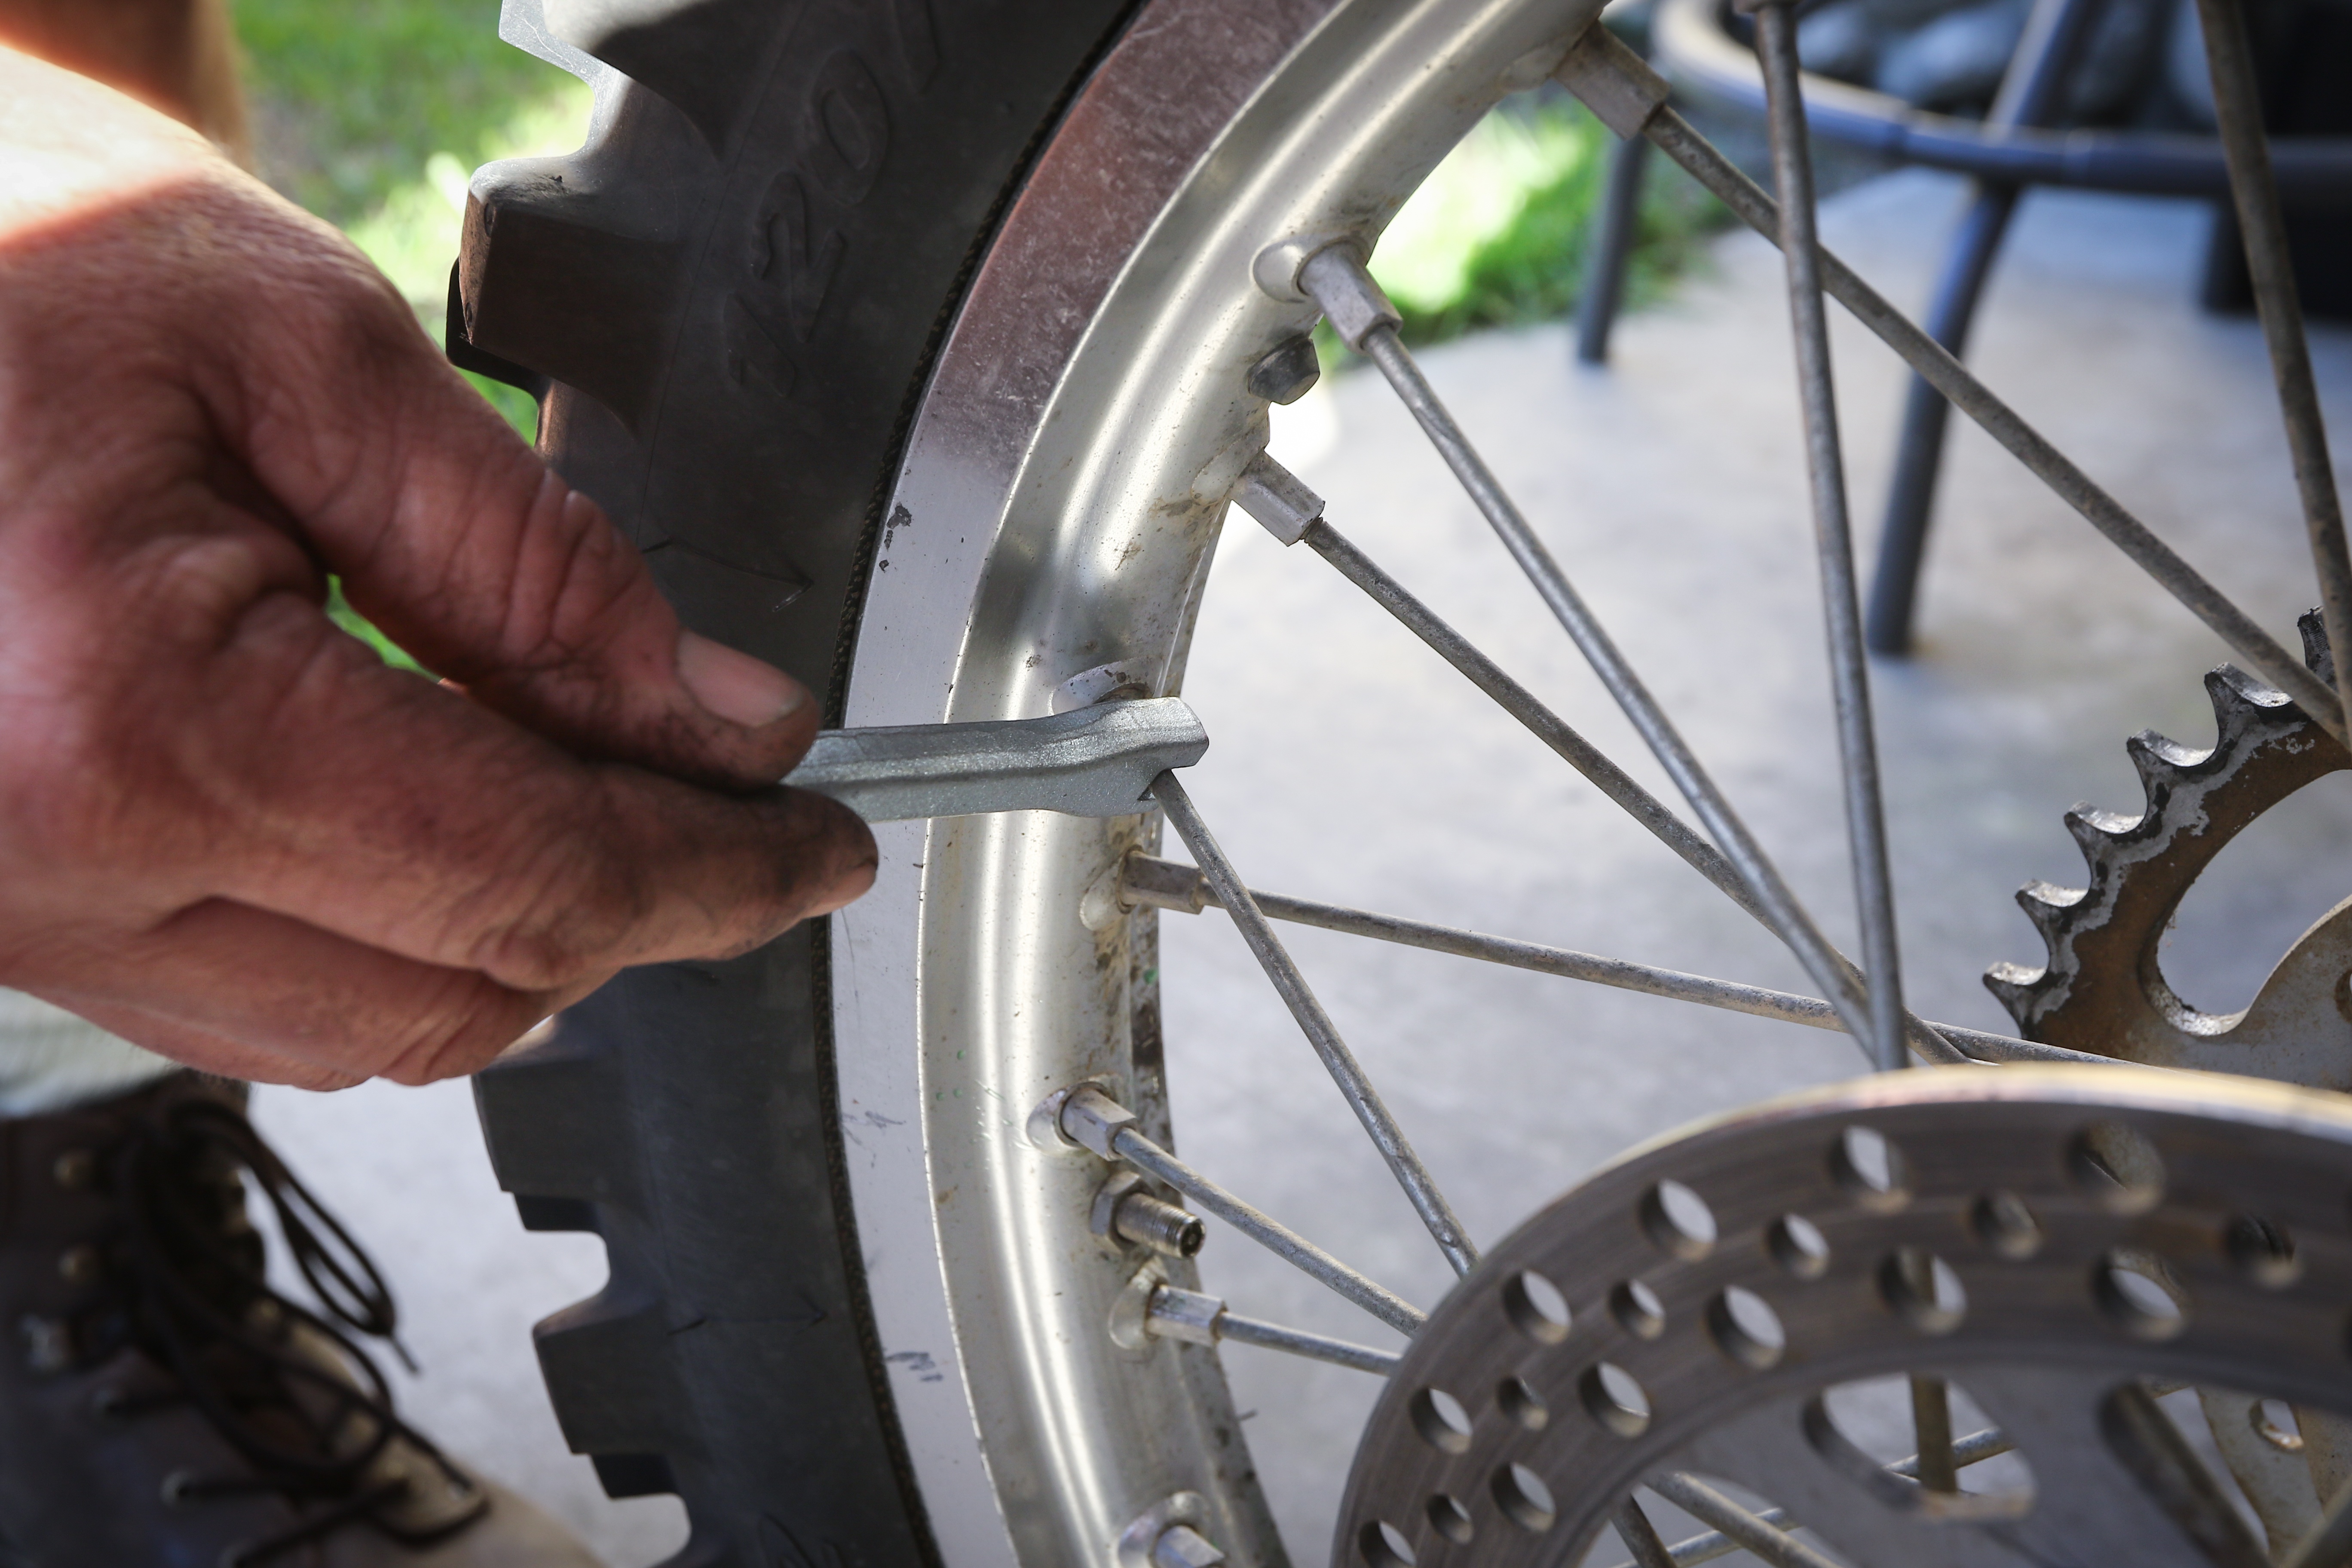
Wheels
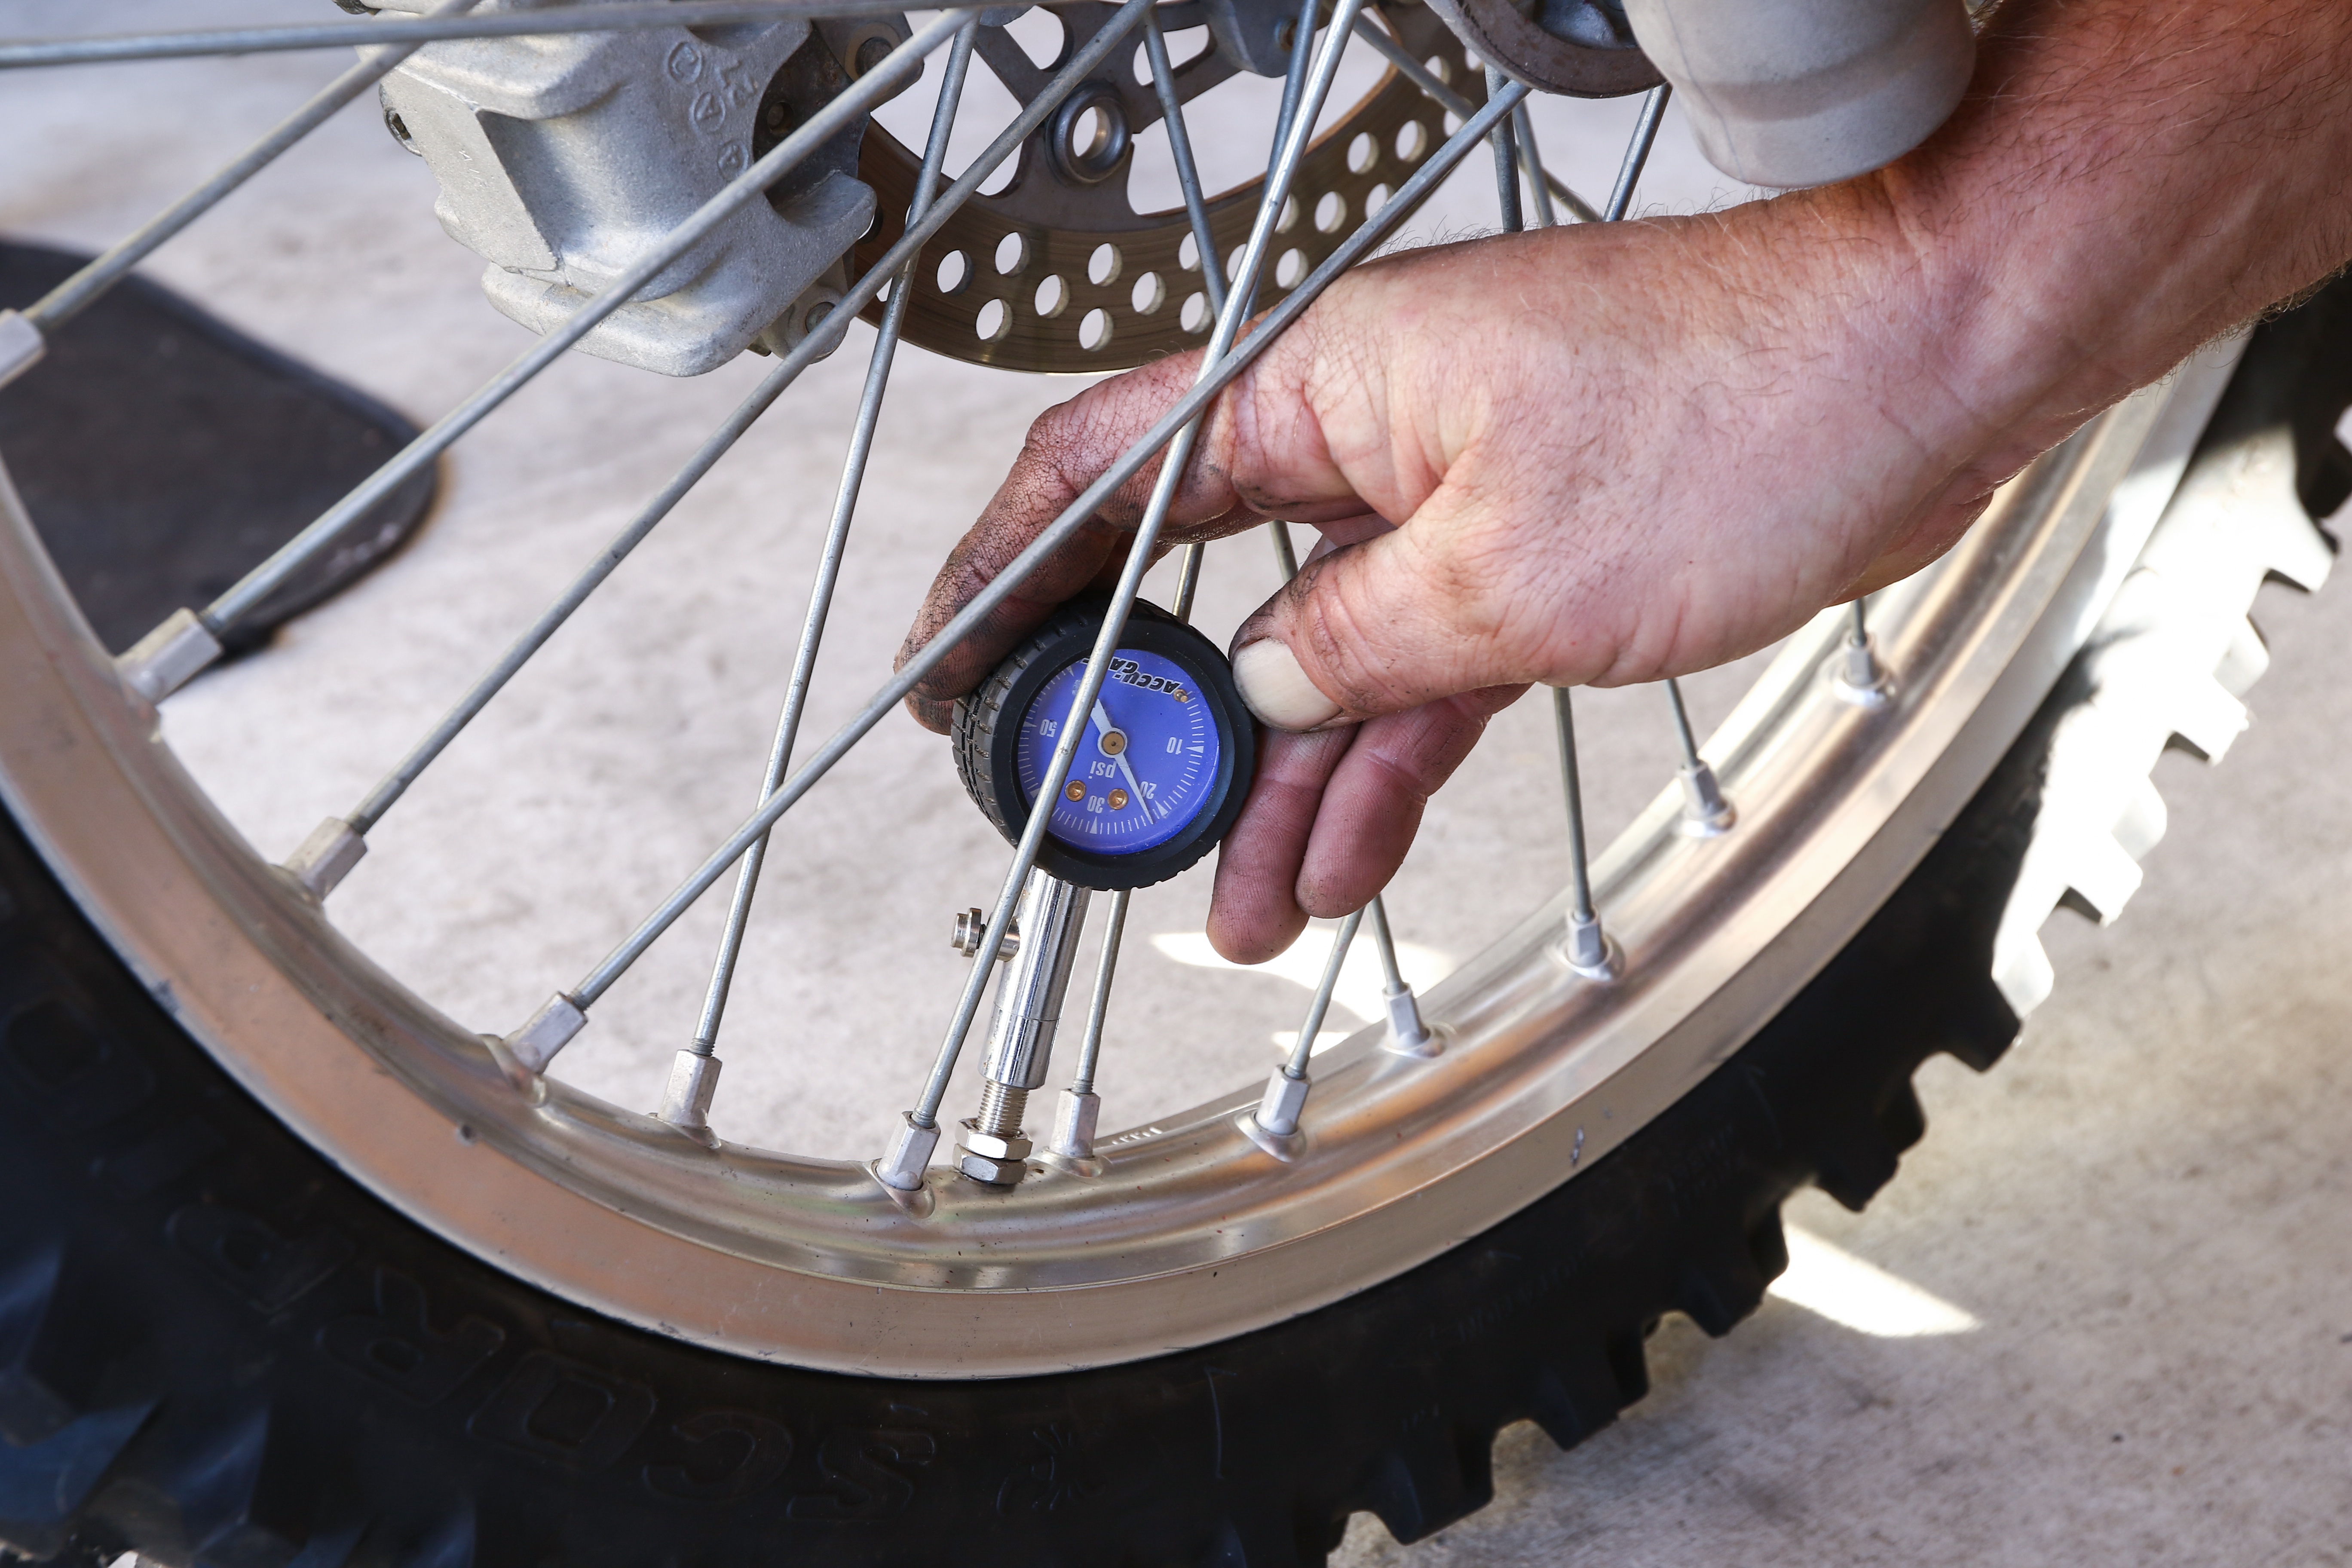
Have you walked around the pits at a professional race and noticed how often the mechanics are wrenching on their rider’s wheels? That’s because a motorcycle wheel undergoes a tremendous load. In short order the spokes can loosen, causing the wheel to fall out of alignment, leading to uneven weight on the hub and rim. What happens next is not good. Always inspect your wheels before hitting the track or trails. Invest in a spoke torque wrench to ensure that your spokes are set to the proper tightness. Locate the rim locks and tighten if necessary. Make sure that the rims are round and void of cracks and dents. Lastly, check the tire pressure using an accurate gauge.
Unfortunately, wheels don’t last forever. Over time, water and debris can work their way past the dust seals and into the wheel bearings. When that happens, you’ll need to replace the wheel bearings. ProX is again a source for finding OEM manufactured replacement parts such as this. Find comfort in the knowledge that you can order one bearing, or the entire set with new dust seals.
While positioned eye level with your motorcycle, take a close look at the tires. Slowly rotate each tire, paying close attention to the knobbies. Inspect for excess wear, possible cracking in the knobs, and foreign objects lodged in the rubber. Replace the tire(s) as necessary. Understand that a rear tire generally wears out three times faster than a front tire.
